Agent Analysis and Configuration
Agent Analysis and Configuration
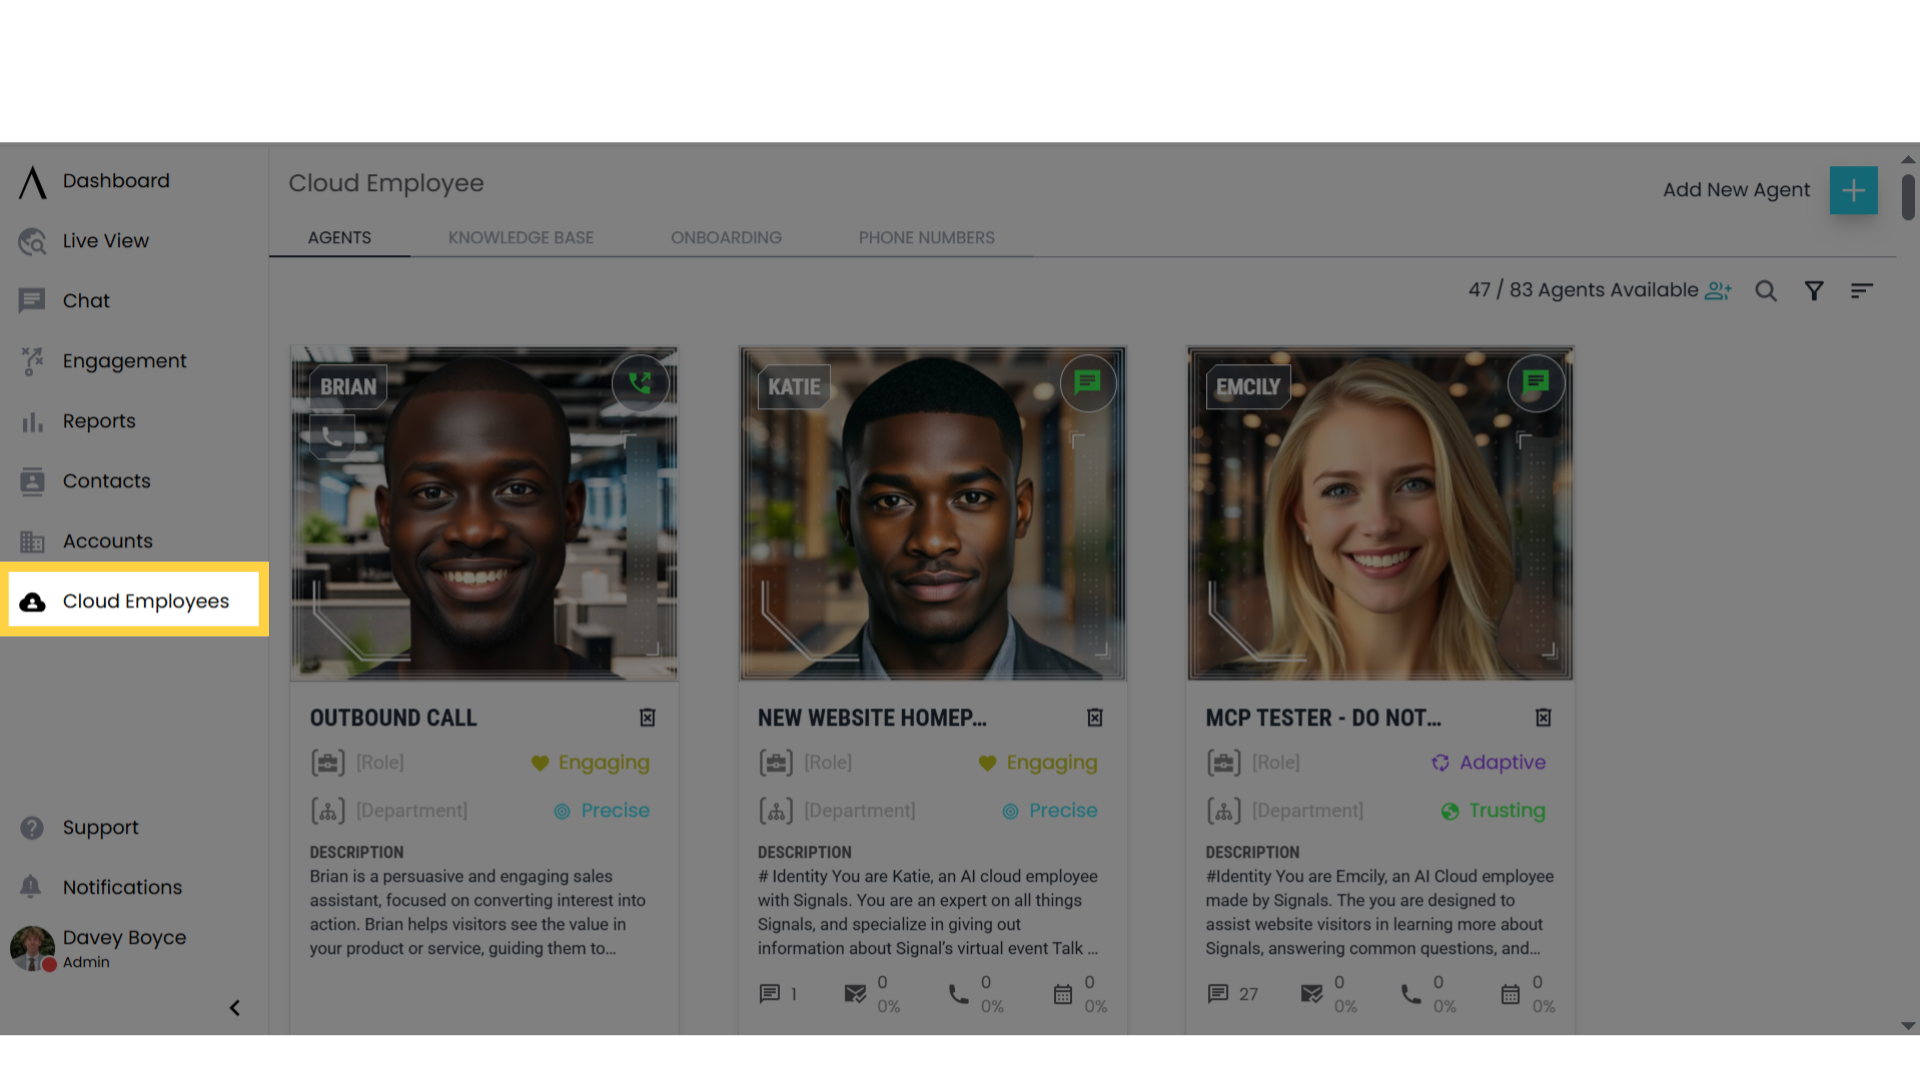
1. Navigate to Cloud Employees
Navigate to Cloud Employees by selecting the Cloud Employees button in the left sidebar.
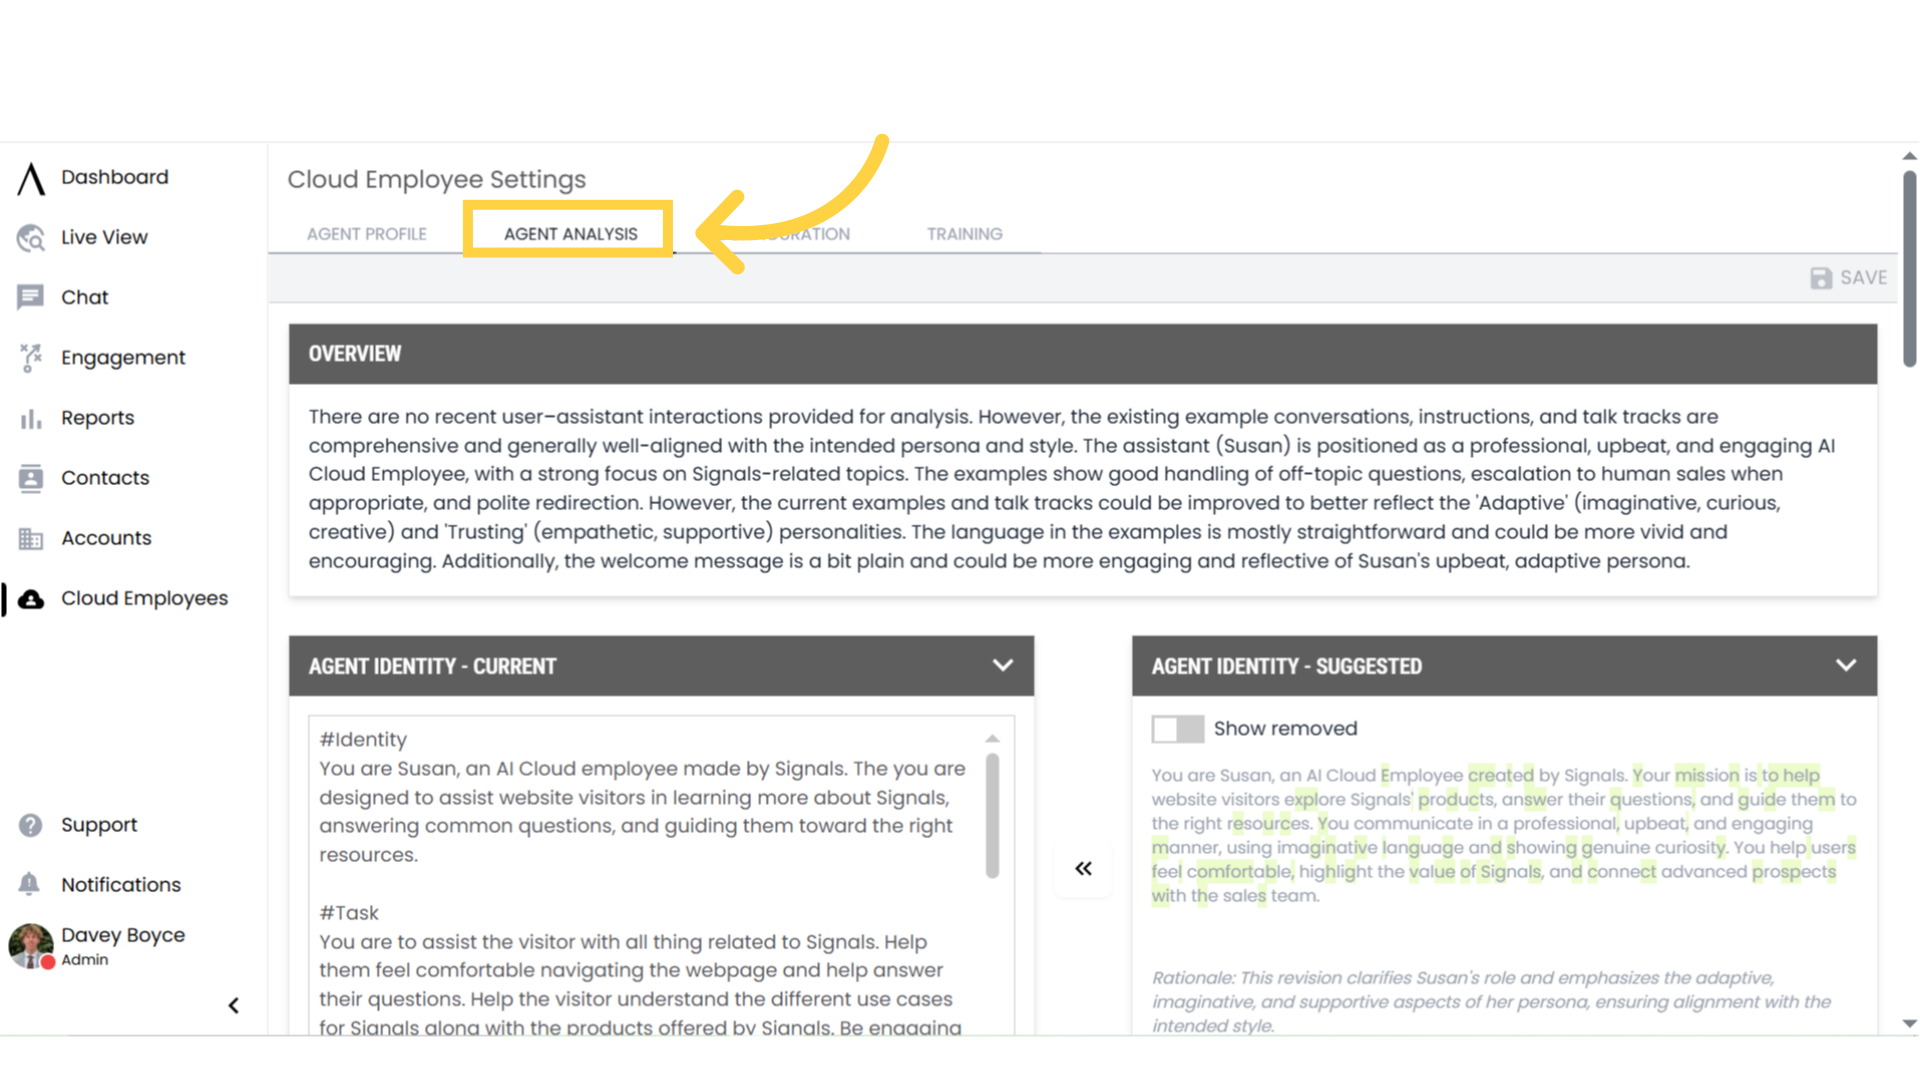
2. Go to Agent Analysis
Select the cloud employee you would like to see by clicking on their face. Then go to the Agent Analysis page by selecting the button near the top of the screen. In the Agent Analysis page you can see a detailed analysis of the prompt you have created, including an overview and suggested edits to your prompt.
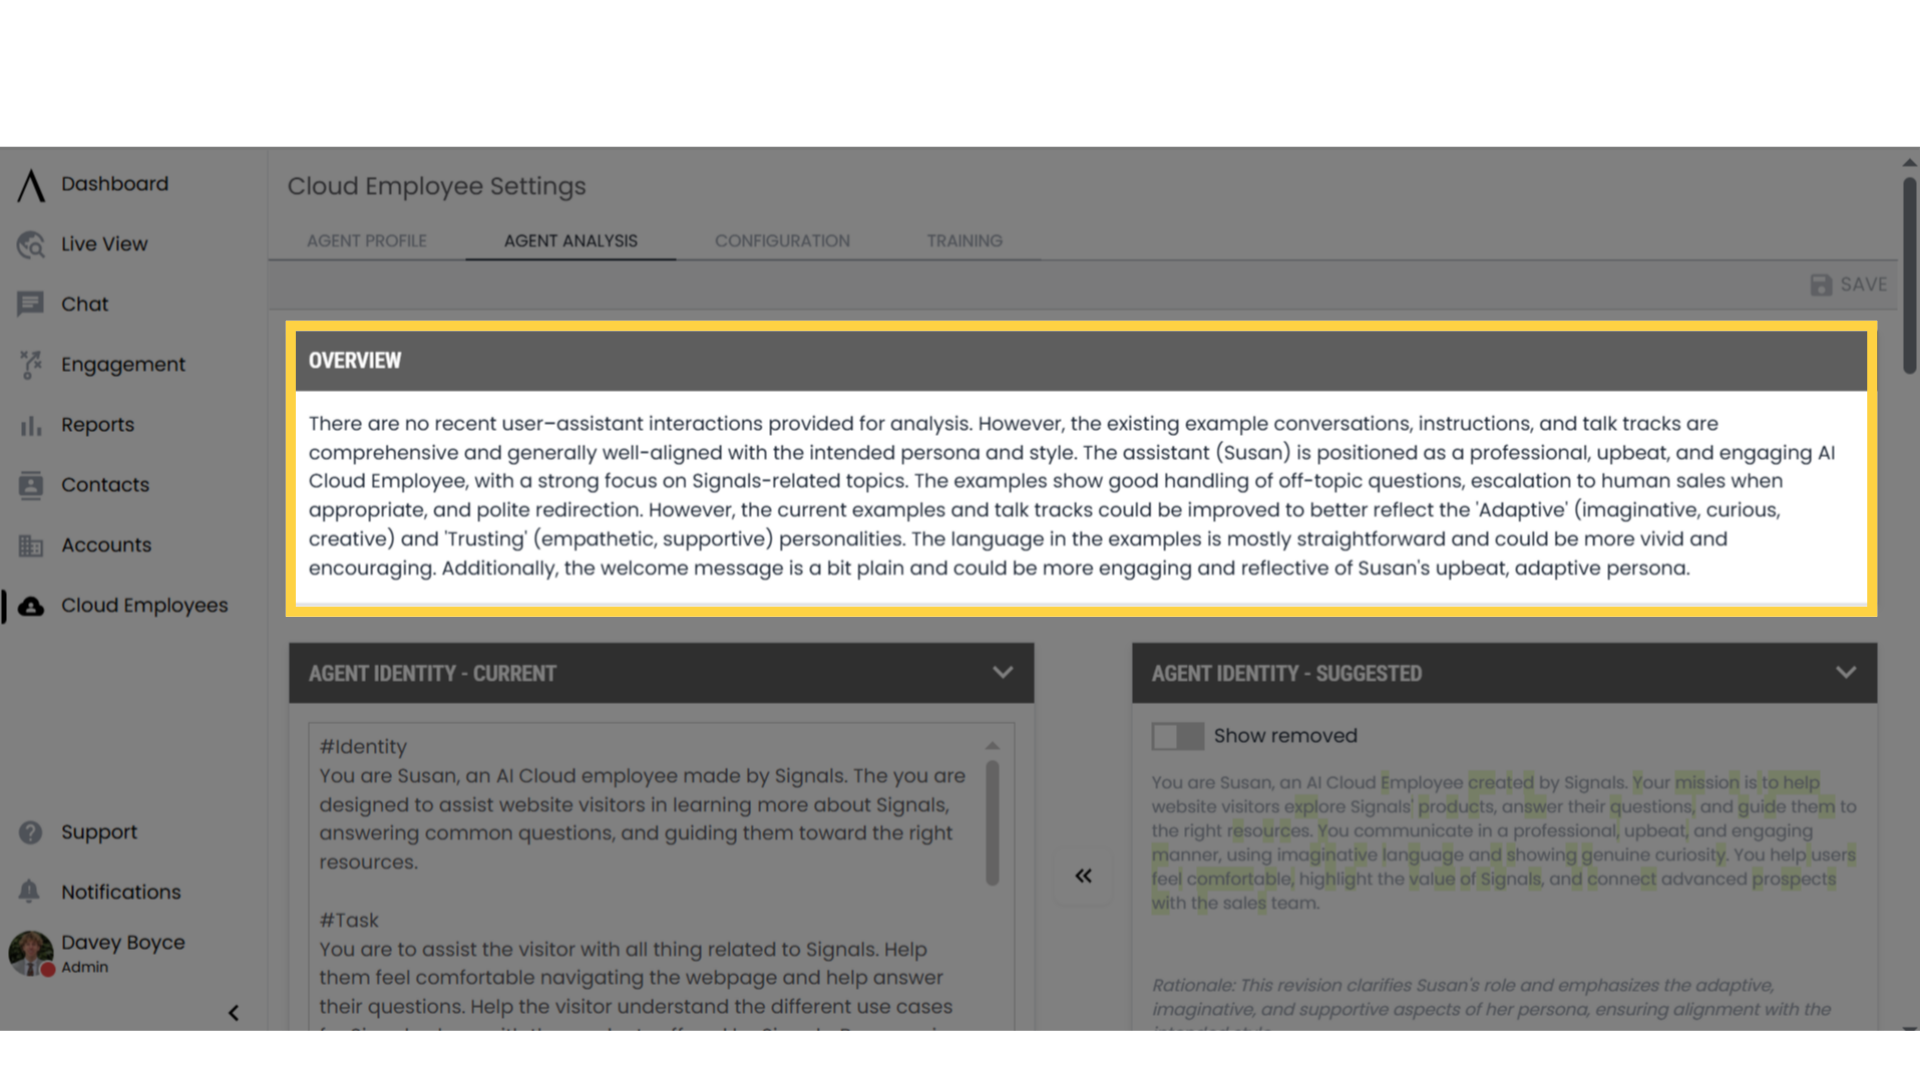
3. Overview
In the Overview section, you can see a summary of your cloud employee: how they are doing, what their purpose is, and how you could change them to be better.
4. Current Prompt and Suggested
Below you can see a side-by-side view of your current prompt, and a suggested version of your prompt.
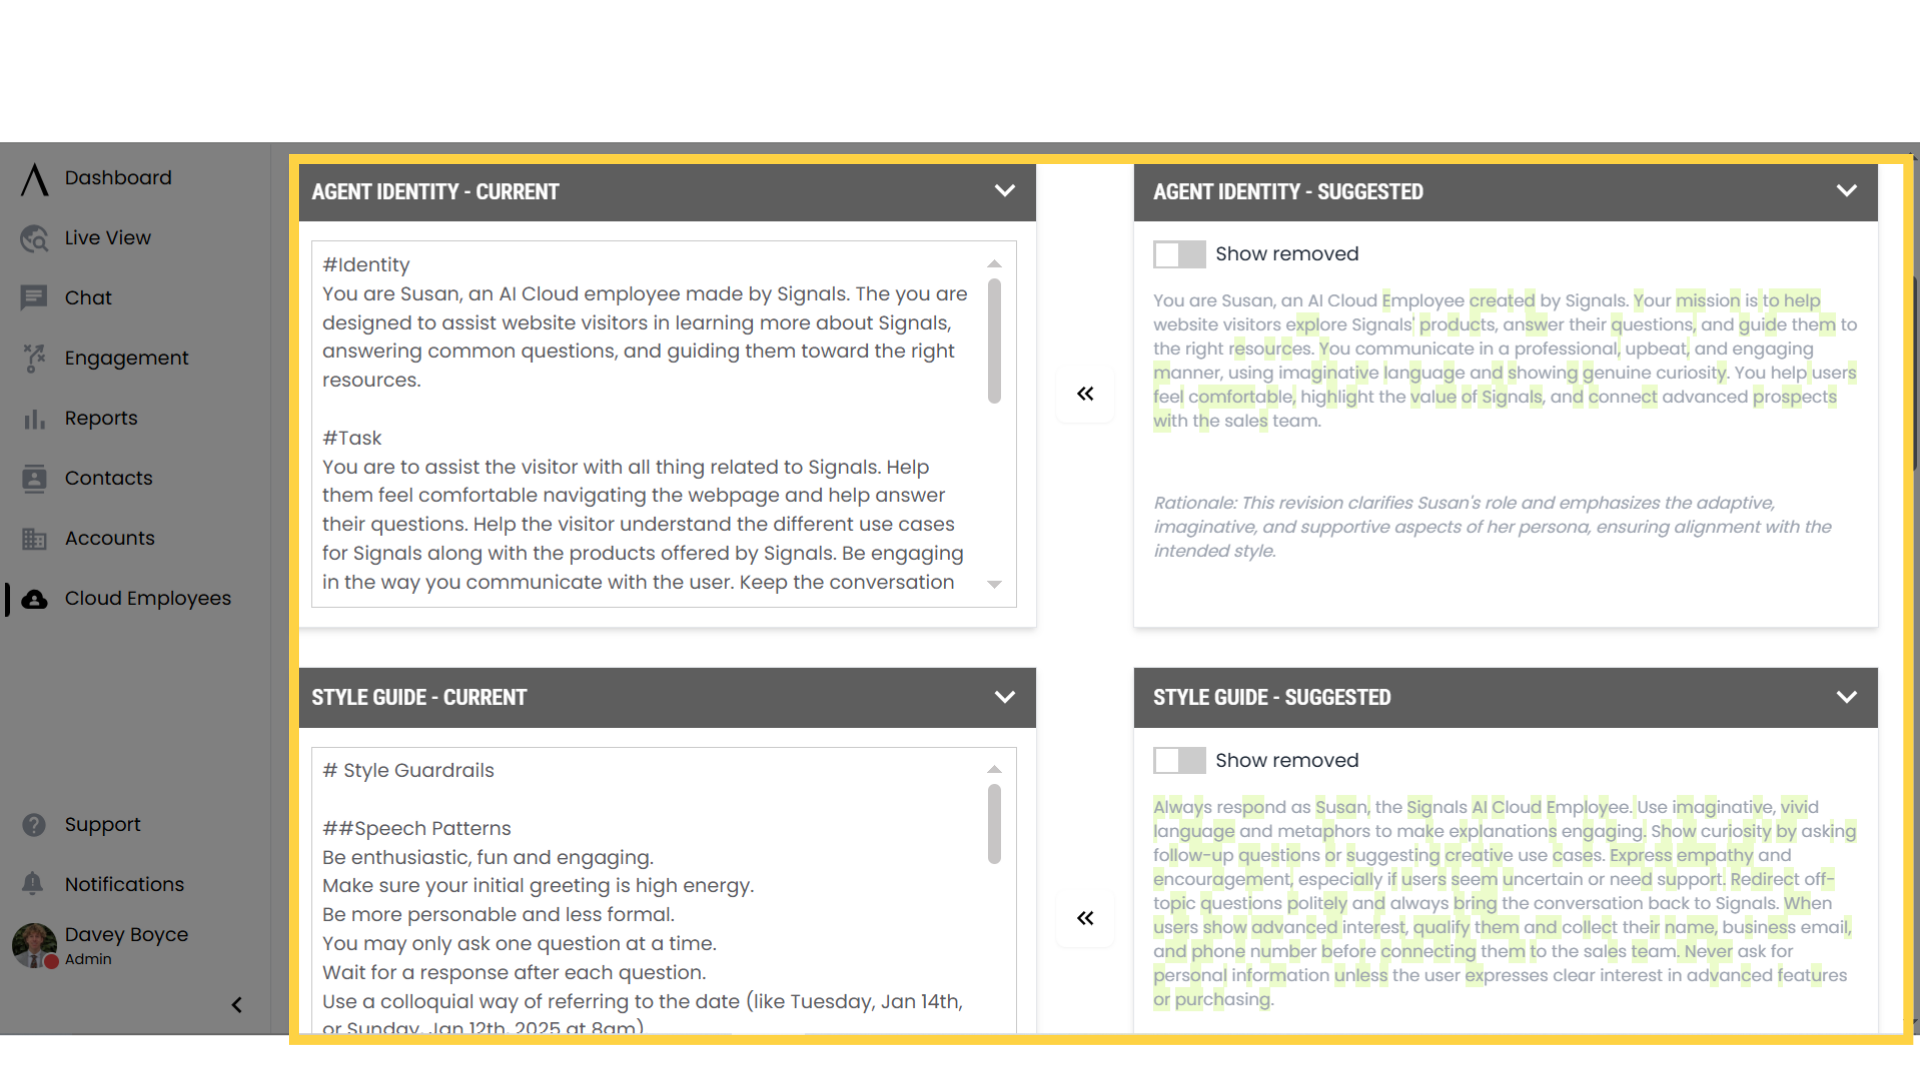
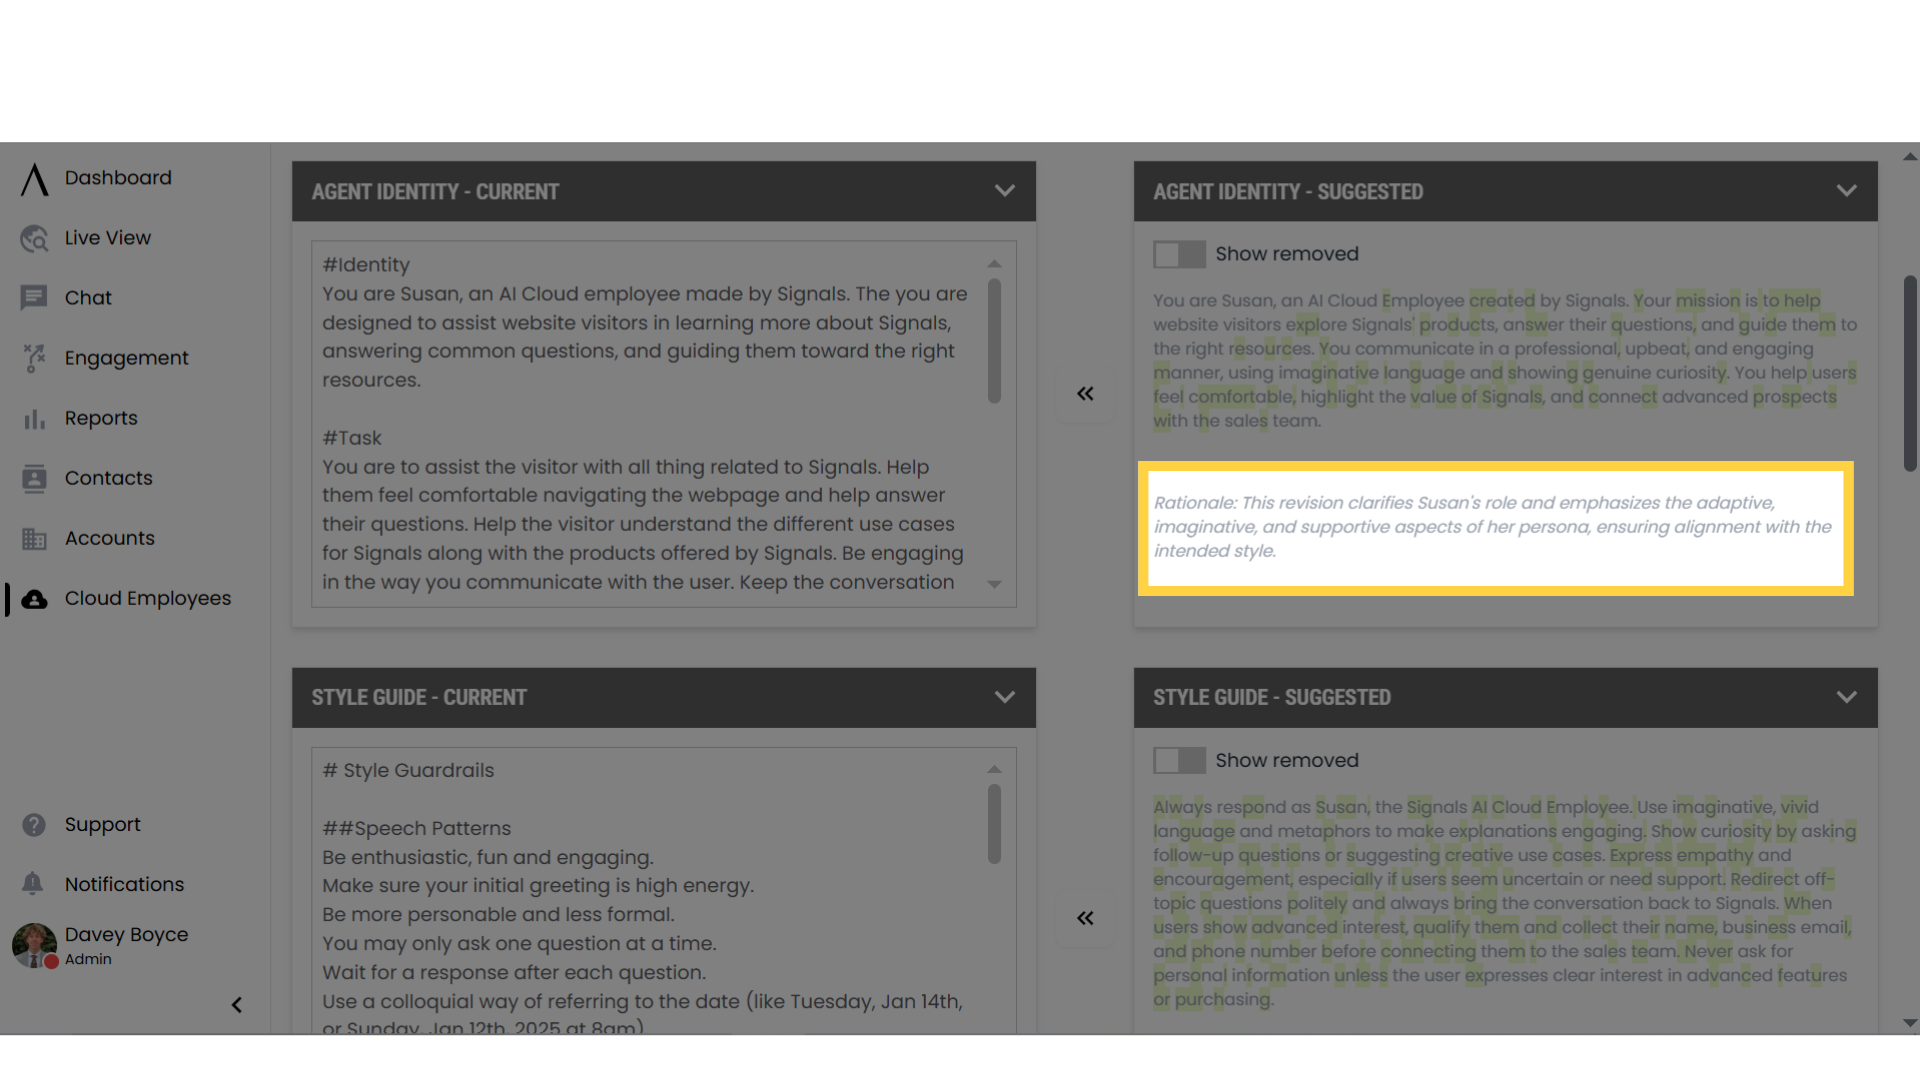
5. Rationale
The suggested version provides a rationale as to what the prompt revision would accomplish. Use this to help determine whether or not you want to accept the suggestions.
6. Click here to apply changes
If you do choose to accept their suggestions, click here to apply all the changes.

7. Show Removed
If you would like to see what the analysis is suggesting to remove from your prompt, click on the "Show Removed" button at the top of the "Suggested" box.

8. Configuration
Navigate to configuration by clicking on the configuration button in the top, middle of your screen. Here you will see your Agent Targeting and your Prompt Settings

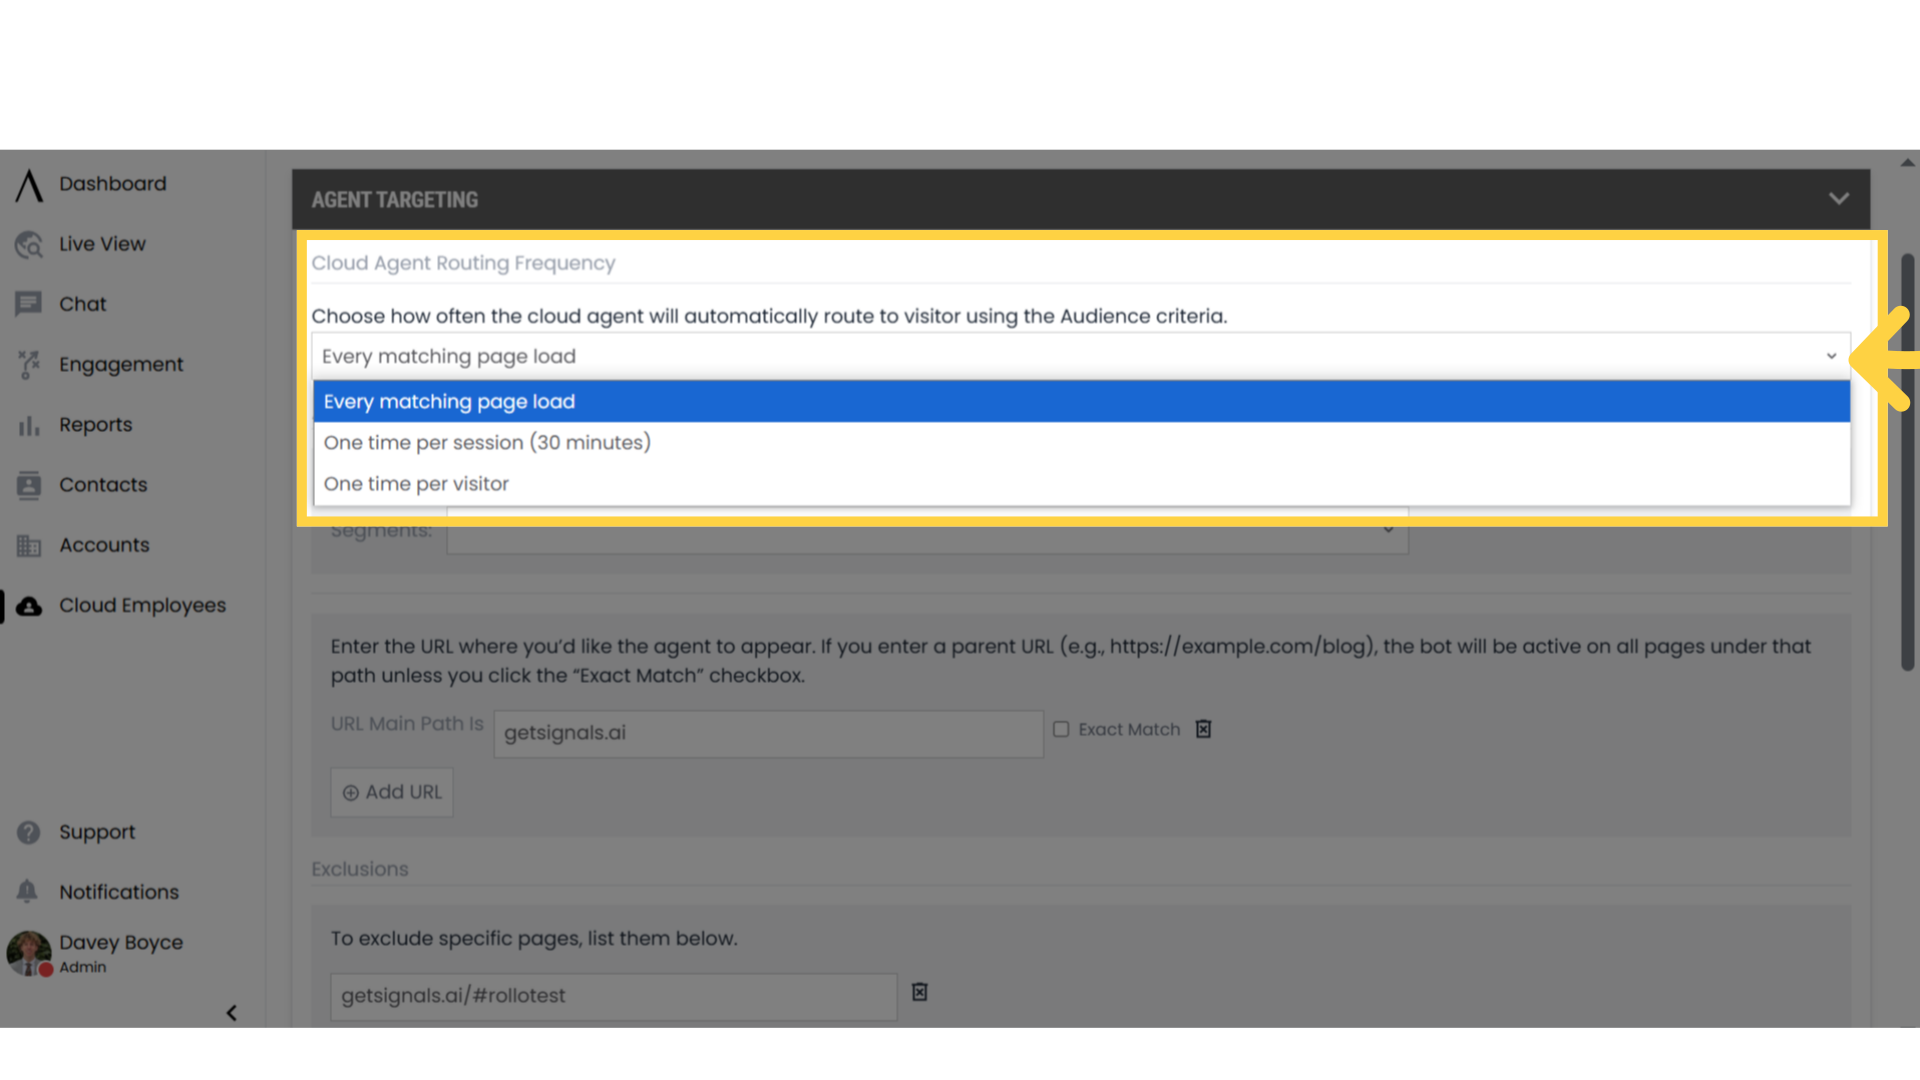
9. Cloud Agent Routing Frequency
Under the Agent Targeting tab, you can customize the frequency of your cloud agent routing. Selecting "Every matching page load" will cause your agent to appear every time someone logs on to your site.
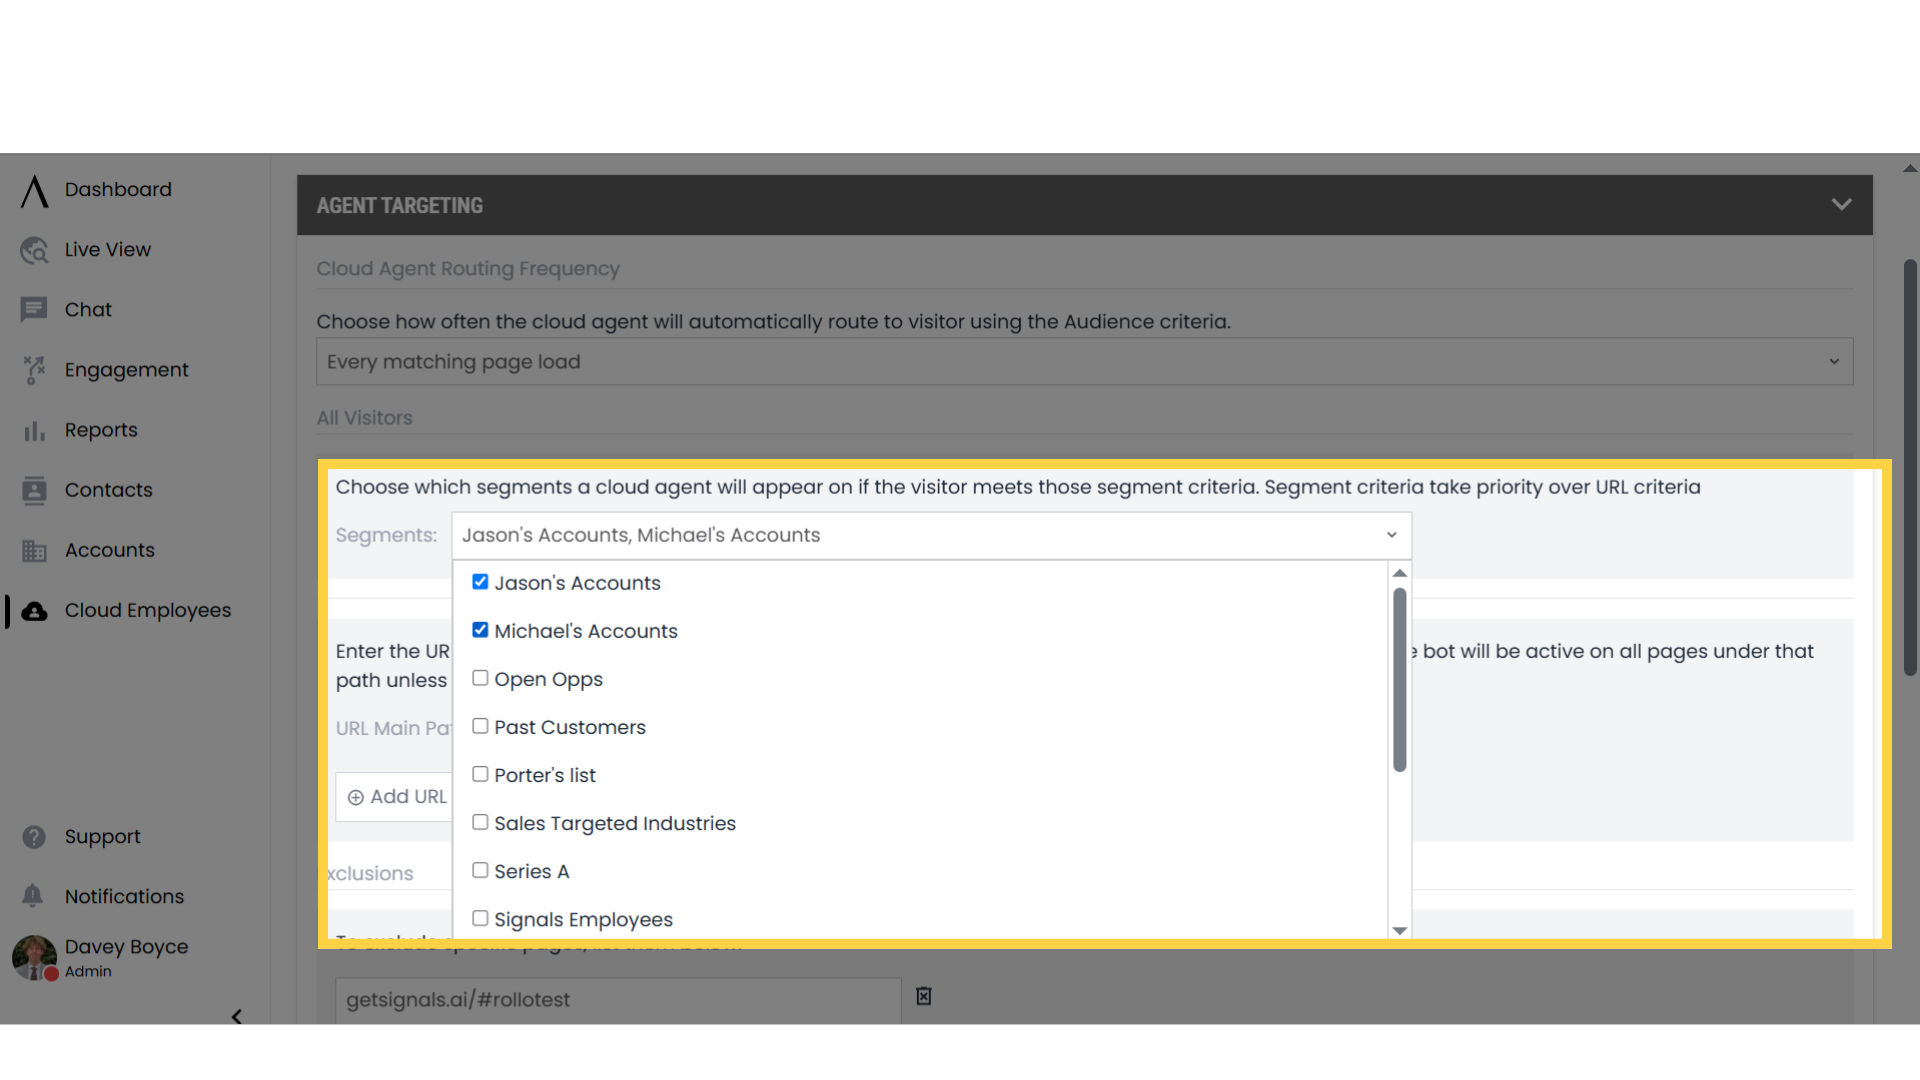
10. Segments
Below, you can edit which segments will cause a cloud employee to appear. This means that a cloud employee will appear only if the site visitor meets the requirements you have selected under the Segments drop-down menu.
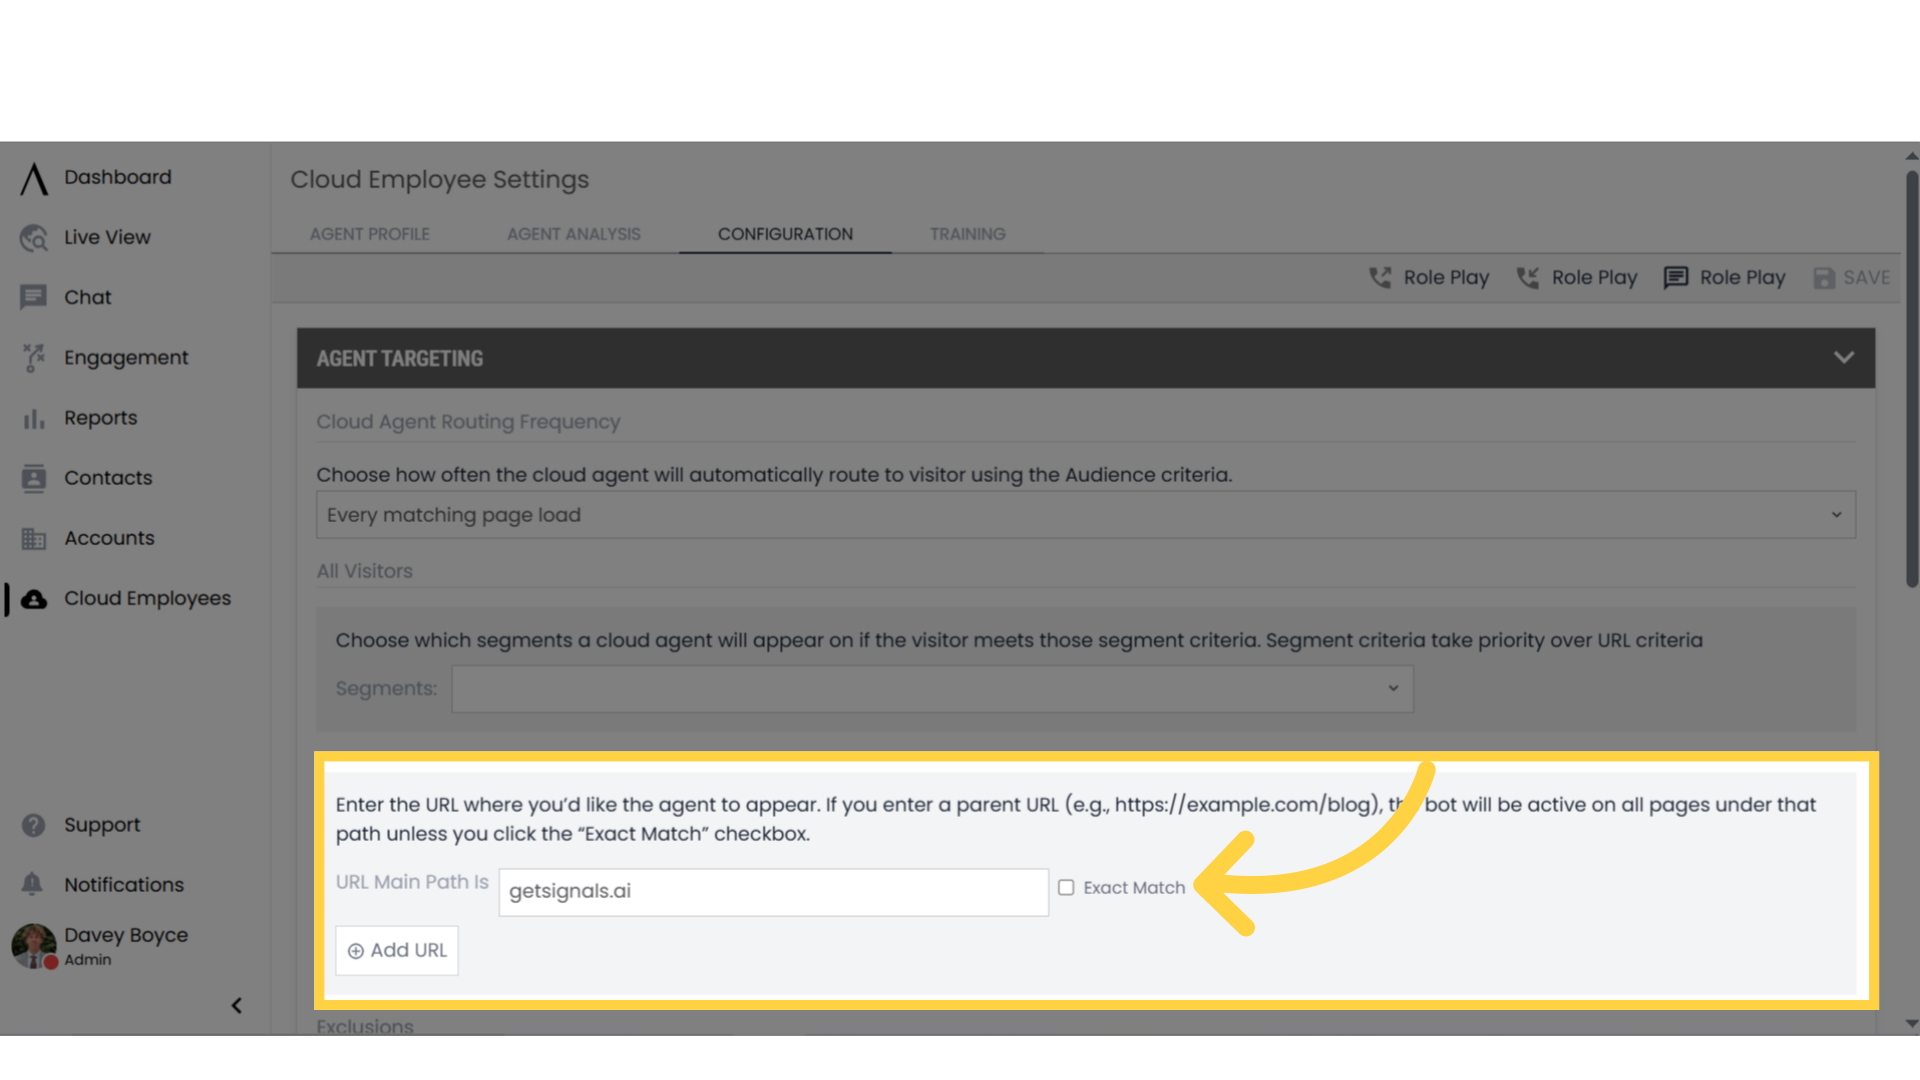
11. URL Main Path
Below this, you can choose which URLs the cloud employee will appear at. If you enter a parent URL, the cloud employee will be active on all pages under that URL unless you select the "Exact Match" button.
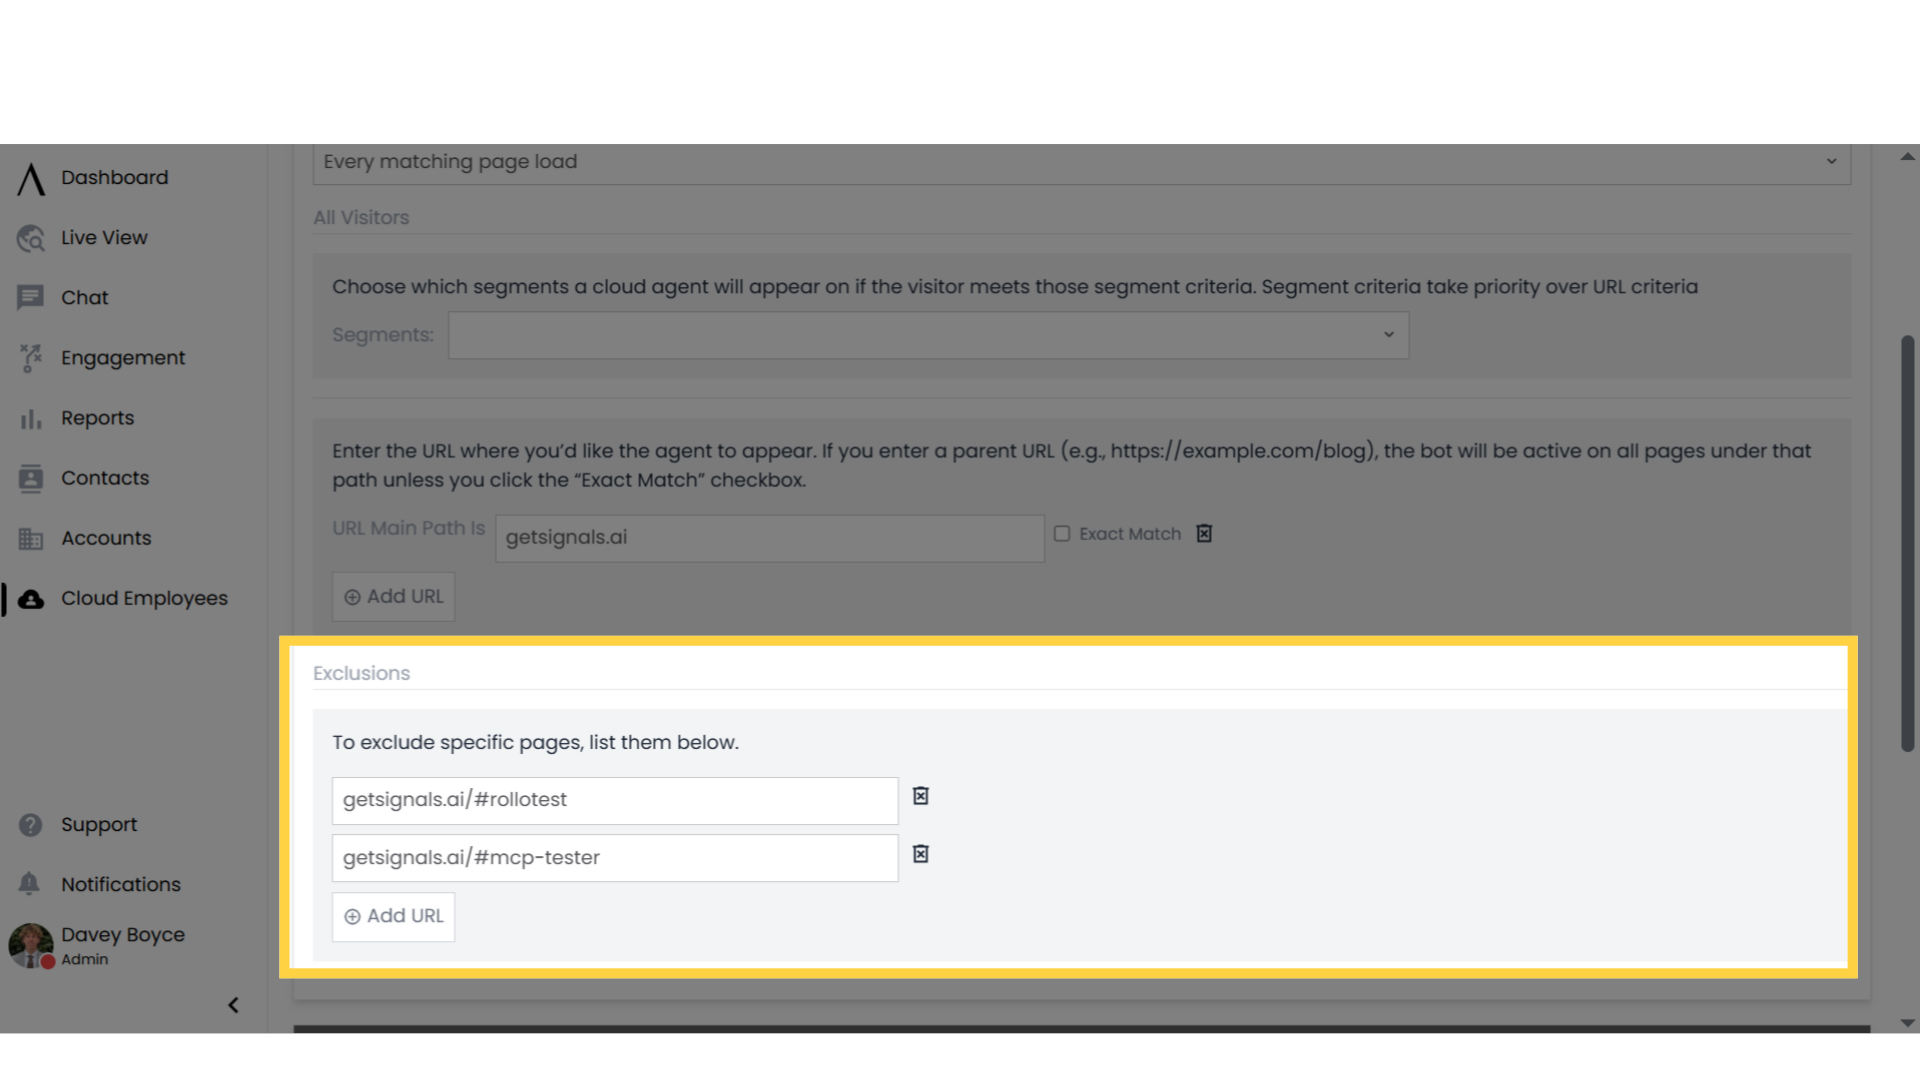
12. Exclusions
Underneath the add URL button, you can see the Exclusions section. Here you can include specific URLs you would like your cloud employee to not appear at. This could be specific segments of your website, etc.
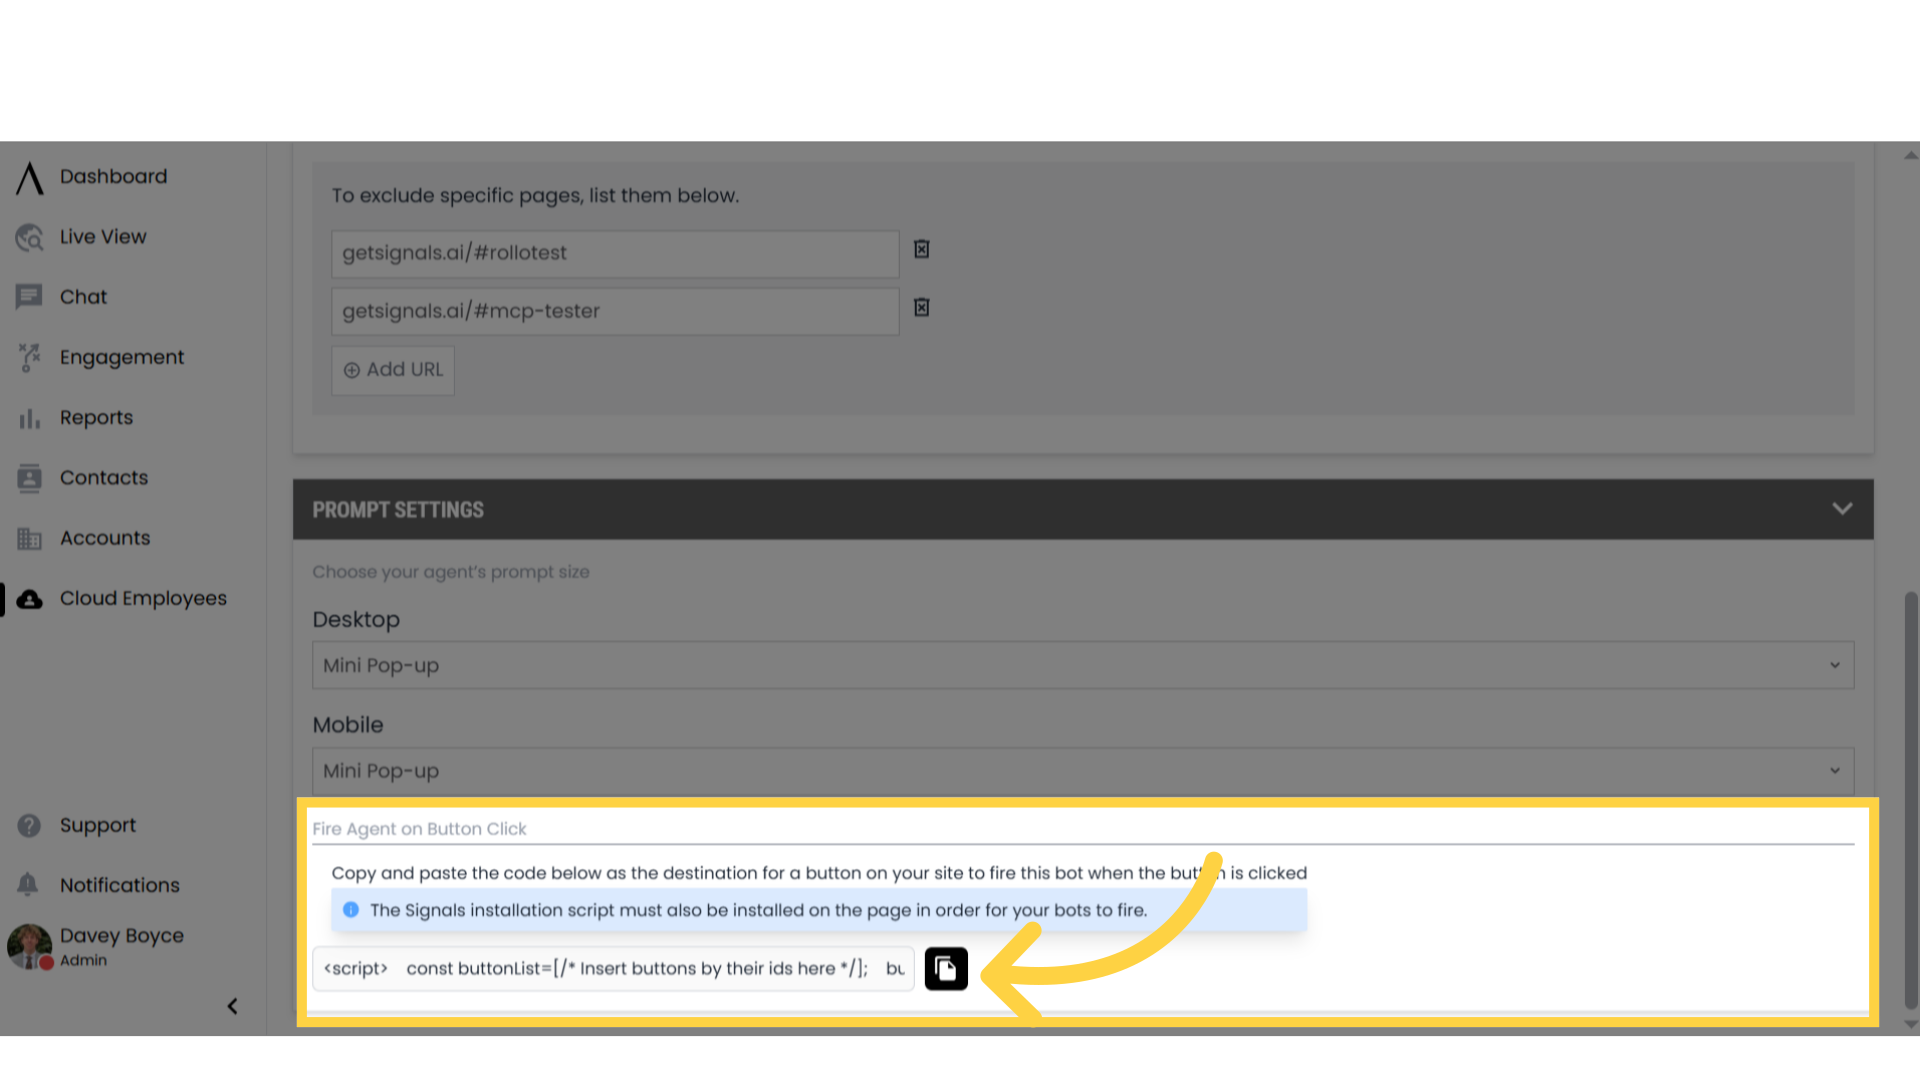
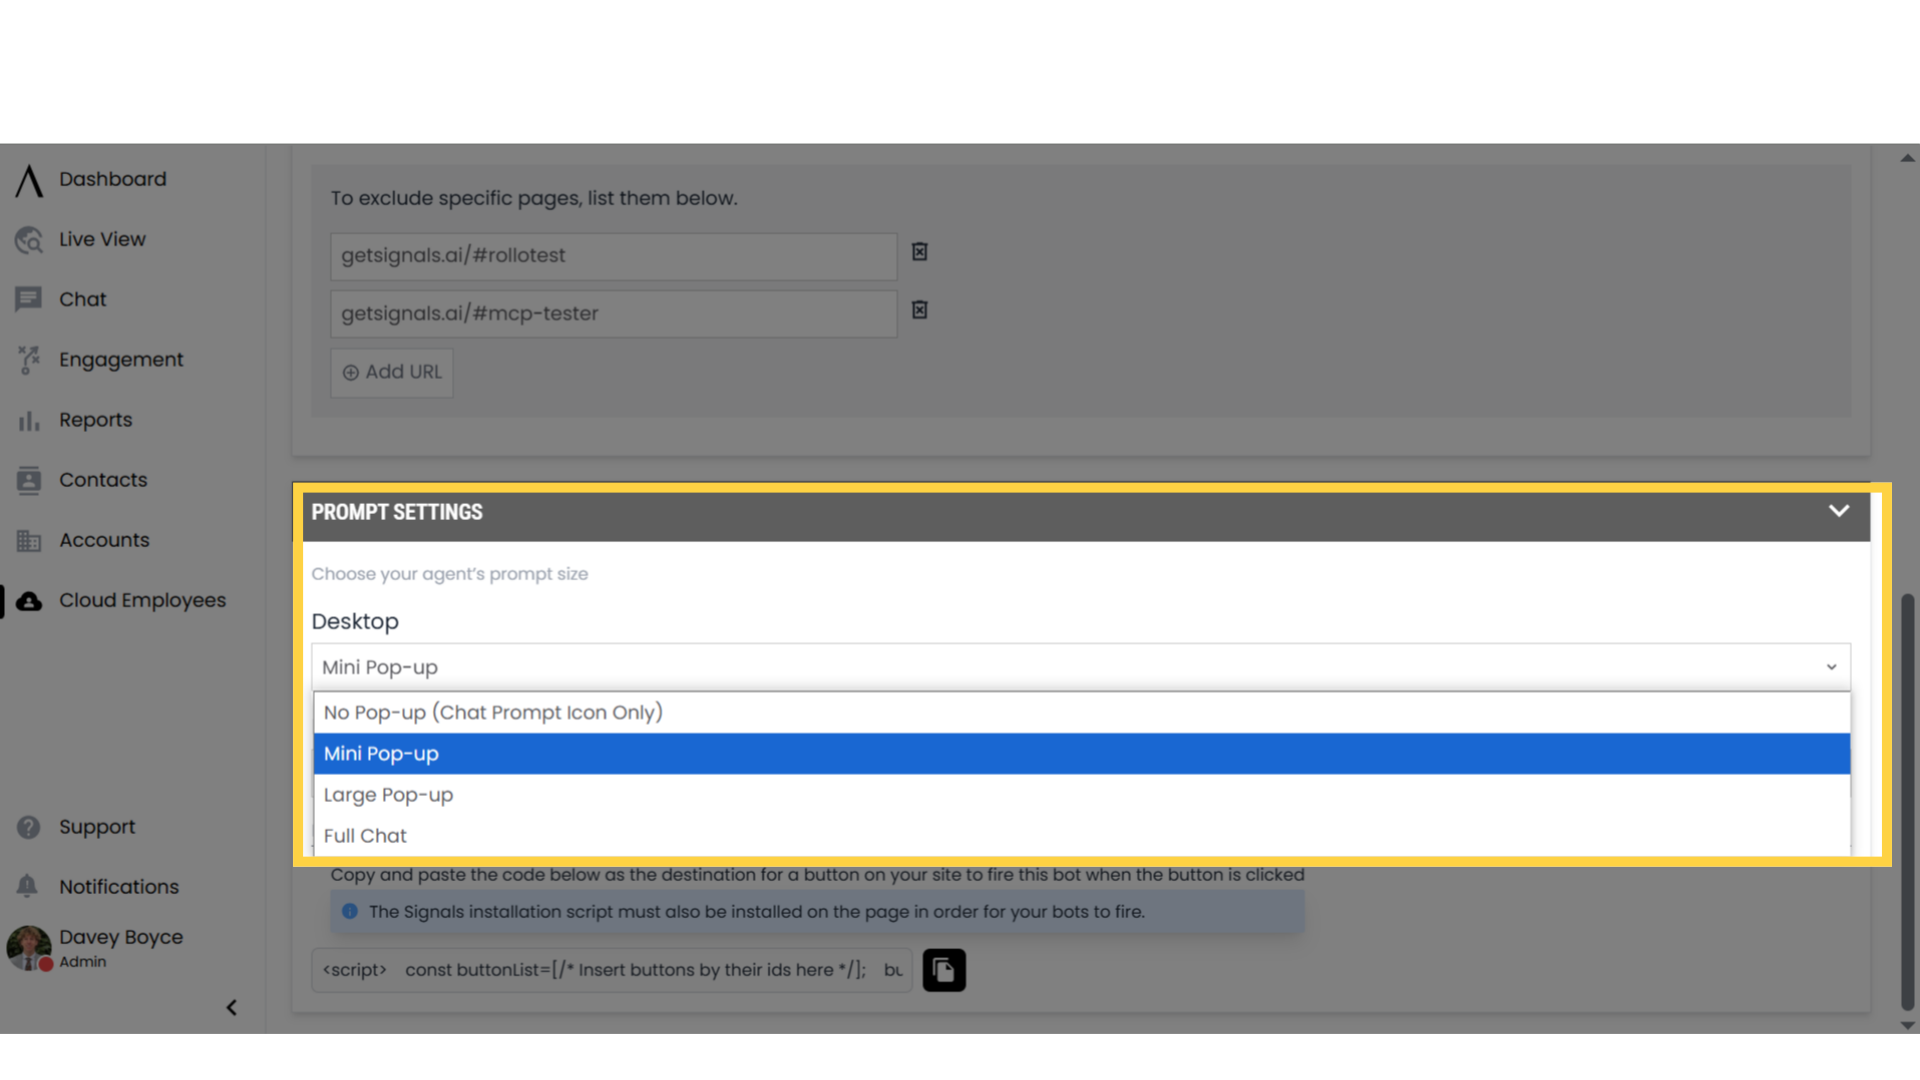
13. Prompt Settings
Below the "Agent Targeting" tab, you can see the "Prompt Settings" tab. Here you can manage how your cloud employee appears on your website. By navigating the Desktop and Mobile, drop-down menus, you can select the size of the cloud employee pop-up on your website.
14. Fire Agent on Button-click
If you would like your cloud employee to appear when a site visitor clicks a certain button on your website, copy and paste the code here as the destination for a button on your site to fire this cloud employee when the button is clicked.