Teams
Teams
As an administrator, you can create groups of users called “Teams”, which primarily help you organize which chat agents receive incoming chats.
Go to app.getsignals.ai
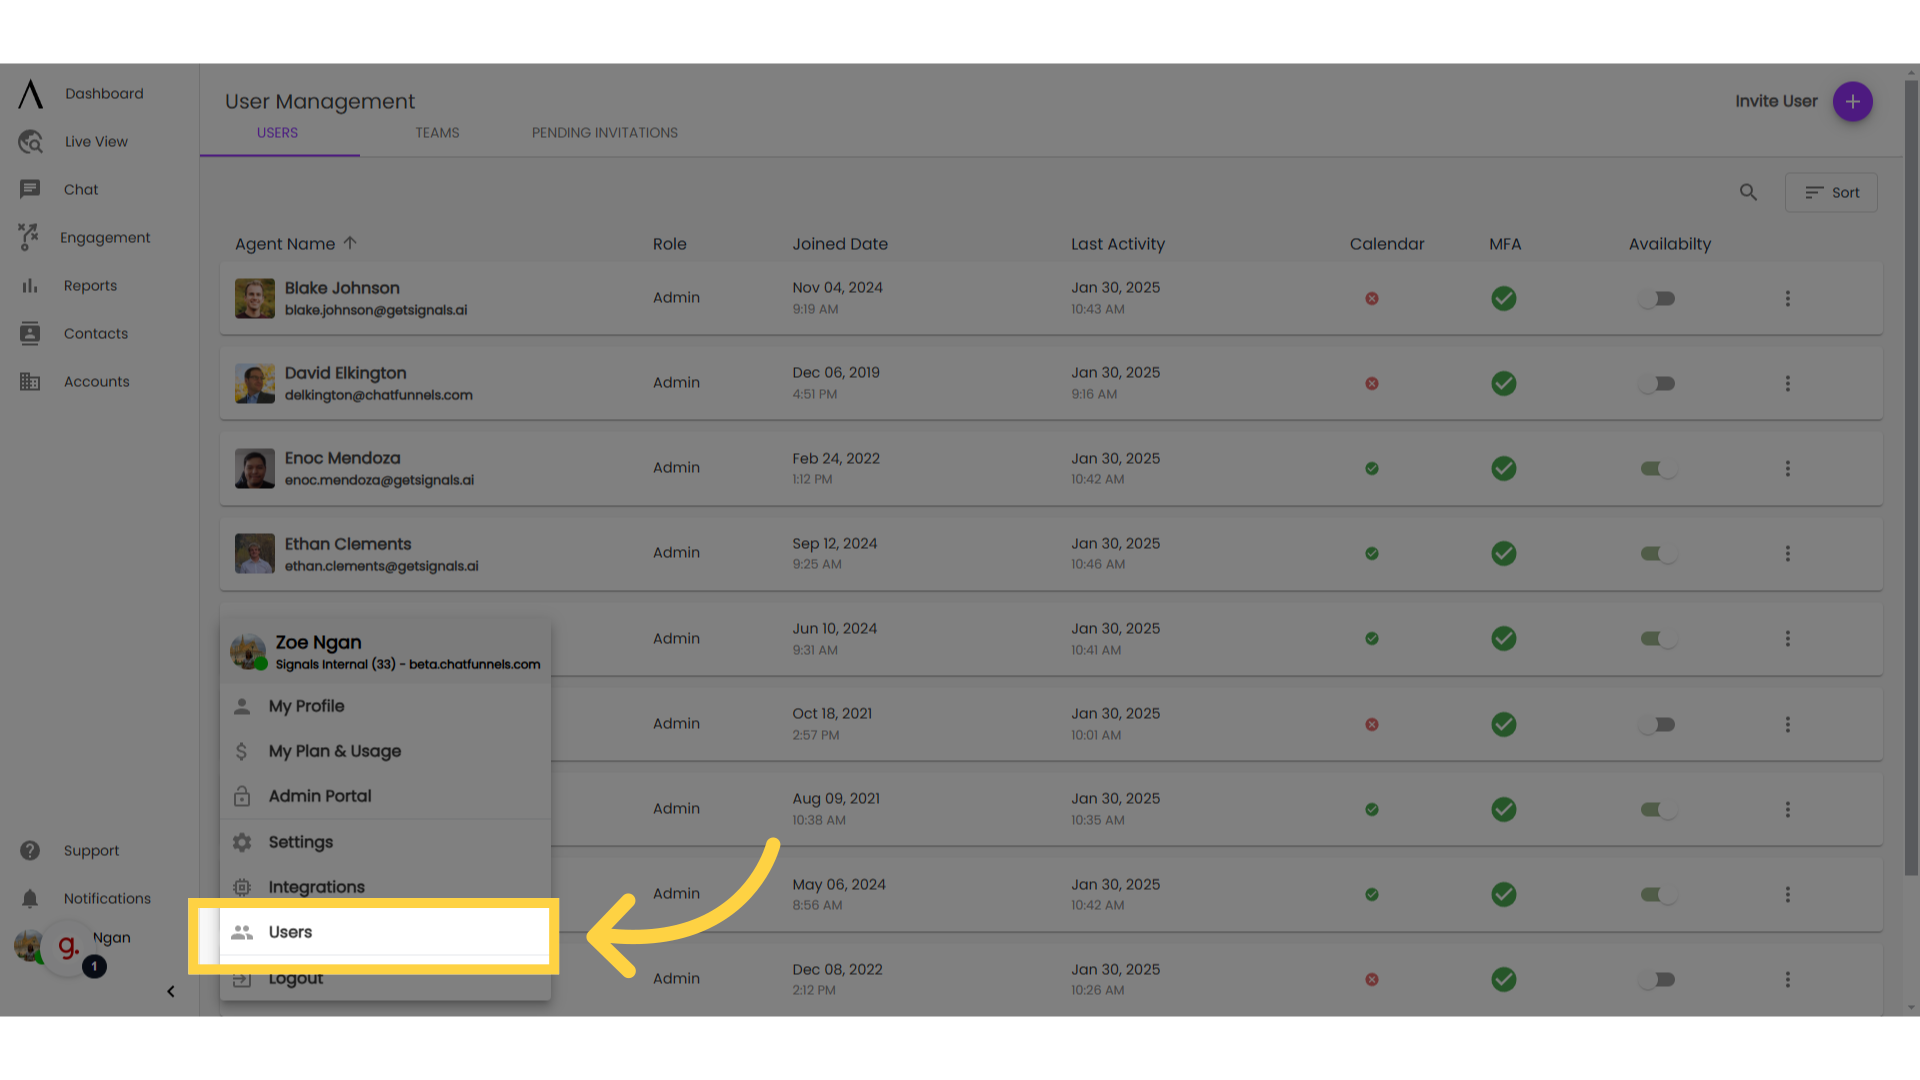
1. Go to "Users"
With Teams, you can make sure that the right web visitors are directed to the right chat agents. To start, click on your Profile in the bottom left corner, then go to "Users."
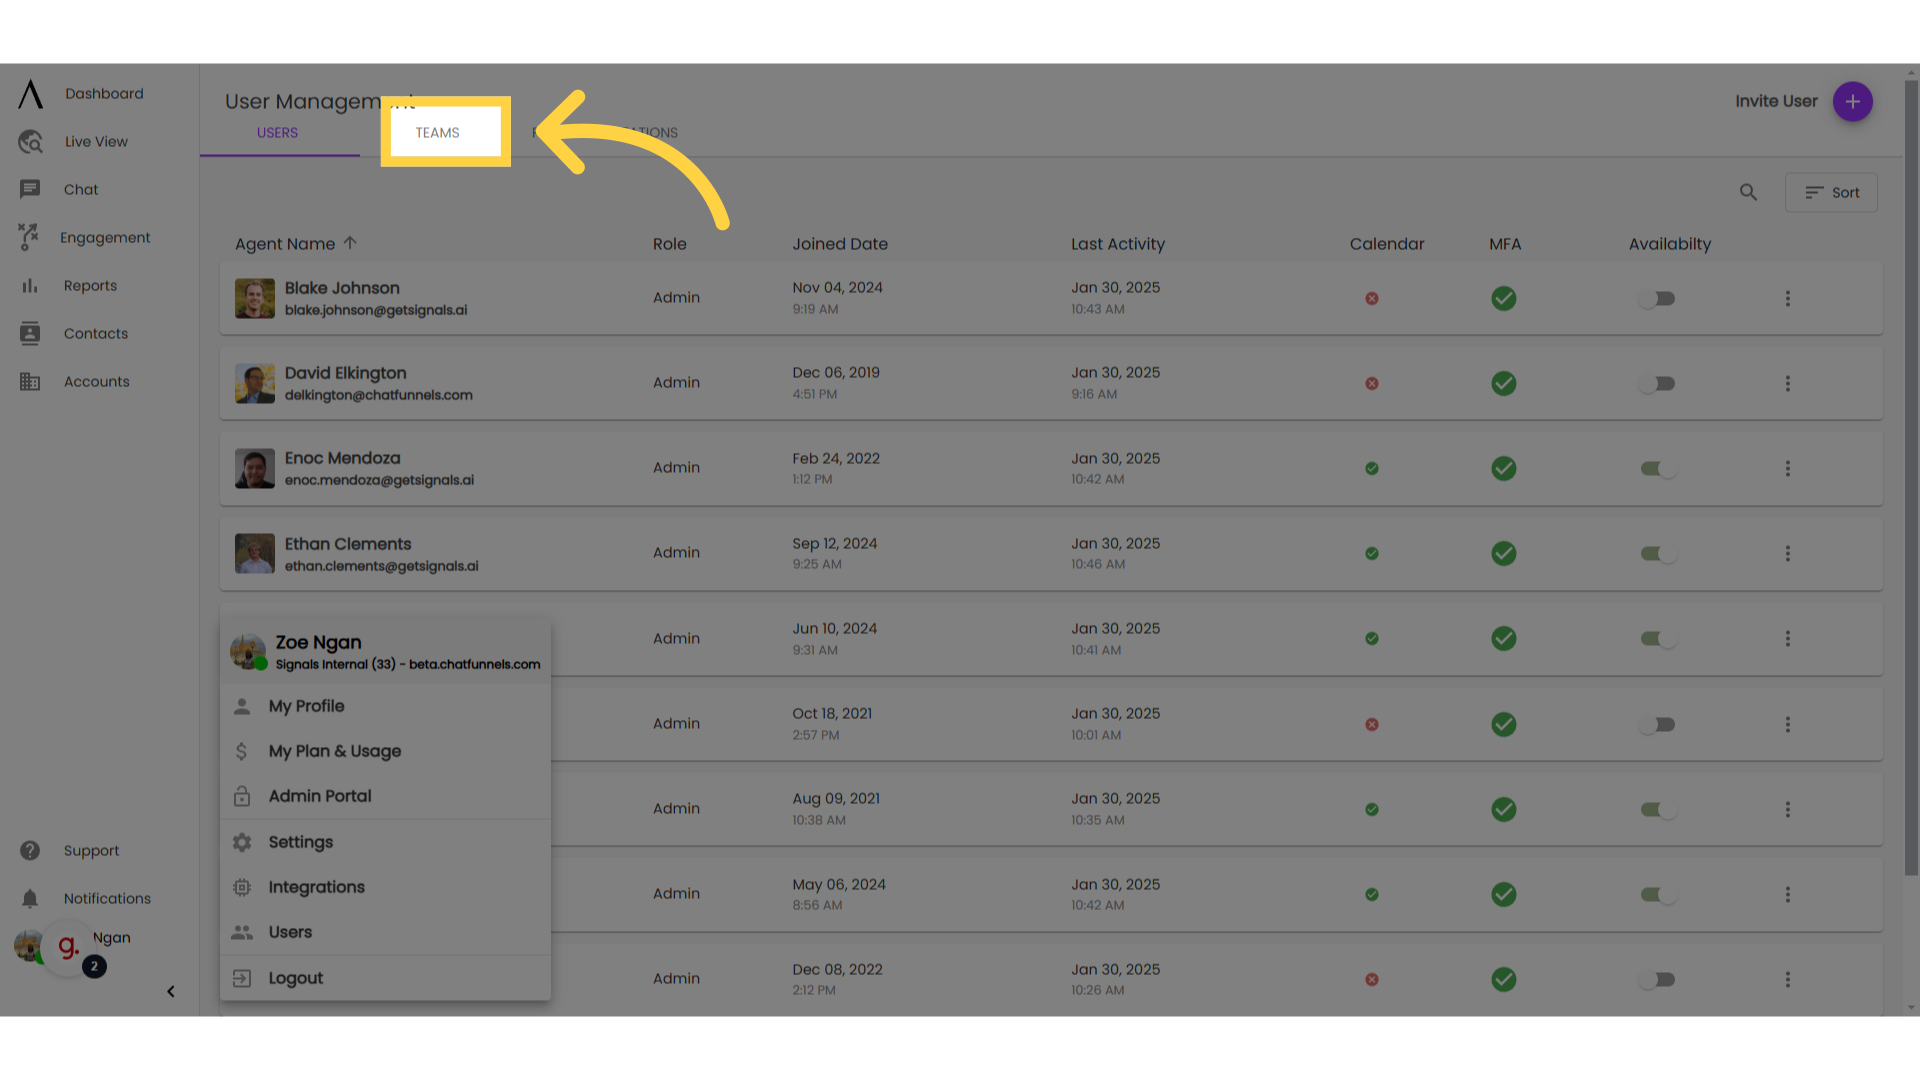
2. Navigate to "Teams"
Once there, navigate to the "Teams" tab.
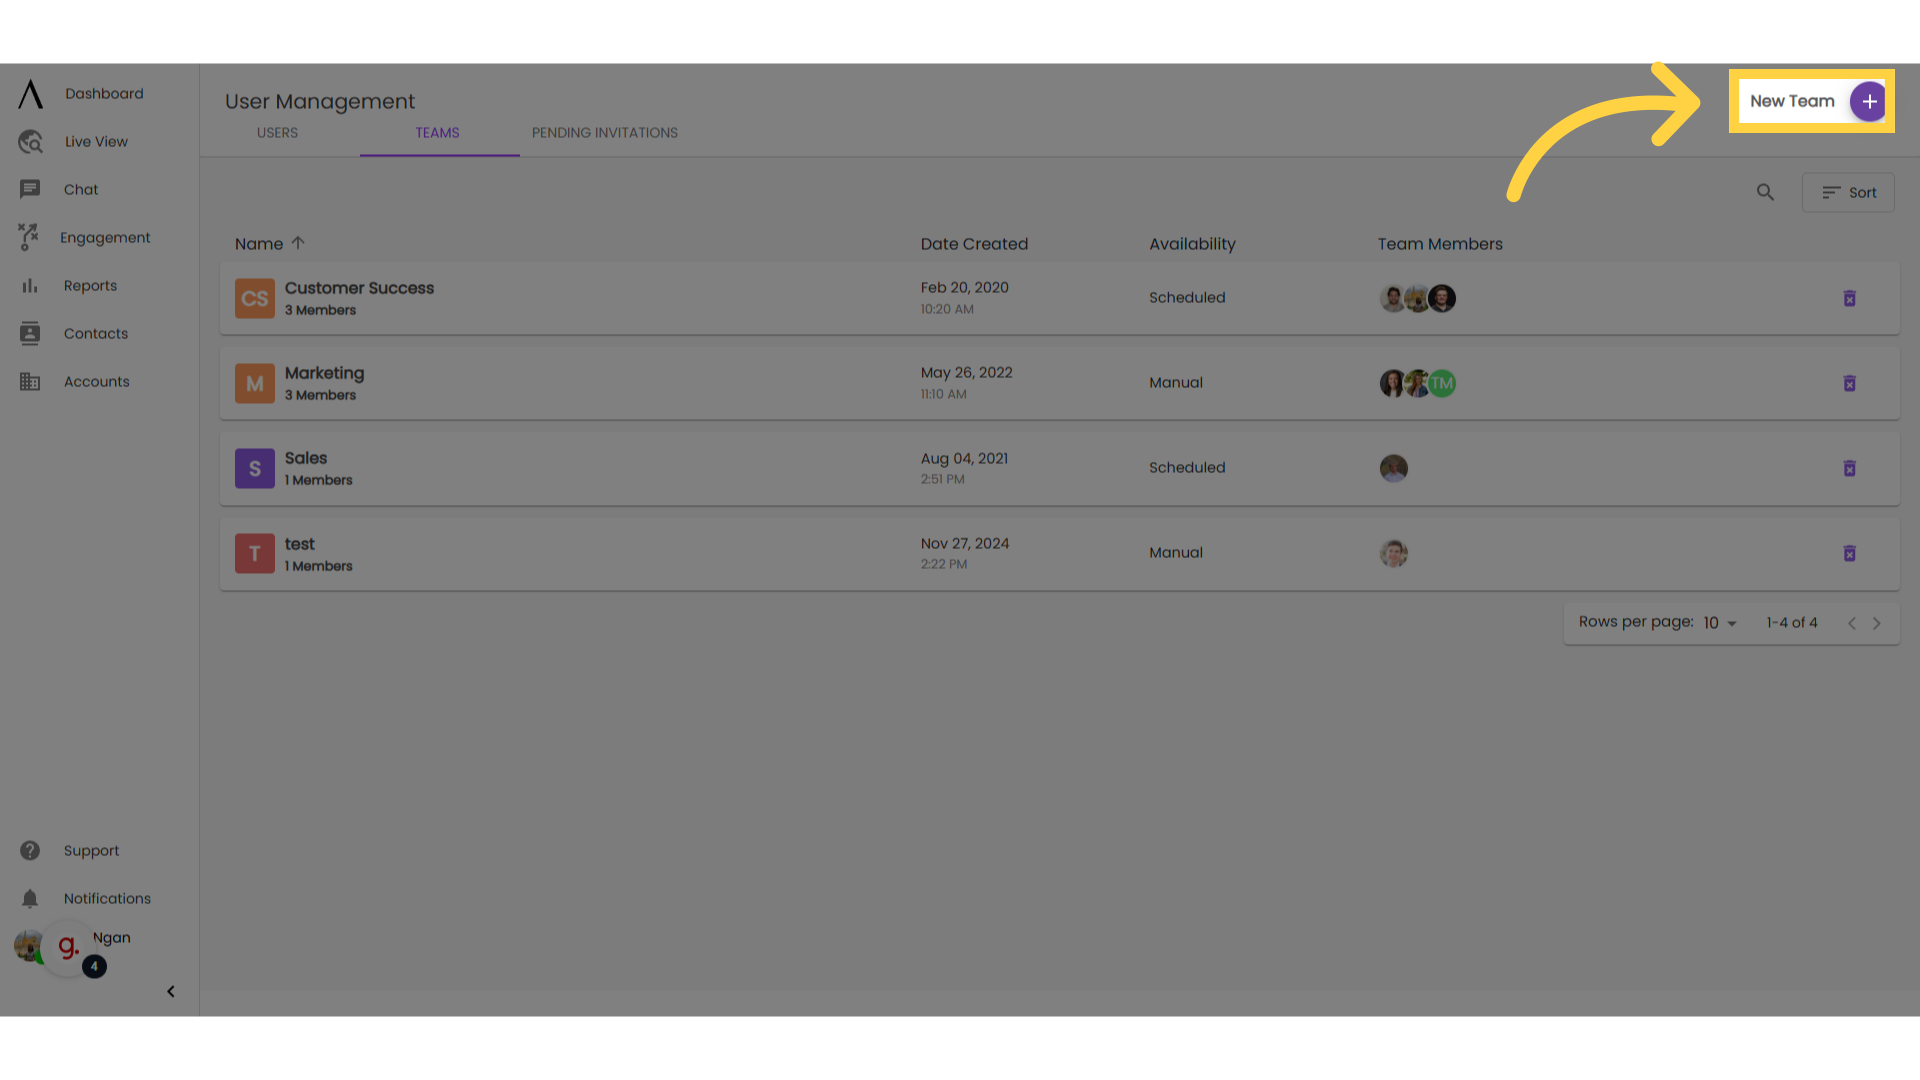
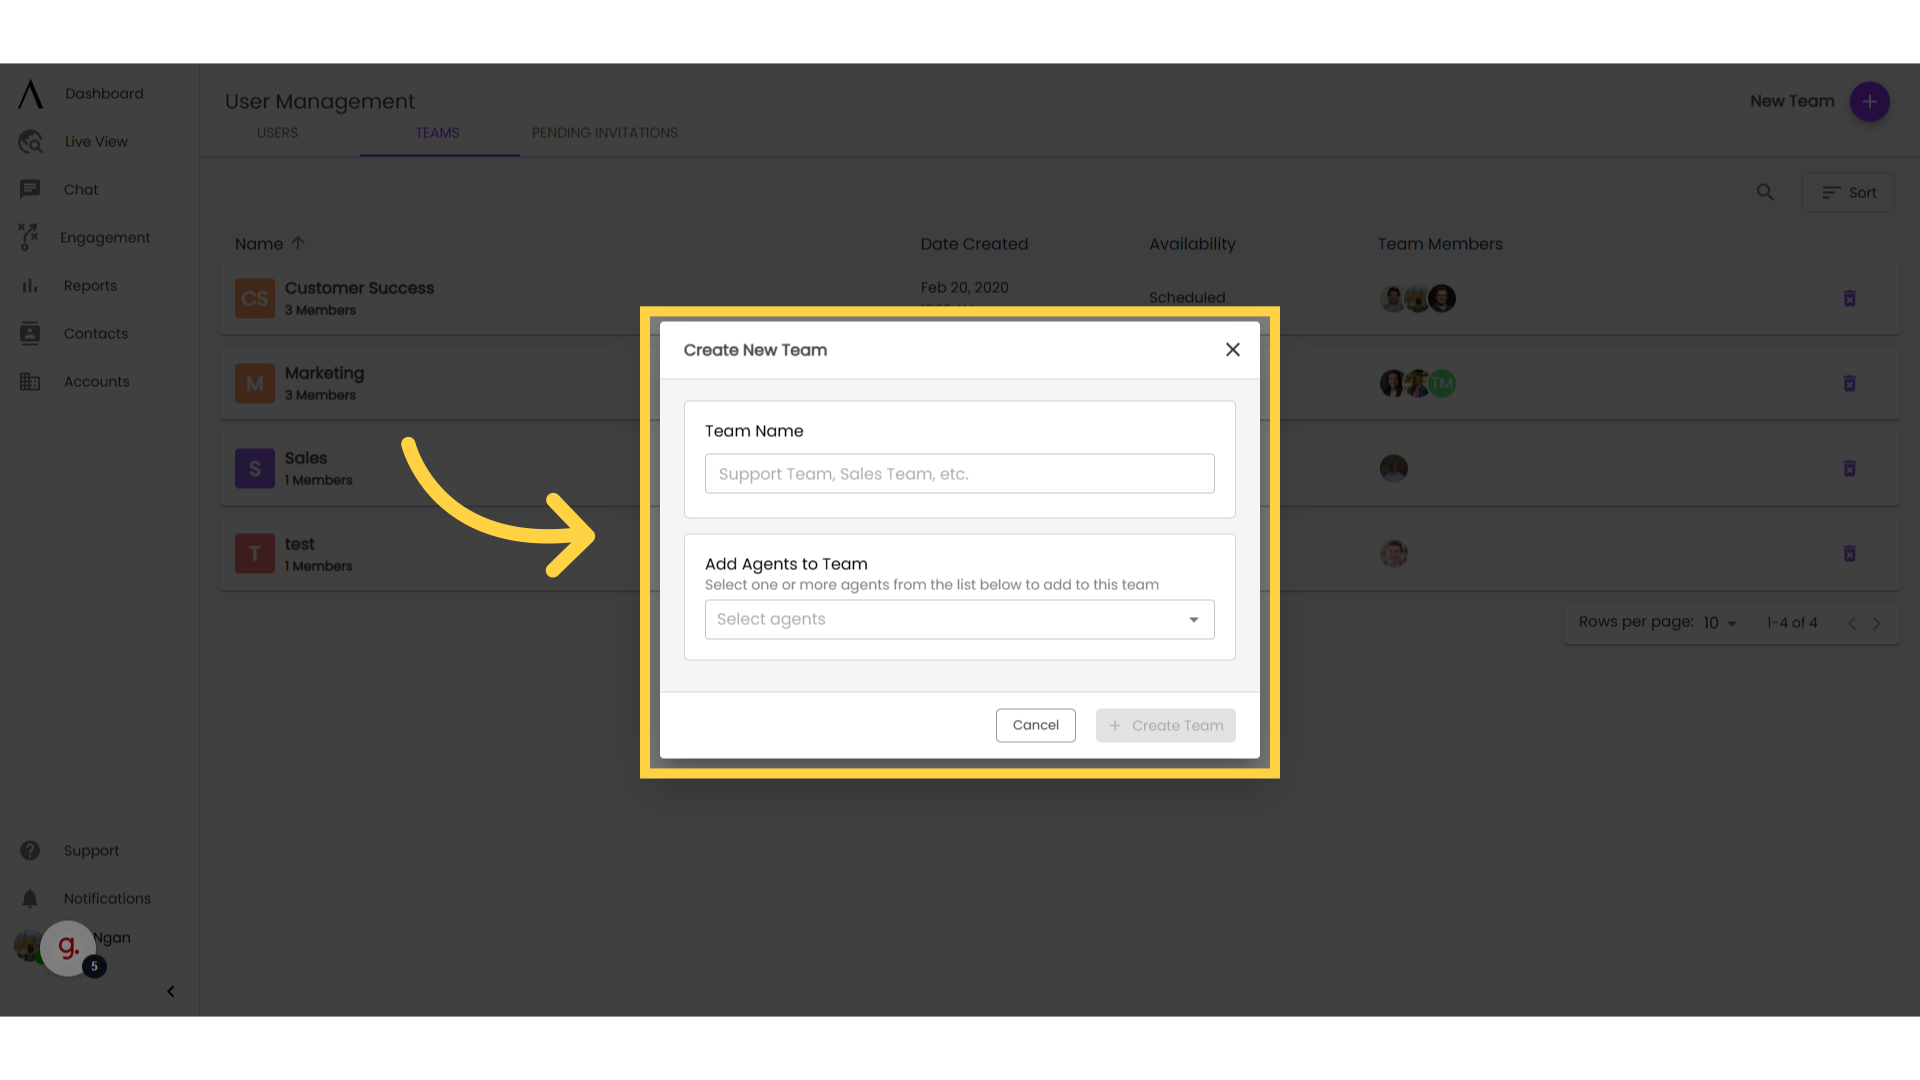
3. Click "New Team"
In the top right corner of the Teams tab, click "New Team."
4. Fill in team information
In the Create New Team modal, give your team a name and select agents to add to the team. Click "Create" in the bottom right corner of the modal.
5. Delete teams here:
Delete teams by using the "trash" icon on the far right of the page.
Note: Before deleting a team, ensure that you have removed the team from any settings. This can include ensuring that the Team is not being used in Live Chat Nodes, Calendar Drop Nodes, Conditional Branching Nodes, or any Bot’s Audience settings. Failure to remove a team from these settings before deleting the team can disrupt your bot’s performance.

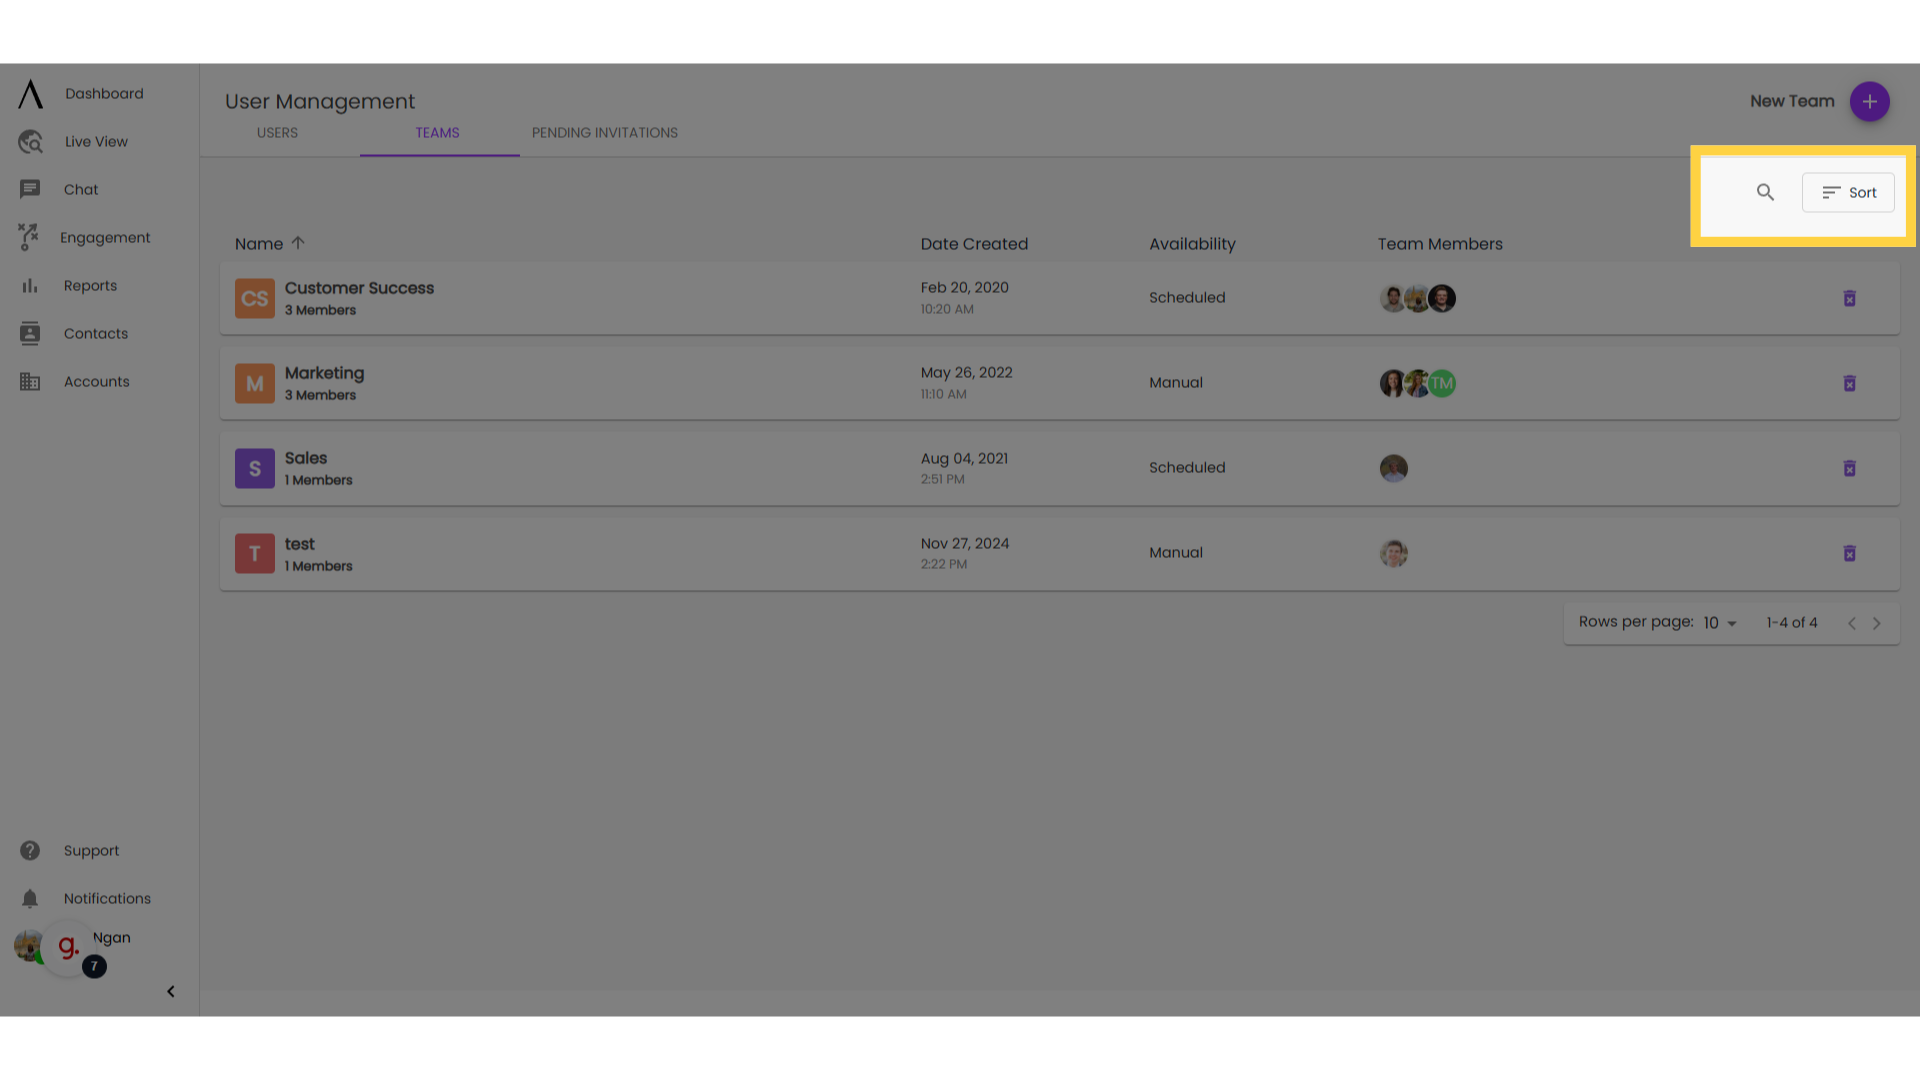
6. Sort teams here:
In the top right corner of the Teams tab, you will also find a search button and a sort button. Search by team name to find a specific team, or you can sort teams by name, date created, or availability (manual or scheduled).
7. Edit team name/members
Click into the name of the team and make any desired changes. These changes will auto-save. To add a team member, click "Add Team Member" in the upper right corner of the page.
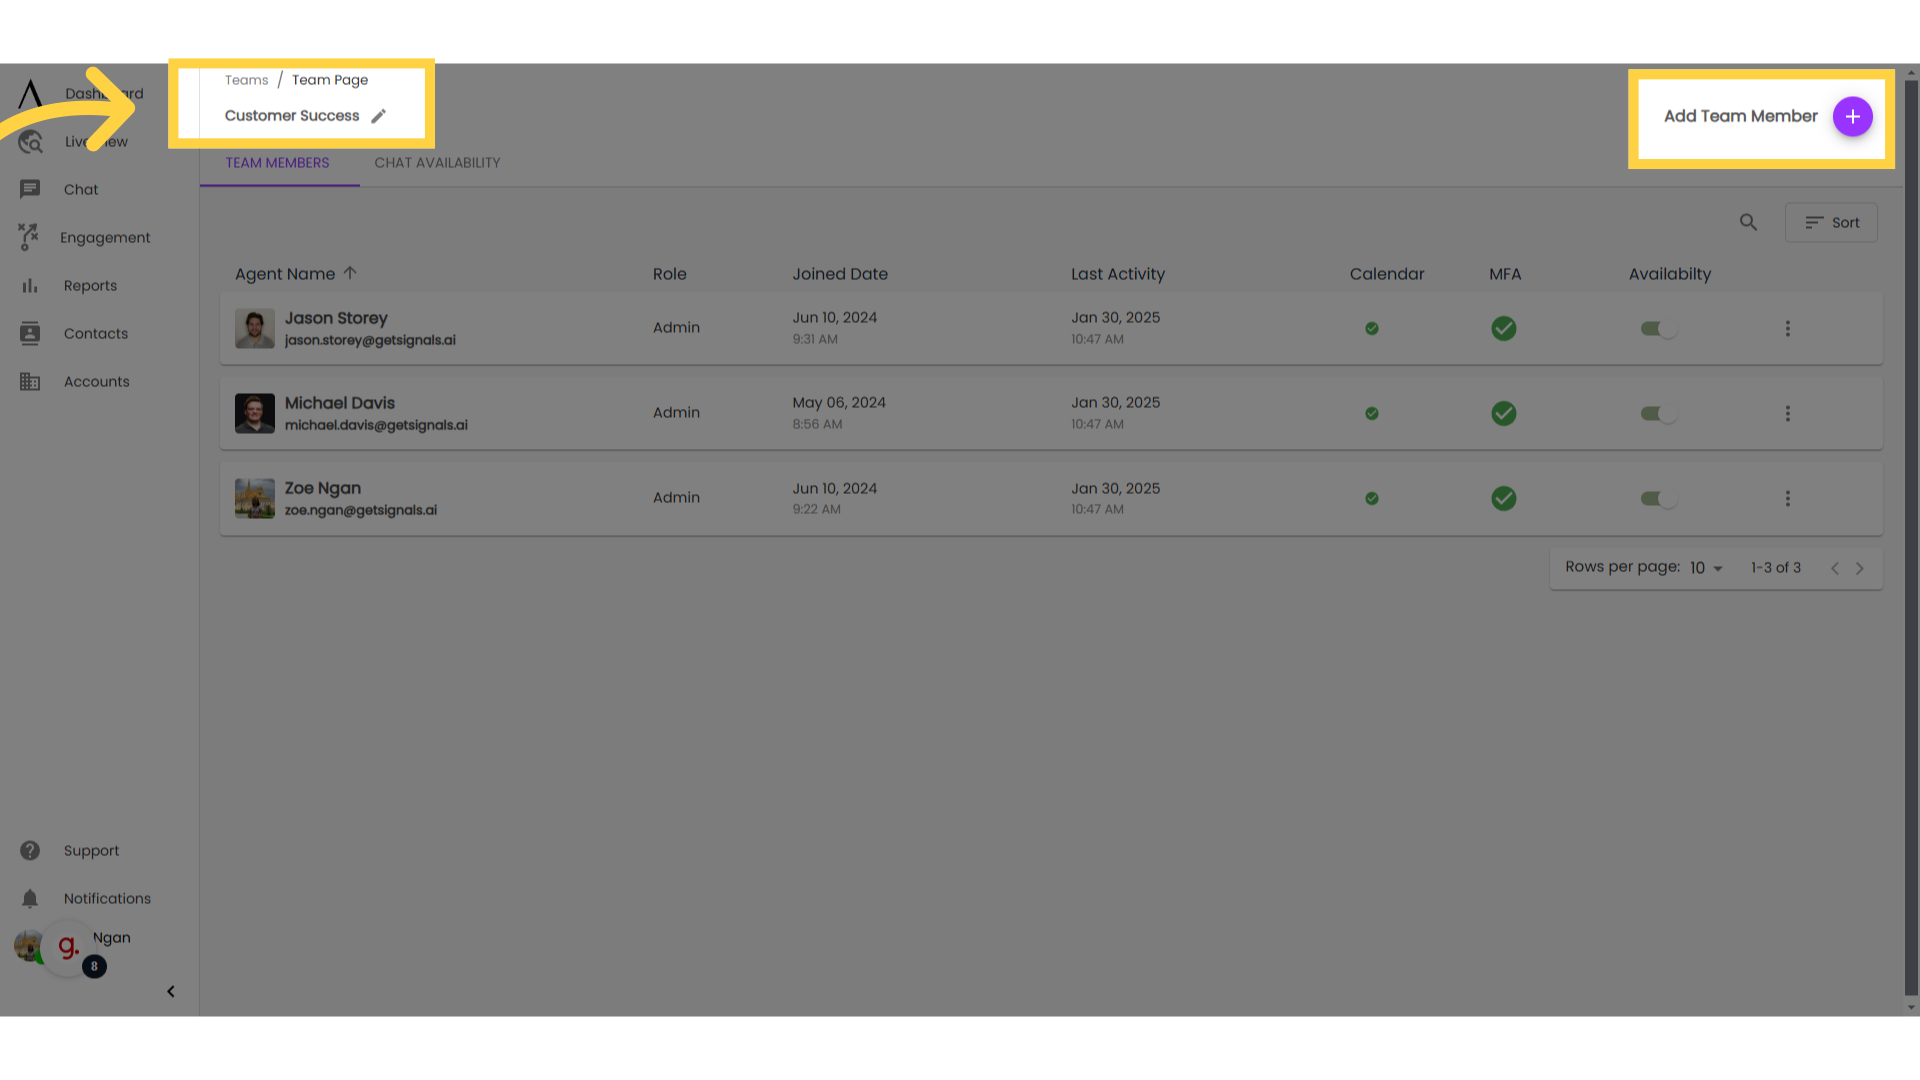
8. Click here to edit teammates
The hamburger menu on the far right allows you to remove a team member from a team, edit their chat permissions and out of office settings, or copy a members' agent profile links. Changes made on this page will auto-save.

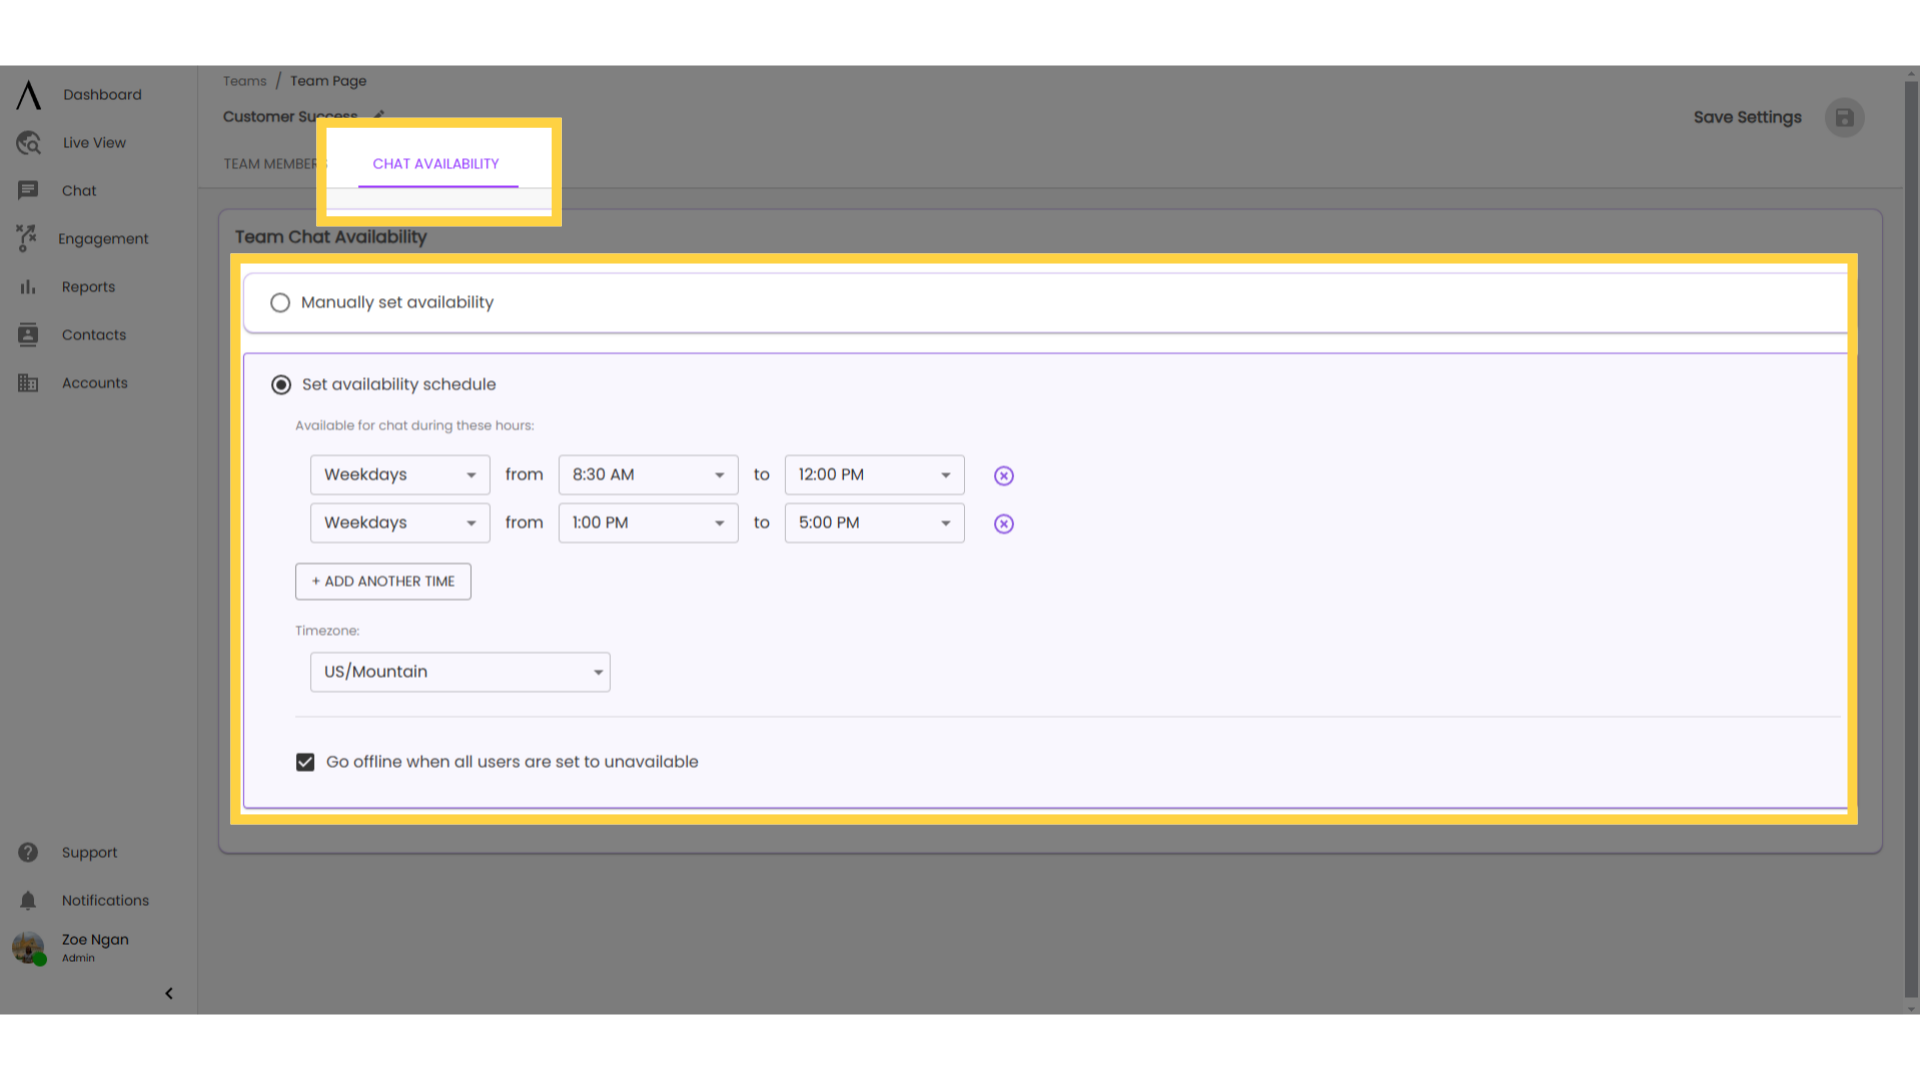
9. Set team availability
You can either manually set your team availability or set an availability schedule.
Manually setting availability means that an admin manually turns chat availability on or off for the team. This is great for teams that want to always be available, or if the entire team will be unavailable for a specific period of time.
Setting an availability schedule allows the team to be automatically changed between available and unavailable according to the schedule that you set. This is great for teams that observe strict and consistent working hours.
Note: if you have reps in multiple time zones, create a team for each time zone in order to respect your reps' office hours.
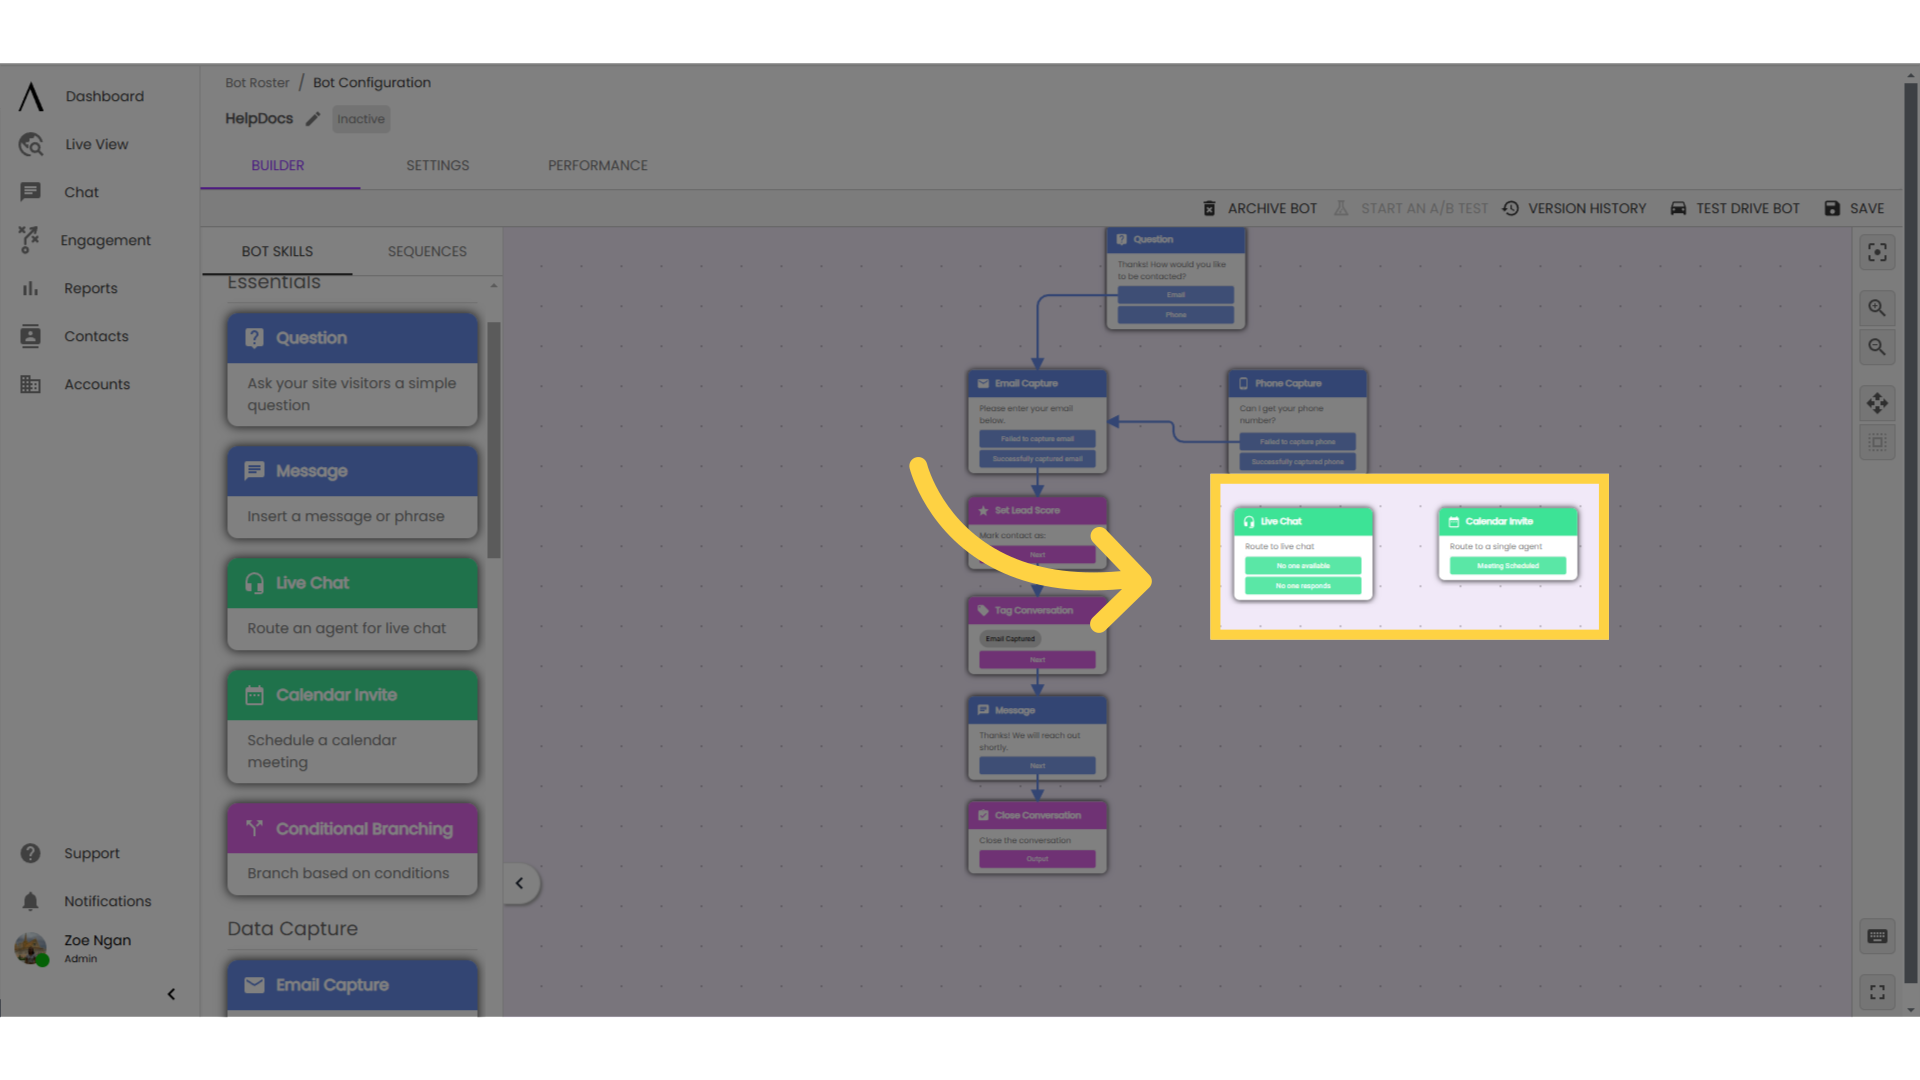
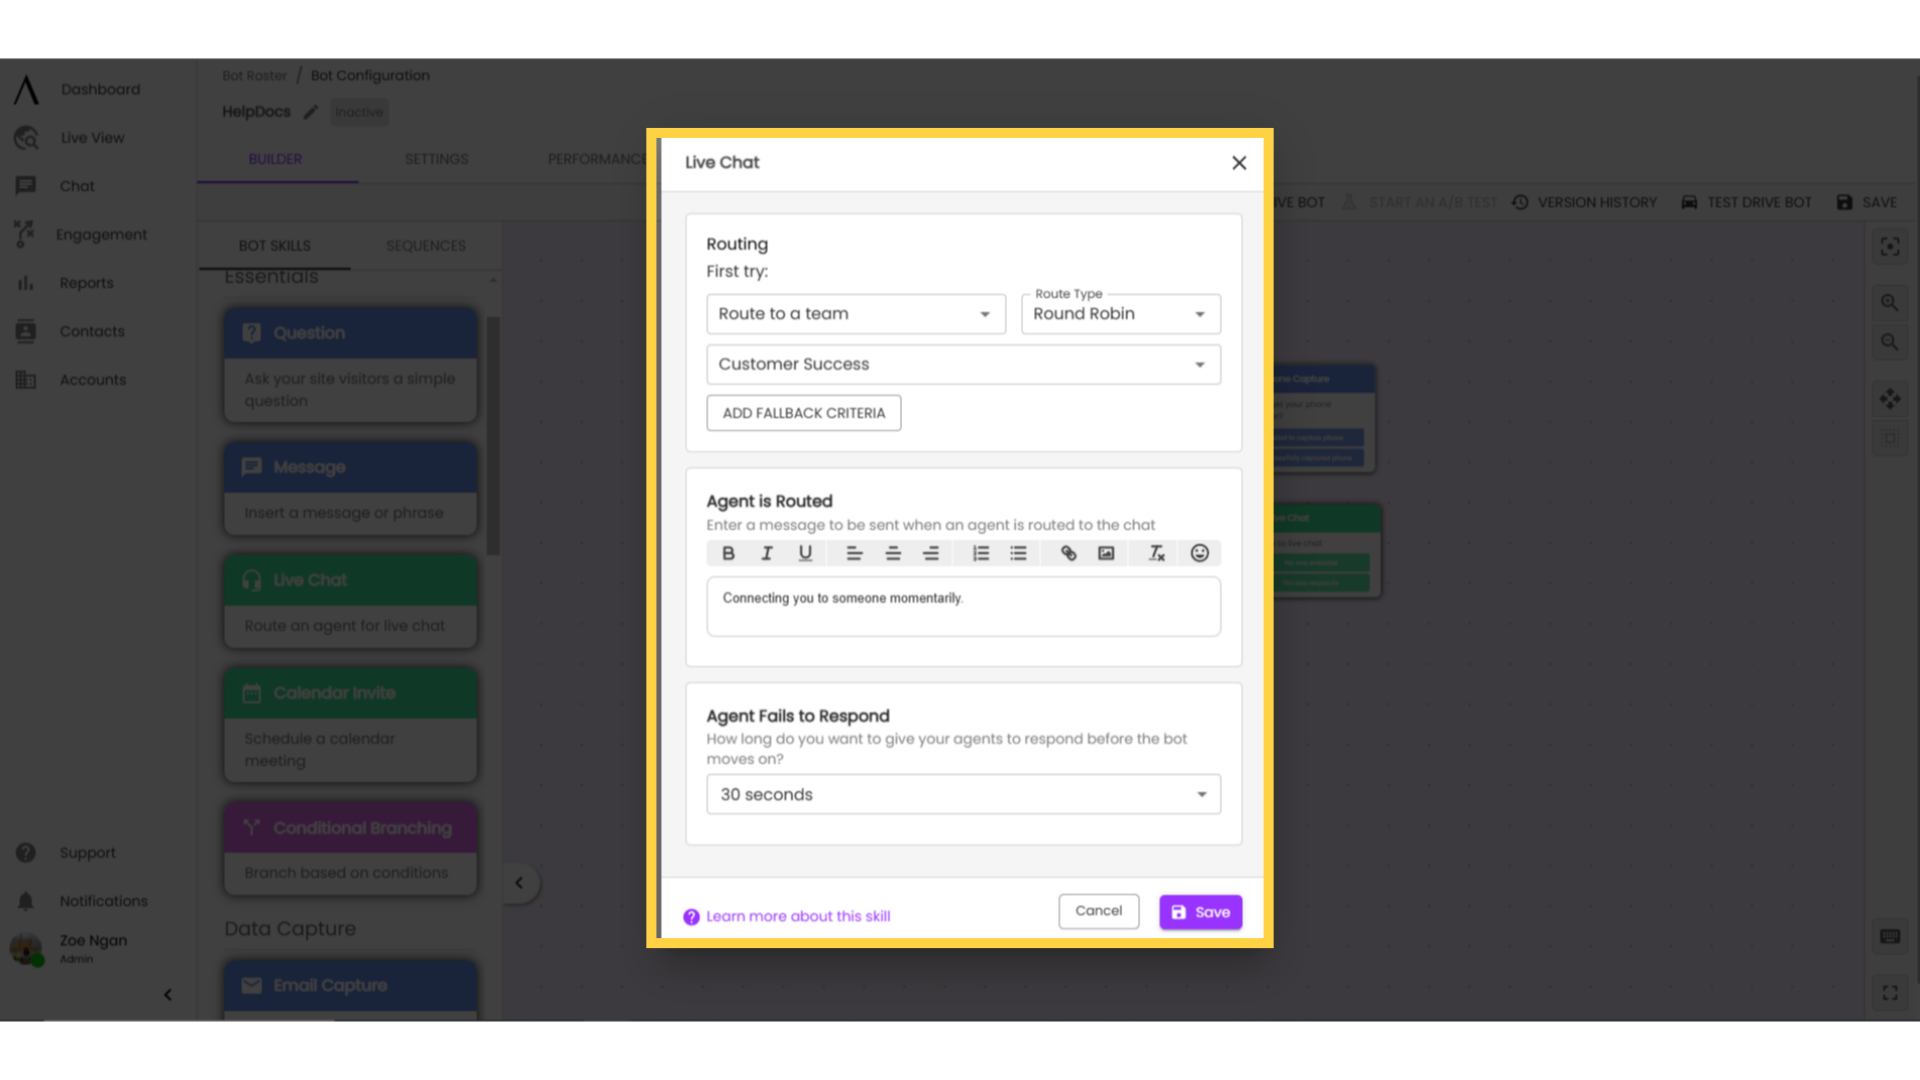
10. Use Case: Live Chat
In most cases, if you want to assign live chat or calendar routing to a group of agents, creating a team will make that easier.
Instead of manually selecting the agents in each routing skill, simply select a team. This also helps for agent turnover management. If an agent needs to be removed from your organization, routing through a team rather than an individual agent or group of agents will save you work. Rather than tracking down every routing instance that the agent was included in, simply remove them from the system and the routing will adjust automatically to the new team size.
Similarly, when using complex geographical routing sequences, you can save yourself work in the case of employee turnover by creating a team for each geographical region, even if the team only holds a single user. This allows you to manage adjustments easier because you can update the teams rather than the sequences that use them.
11. Use Case: Sales-Support Handoff
Building agent teams for each of the teams in your organisation that are licensed in the system helps maintain a smooth transition for prospects as they move through the buyer's journey.
As their account or opportunity changes in your CRM and they move into new segments, their live chat requests can be consistently routed to the correct team in your organisation.