Users
- Users
- Go to app.getsignals.ai
- 1. Click "Users"
- 2. Go to Invite User
- 3. Add user information
- 4. Establish chat permissions
- 5. Add the user to a team
- 6. Send Invite
- 7. Check Pending Invitations
- 8. Click "Edit Permissions"
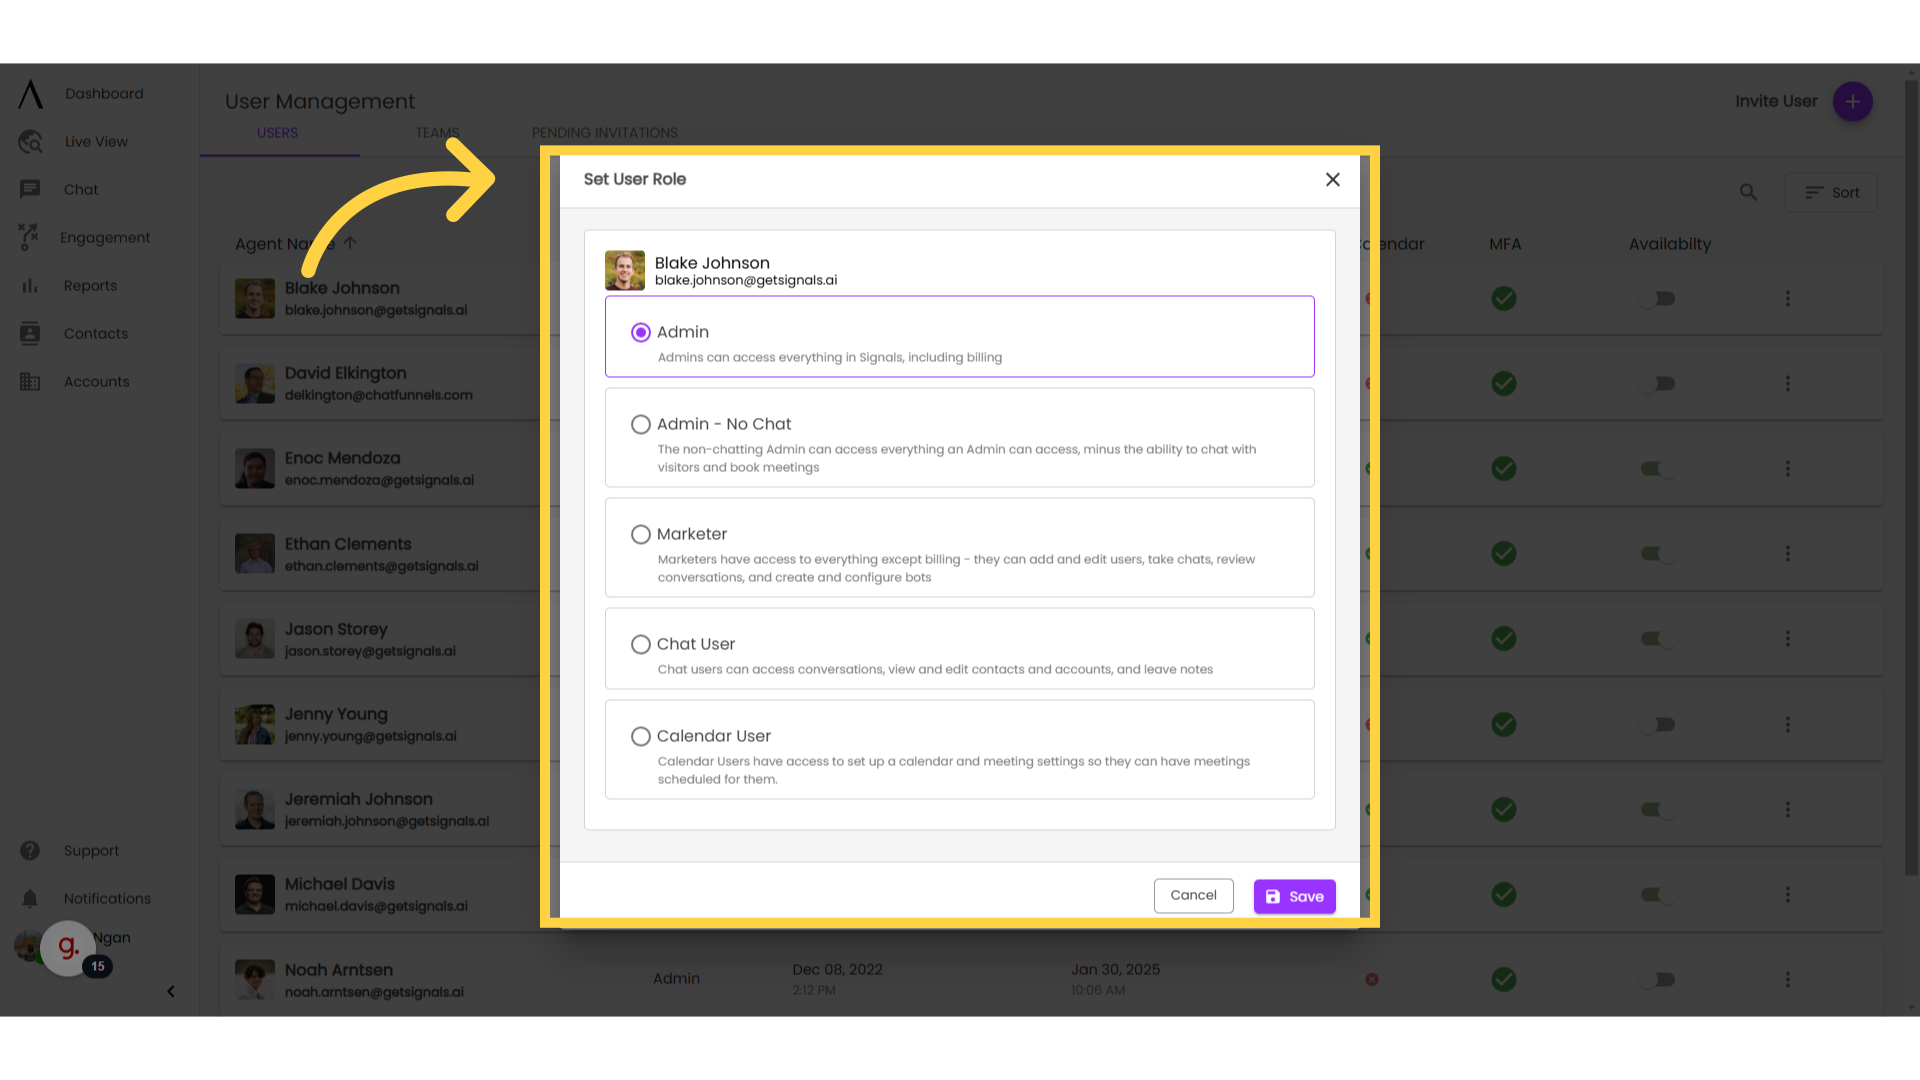
- 9. Set User Role
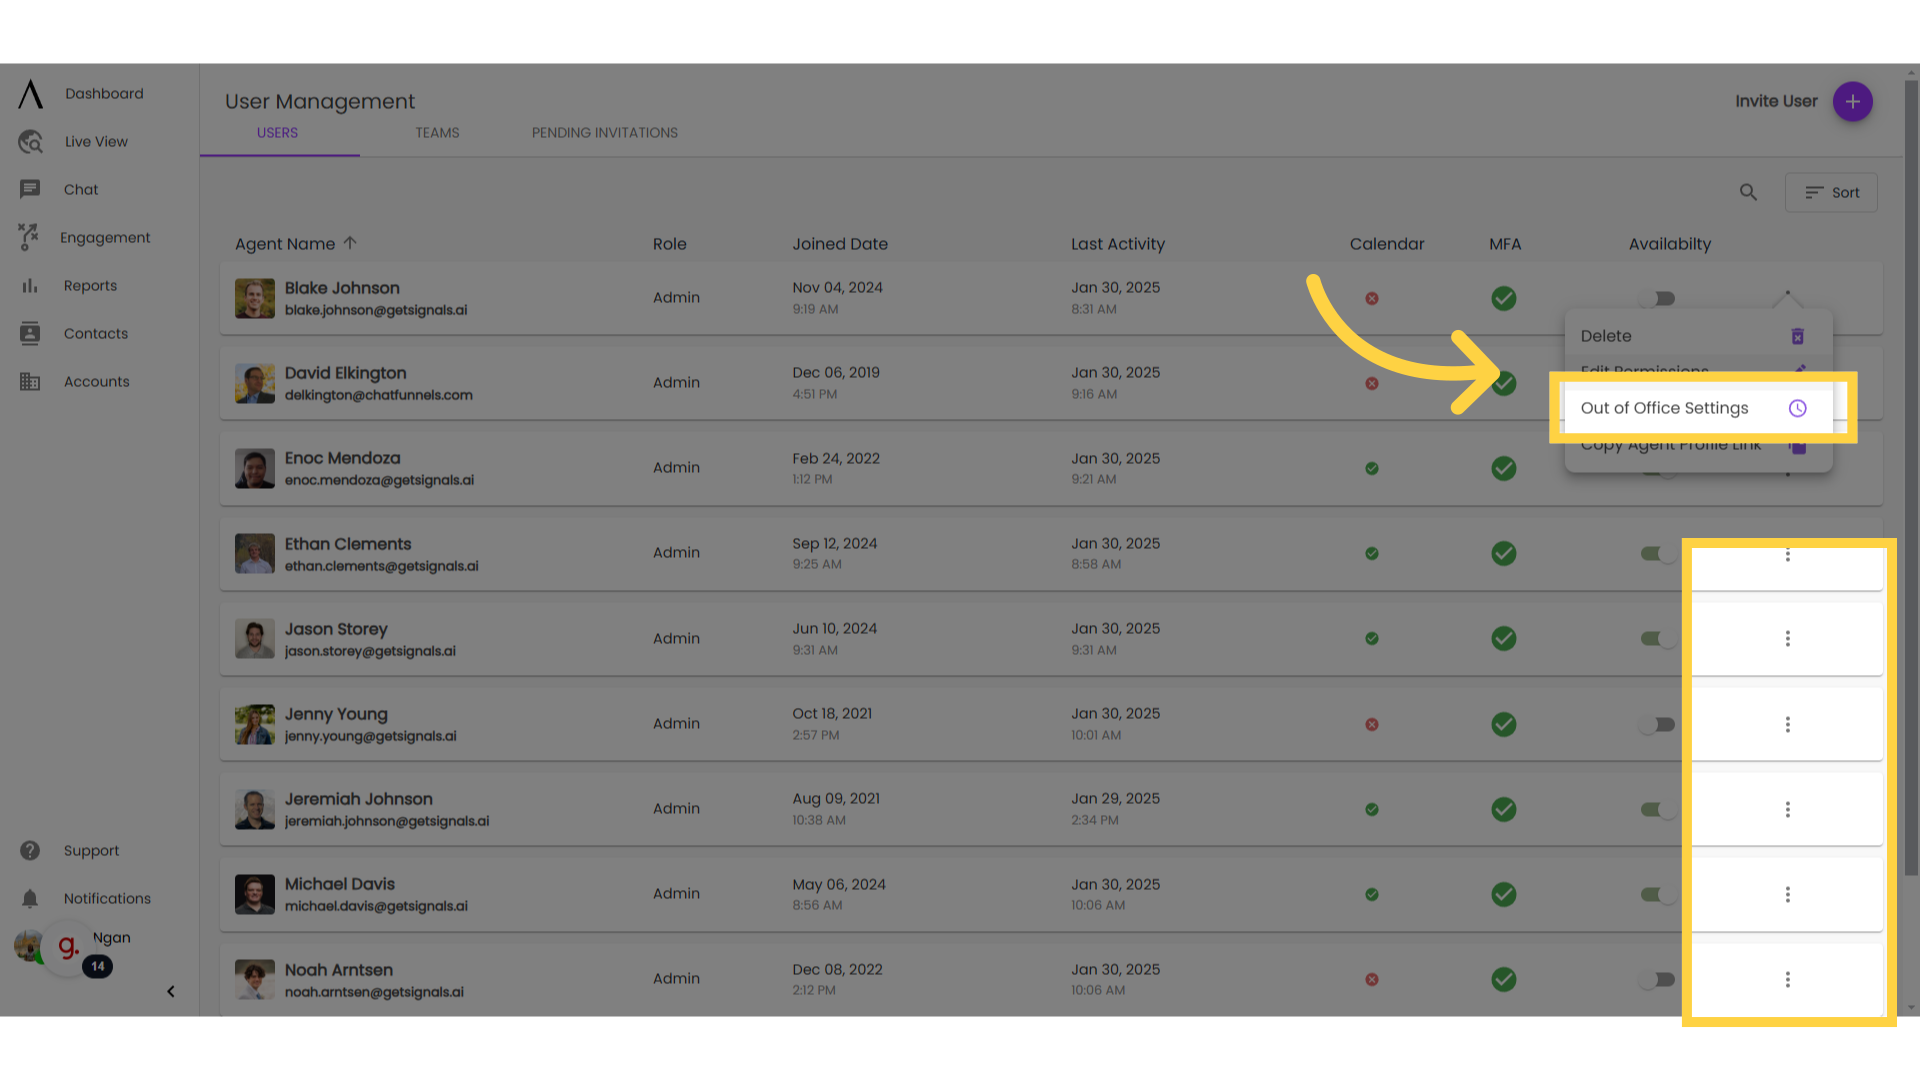
- 10. Click "Out of Office Setttings"
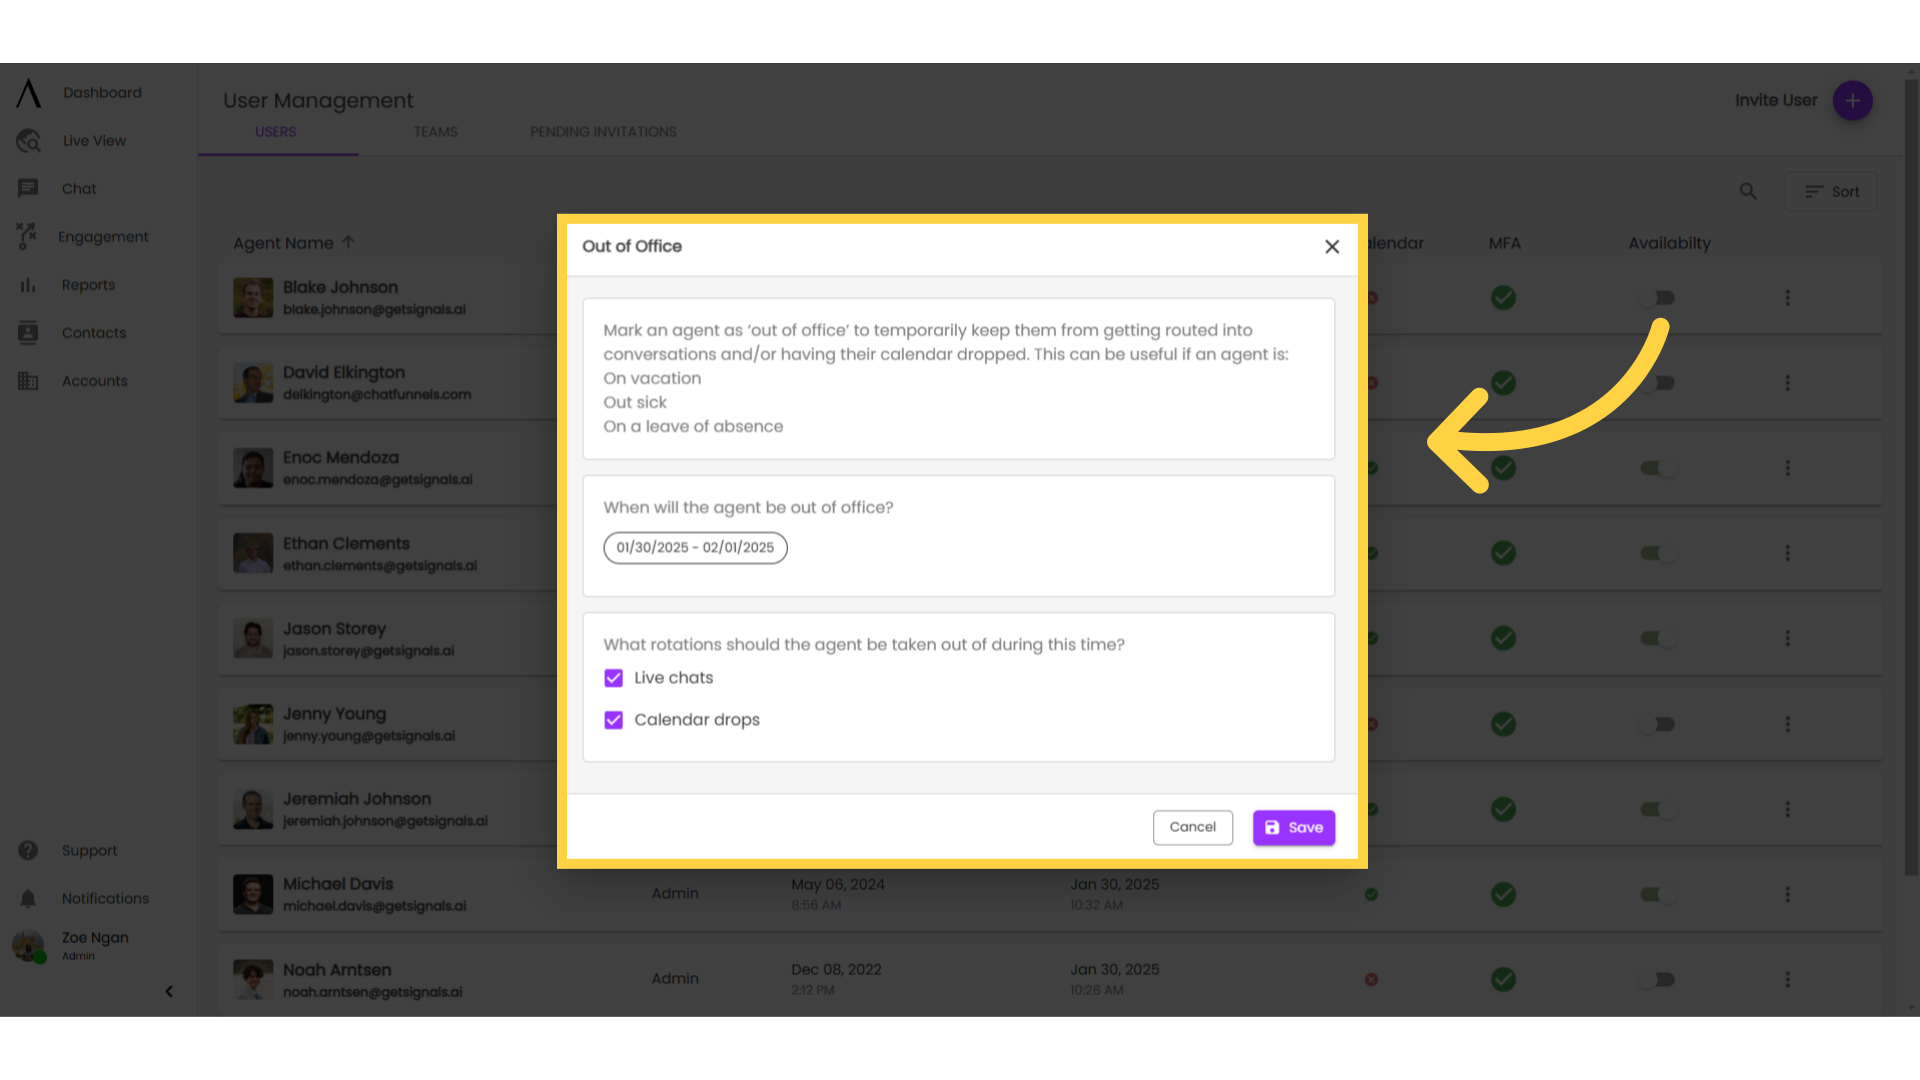
- 11. Configure OOO Settings
- 12. Search or Sort Users
Users
This video provides assistance for administrators managing user licenses.
Go to app.getsignals.ai
1. Click "Users"
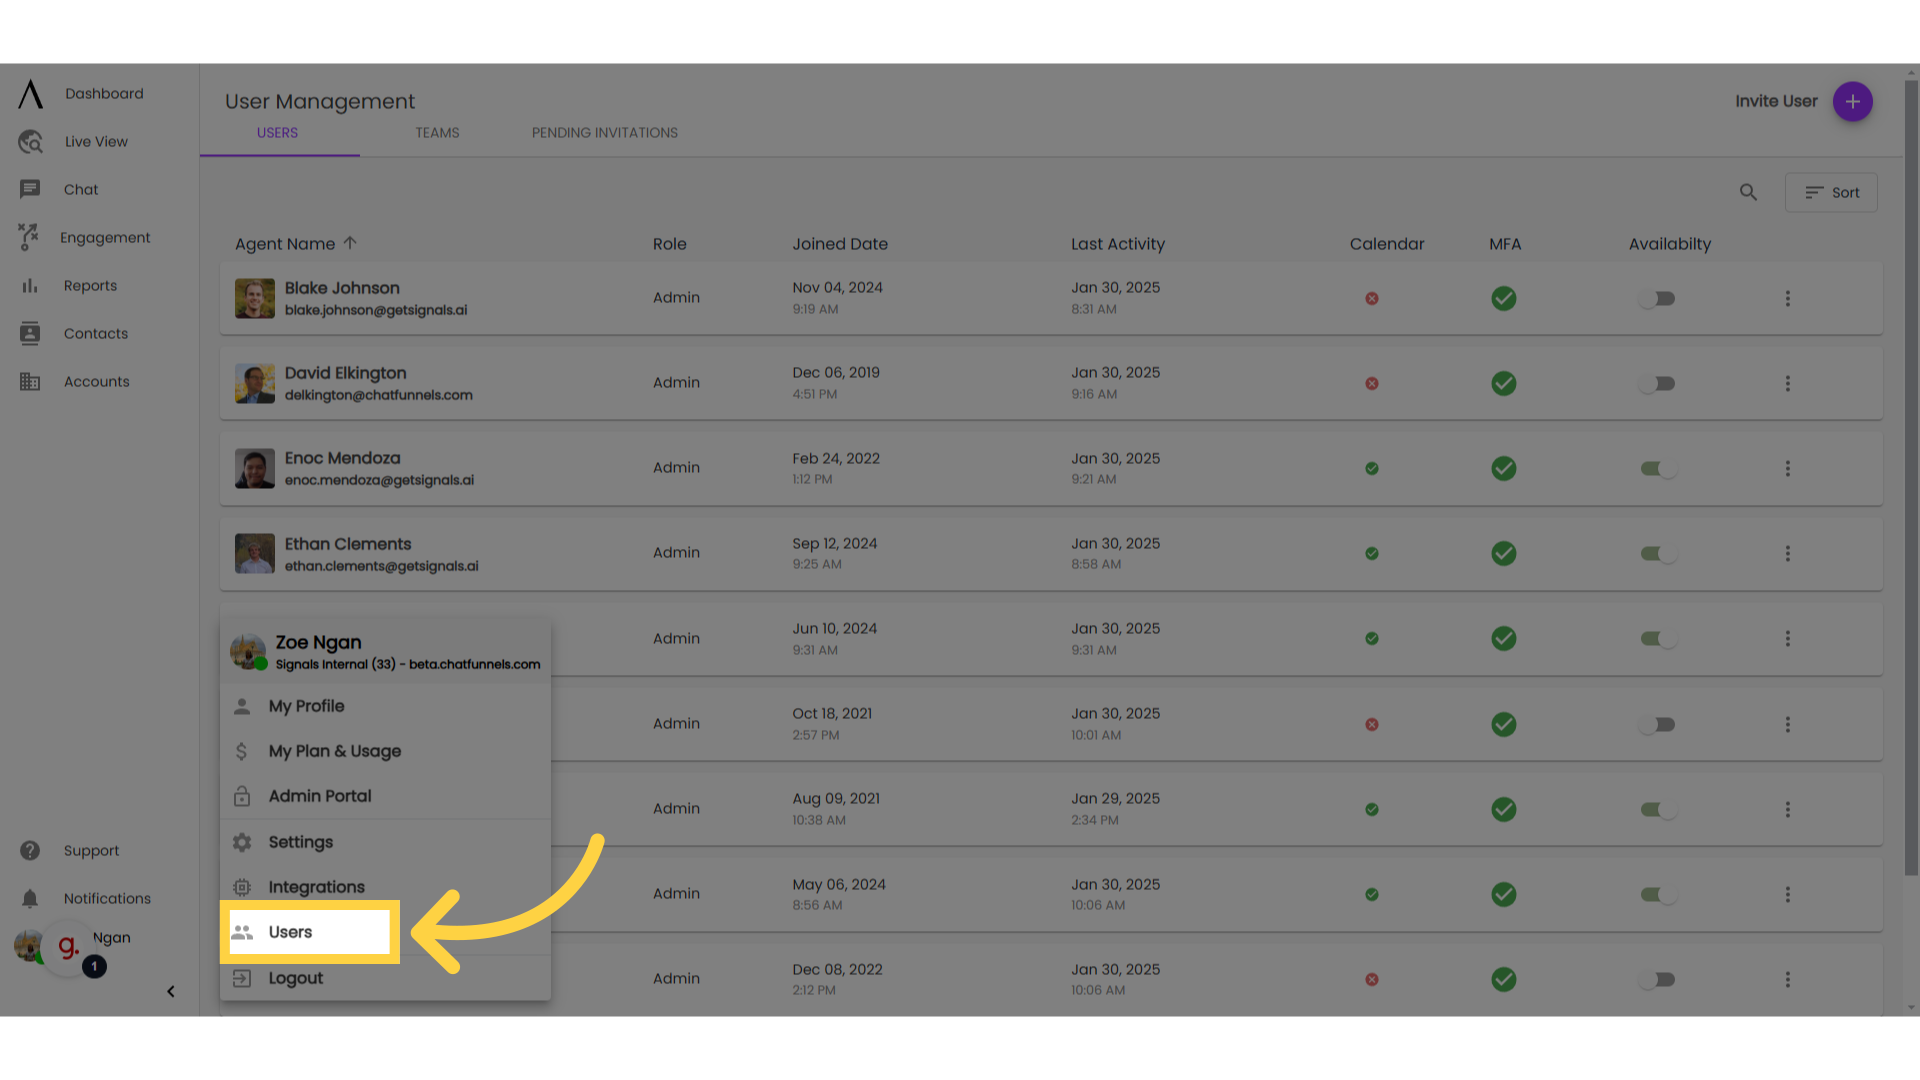
The Users tab allows you as an administrator can add, edit and manage the user accounts within your organisation. To get there, click on your Profile in the bottom-left corner, then go to "Users."
2. Go to Invite User
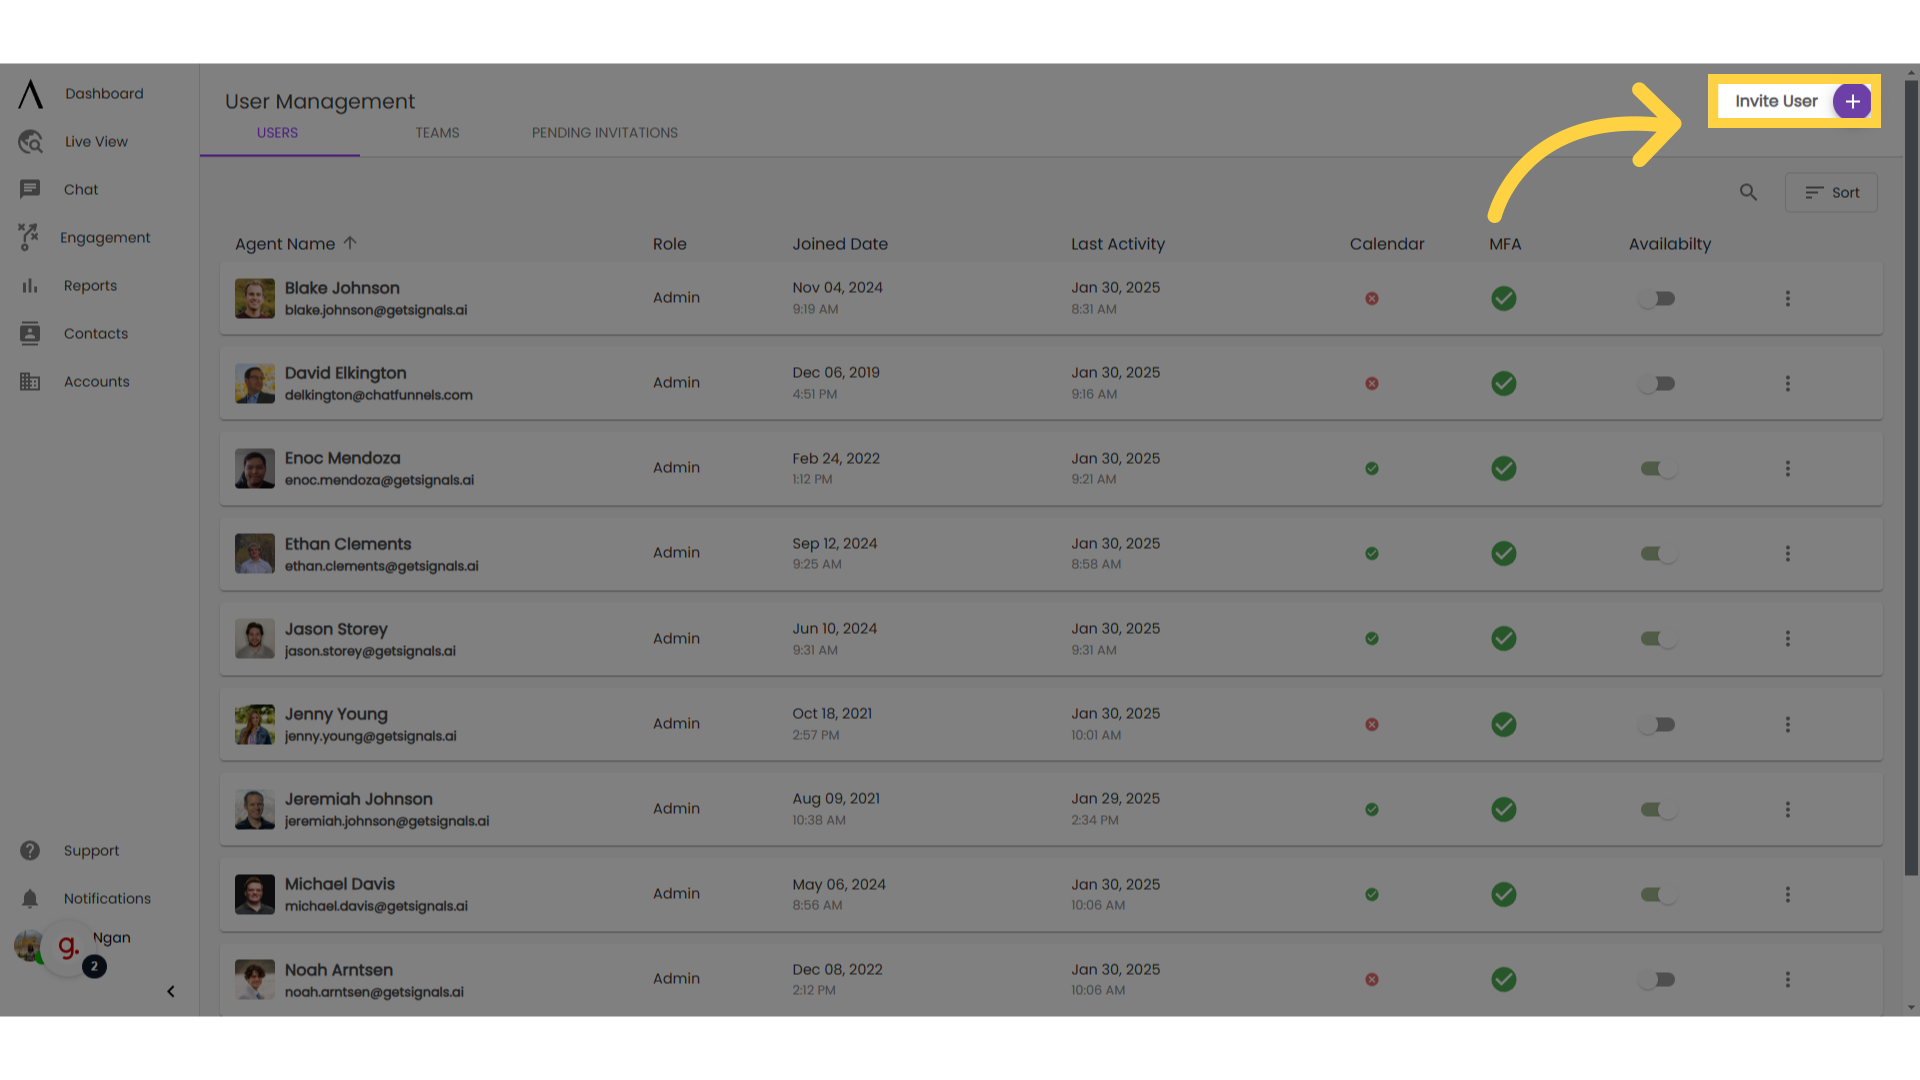
In the Users tab, select "Invite User" in the top right corner.
3. Add user information
In the modal, enter the new user's email and role type.
These are the roles and permissions:
Admins can access everything in Signals, including billing
Admin - no chat can access everything, minus the ability to chat with visitors and book meetings
Marketers have access to everything except billing - they can add and edit users, take chats, review conversations, and create and configure bots
Chat Users (SDRs, AEs, Customer Support) can access conversations, view and edit contacts and accounts, and leave notes
Calendar Users have access to set up a calendar and meeting settings so they can have meetings scheduled for them
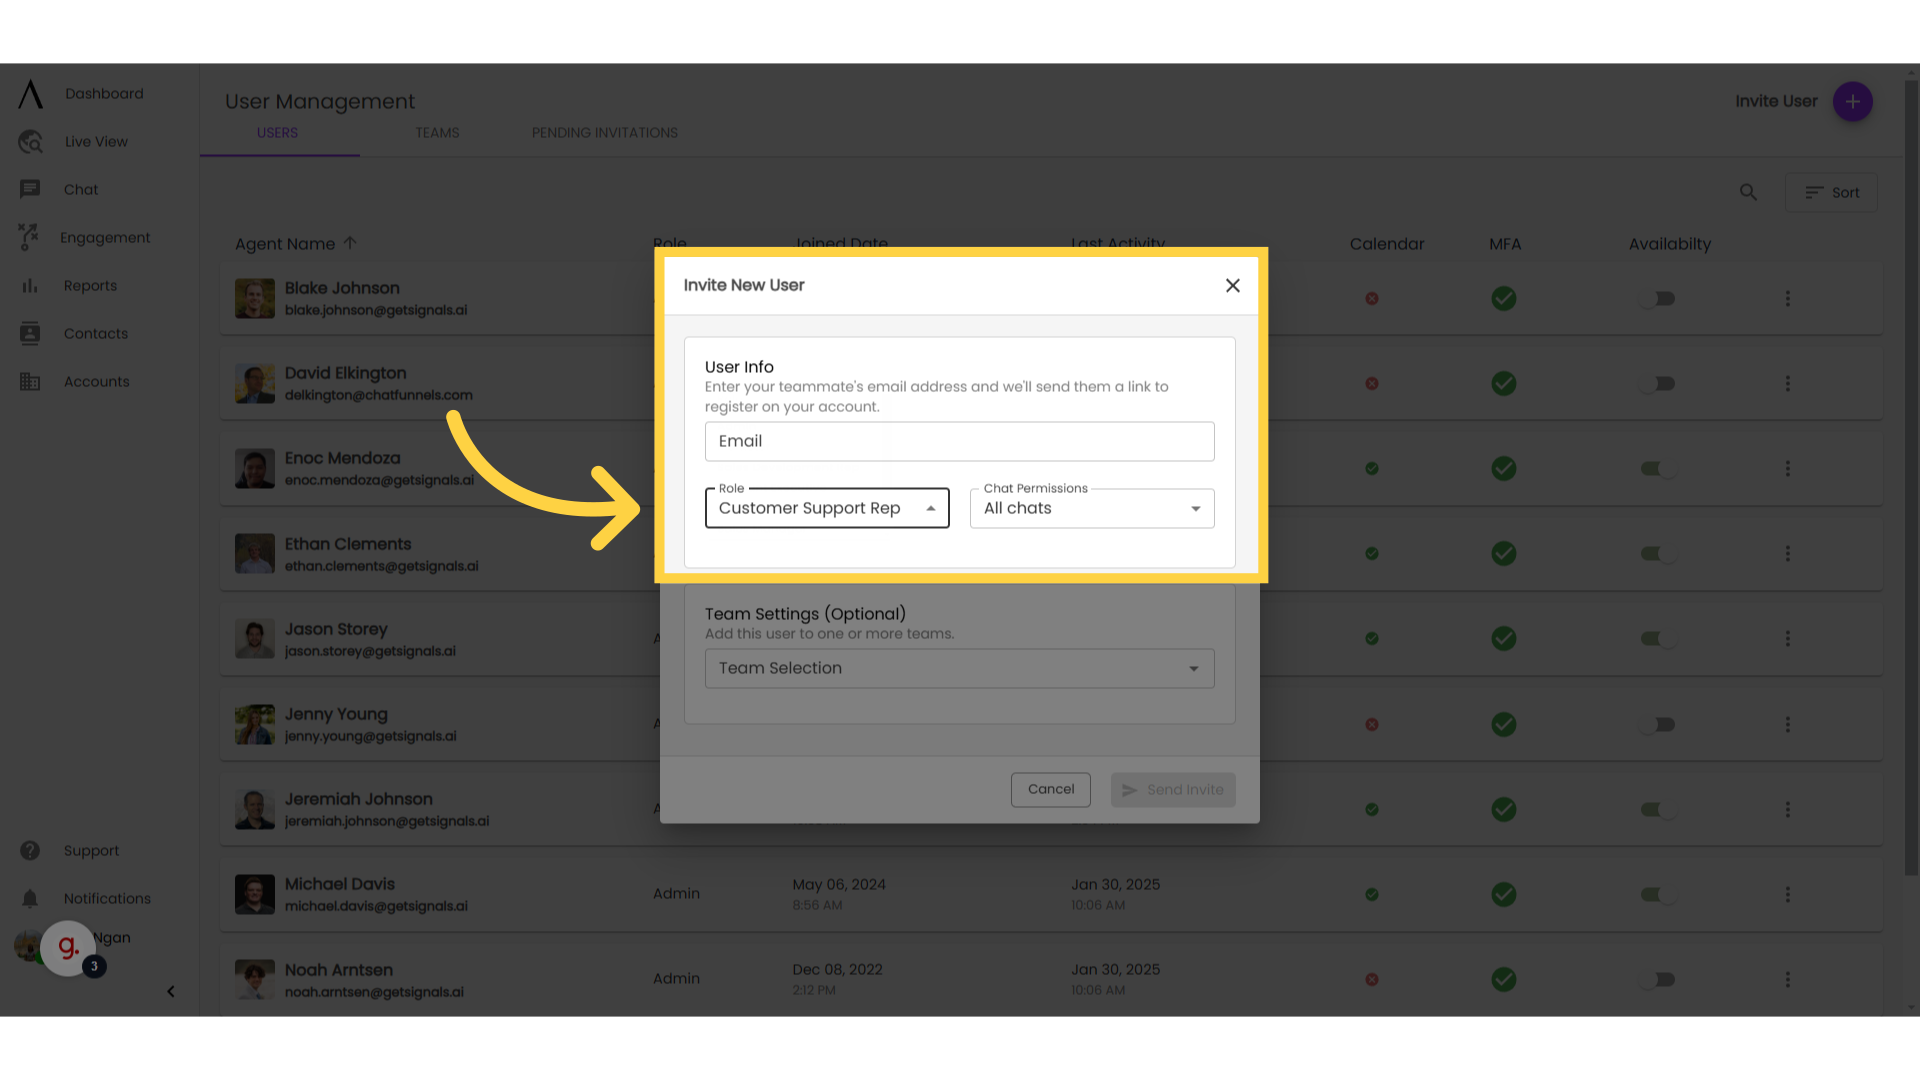
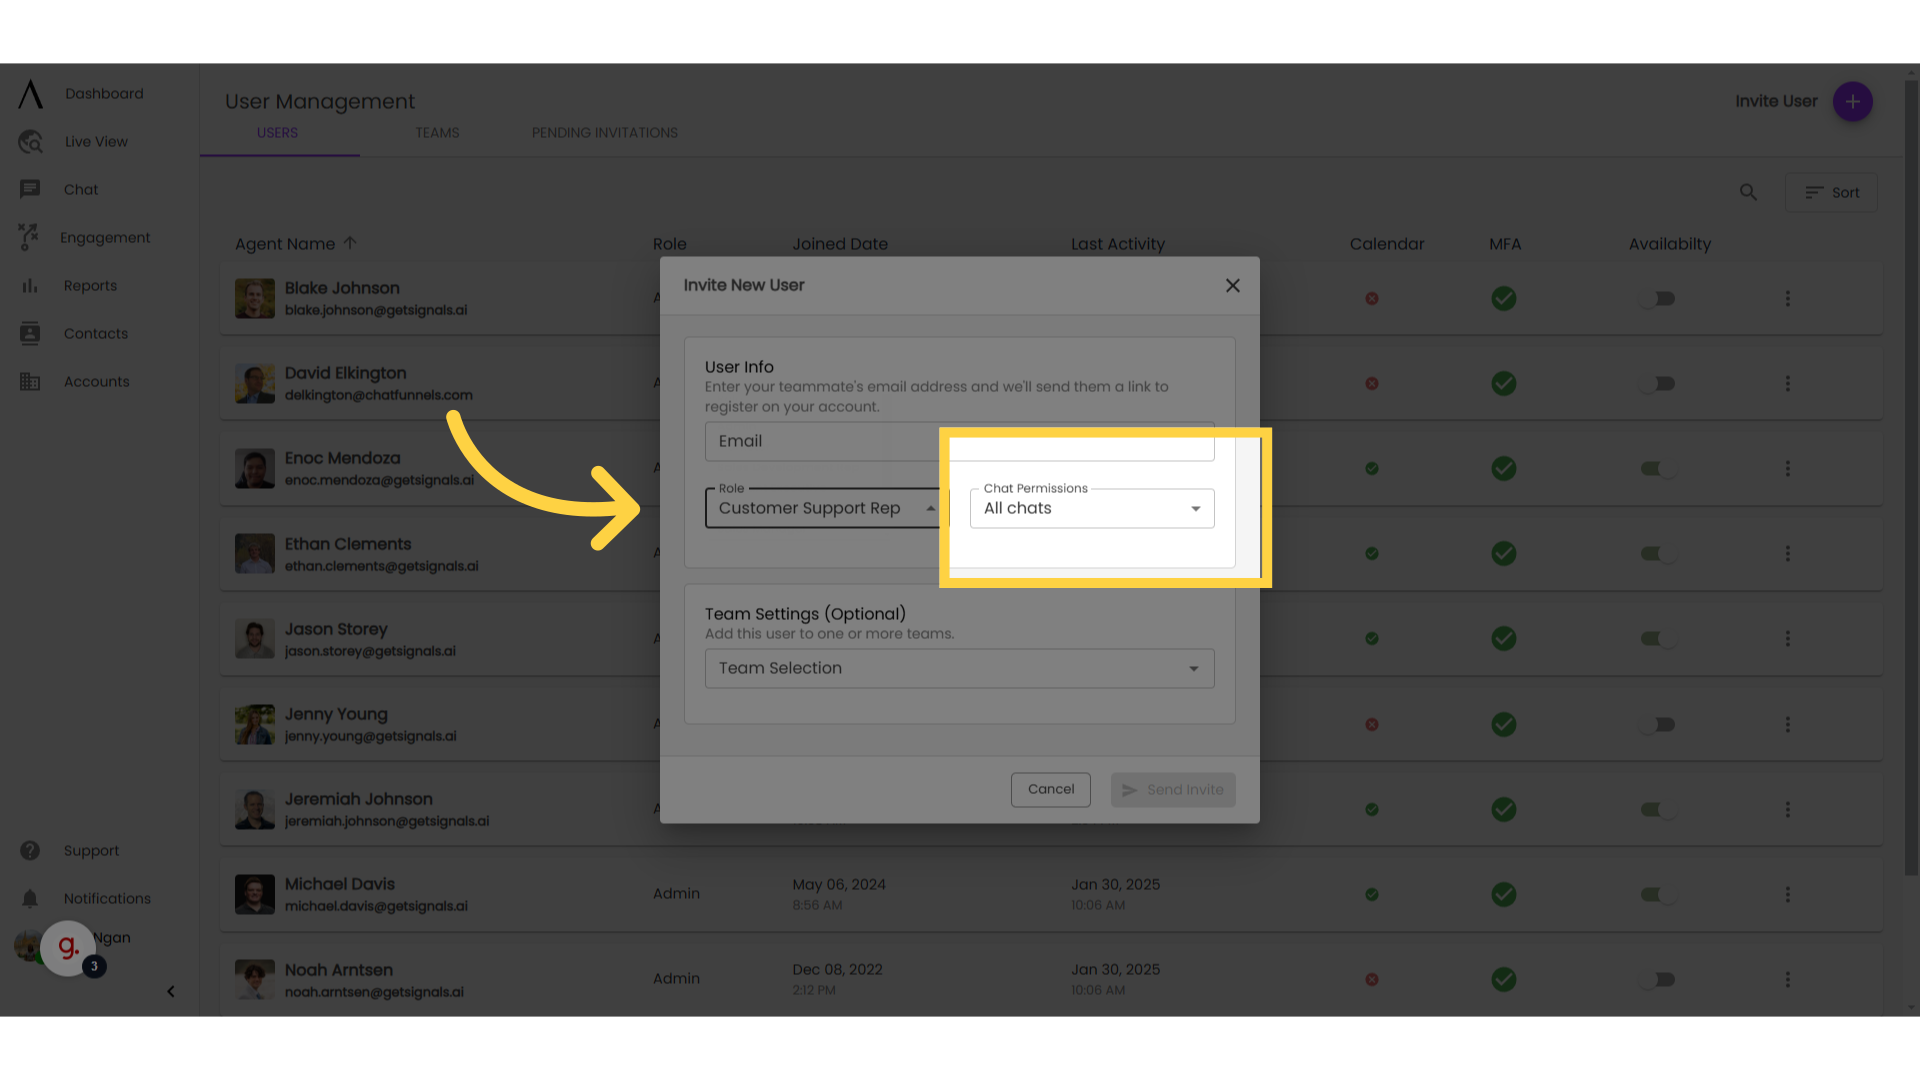
4. Establish chat permissions
You can also establish chat permissions here. Users can be permitted to view all chats within the license, only chats routed directly to them (own chats), or chats routed to them AND unclaimed chats (own chats and empty ones).
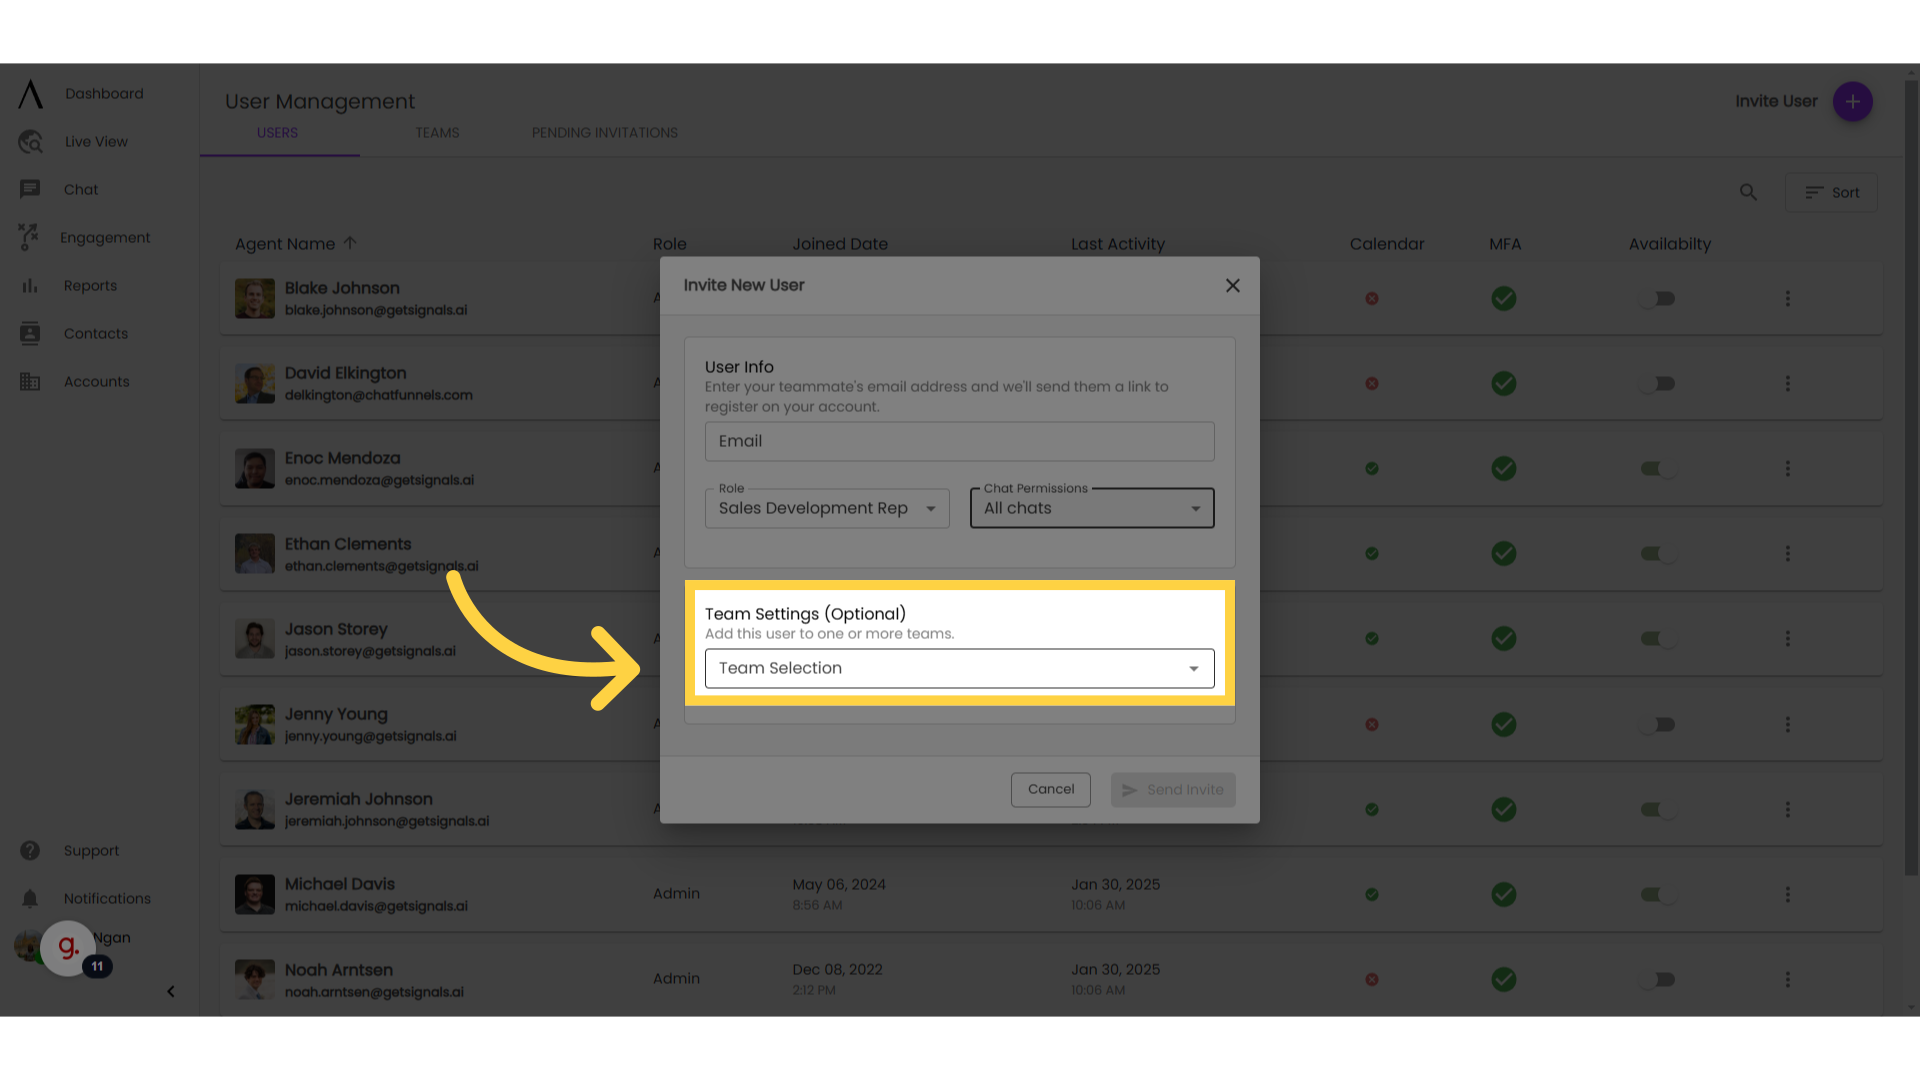
5. Add the user to a team
Here, you also have the option to add a user to a team.
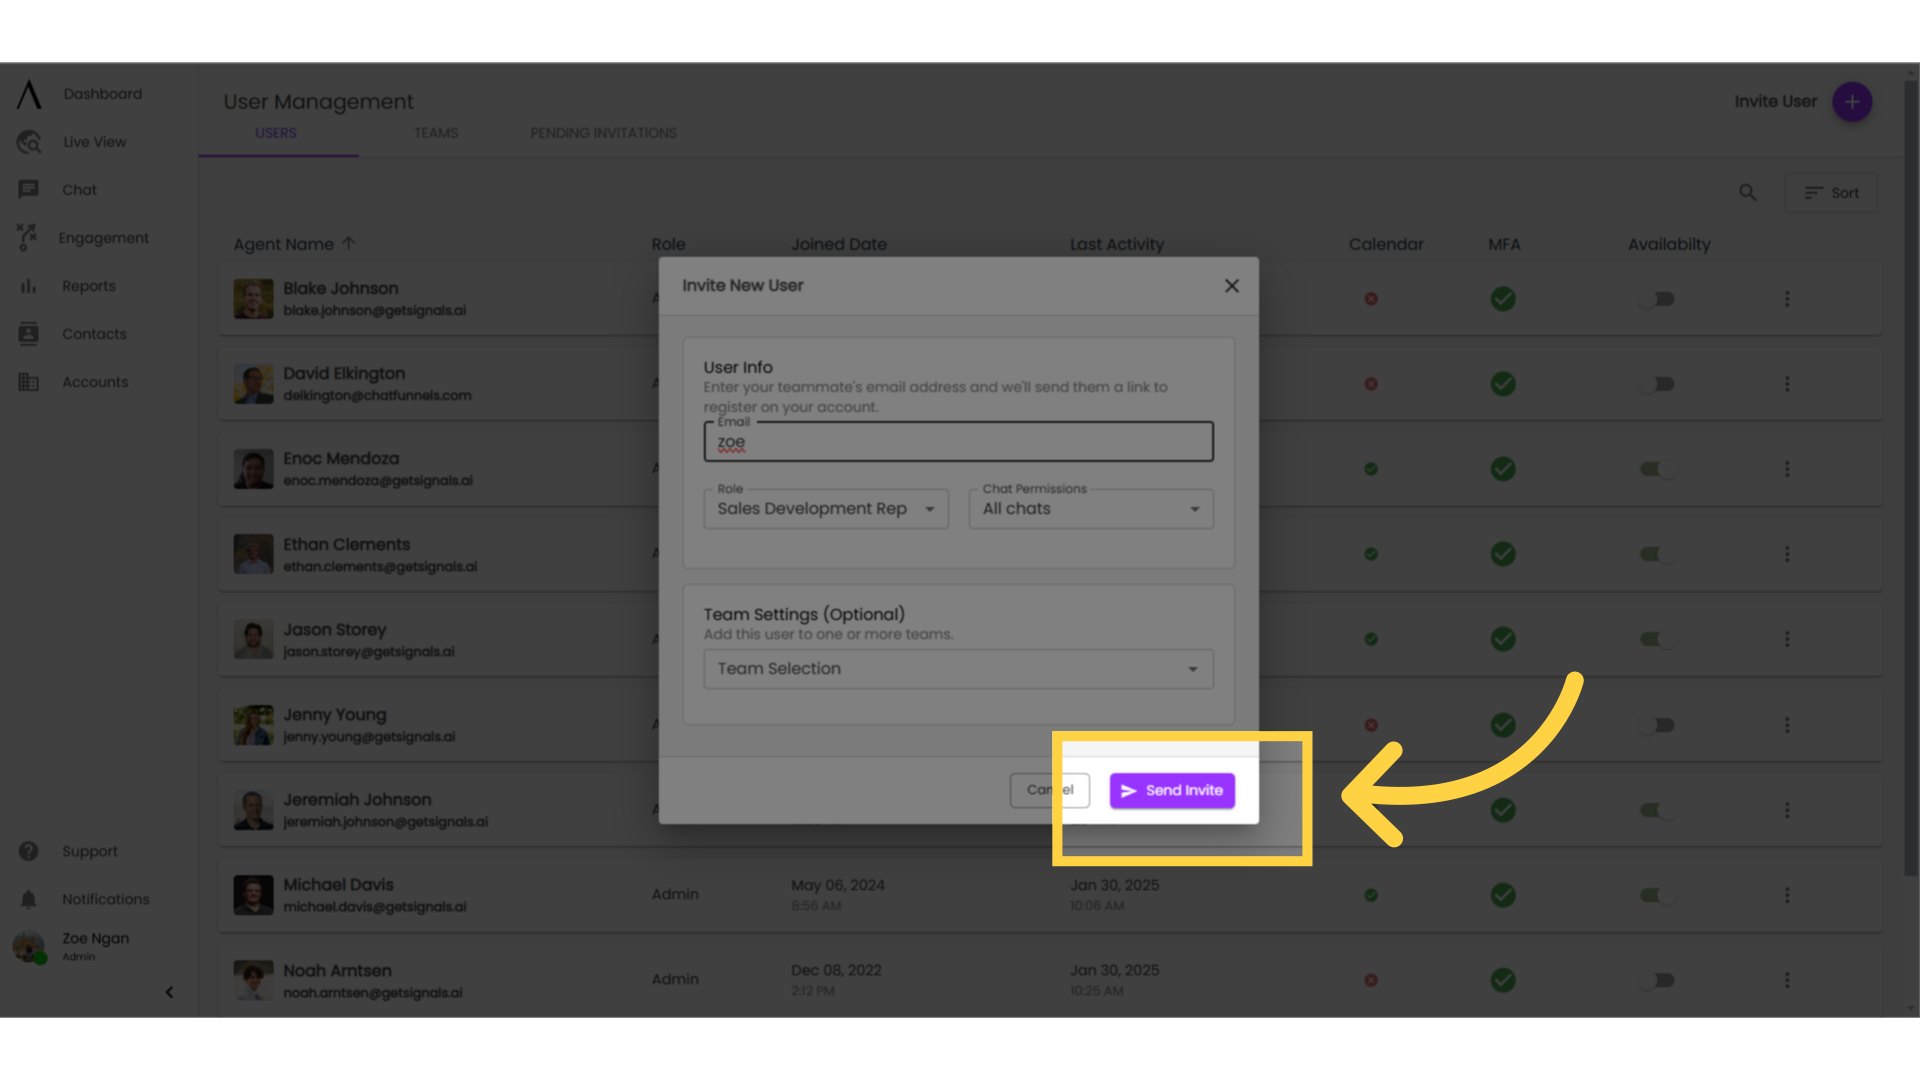
6. Send Invite
When you're ready, select "Send Invite" in the bottom left corner of the modal.
Please note, invitations expire after 72 hours. Reach out to the users you invite reminding them that they may have to check their spam.
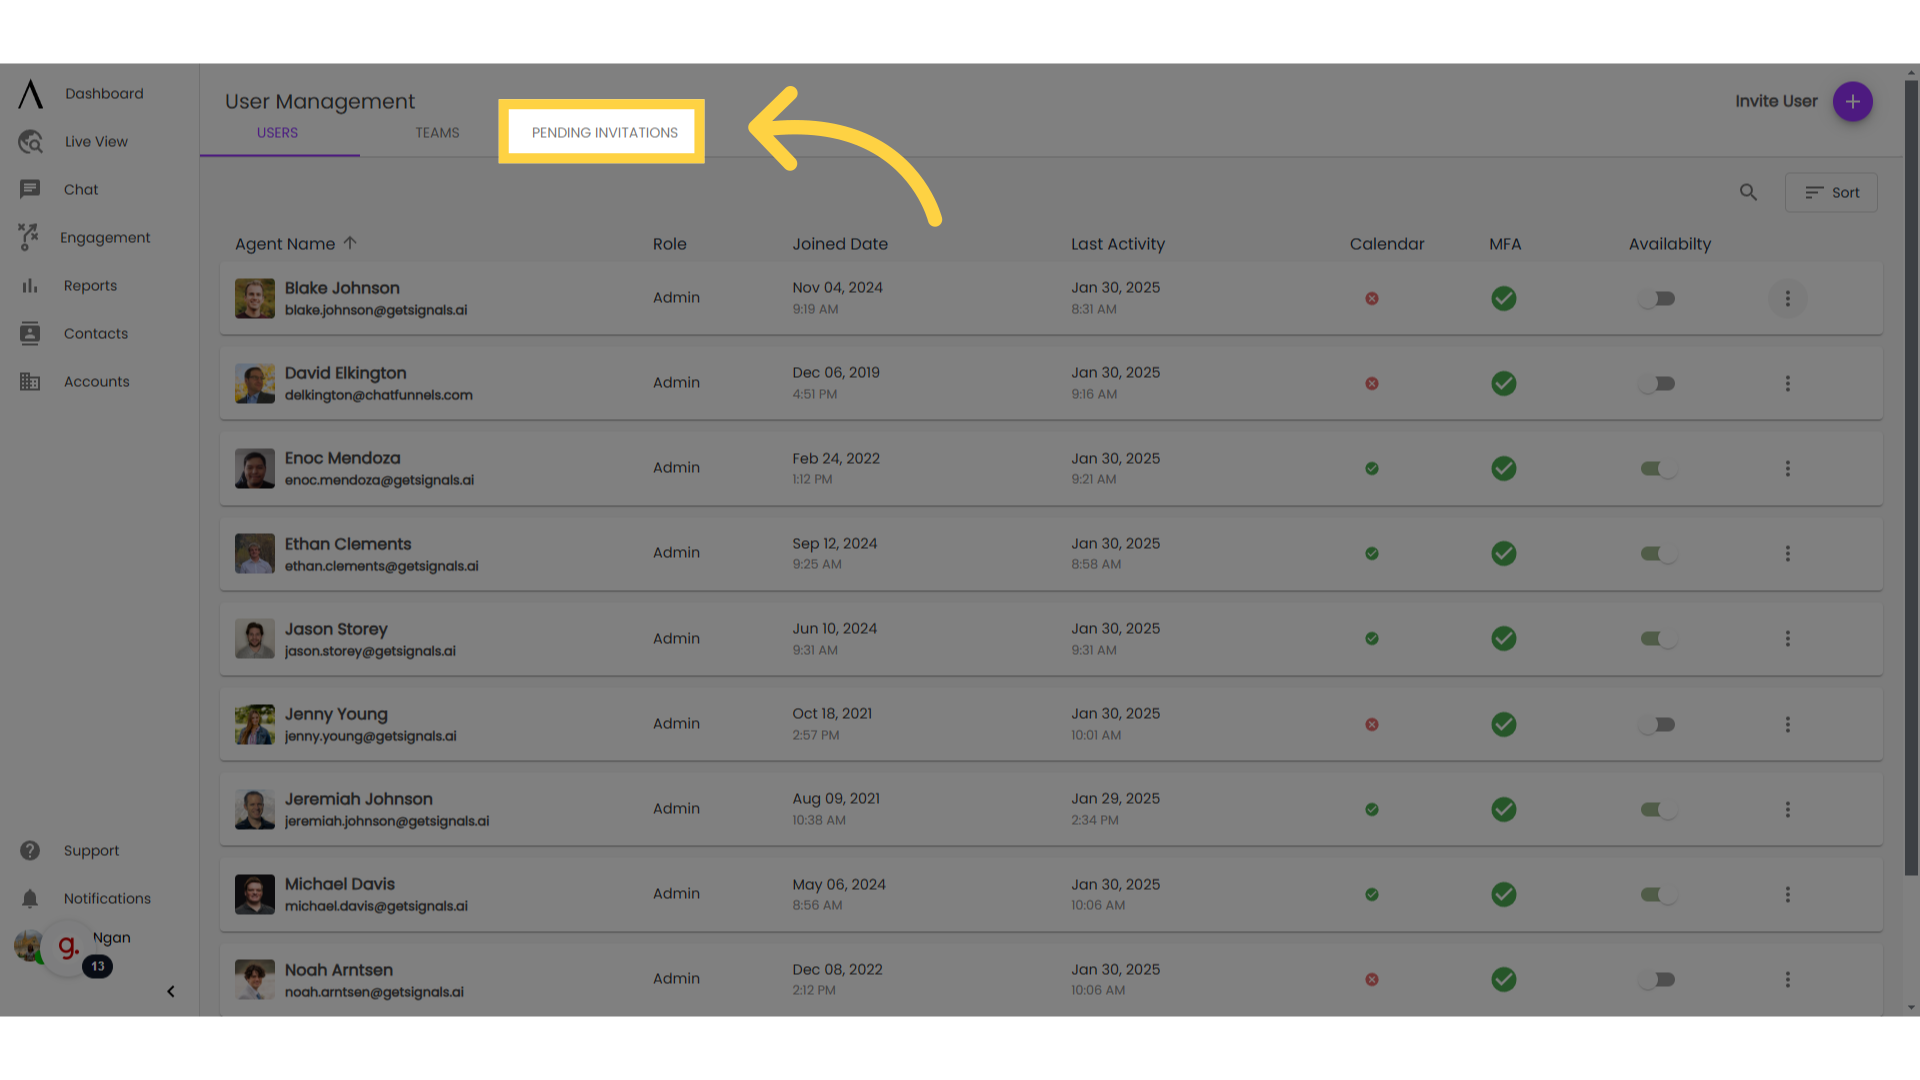
7. Check Pending Invitations
To ensure your invitation has been sent, check the "Pending Invitations" tab.
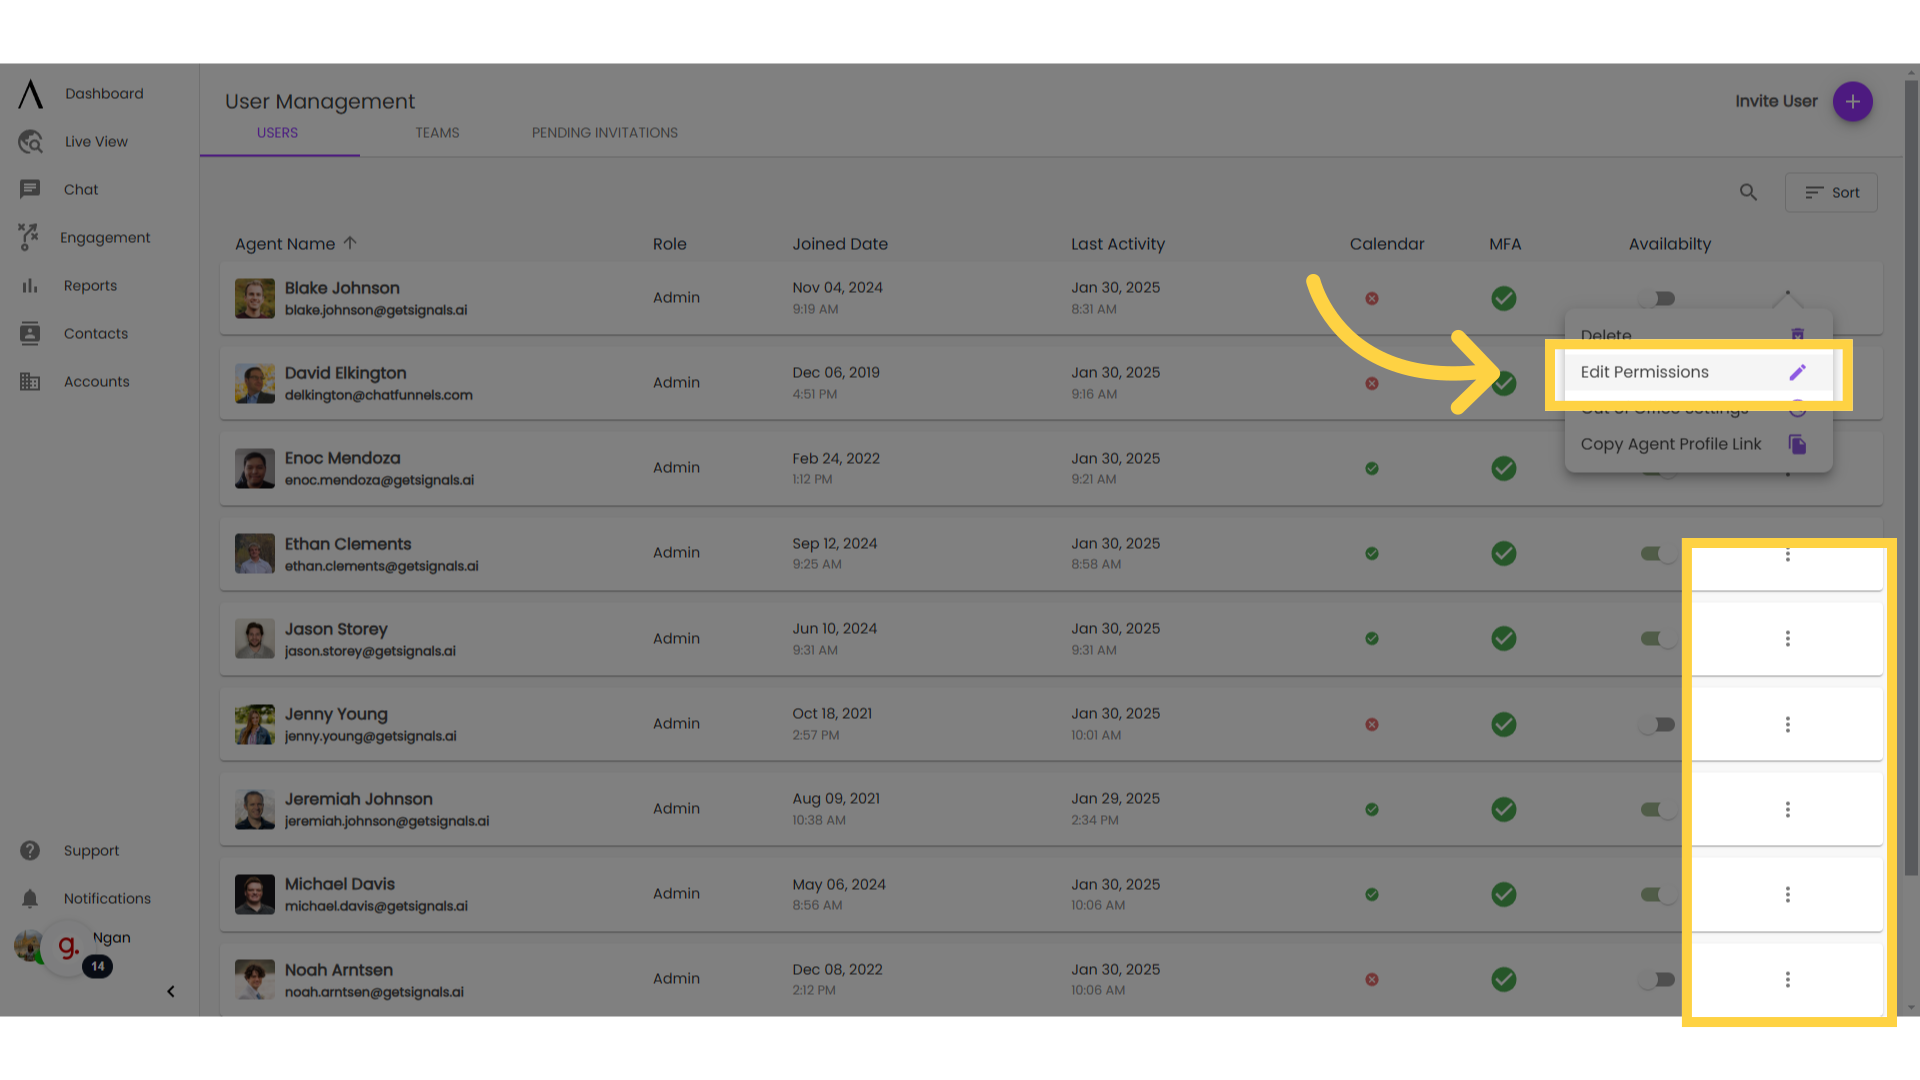
8. Click "Edit Permissions"
To update a user's role or permissions, click the three dots to the far right of their user entry in the user list. Select "Edit Permissions."
9. Set User Role
In the pop-up modal, select the new user role. Click "Save" in the bottom left corner to save, or "Cancel" in the bottom left corner to revert to existing permissions.
Note: Each package has a user limit for the different user role types. Admins can update that limit in the Admin Settings section in the product or by contacting Customer Support.
10. Click "Out of Office Setttings"
You can also access your OOO settings via the hamburger menu on the far right. Click on this.
11. Configure OOO Settings
Update the date range that you or the agent will be out of office, then check the boxes for events that the agent should be excluded from for that time frame. Click "Save" in the bottom left corner to save your settings, or "Cancel" in the bottom right corner to revert to existing settings.
12. Search or Sort Users
In the top right corner of the Users tab, you'll find a search button and a sort button. Search by name to find a specific user, or sort by pre-set criteria like name, role, and joined date.
Note that you can only by only one of these fields at a time. Alternatively, you can sort fields by clicking on the column titles.

Here is a further breakdown of each user and their permissions:
Admin | Marketer | Sales/Customer Manager | Customer Support Rep | Calendar User | |
View / Edit Contacts | Yes | Yes | Yes | Yes | Yes |
View / Edit Accounts | Yes | Yes | Yes | Yes | Yes |
Book a meeting | Yes | Yes | Yes | Yes | Yes |
Access Chat | Yes | Yes | Yes | Yes | No |
Delete Chats | Yes | Yes | Yes | No | No |
View / Edit Teams | Yes | Yes | Yes | No | No |
Access Reporting / Overview | Yes | Yes | No | No | No |
Manage / Edit Bots | Yes | Yes | No | No | No |
Perform / View Bot Tests | Yes | Yes | No | No | No |
Create / Manage Users | Yes | No | No | No | No |
Manage Integration | Yes | No | No | No | No |
Access Admin Settings | Yes | No | No | No | No |