Notifications/Updates, Security and Alerts
- Notifications/Updates, Security and Alerts
- Go to app.getsignals.ai
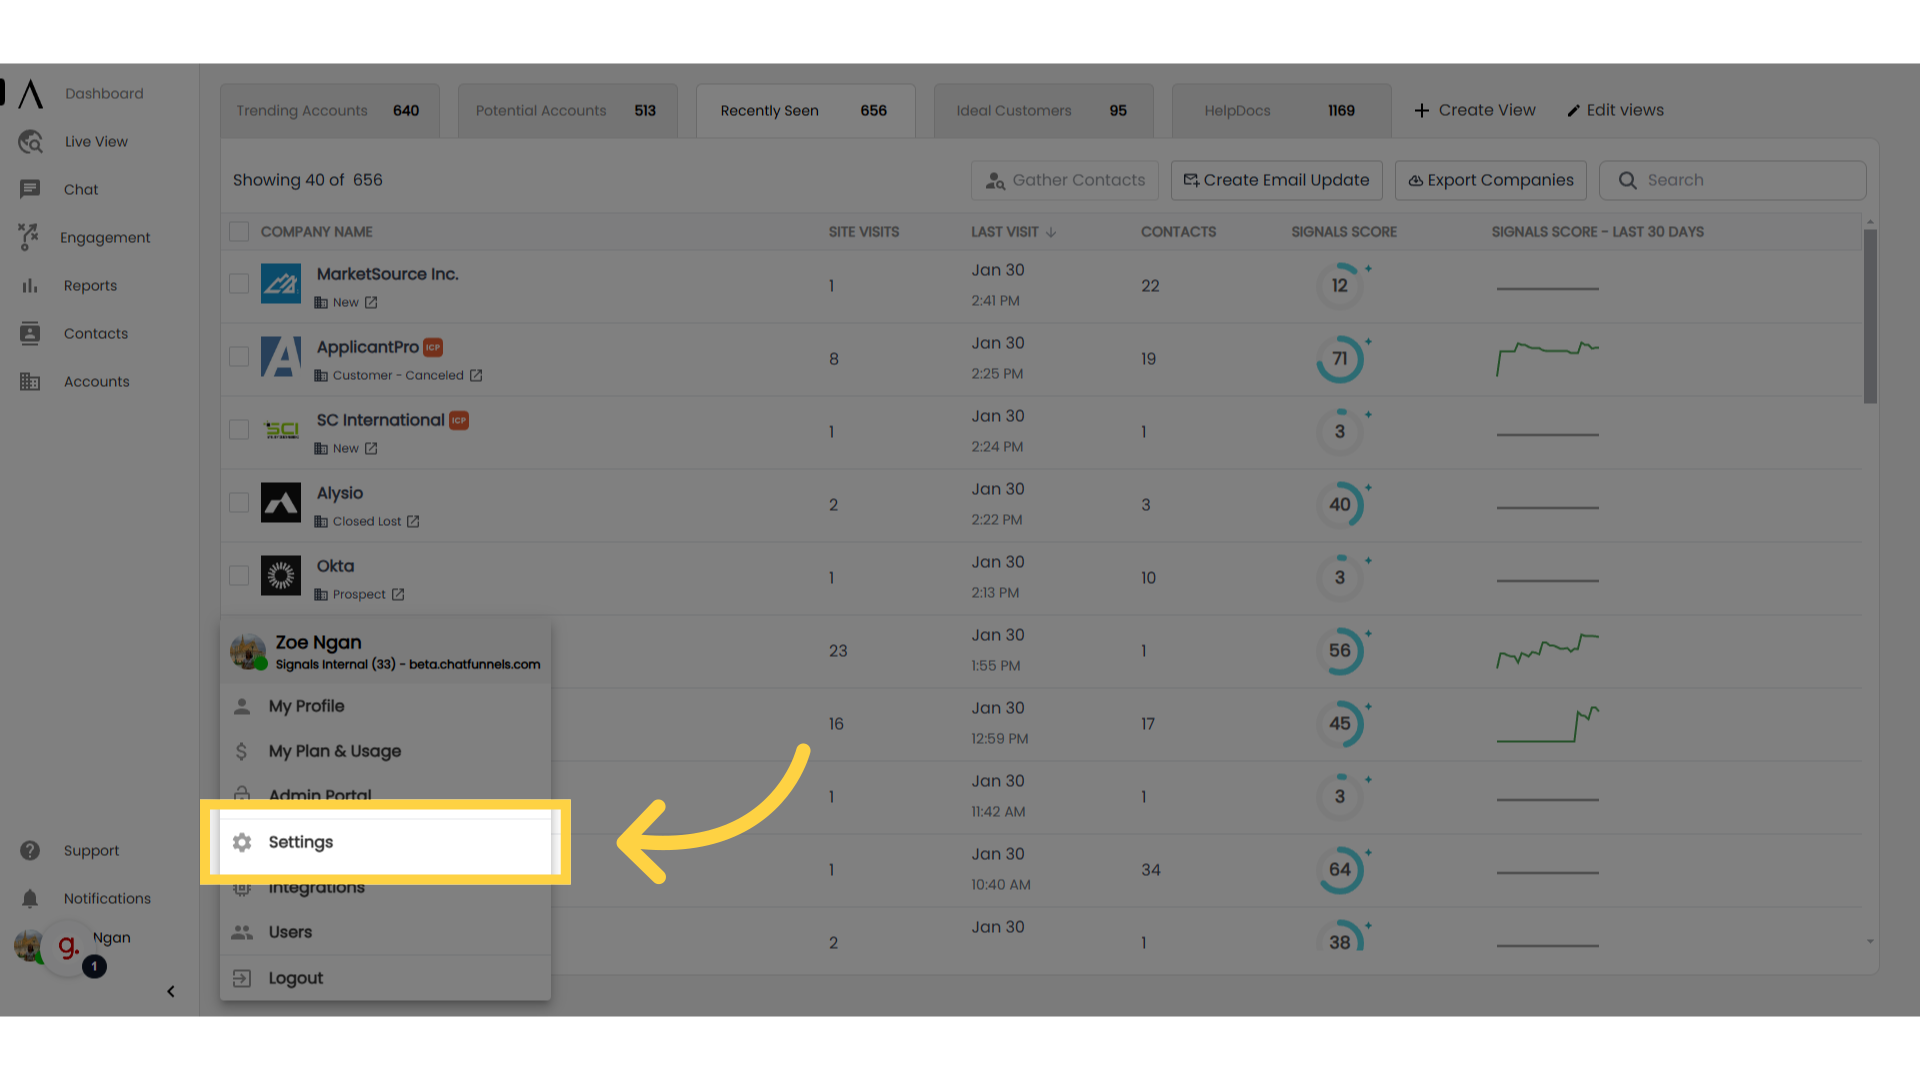
- 1. Click "Settings"
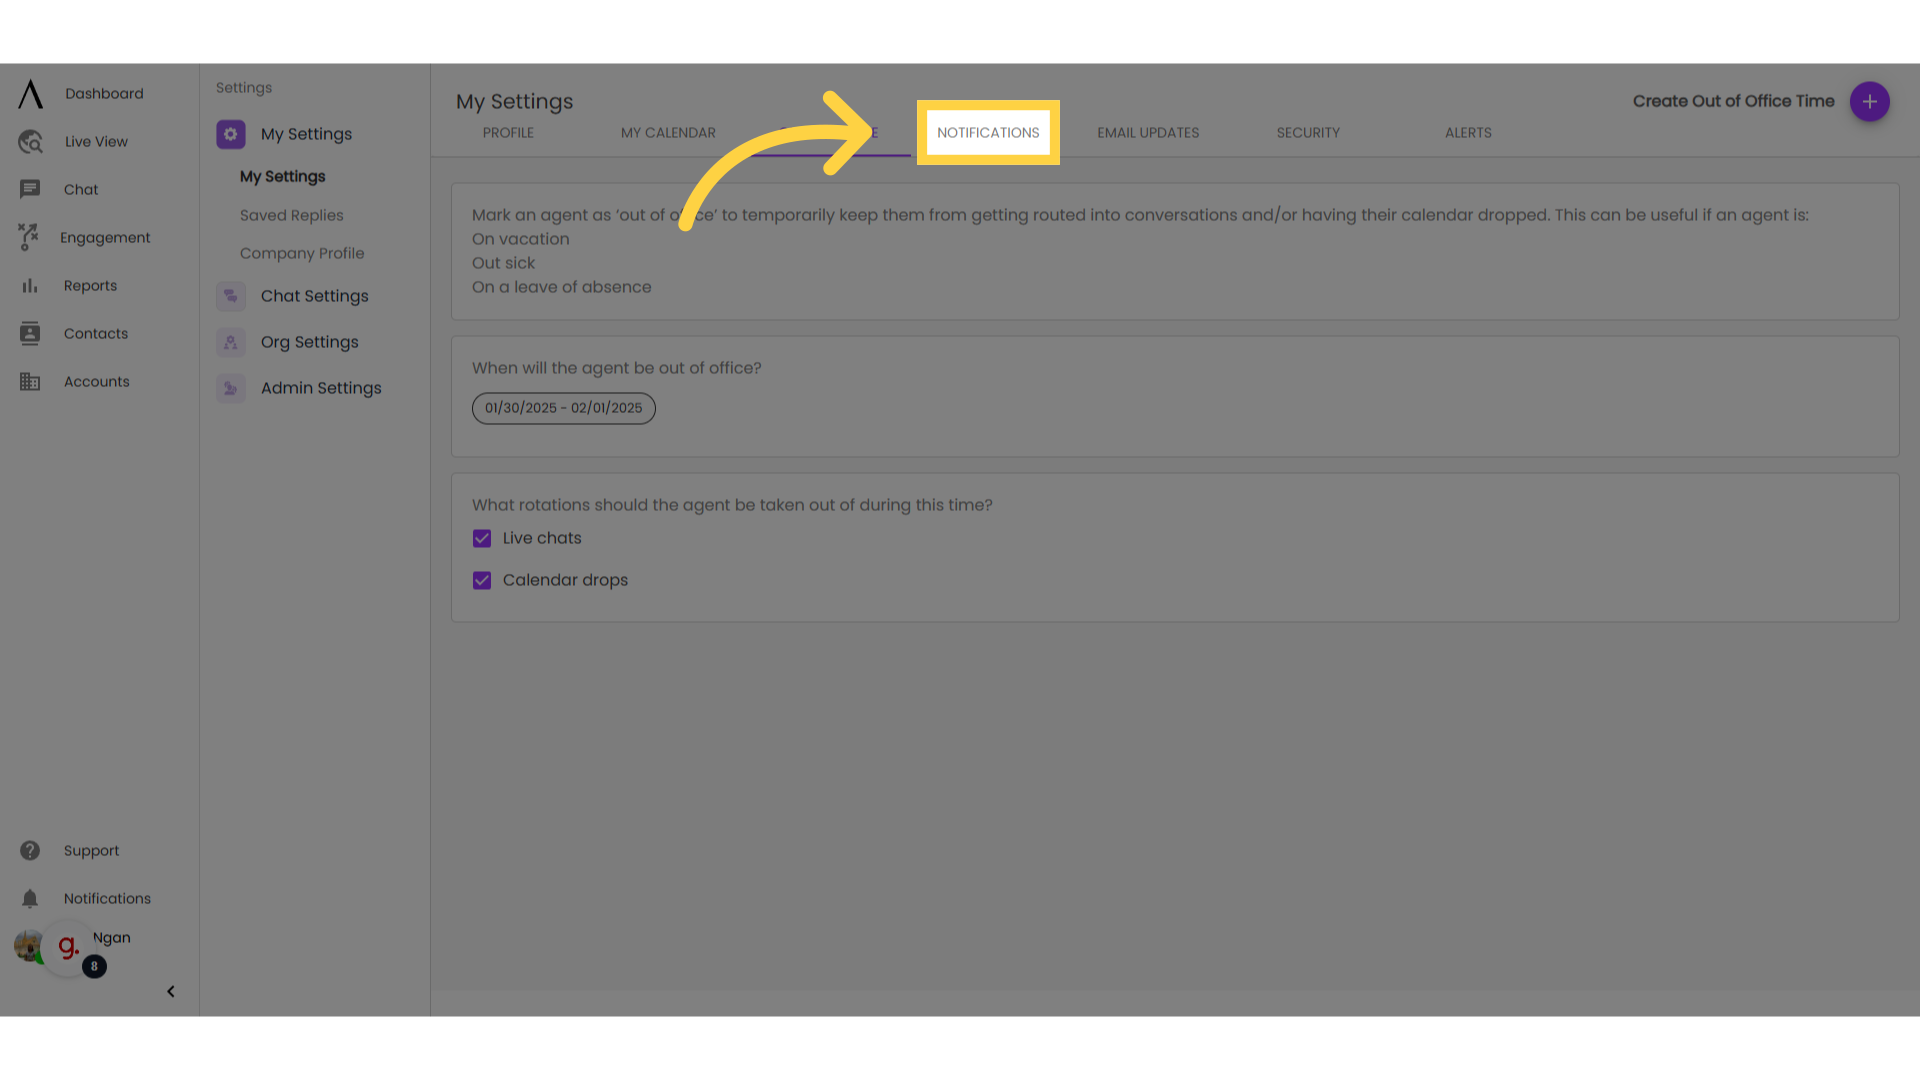
- 2. Navigate to "Notifications"
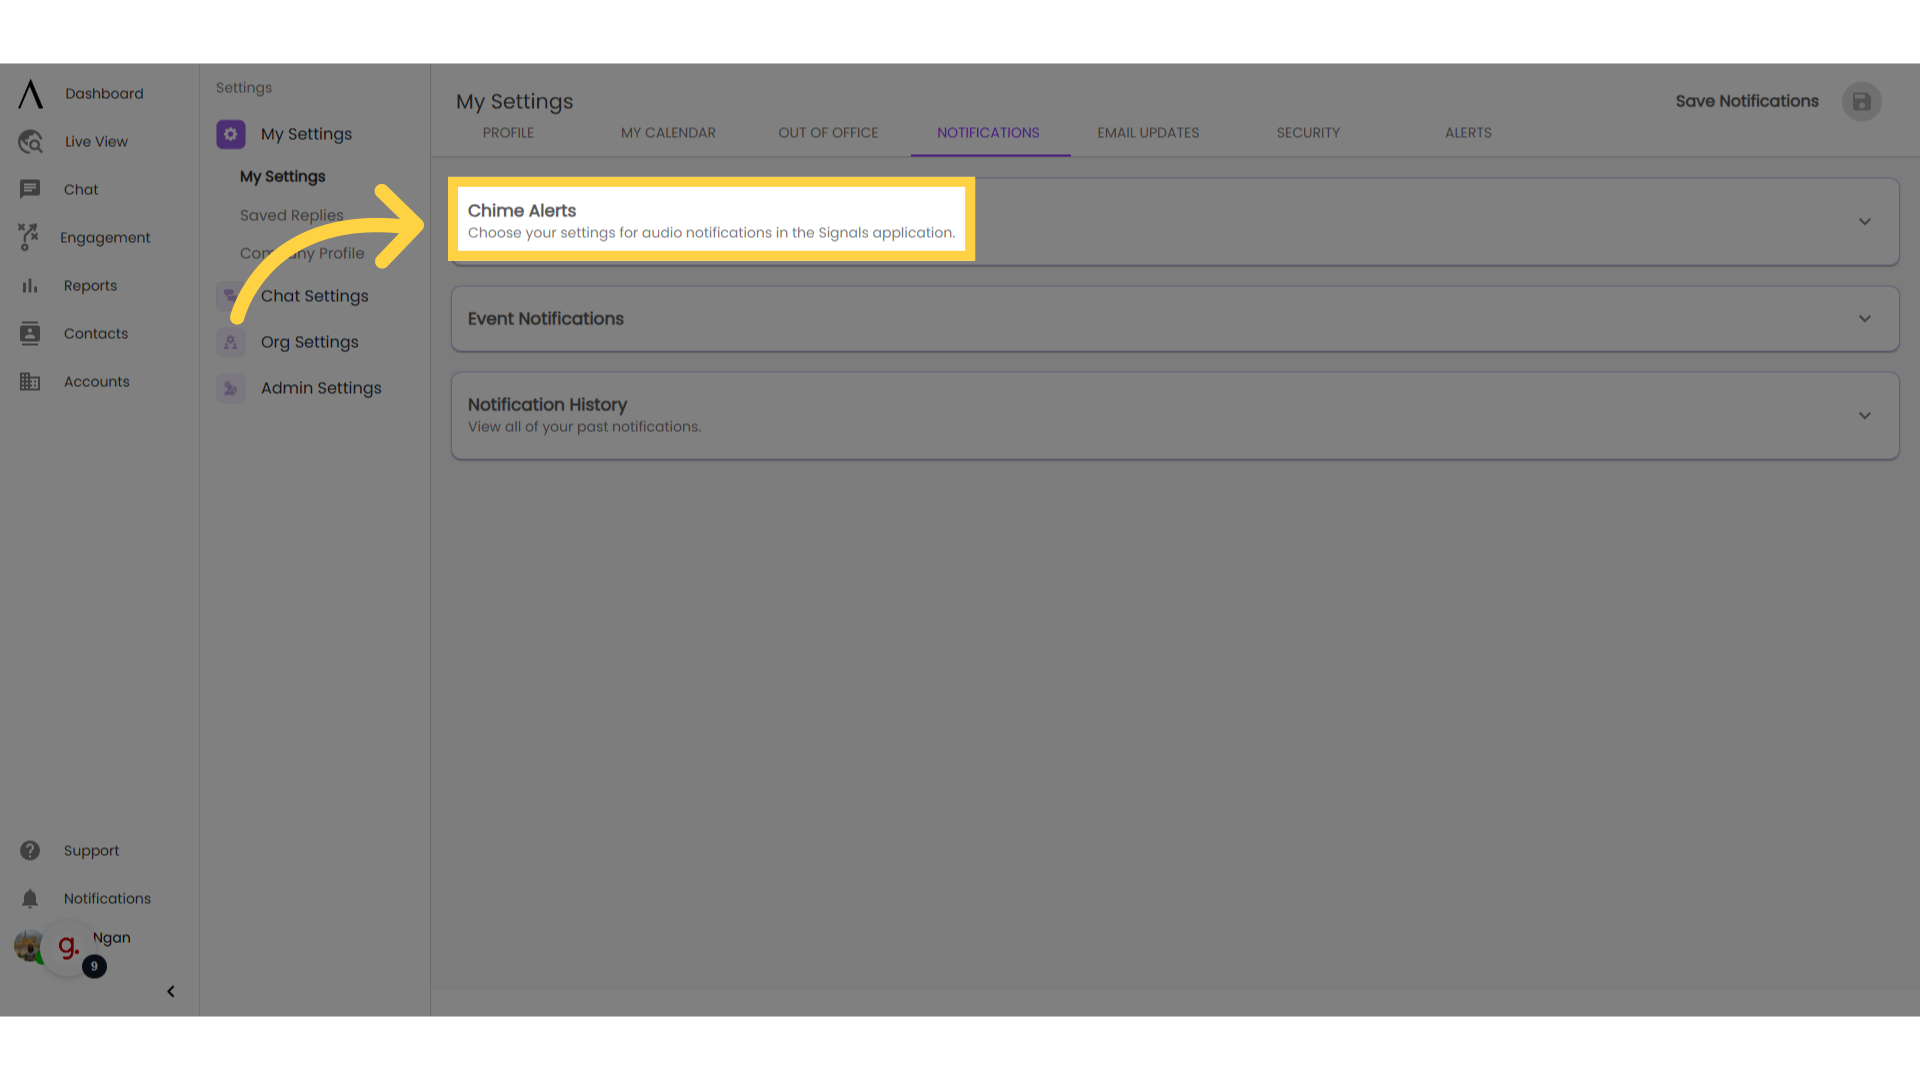
- 3. Chime alerts
- 4. Event Notifications
- 5. Notification History
- 6. Go to "Email Updates"
- 7. Click here
- 8. Customise update details
- 9. Edit/Delete emails here
- 10. Navigate to "Security"
- 11. Set up MFA
- 12. Change password
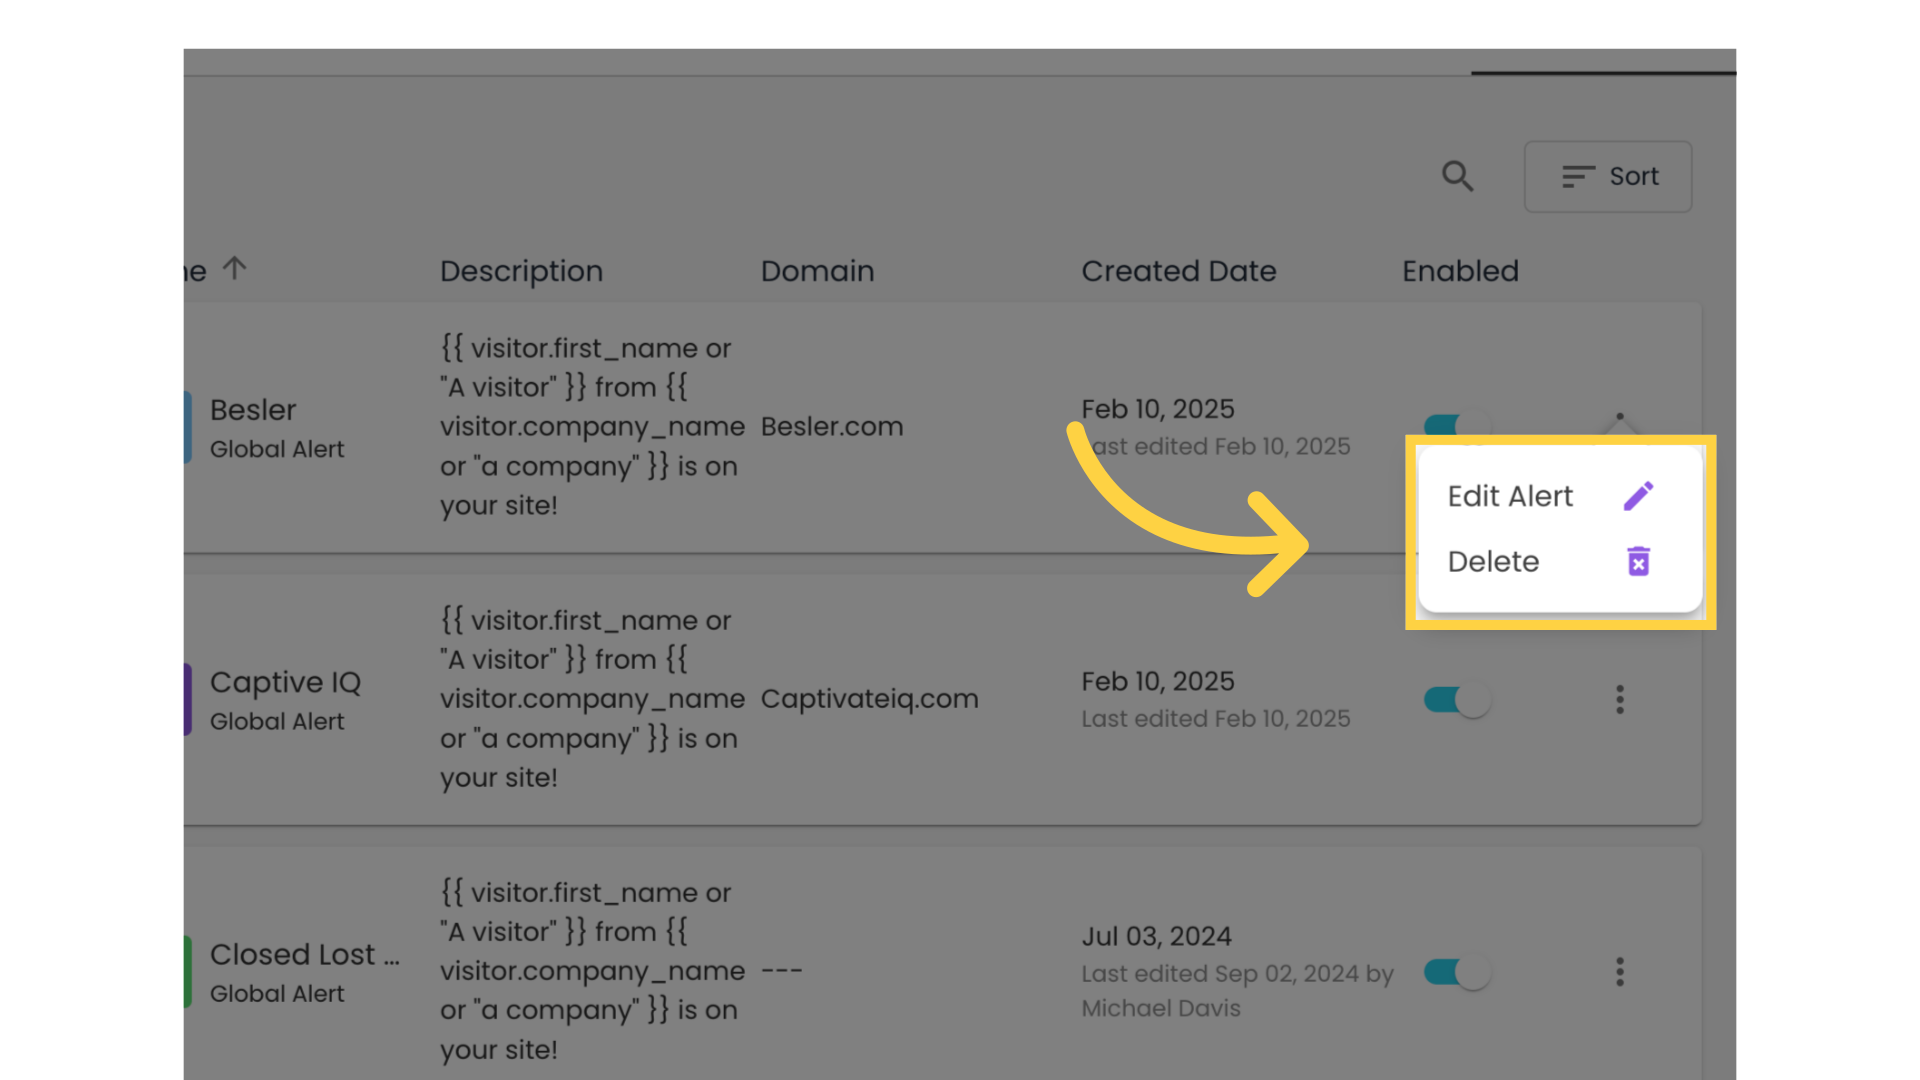
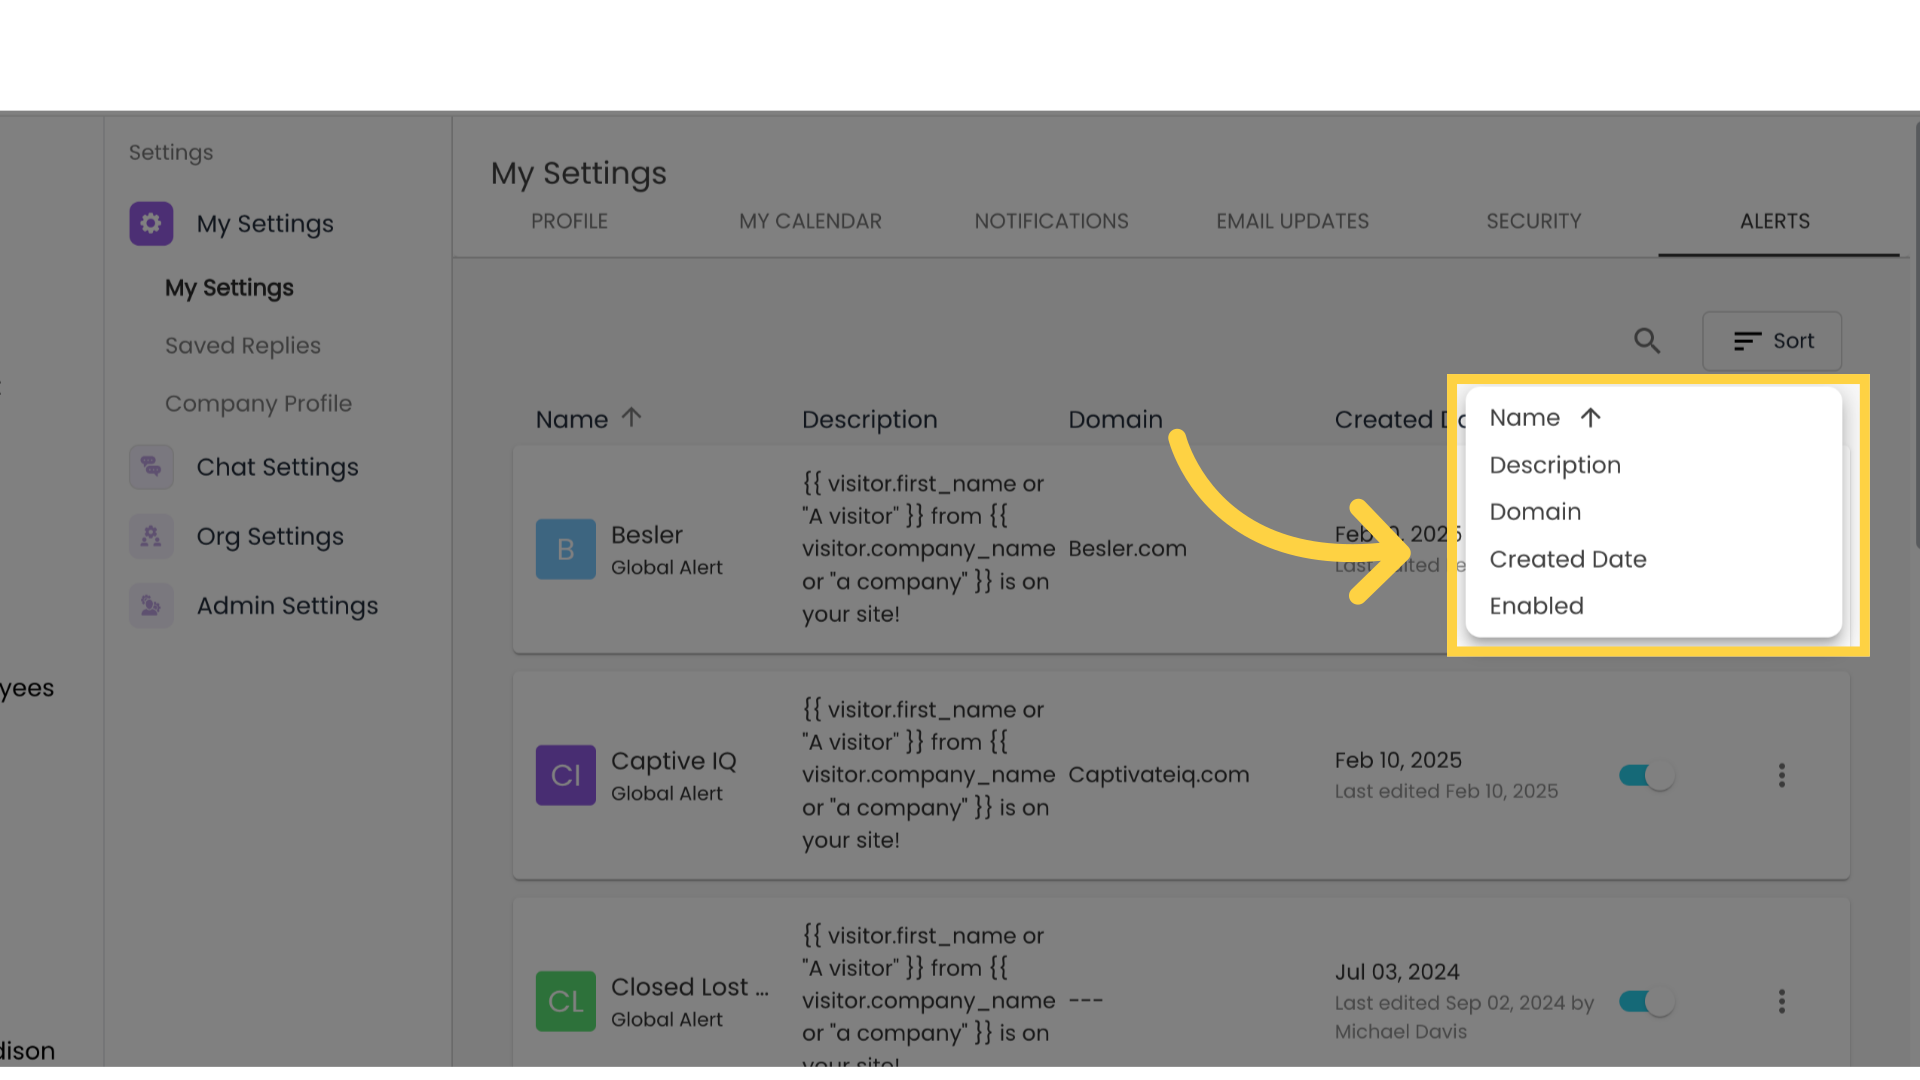
- 13. Click on Alerts
- 14. Filter your alerts here
- 15. Edit or Delete
Notifications/Updates, Security and Alerts
Go to app.getsignals.ai
1. Click "Settings"
To start, click on your Profile in the bottom-left corner, then click Settings.
2. Navigate to "Notifications"
Now, navigate to the Notifications tab. This tab allows you to customize when and how you will be notified of activity.
3. Chime alerts
Set up audio notifications using Chime Alerts. You can choose to receive alerts for new conversations, new messages in your conversations, or in-app notifications.
Note: chime alerts will only be sent while the desktop application is open.
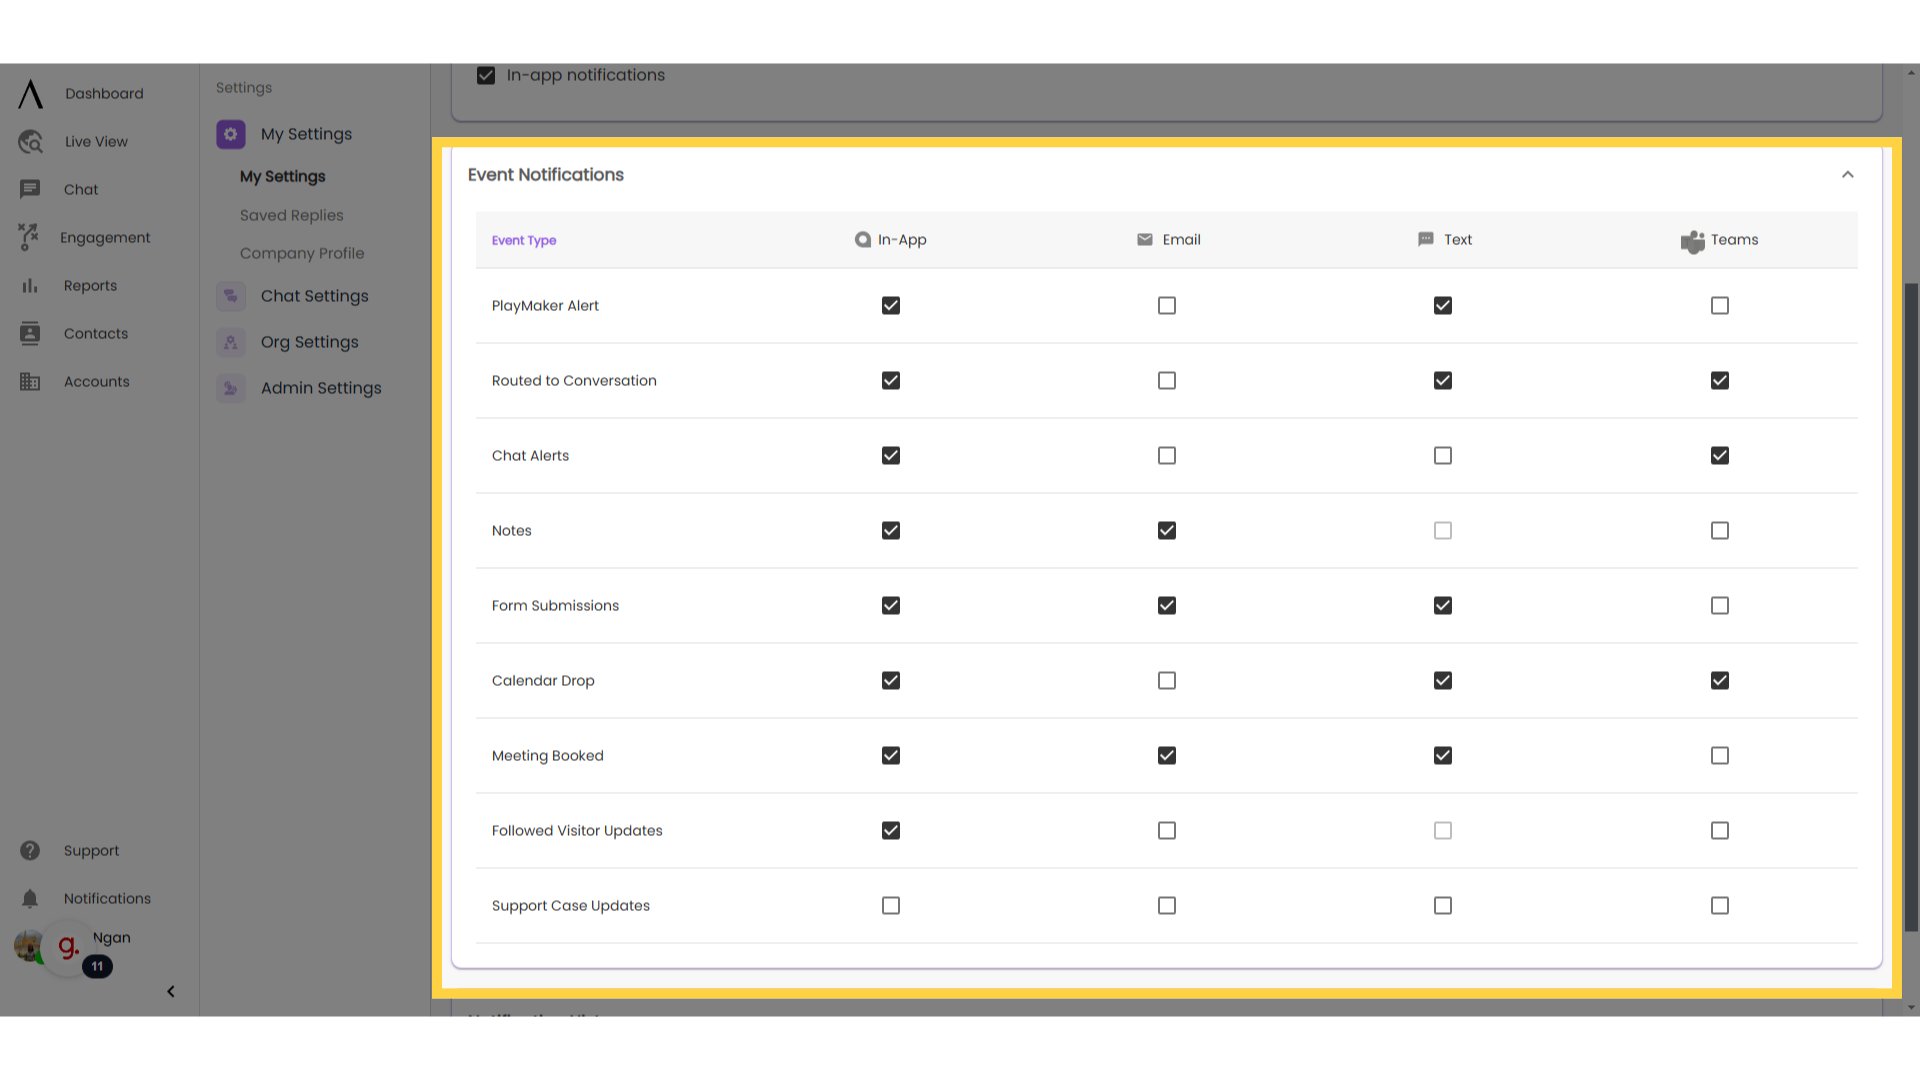
4. Event Notifications
The event notifications matrix manages how you will be notified of certain Signals events. You can choose to be notified in-app, through email, text, teams, or any combination of the above.
Note: the fifth column of this matrix will only populate if a communication integration (like Slack) is active.
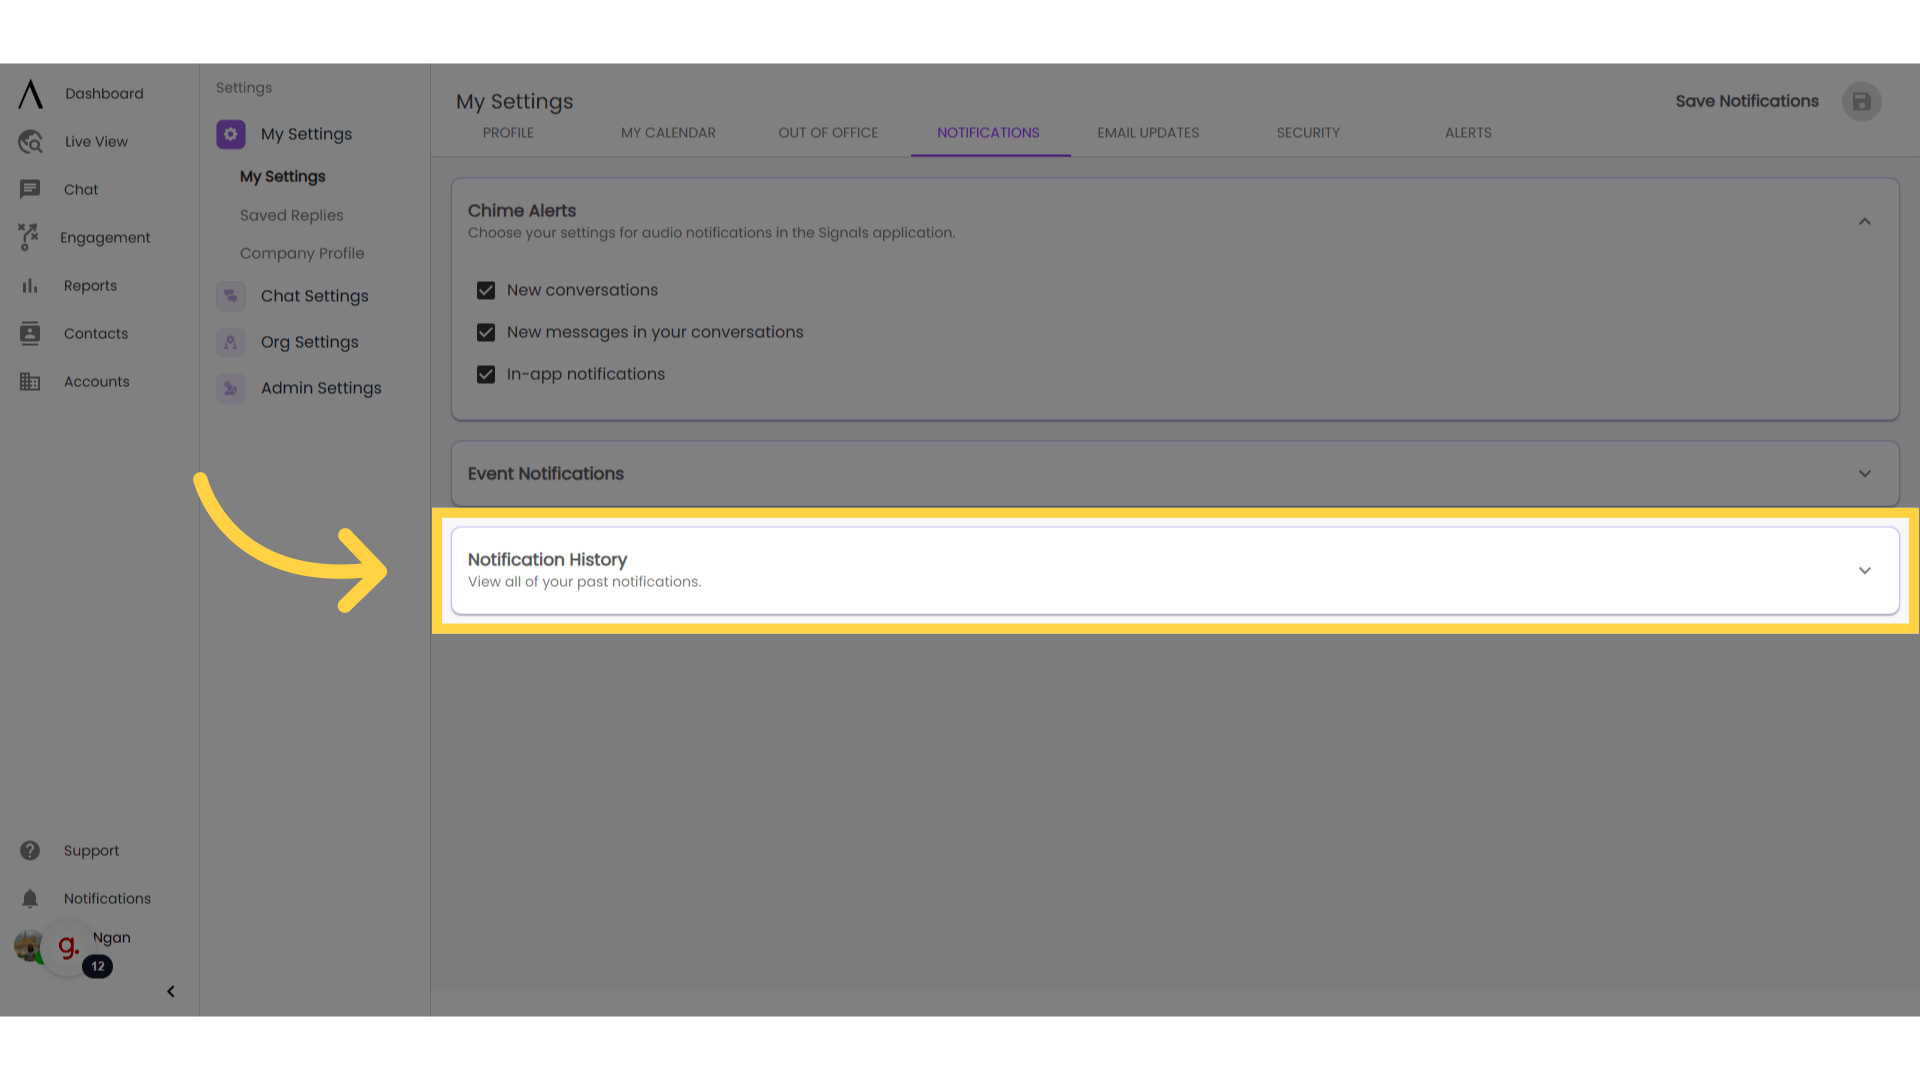
5. Notification History
Notification history shows all past Signals notifications.
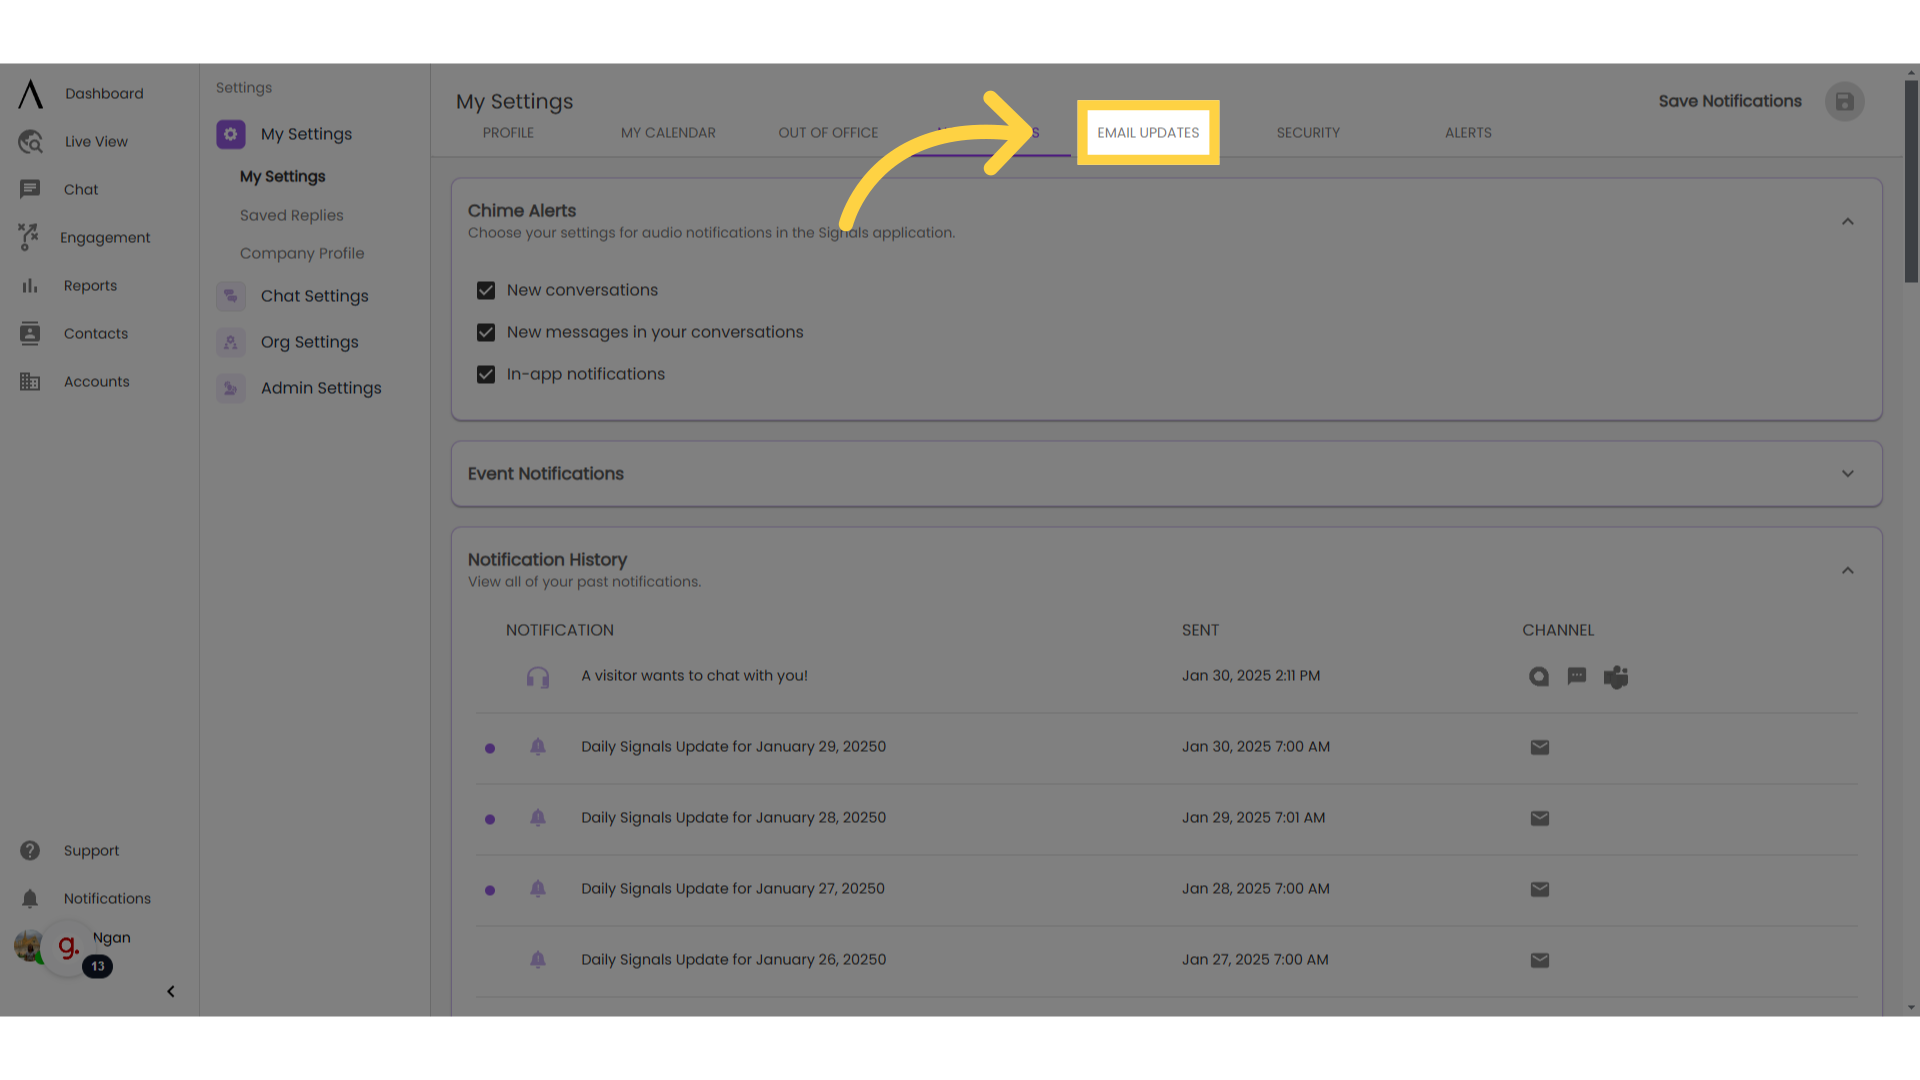
6. Go to "Email Updates"
Now, go to the "Email Updates" tab.
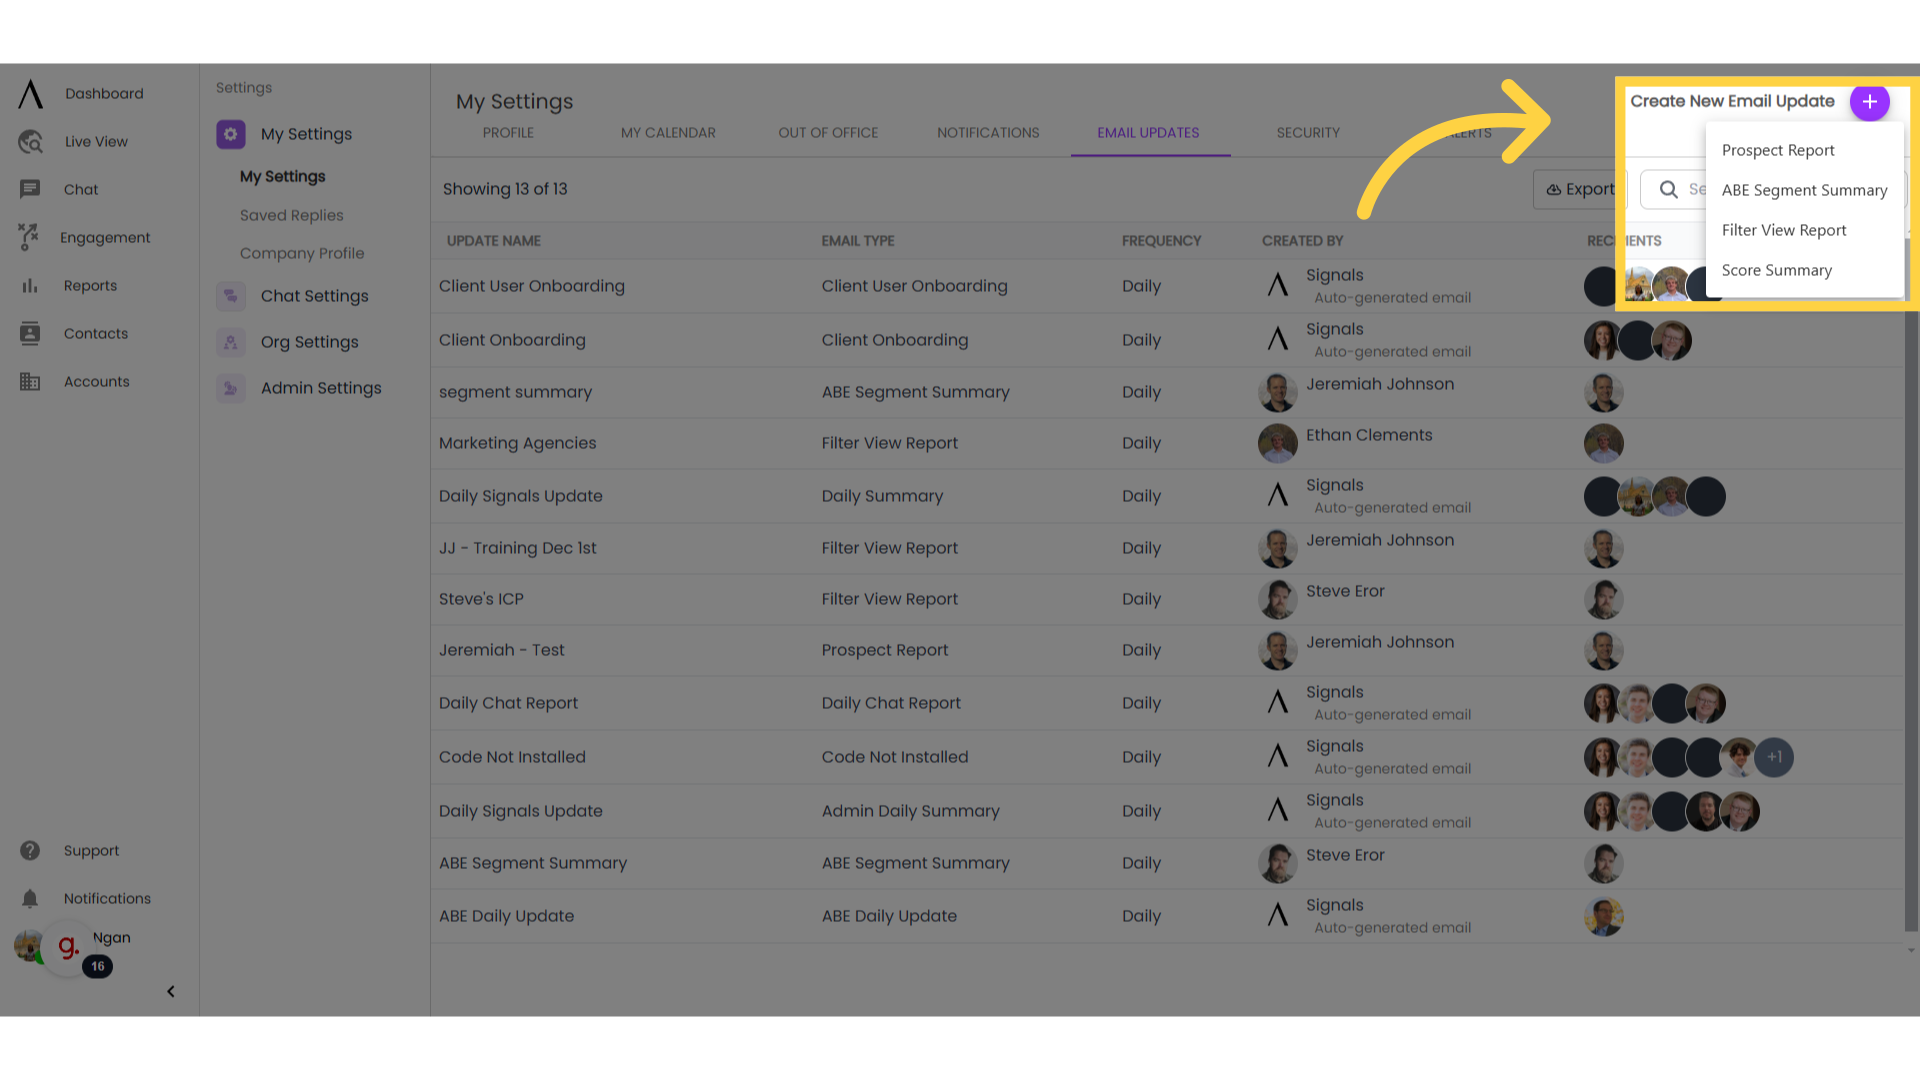
7. Click here
Click "Create New Email Update." There will be several drop-down options to choose from.
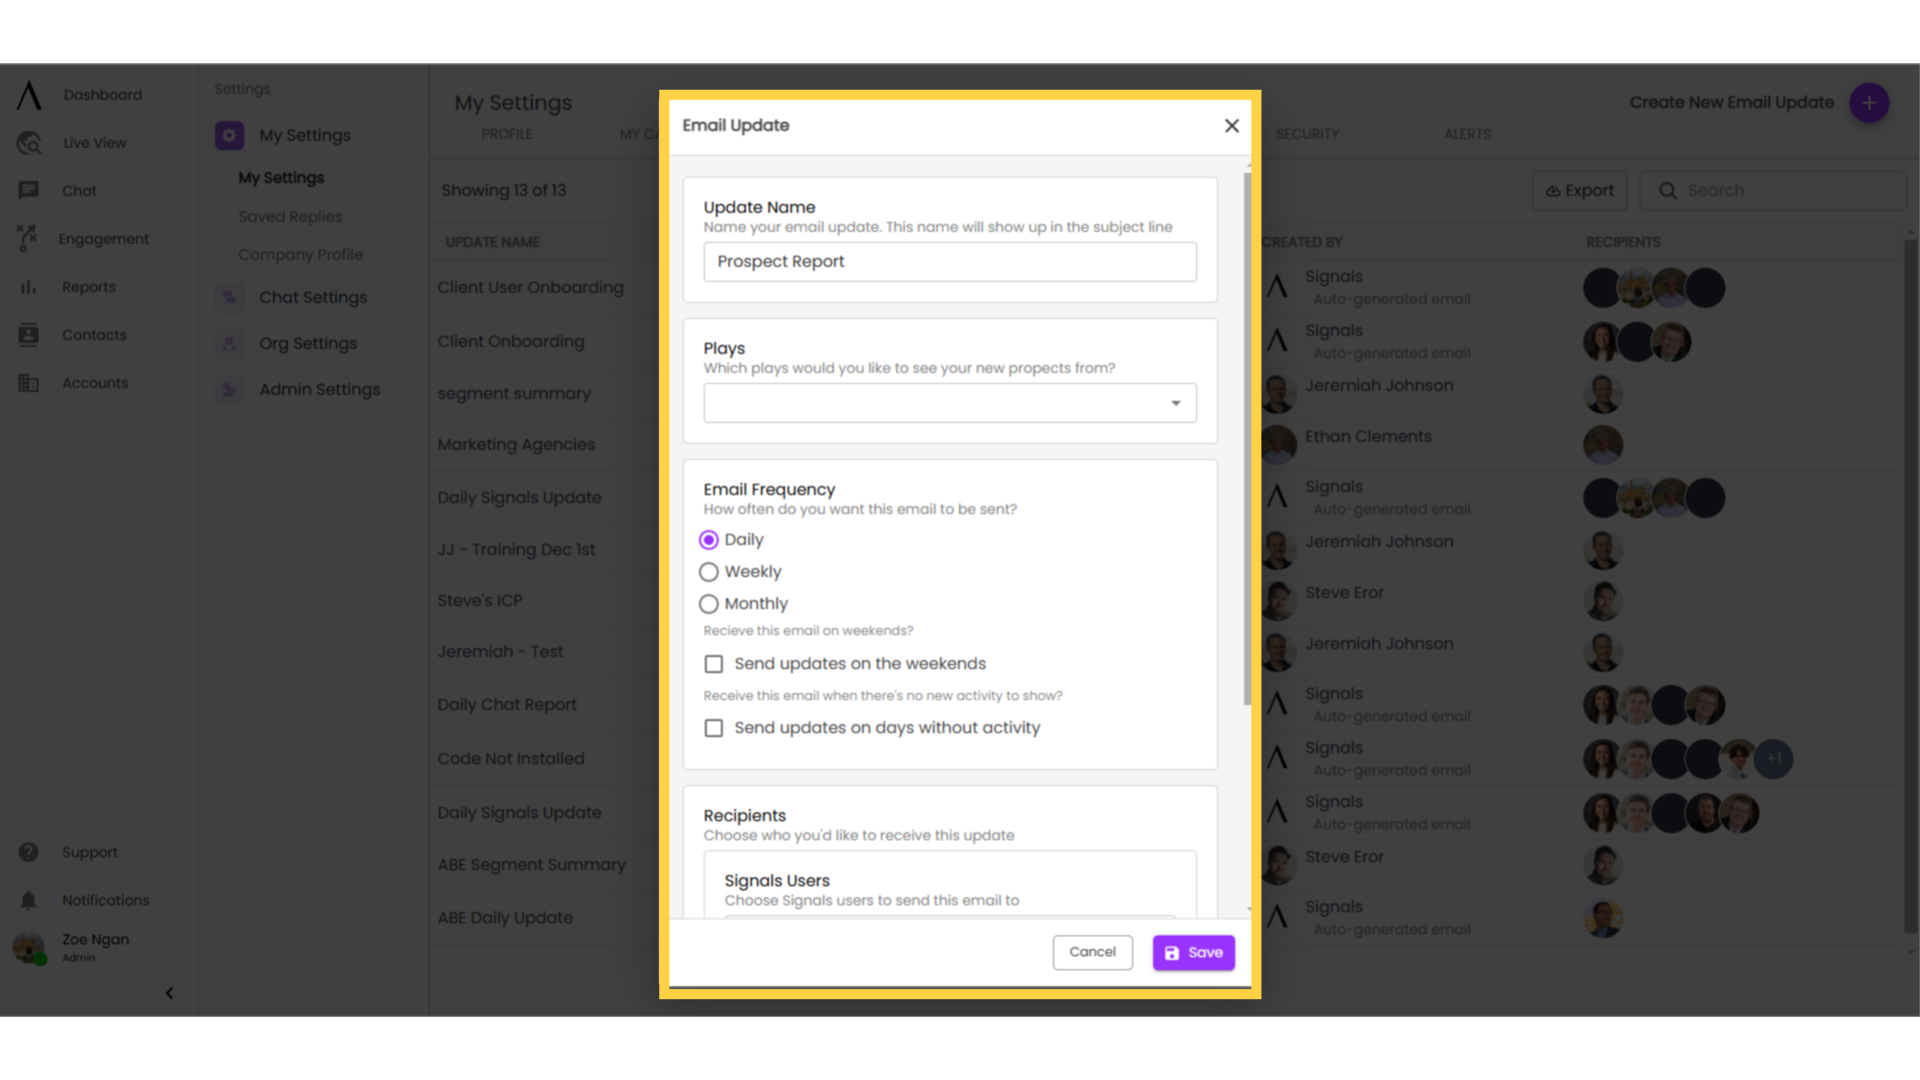
8. Customise update details
Selecting any of these options will prompt the appearance of a pop-up modal, where you can customize your update.
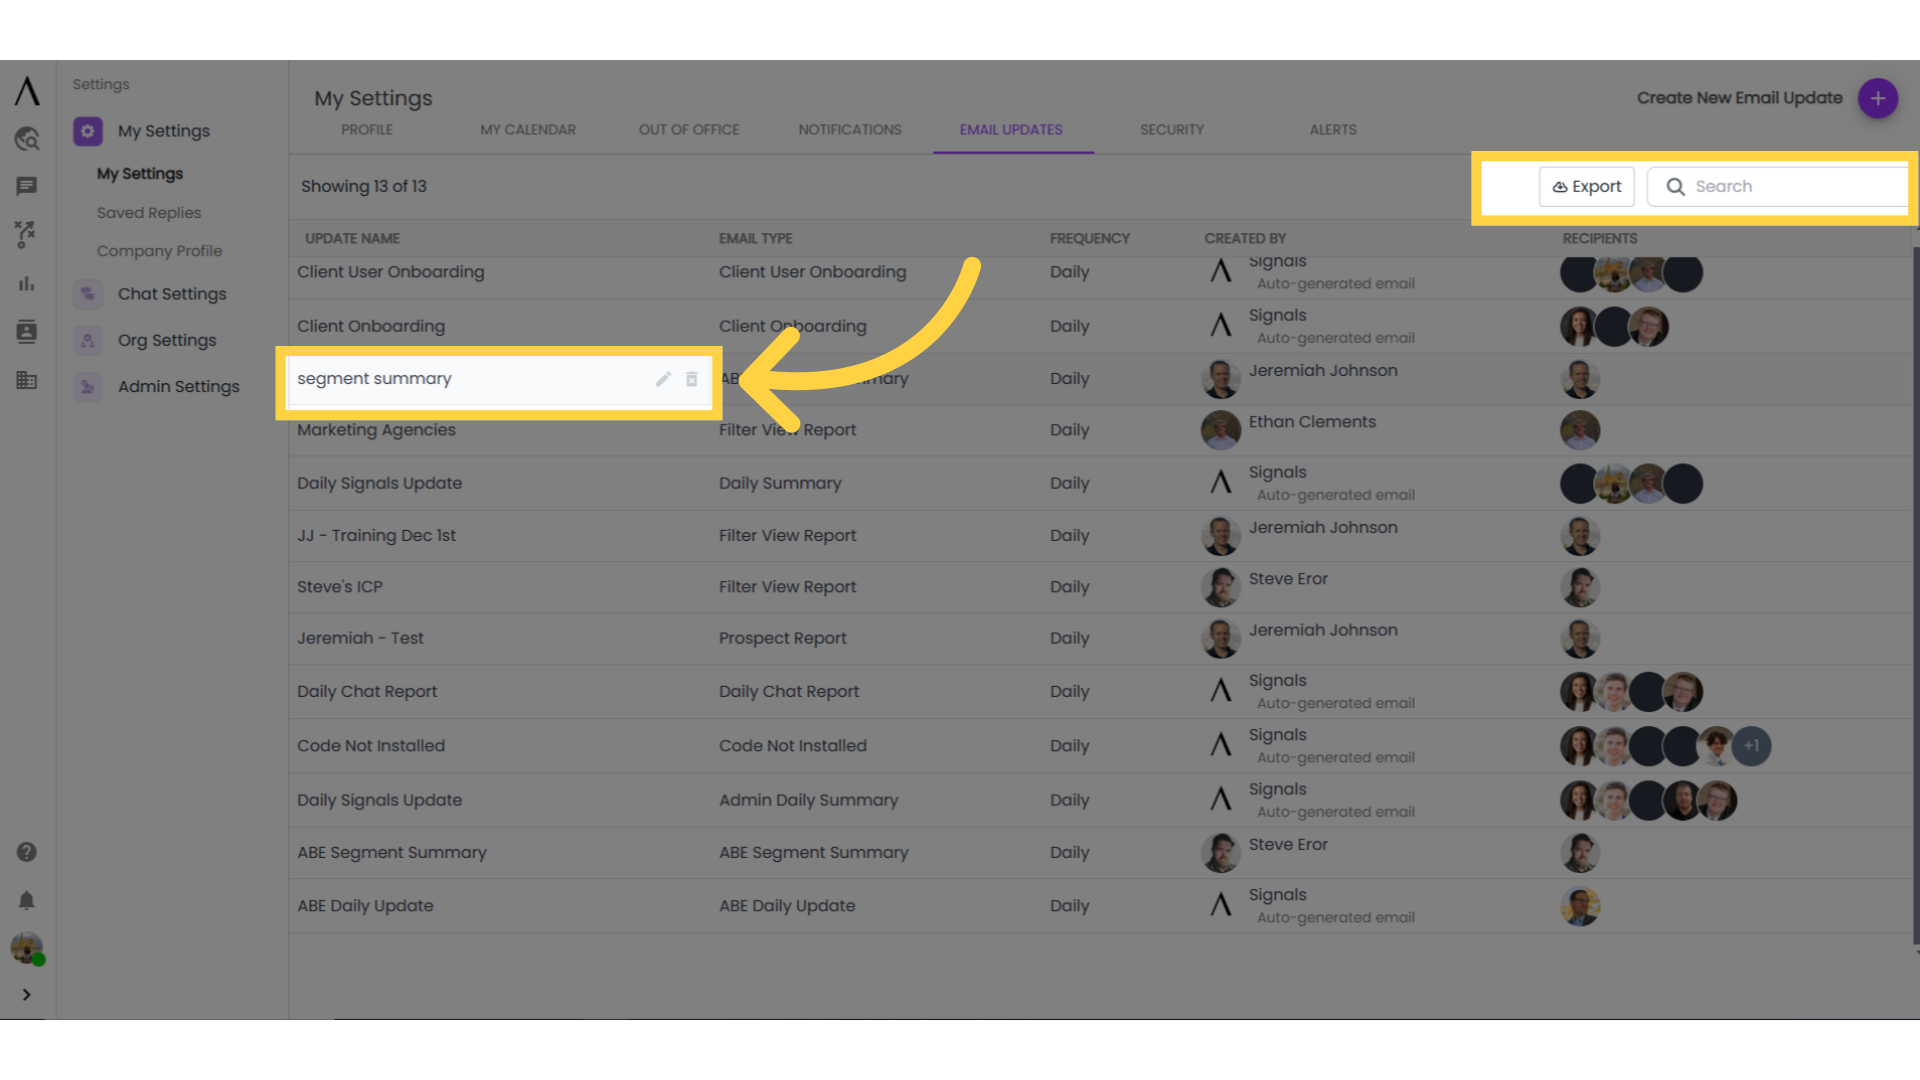
9. Edit/Delete emails here
You can edit or delete emails by hovering over them. There is also a search bar and an export option in the upper-right corner of the page for you to search or export as needed.
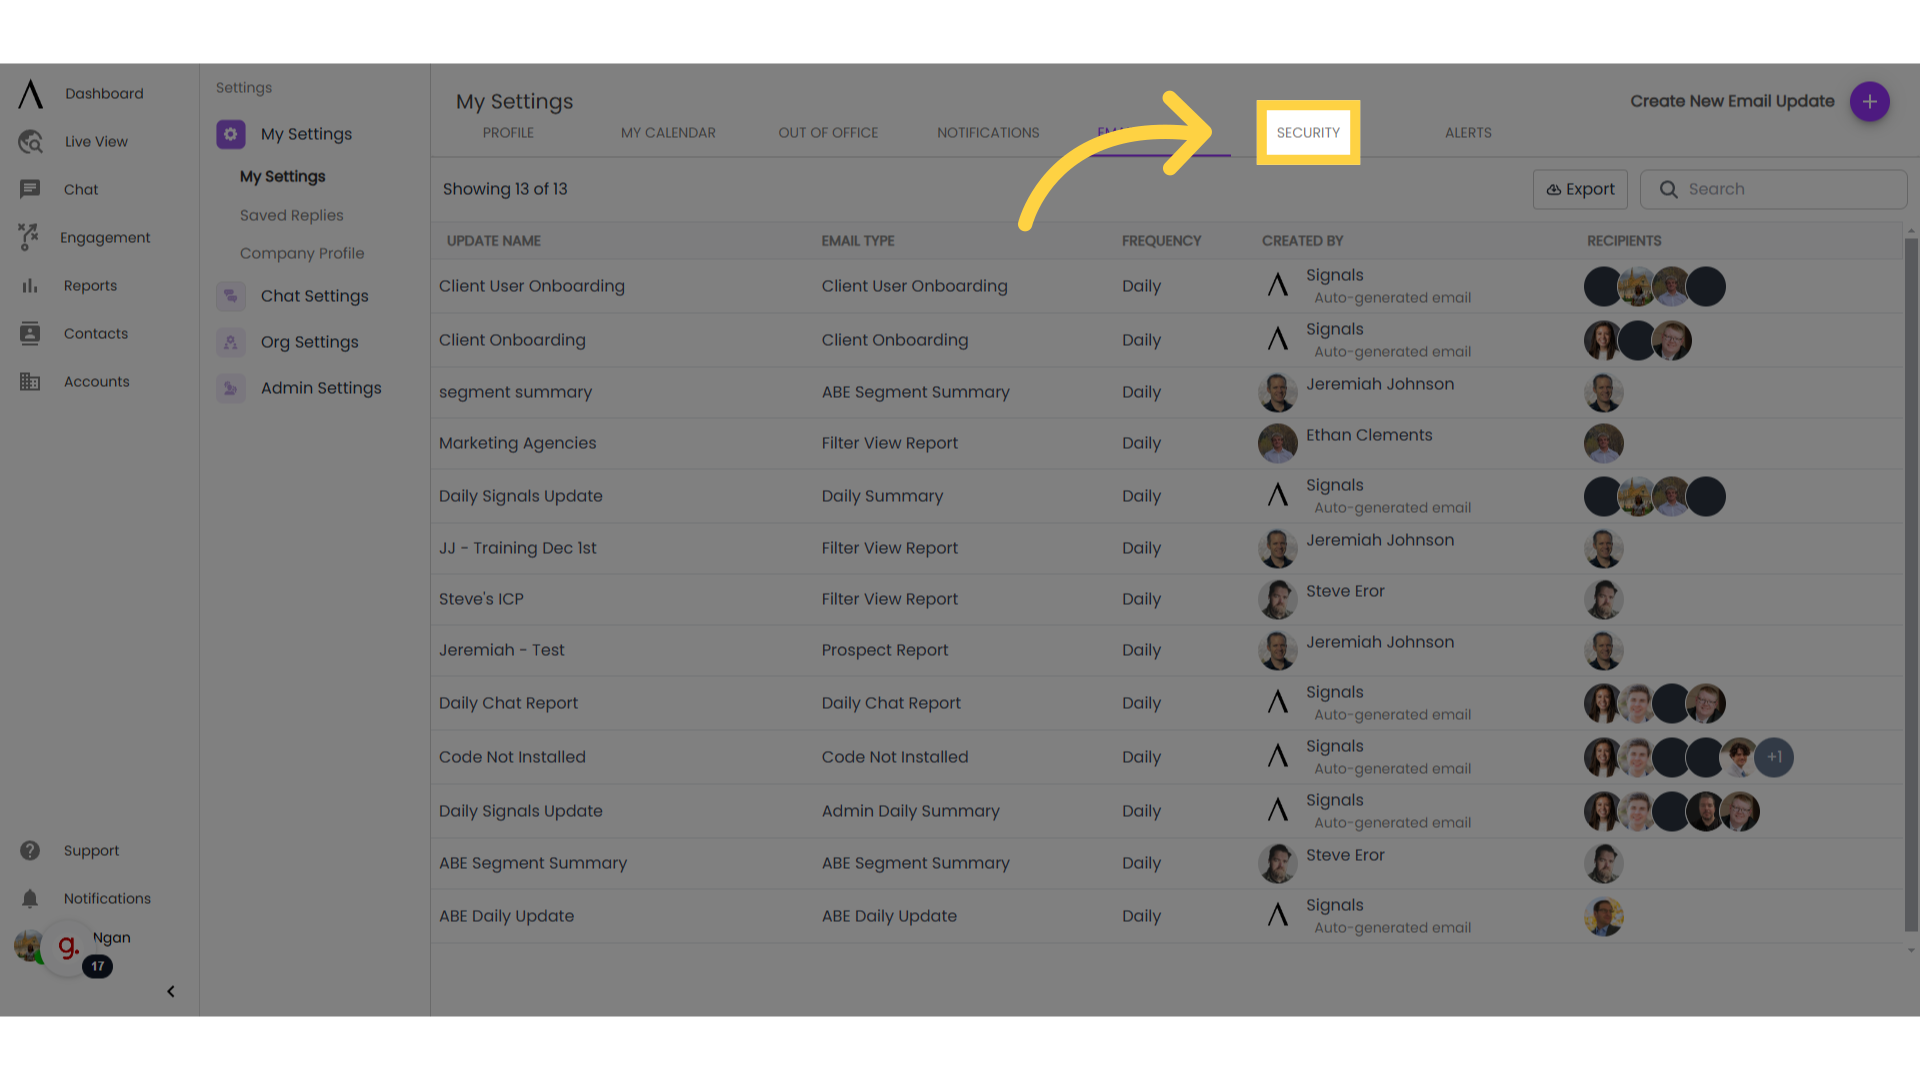
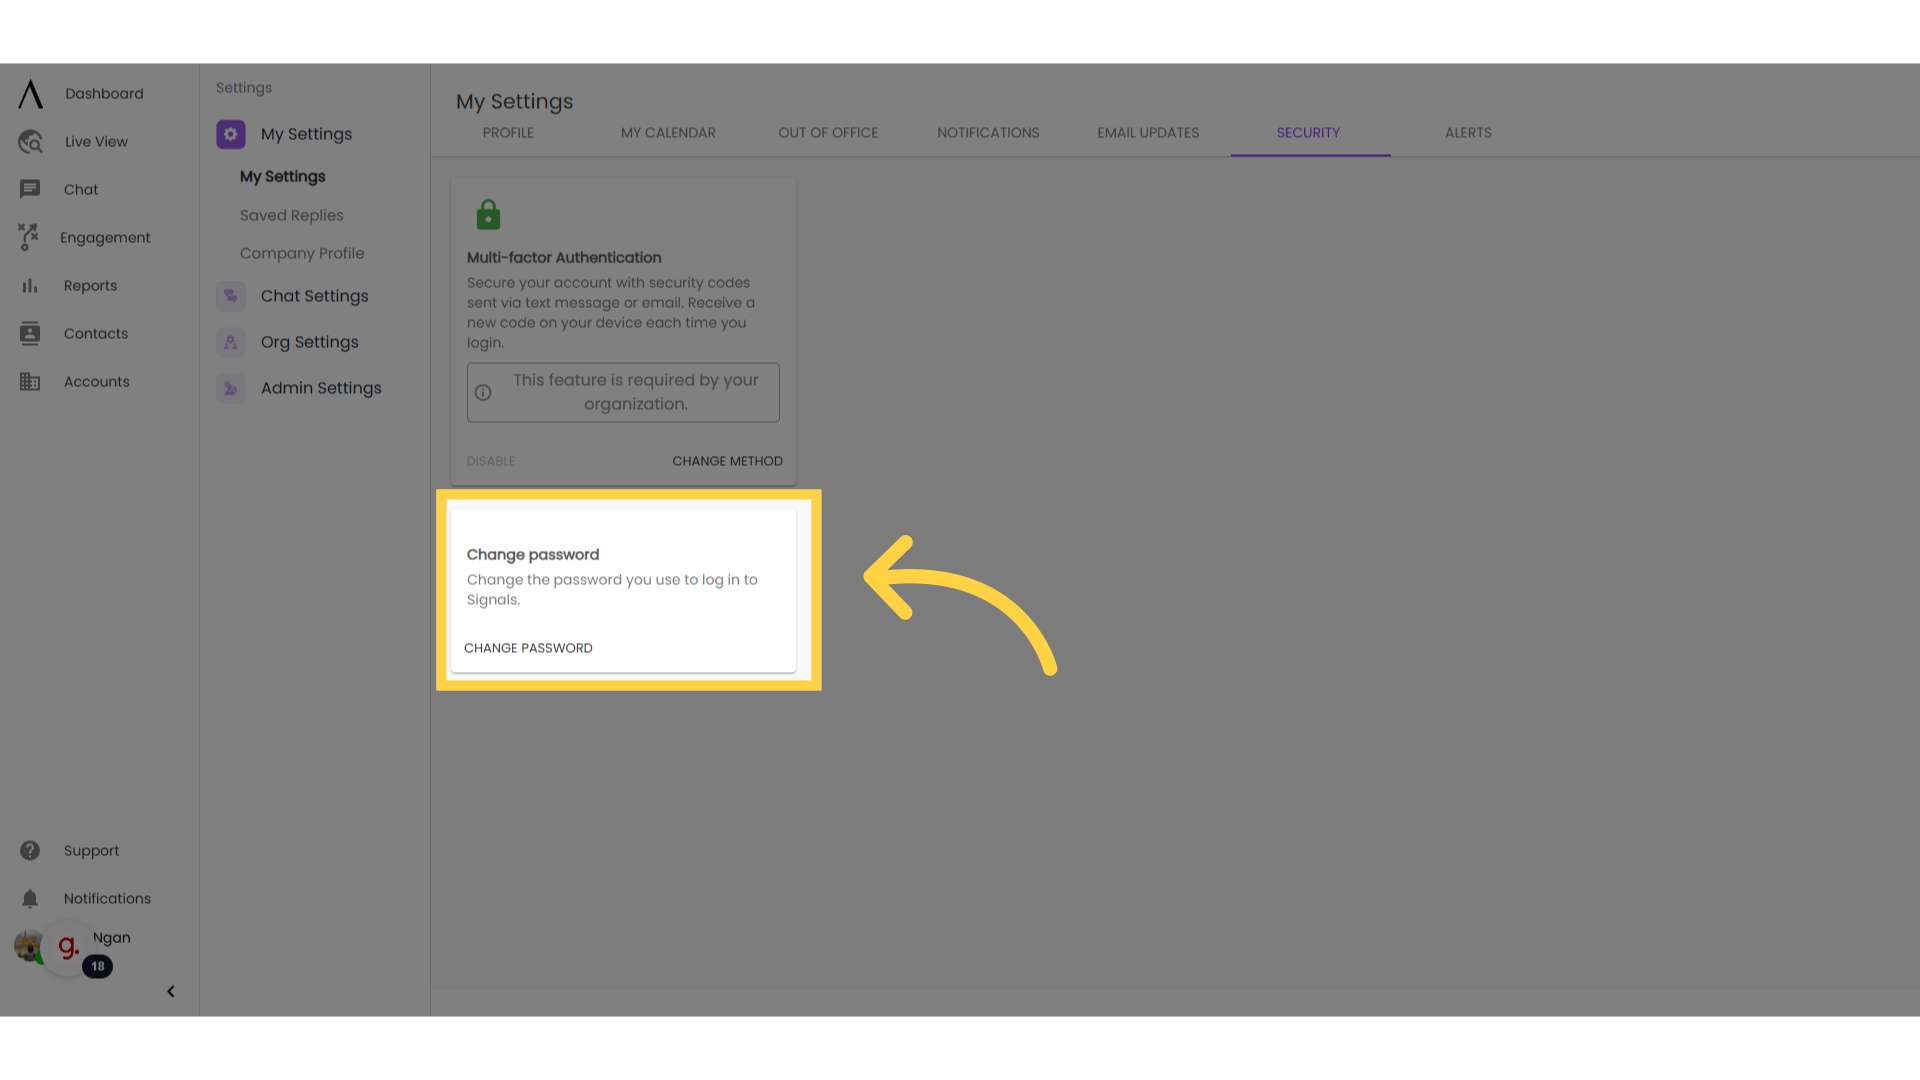
10. Navigate to "Security"
Finally, navigate to the Security tab. The Security tab of the My Settings section allows you to configure security settings for your account.
11. Set up MFA
MFA is a feature to add additional security to your account. With MFA enabled, when you login, you will receive a text message with a code that you need to input in order to log in.
Your administrator has the option to require this for all users in the organization. If this has occurred in your organization, this MFA icon will be uneditable:
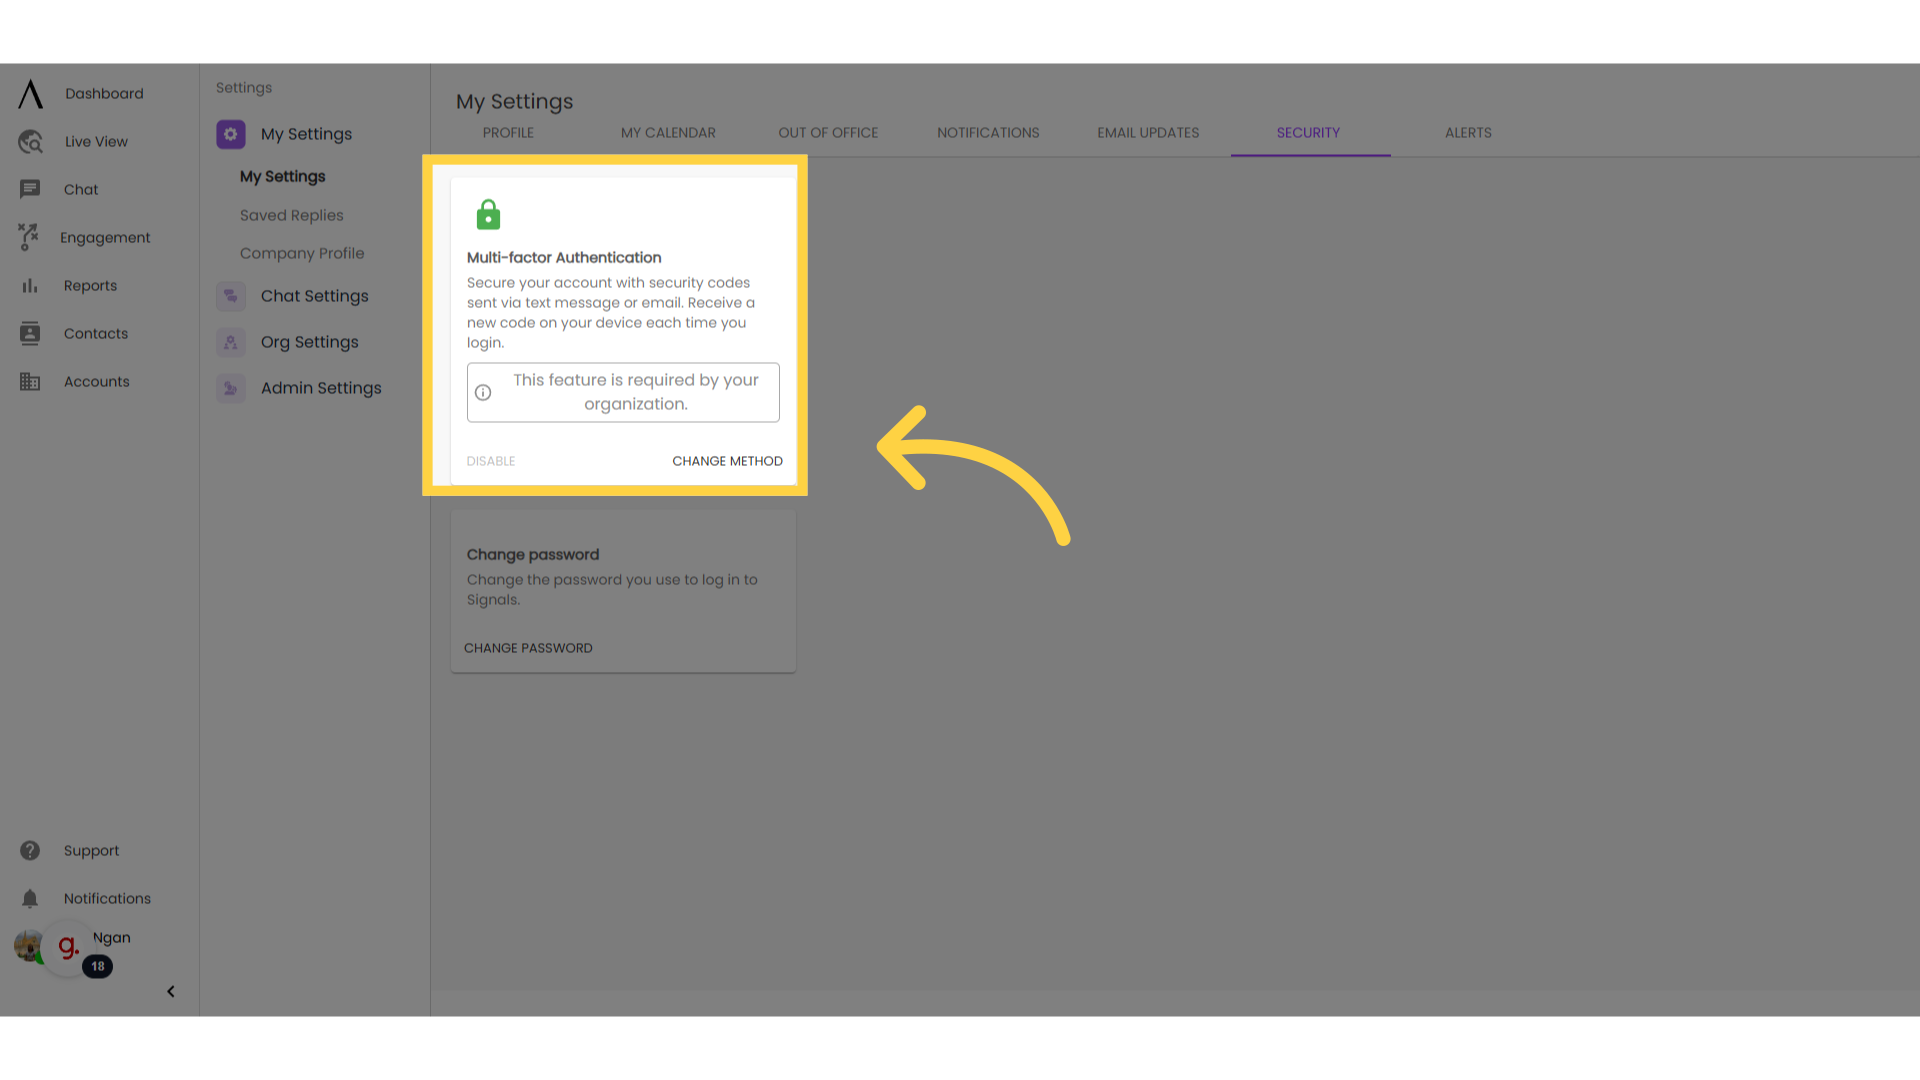
12. Change password
You also have the option to change your password from this menu. Click "Change password," where you'll be prompted to enter your new password.
13. Click on Alerts

14. Filter your alerts here
15. Edit or Delete