Meeting Types
Meetings
Go to app.getsignals.ai
1. Introduction
Every active calendar invite skill (both in chatbots and live chat conversations), must have a meeting type selected. This meeting type determines the details of the meeting invitation that will be received by site visitors.
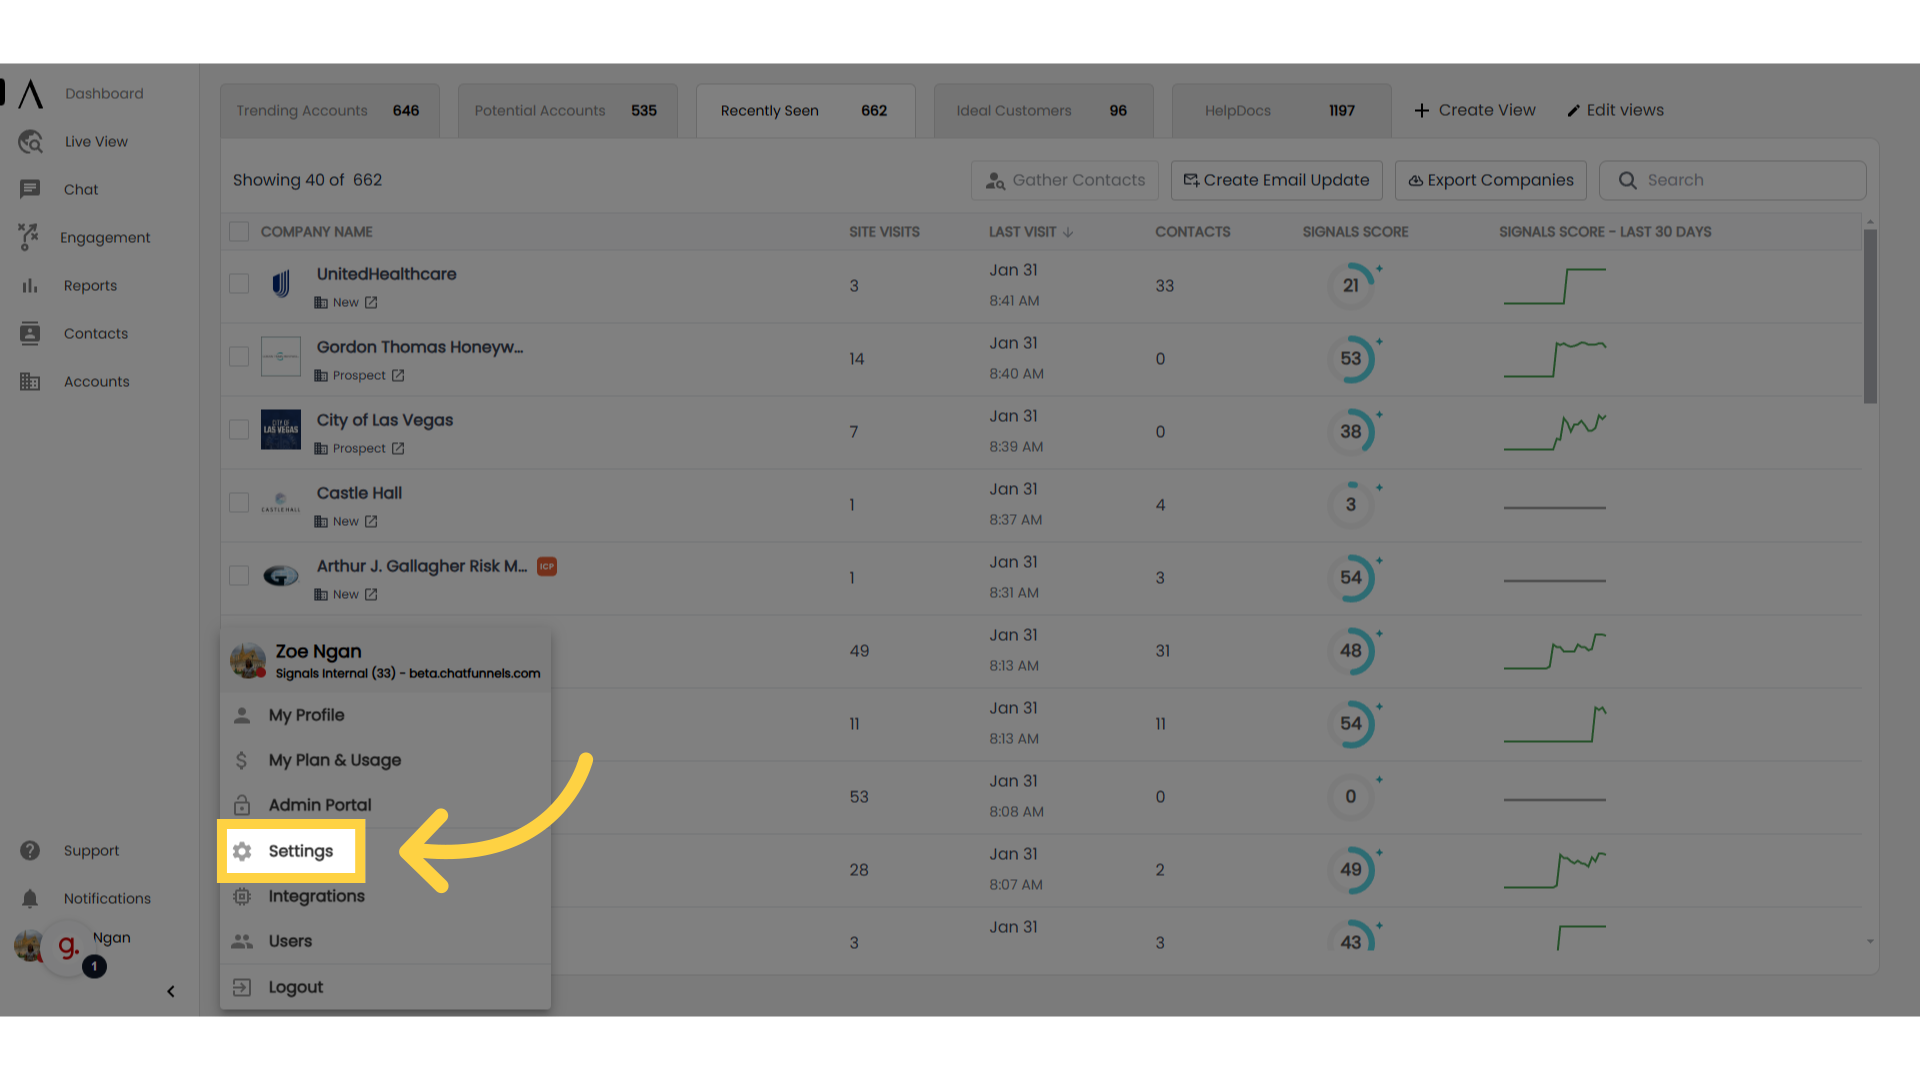
2. Click "Settings"
First, click on your Profile in the bottom left corner, then click "Settings."
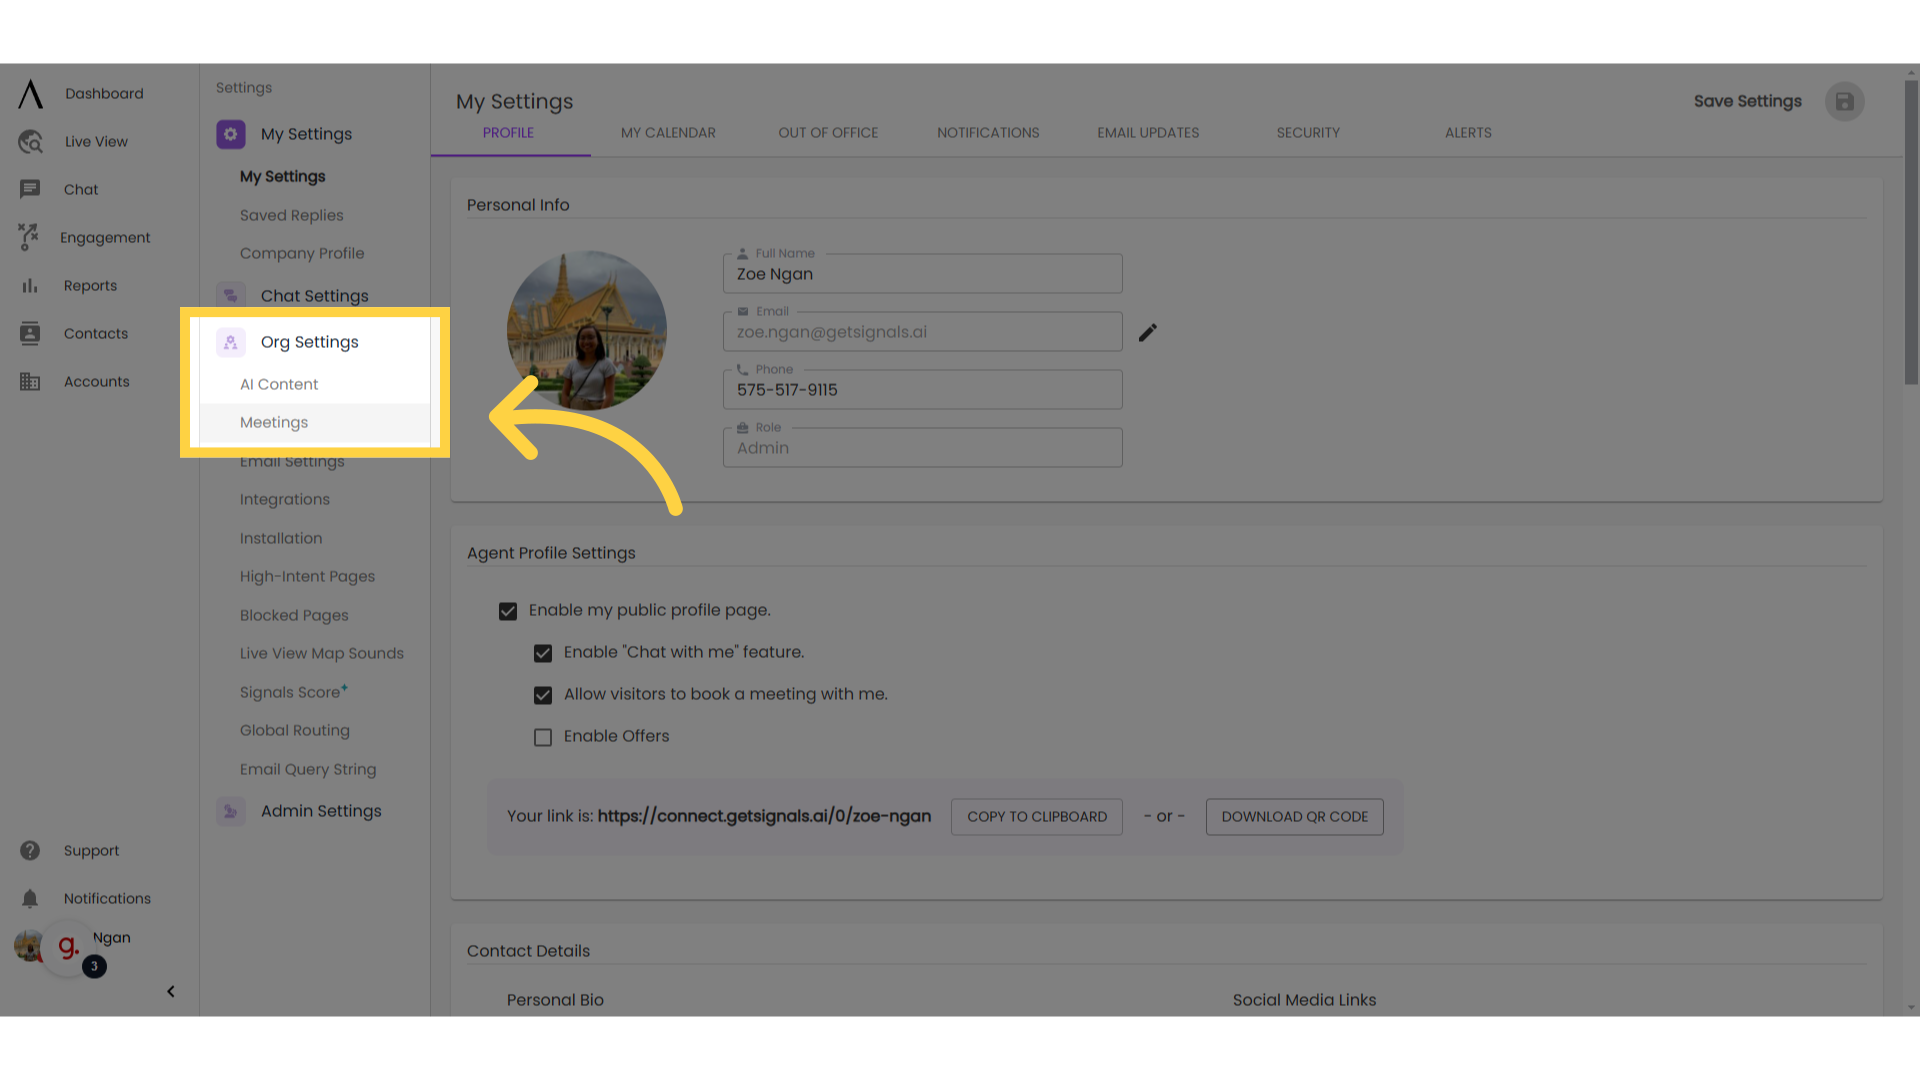
3. Go to "Meetings"
Navigate to Org Settings under the "My Settings" column, then click Meetings.
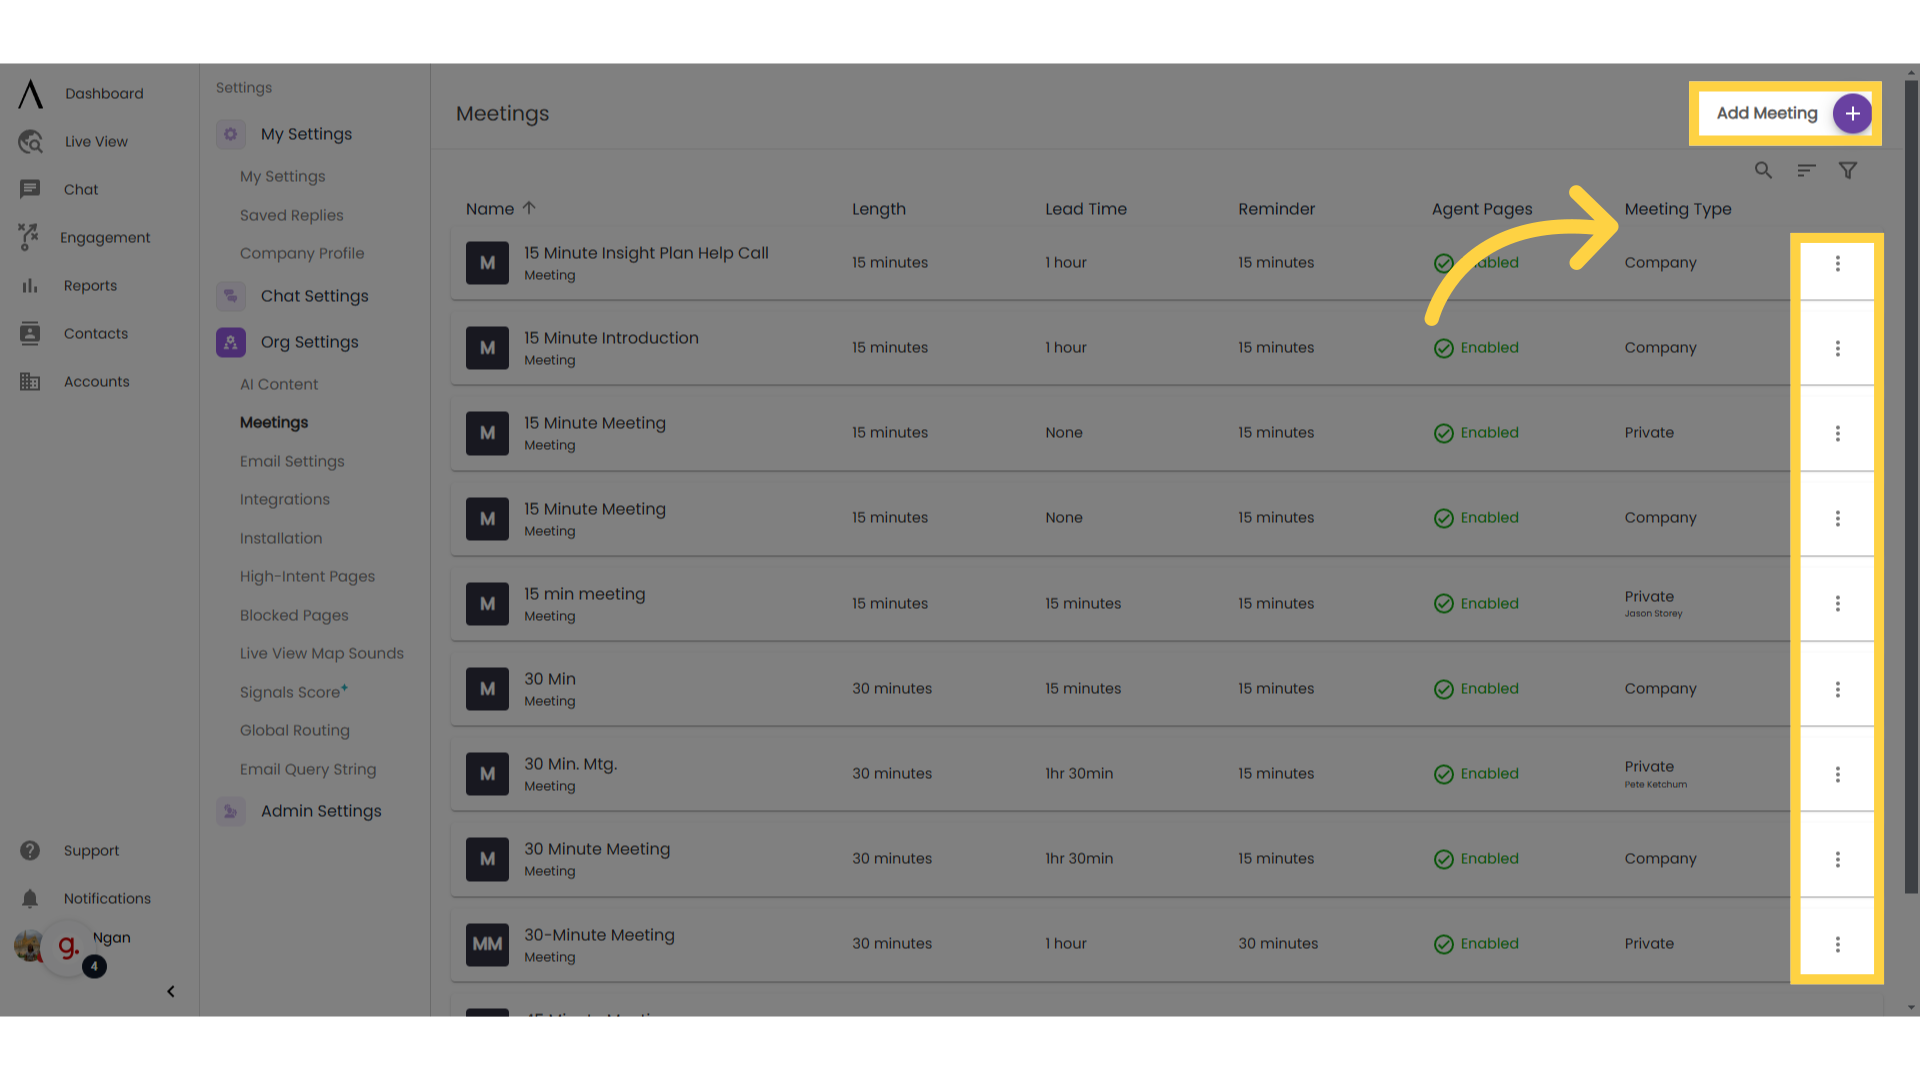
4. Managing Meetings:
To add a new meeting, click "Add Meeting in the upper right corner. Alternatively, to edit or delete an existing meeting, click on the three dots to the far right of each meeting option.
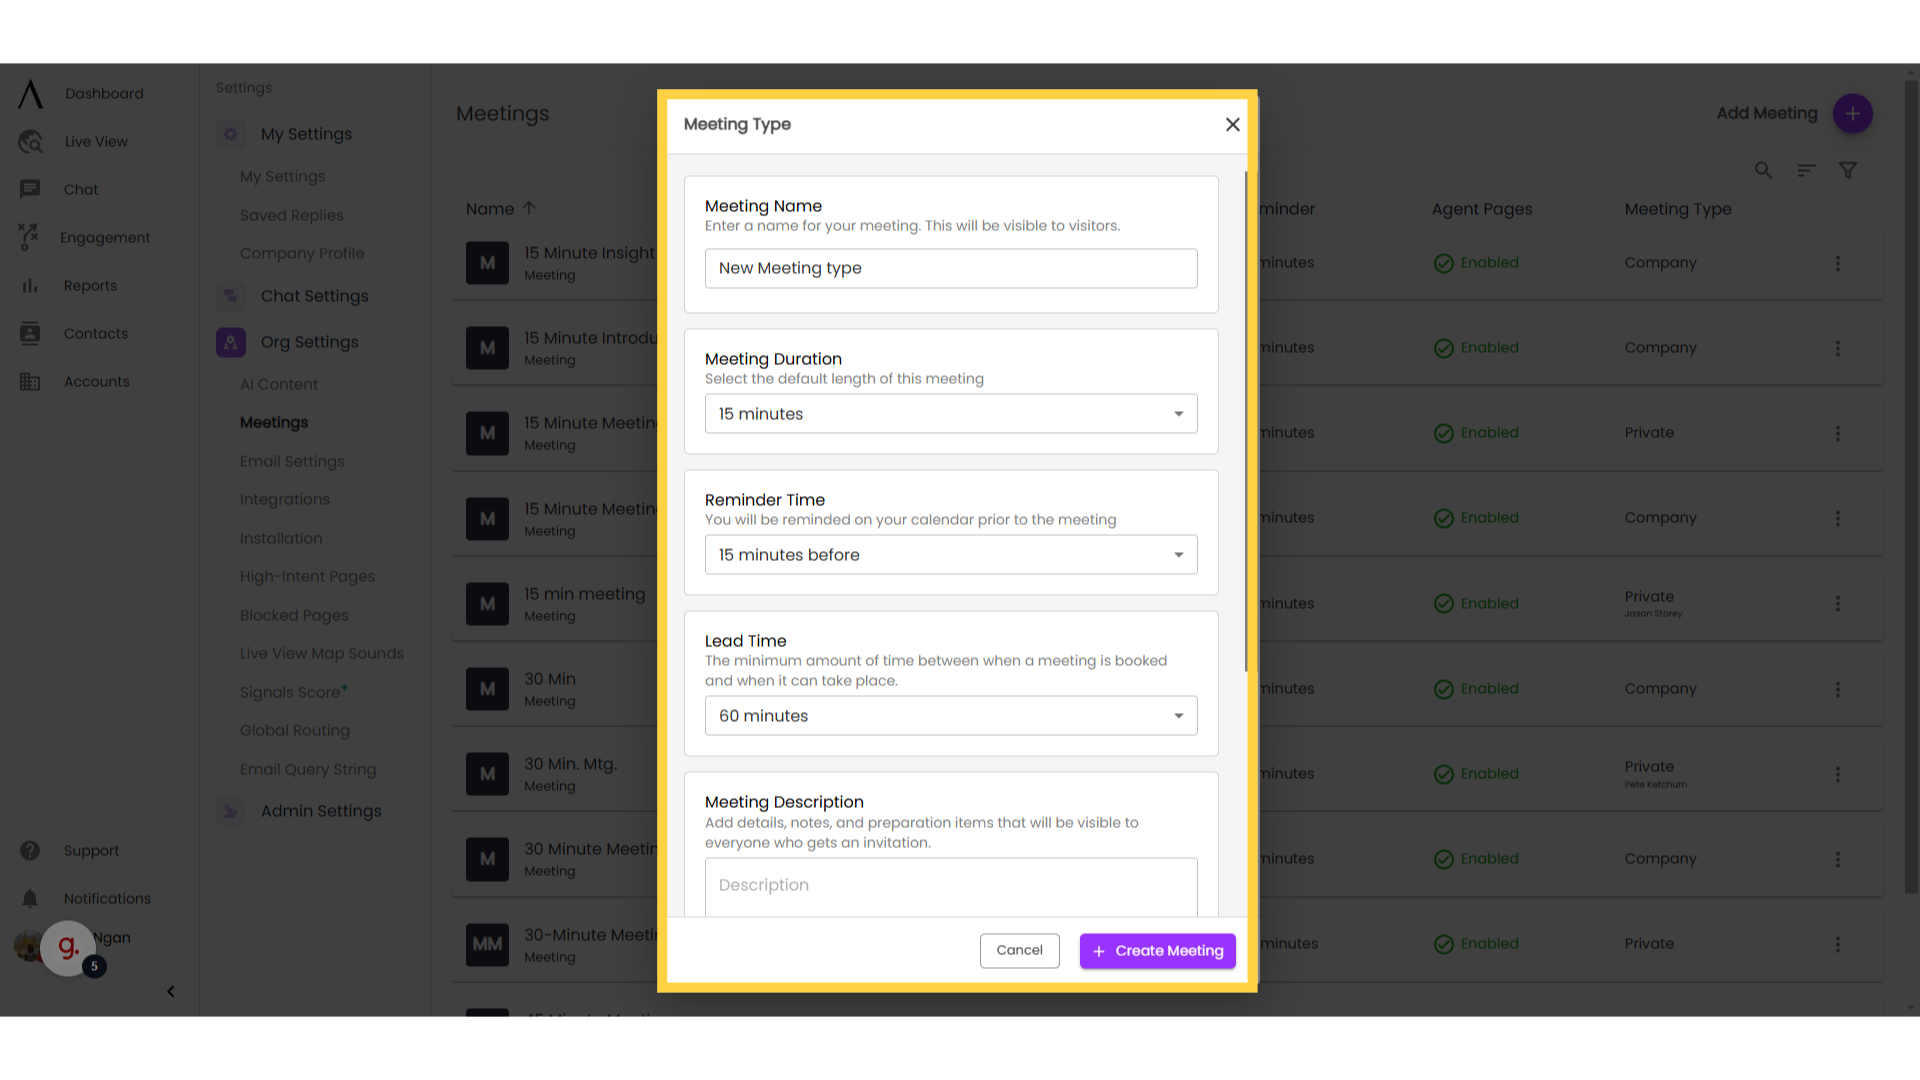
5. Configure meeting settings
If you clicked "Add Meeting" previously, a pop-up modal will appear where you can configure your meeting settings. For example, you can choose whether or not you want the meeting to be only visible to you or your entire company, or if you want it to be used in agent profile pages.
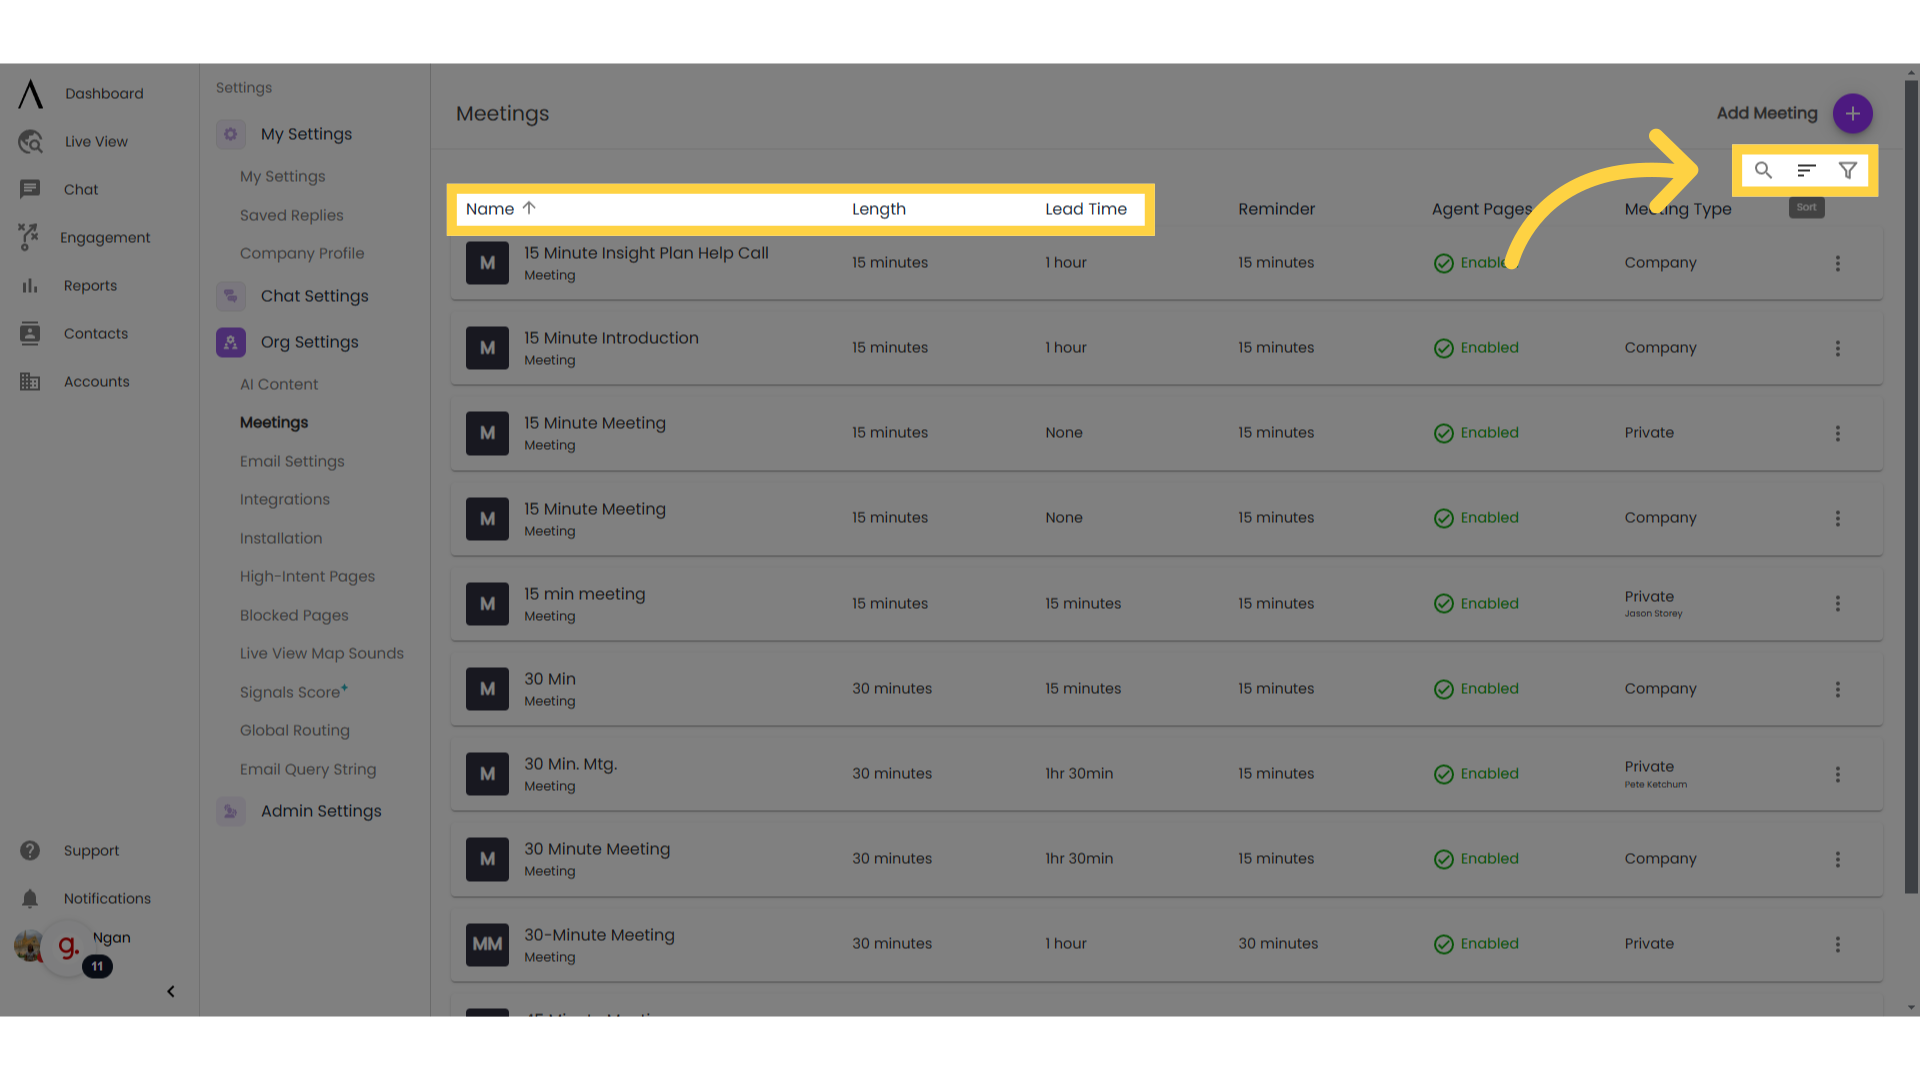
6. Managing Meetings:
In the upper right corner, you will see additional options to search for a meeting, sort your meetings, or filter. You can also sort your meetings by clicking on the arrow next to each column header.
Filtering meetings allows you pick between seeing all meetings, just your company-wide meetings, or just your personal meetings.
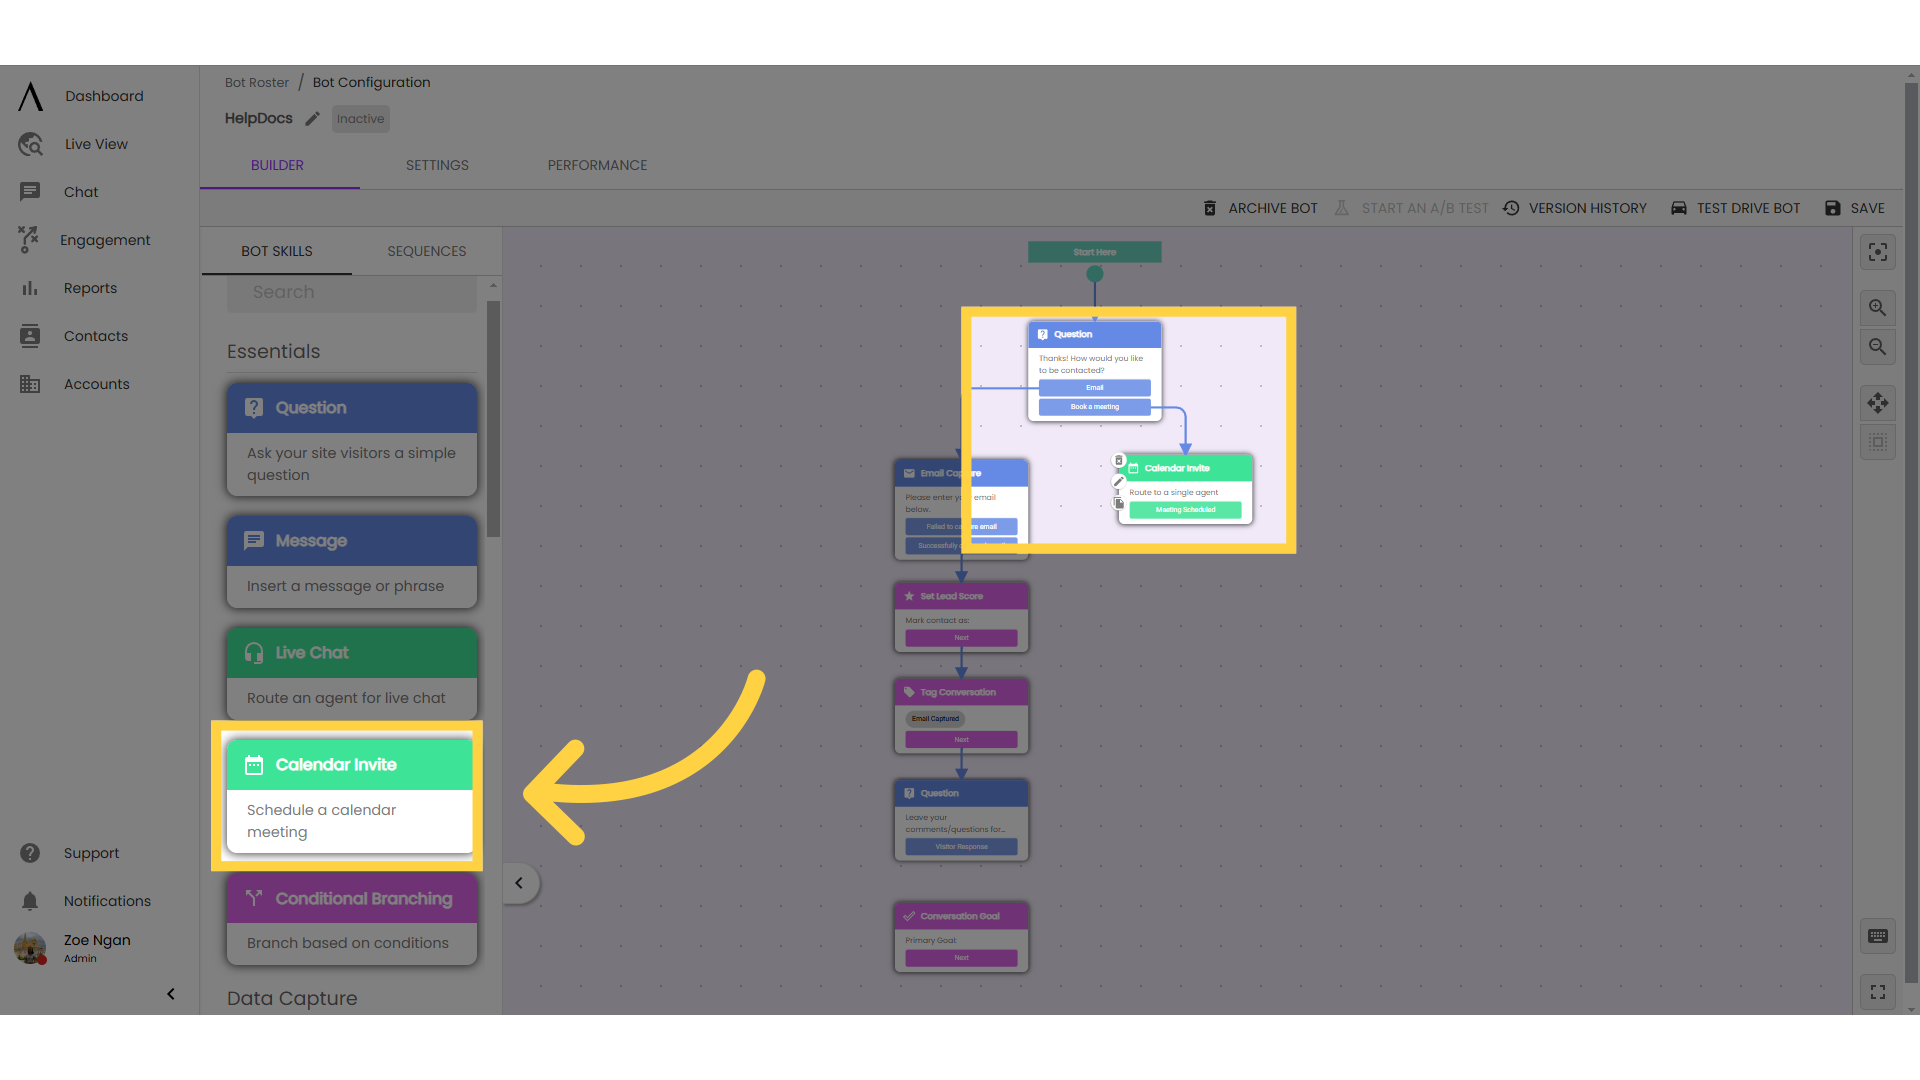
7. Use Case: Calendar Drop
One way to use a Meeting Type is in an automated chatbot flow. Drag and drop the Calendar Invite skill into your bot flow, double-click on the skill, then select the desired Meeting Type.
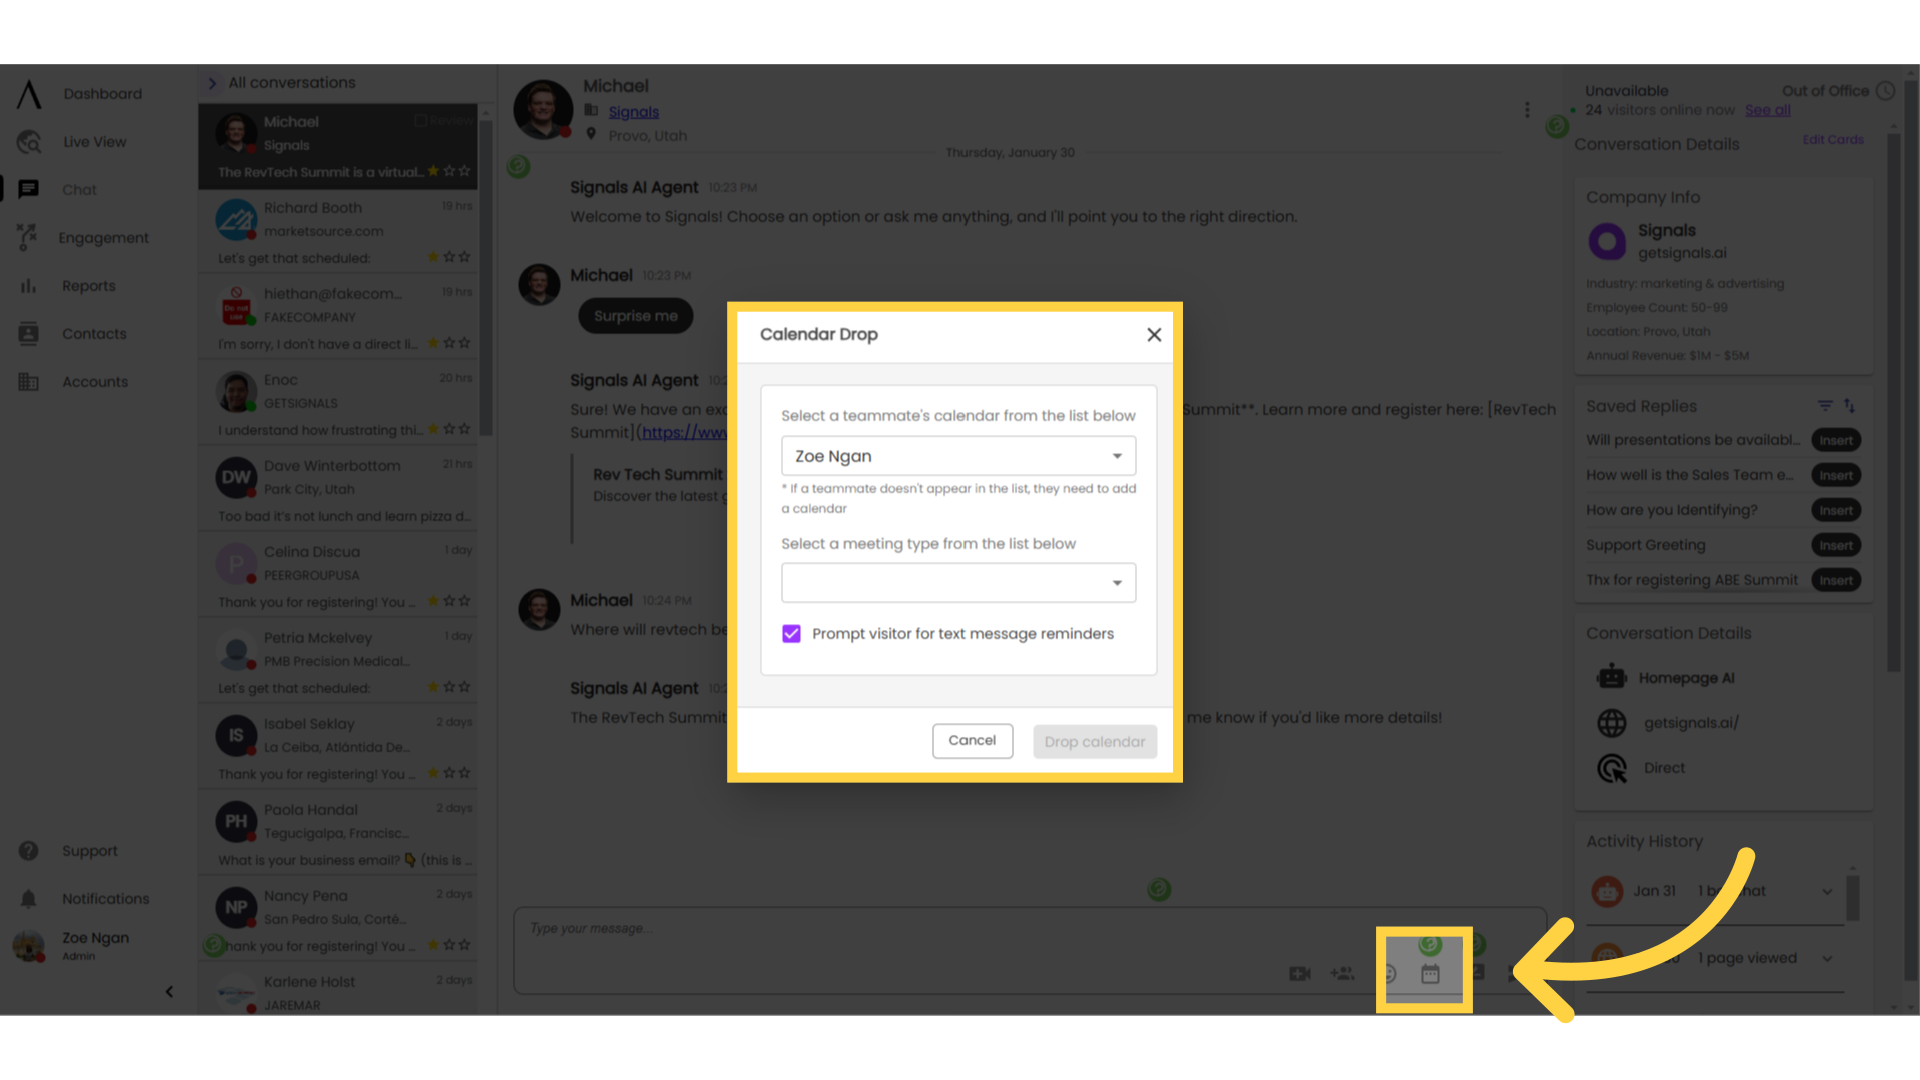
8. Use Case: Agent Chat
Click the "Chat" button on the main left column of your screen. To use meetings in agent chat, click on your desired conversation. In the text bar on the bottom, select the calendar icon toward the right to pick a type of meeting to drop to the visitor.
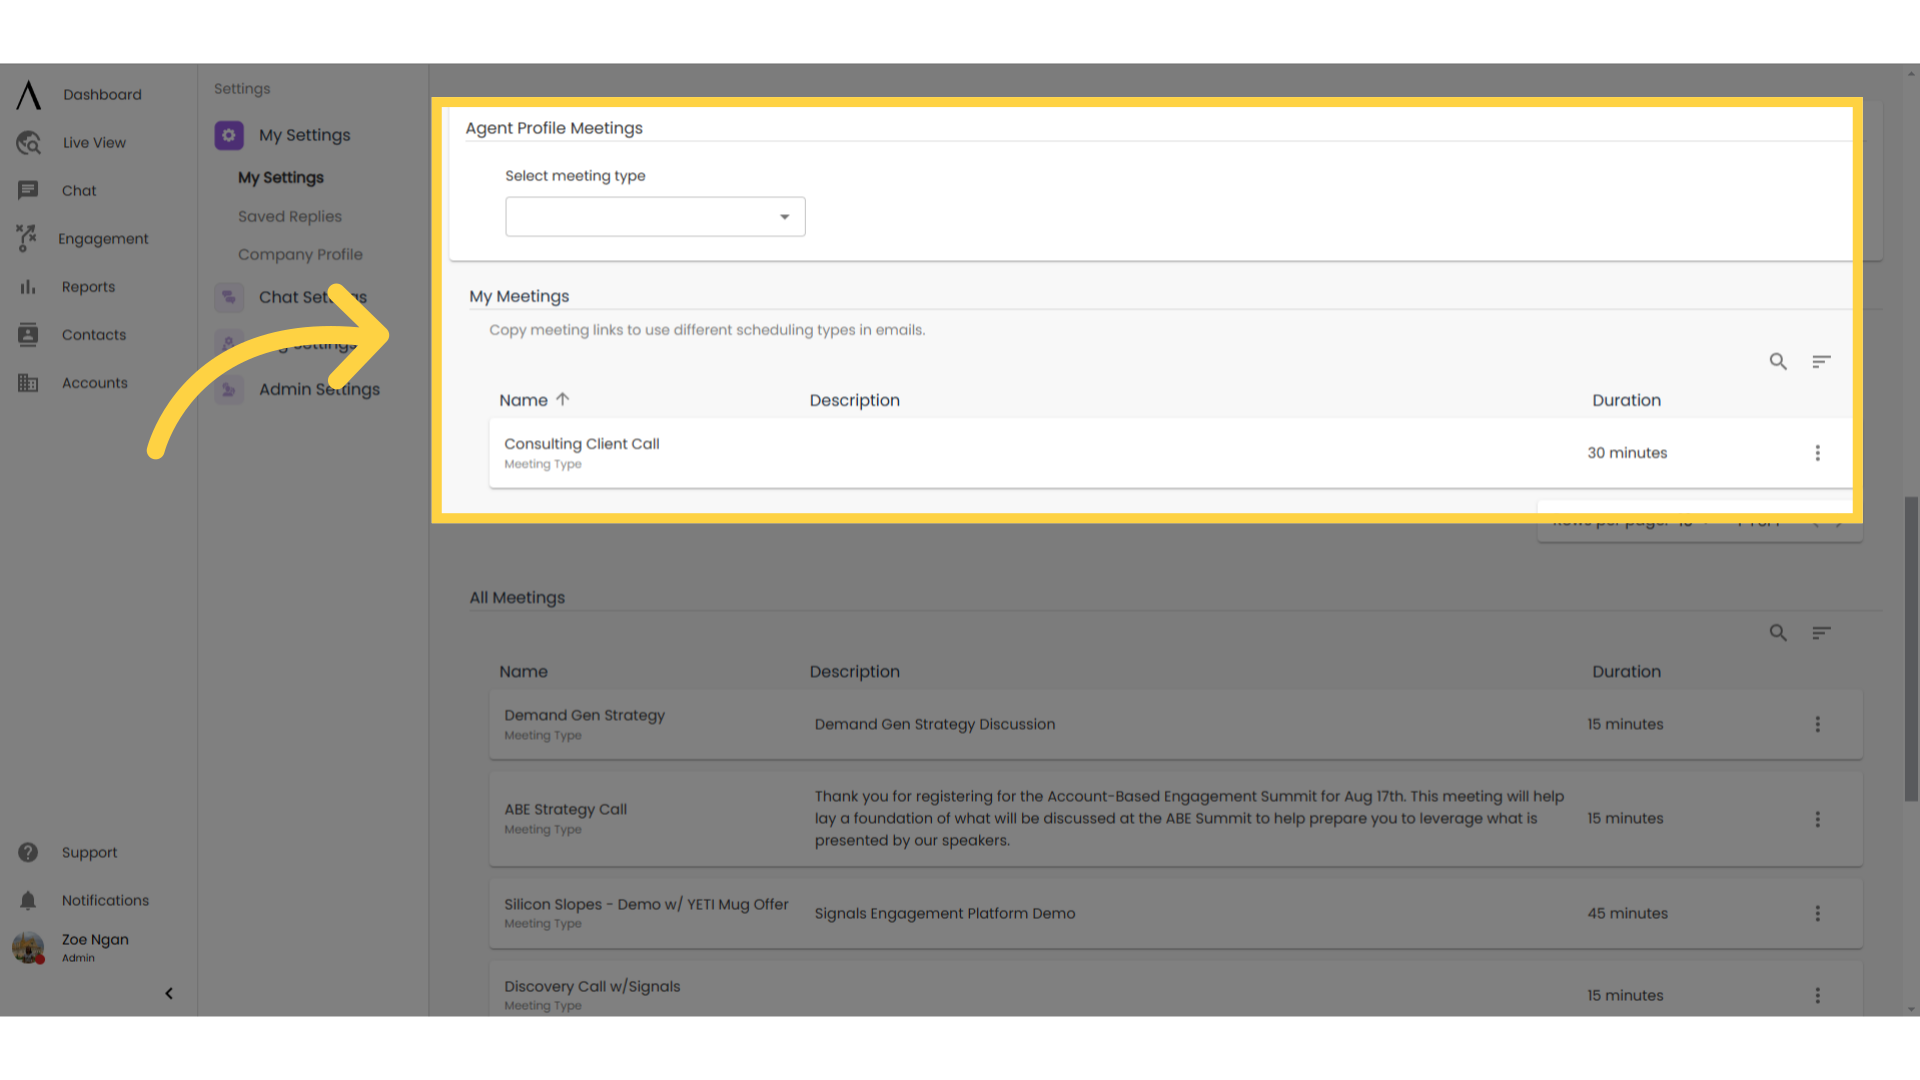
9. Use Case: Agent Profile Meetings
You can also use agent meetings on your agent profile page, so visitors can choose a meeting type that best suits their needs. Click on "My Settings" under "My Settings." Then, scroll down to the "Agent Profile Meetings" box to manage this feature.