Installation - Google Tag Manager
- Installation: Google Tag Manager
- 1. Select your Workspace
- 2. Click "Tags," then "New"
- 3. Click "Tag Configuration"
- 4. Select "Custom HTML"
- 5. Copy Signals script
- 6. Click on your Profile
- 7. Navigate to "Settings"
- 8. Click on "Org Settings"
- 9. Select "Installation"
- 10. Click "Manual"
- 11. Click "Copy to Clipboard"
- 12. Paste the script into the HTML field
- 13. Click "Add Trigger"
- 14. Select "All Pages"
- 15. Click "Submit"
- 16. Name your version, then hit "Publish"
Installation: Google Tag Manager
This guide will walk you through the necessary steps to install the Signals script using Google Tag Manager.
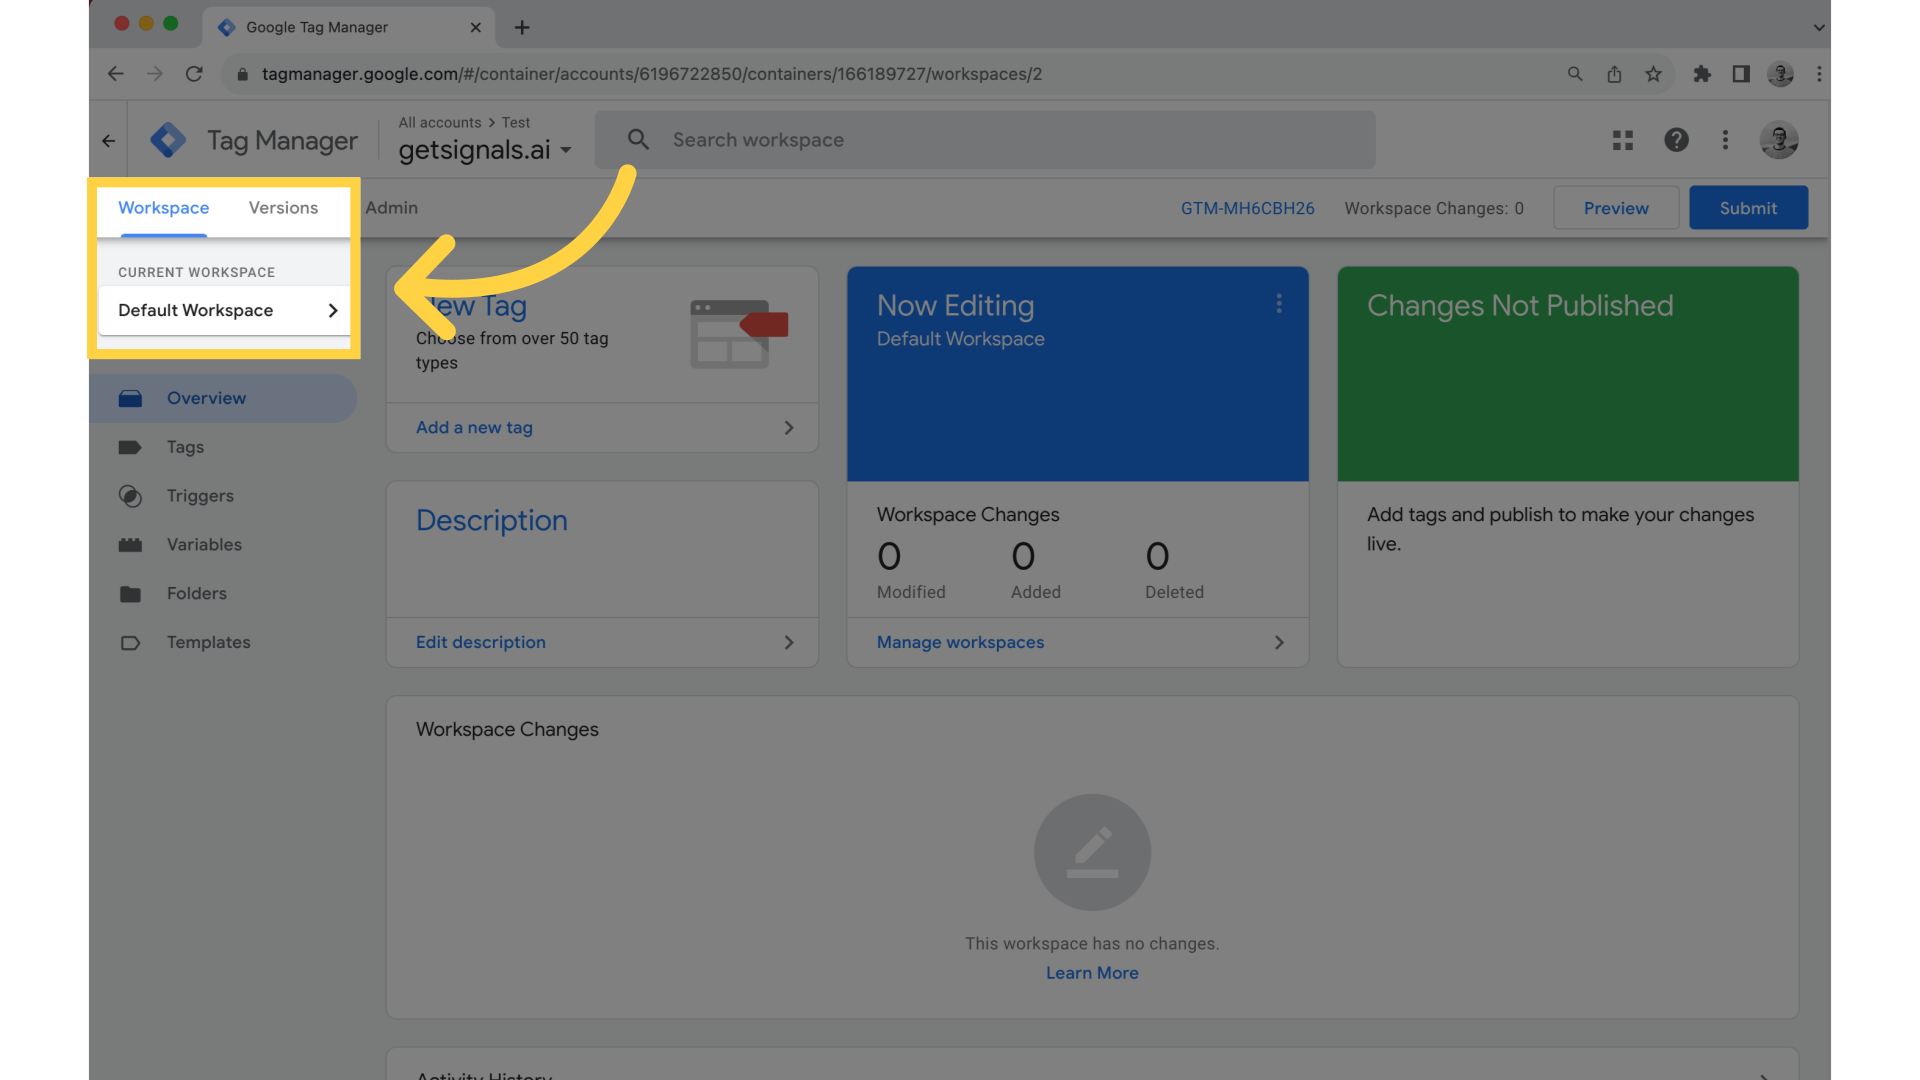
1. Select your Workspace
Sign into your Google Tag Manager account and select your workspace on the left-hand side.
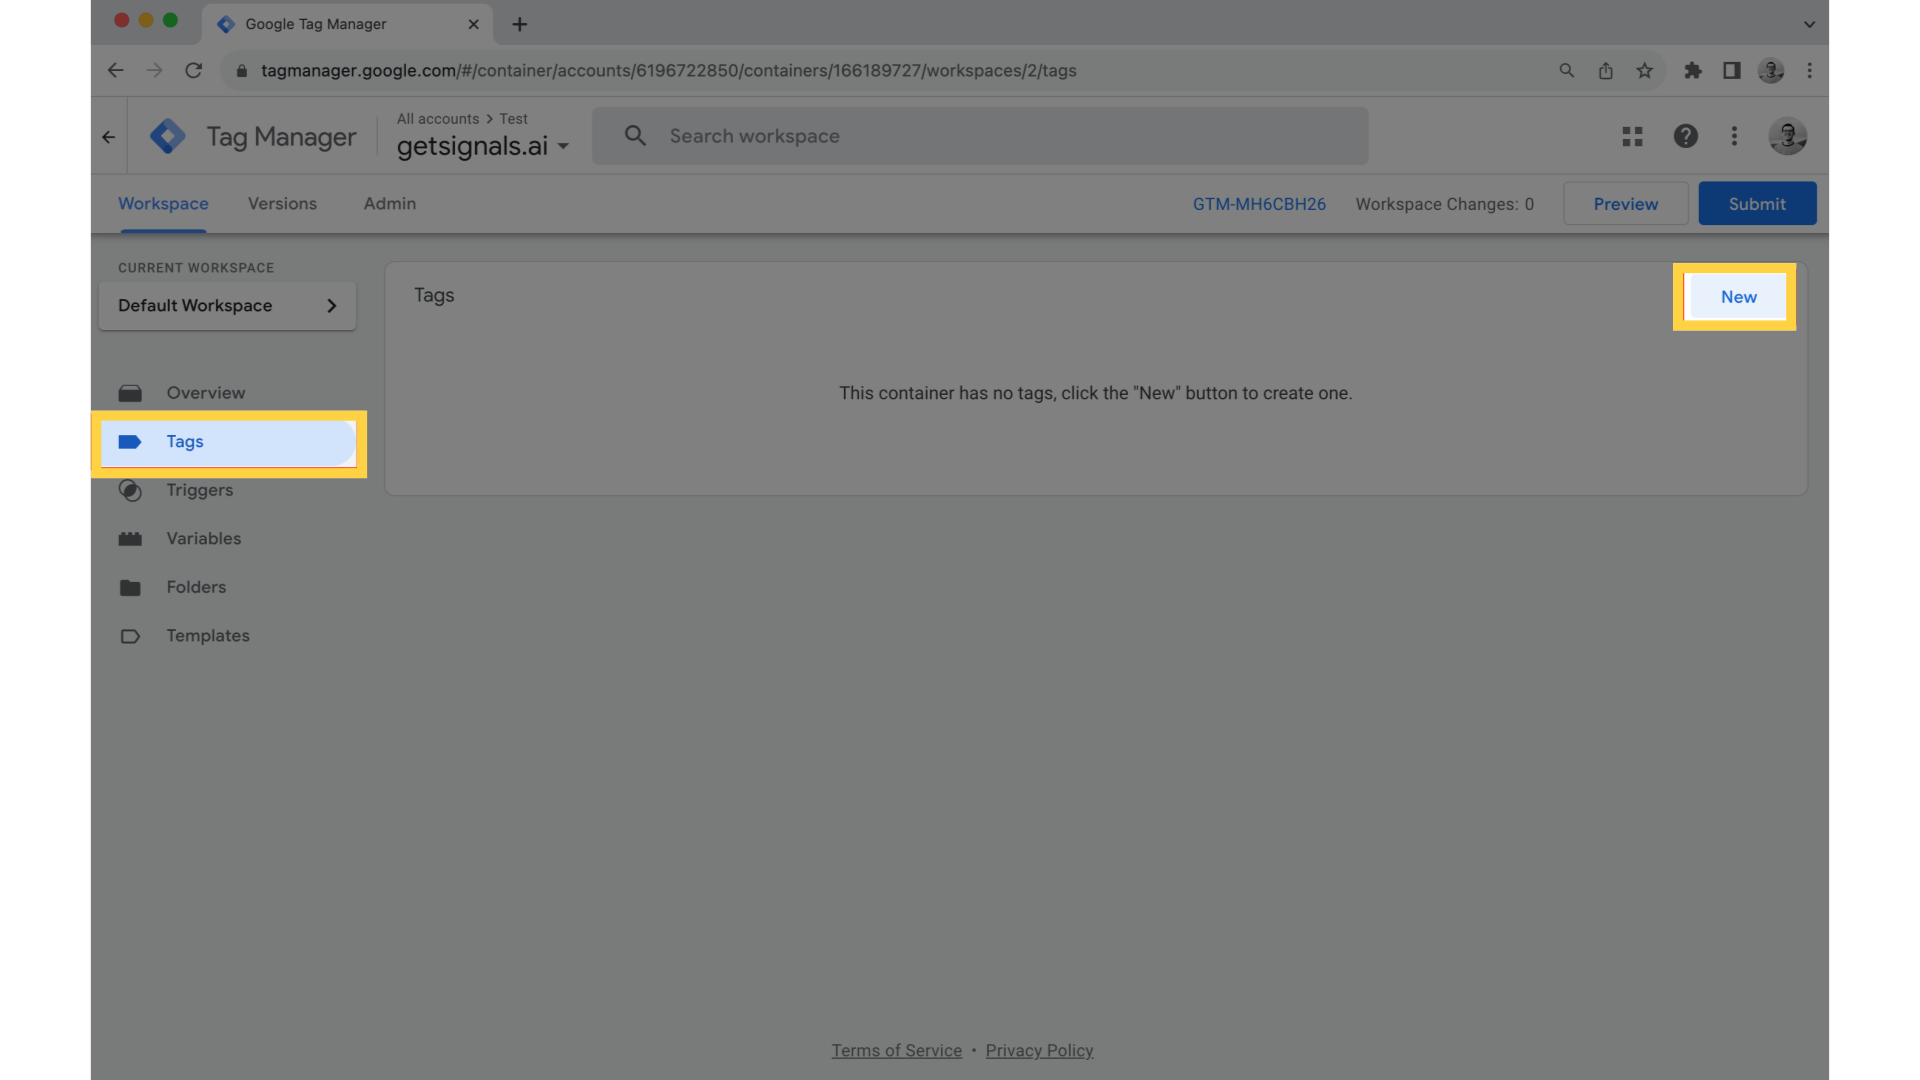
2. Click "Tags," then "New"
Click "Tags" in the menu on the left, then click "New" in the top right corner.
3. Click "Tag Configuration"
Name the tag "Signals," then click "Tag Configuration."
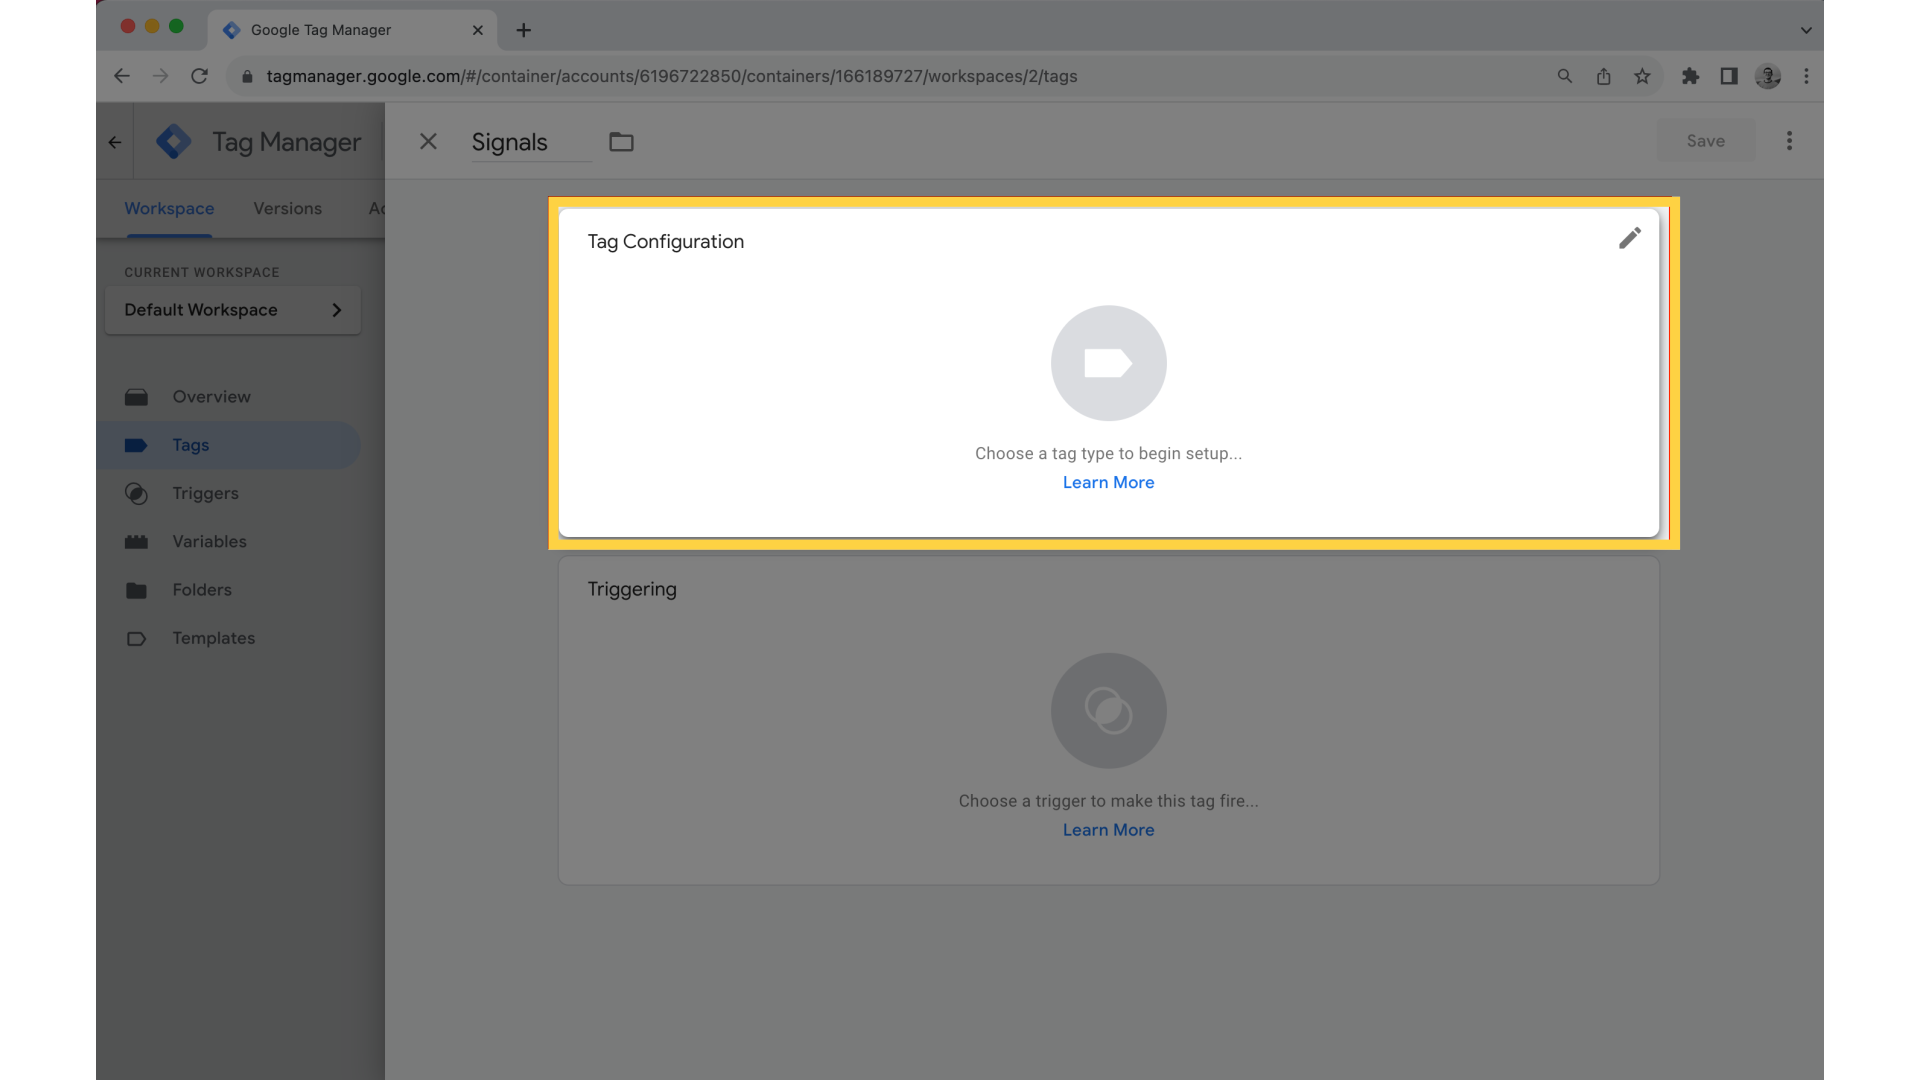
4. Select "Custom HTML"
Select "Custom HTML" in the list of tag types on the right.

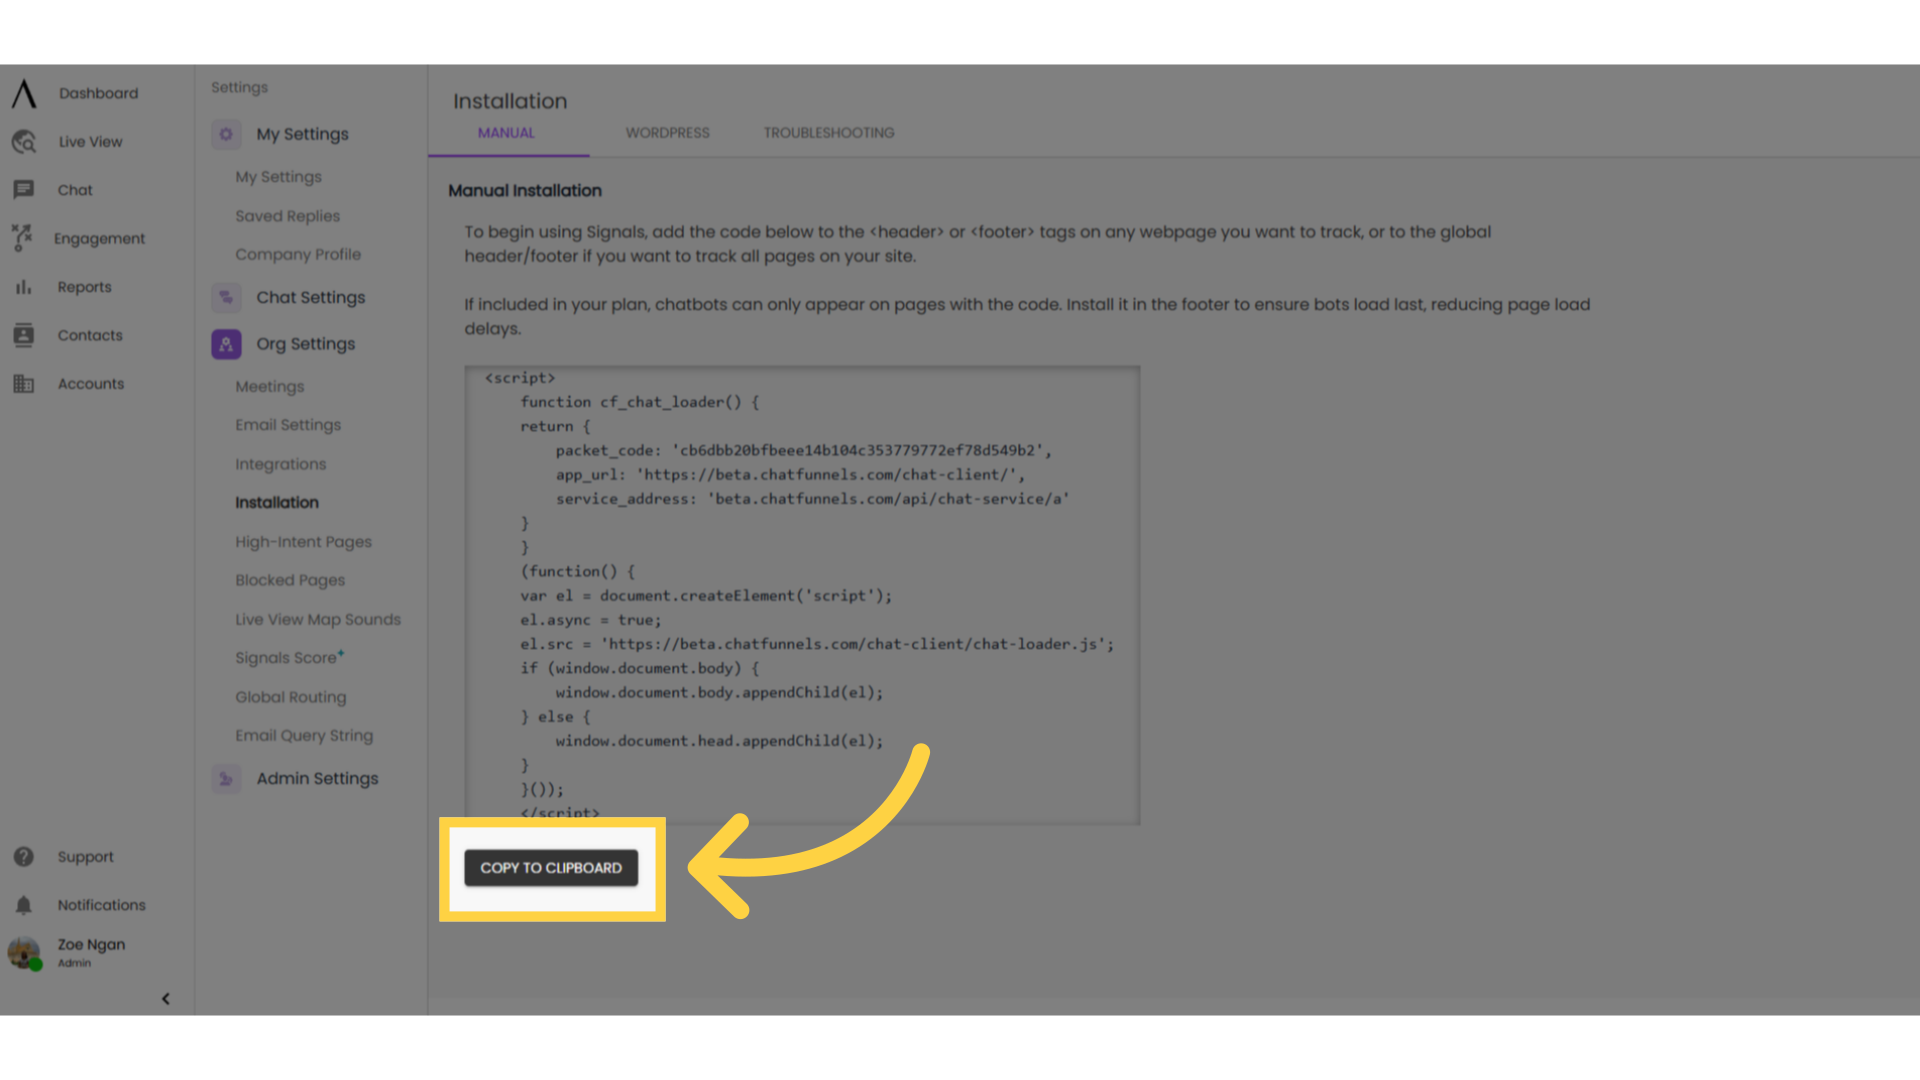
5. Copy Signals script
Copy the Signals script from your Signals account. To do so, log in to your Signals account.
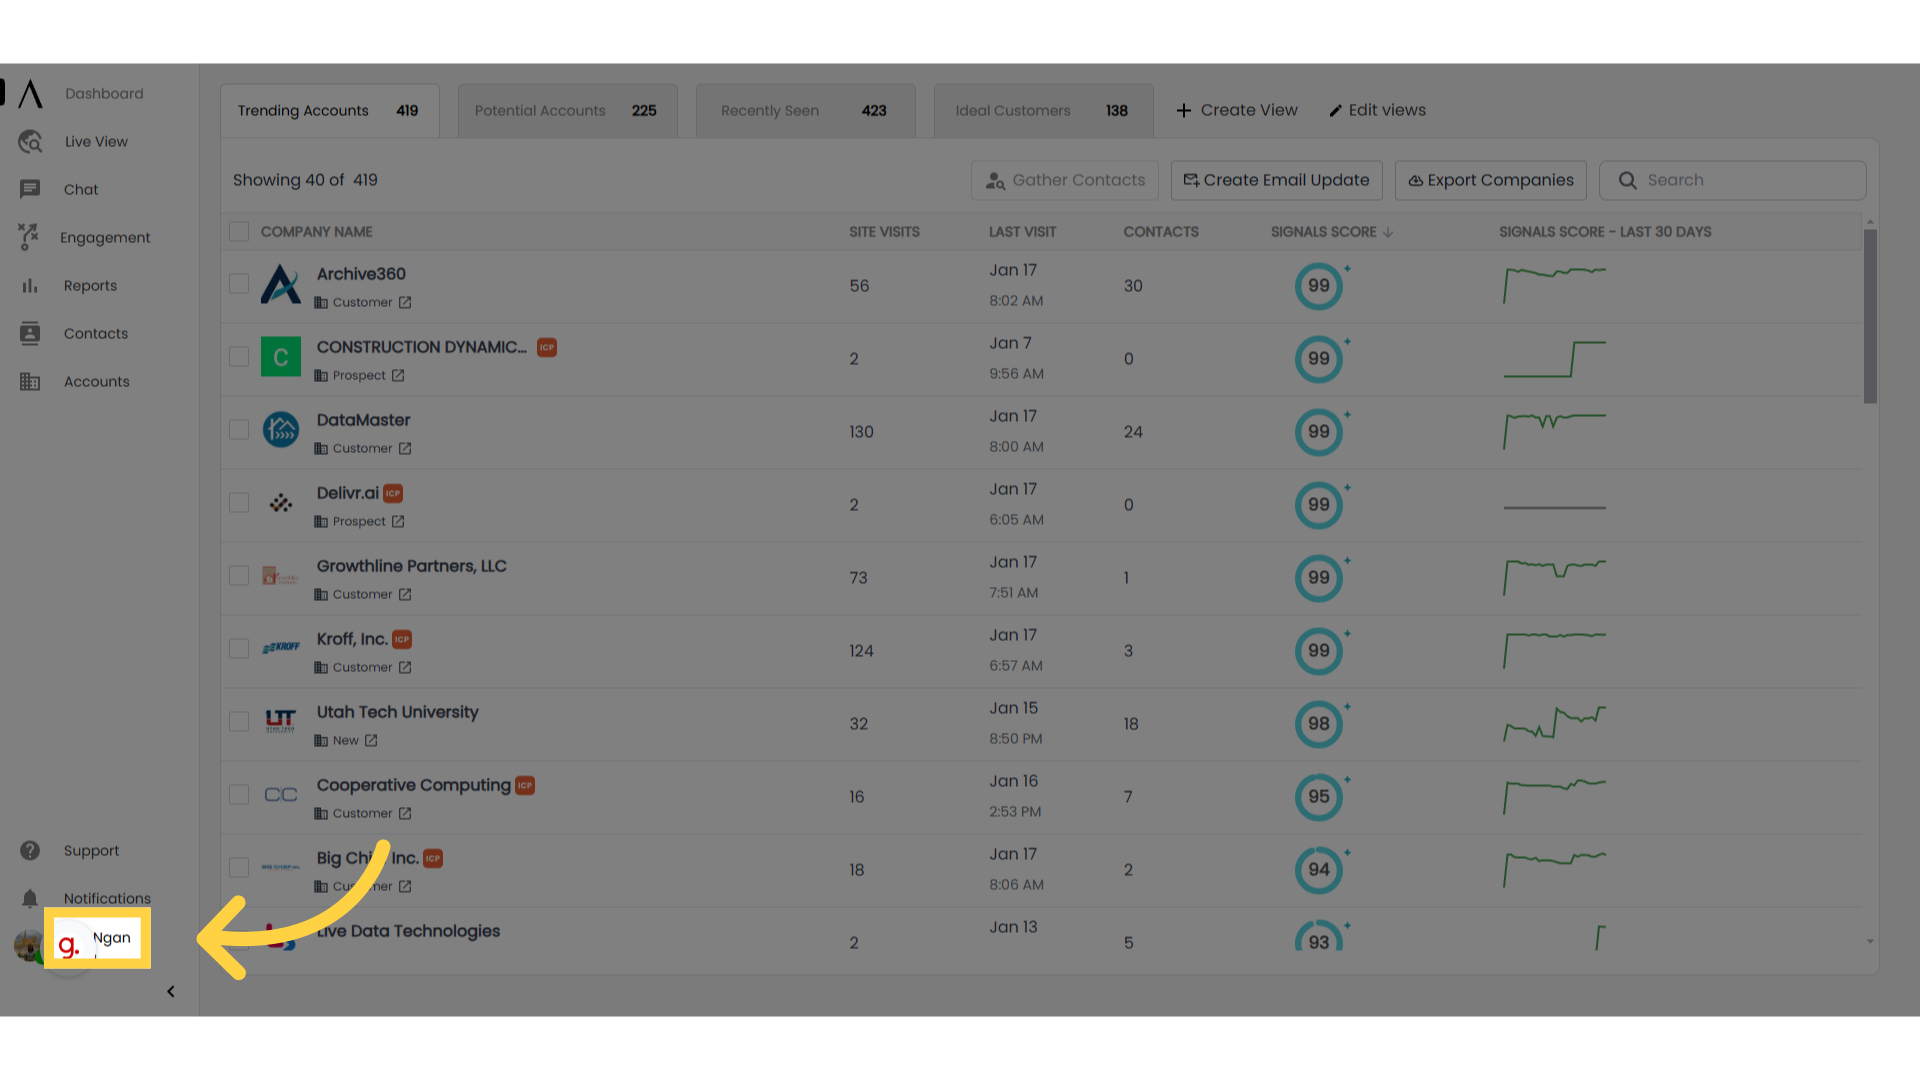
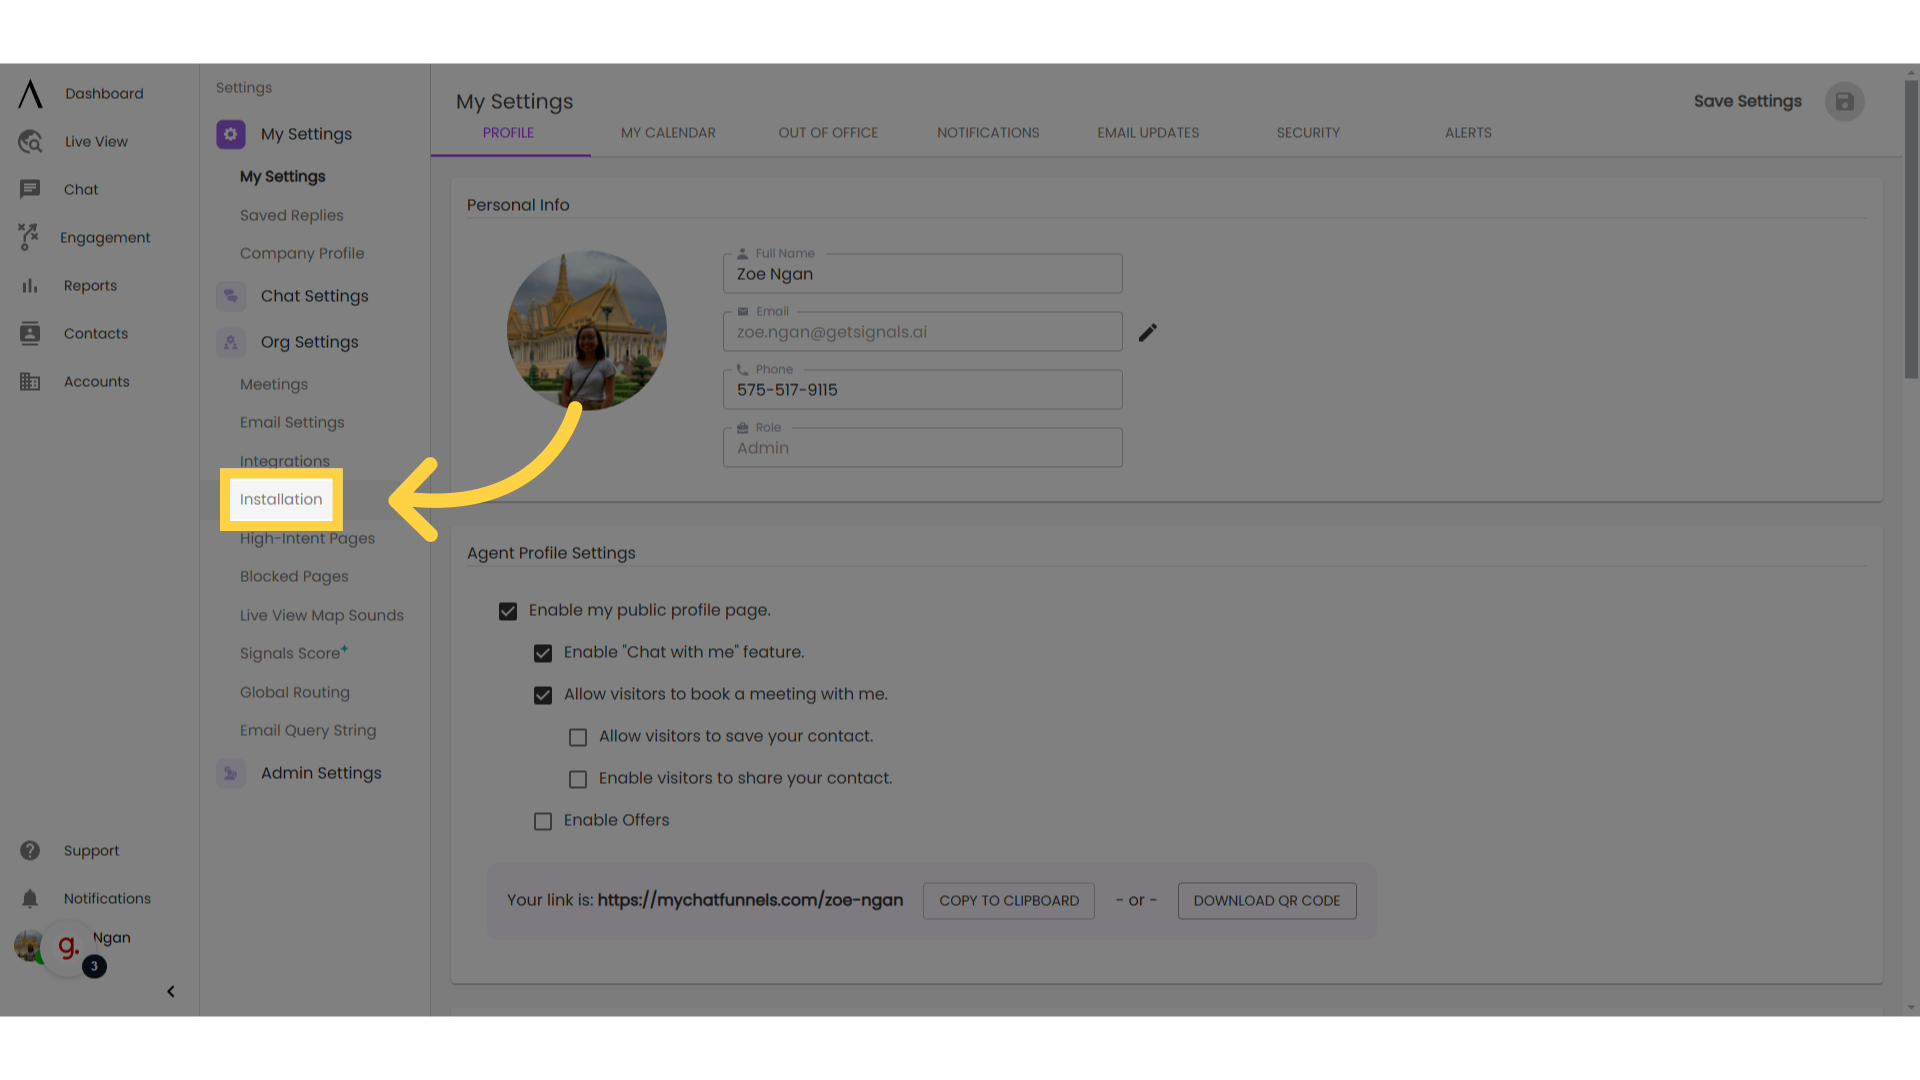
6. Click on your Profile
Click on your name in the bottom-left corner.
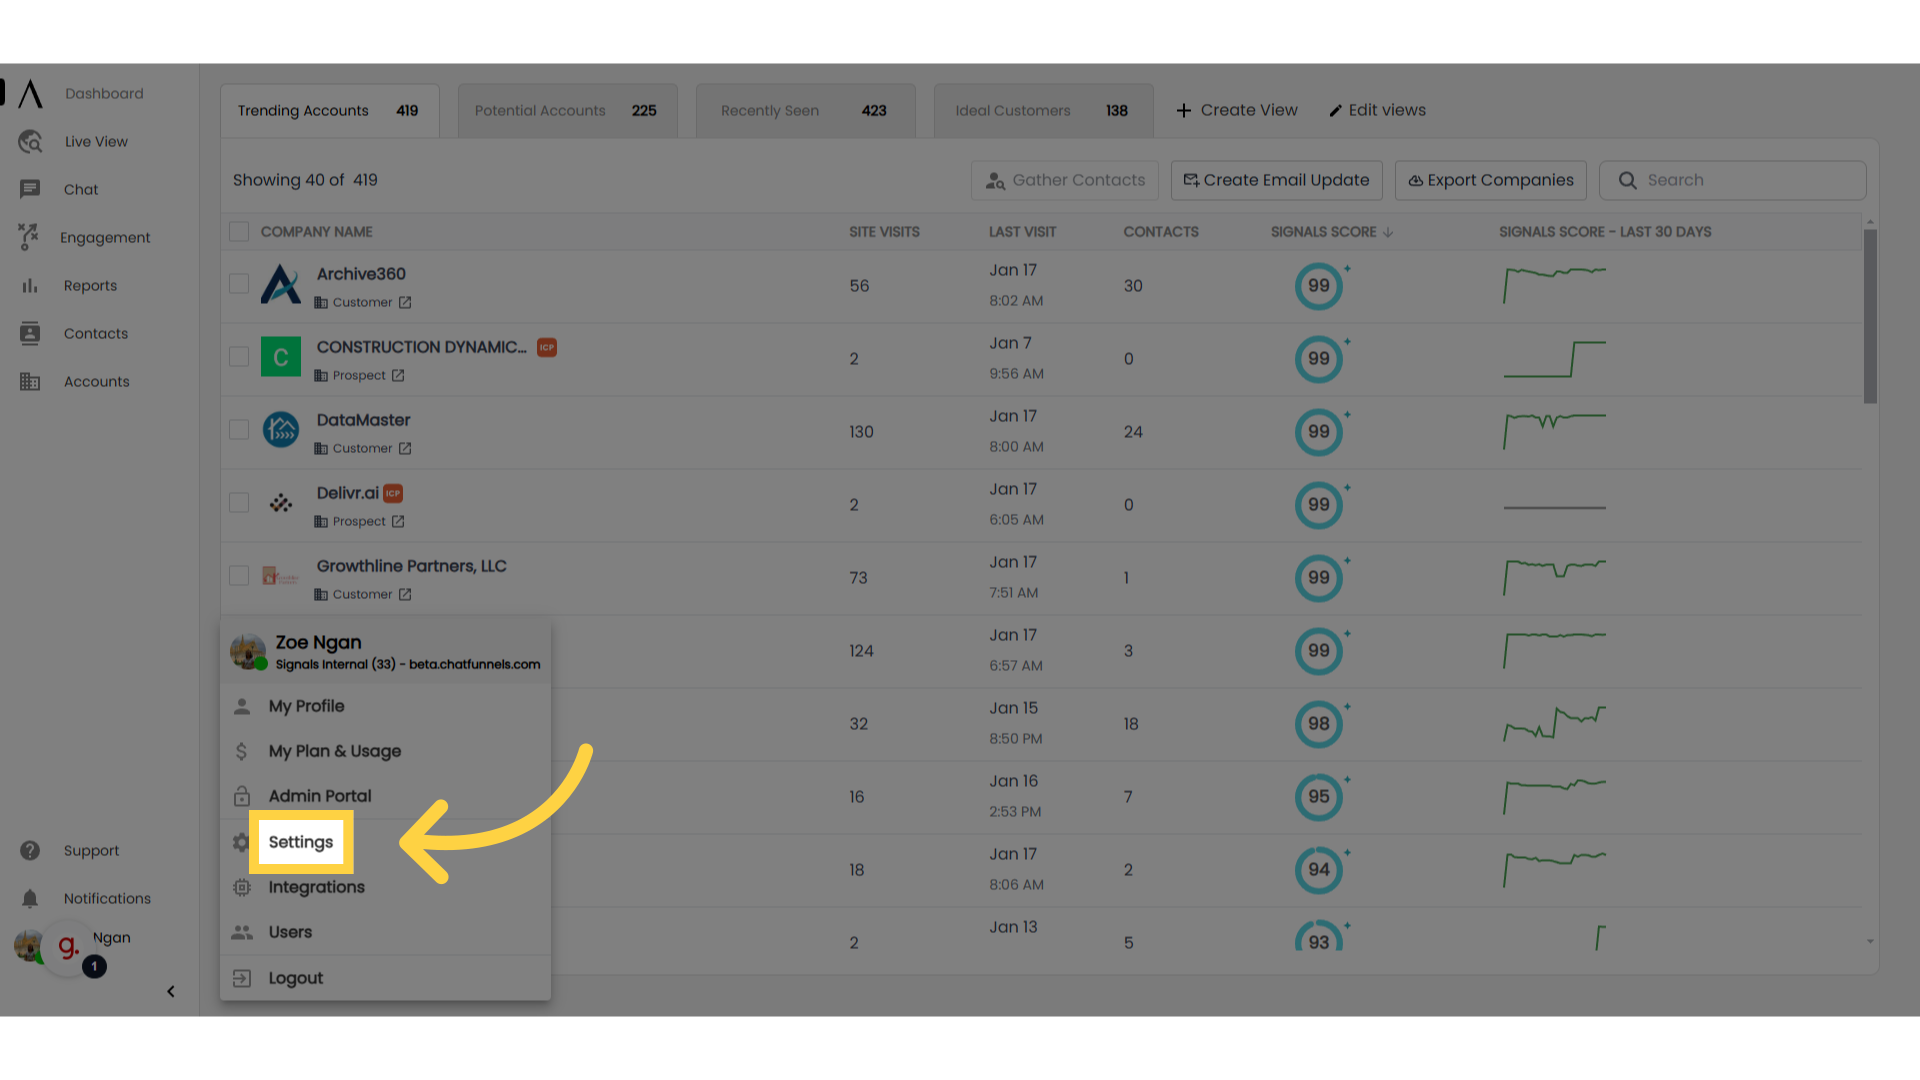
7. Navigate to "Settings"
Navigate to "Settings" in the second, left sidebar.
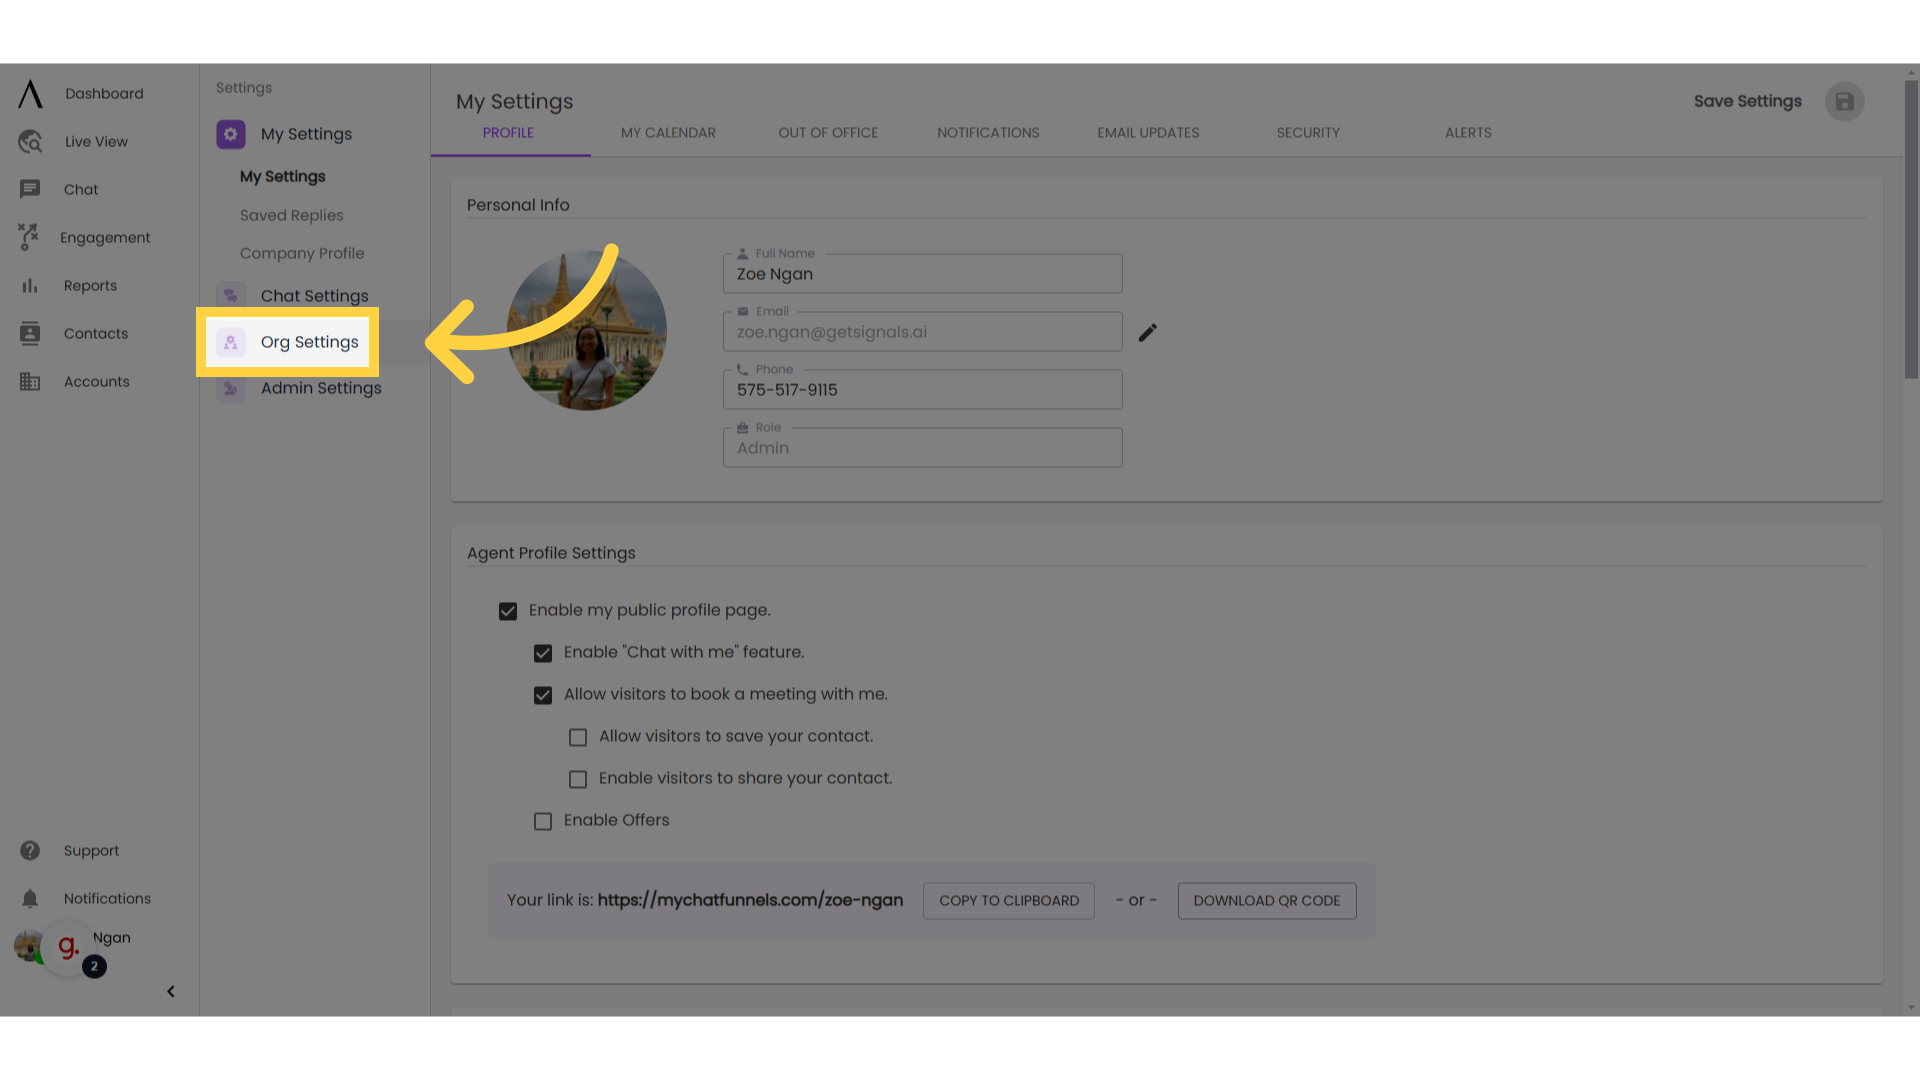
8. Click on "Org Settings"
Select "Org Settings" on the second sidebar.
9. Select "Installation"
Click on "Installation" below "Org Settings."
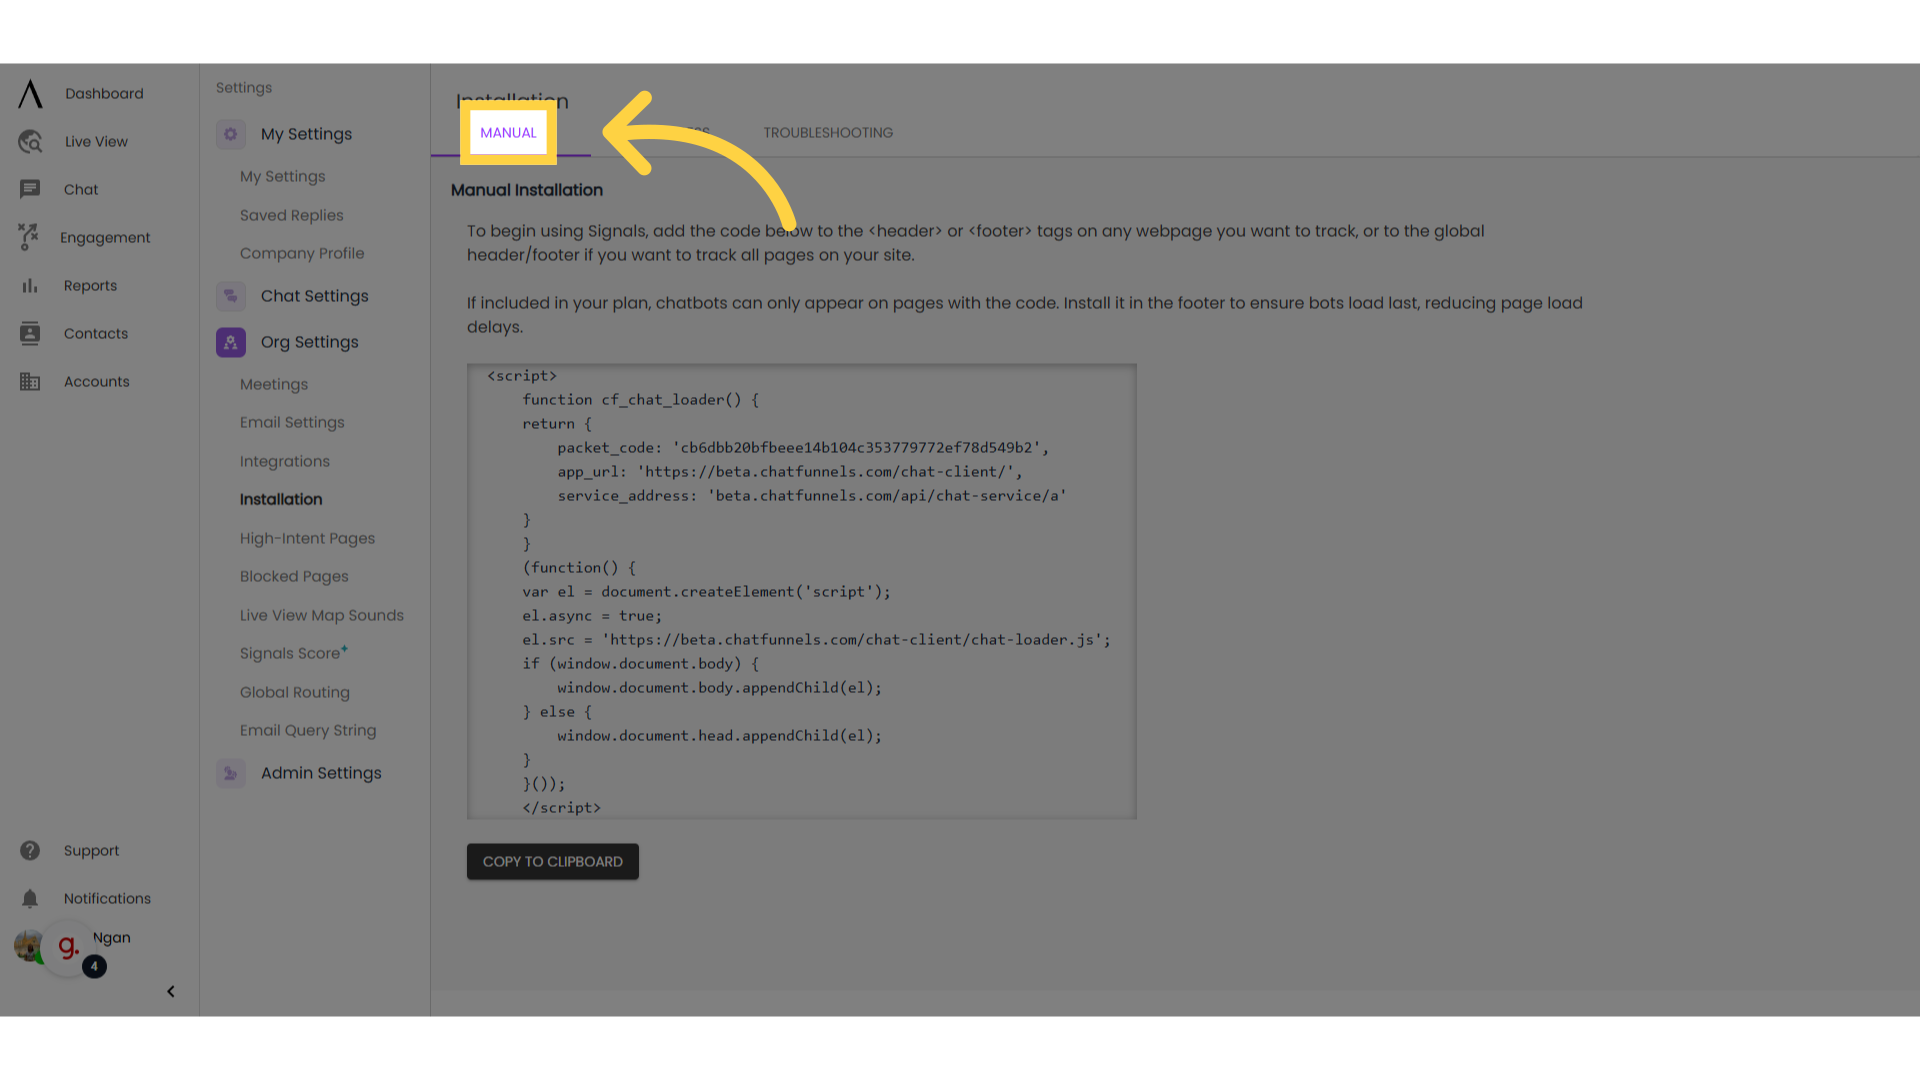
10. Click "Manual"
Access the "Manual" tab near the top of your screen.
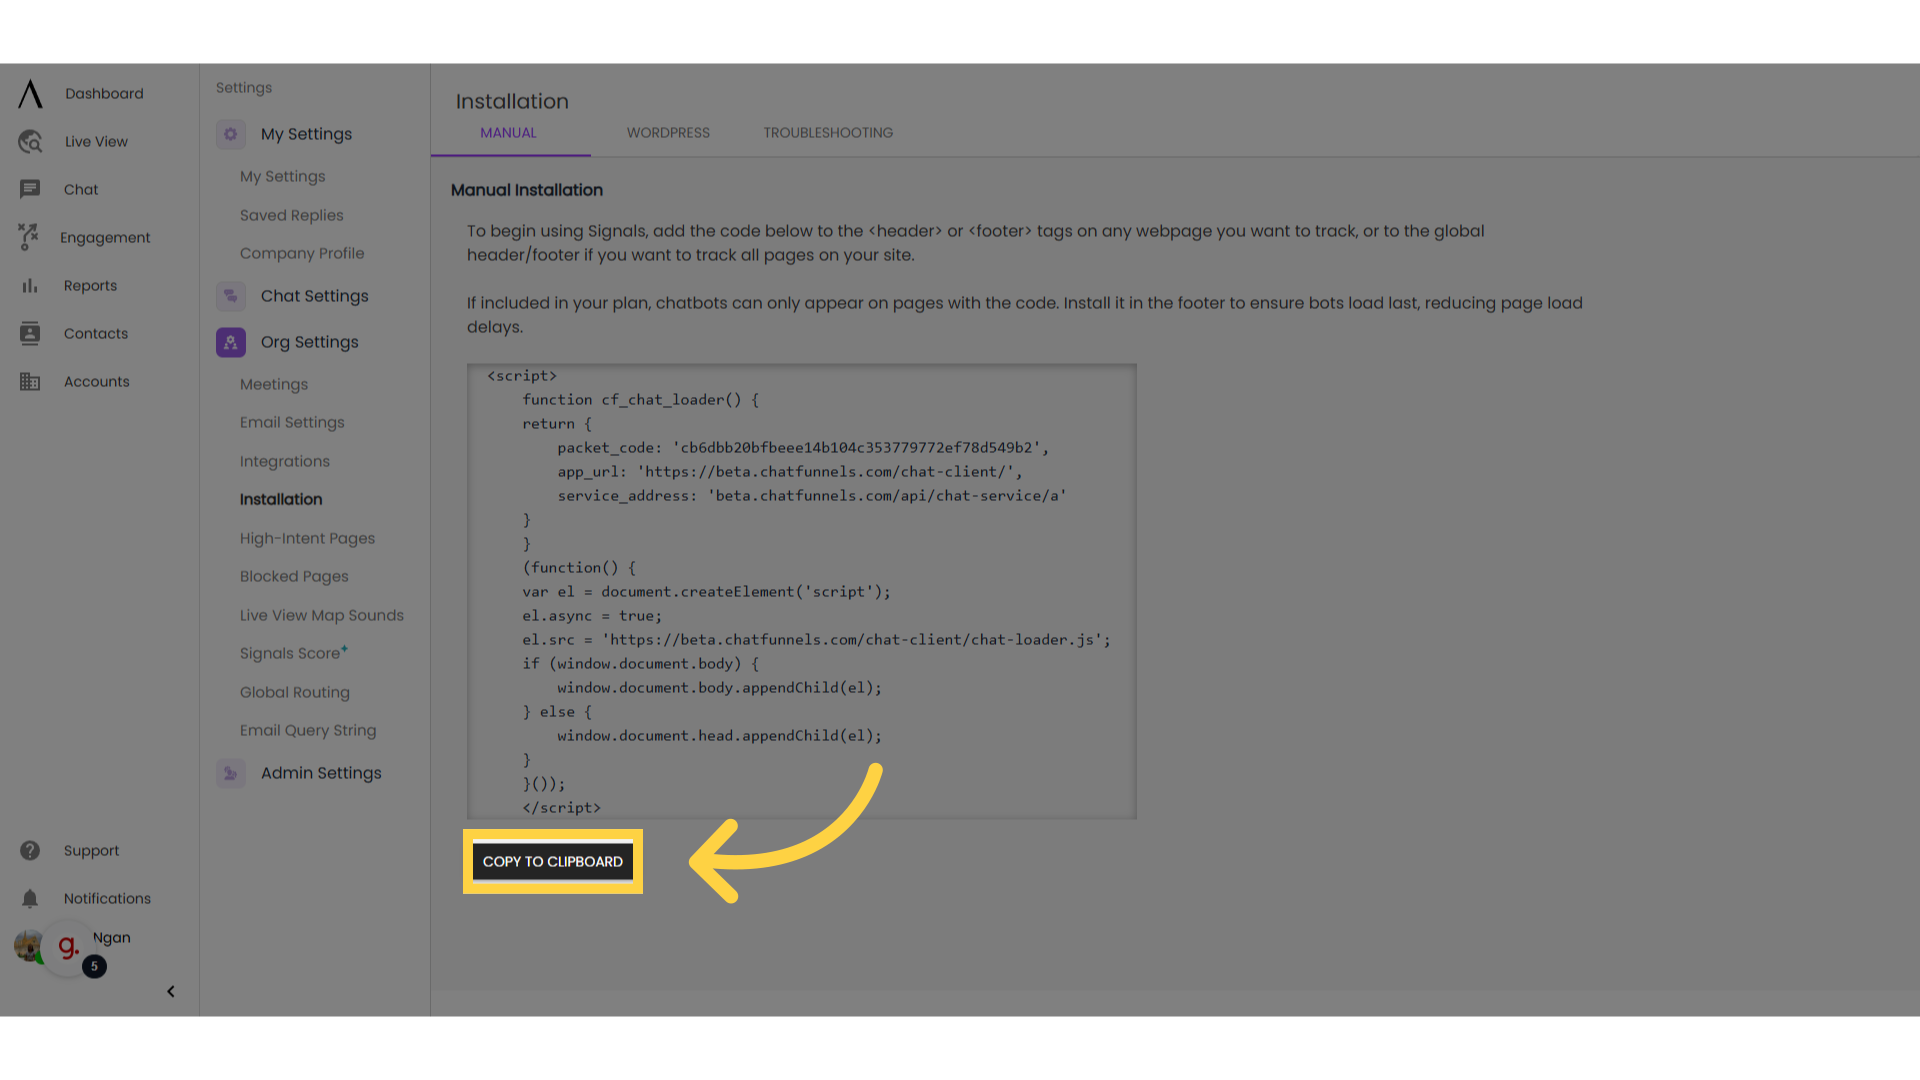
11. Click "Copy to Clipboard"
Copy the installation code by clicking "Copy to Clipboard" near the bottom of the page.
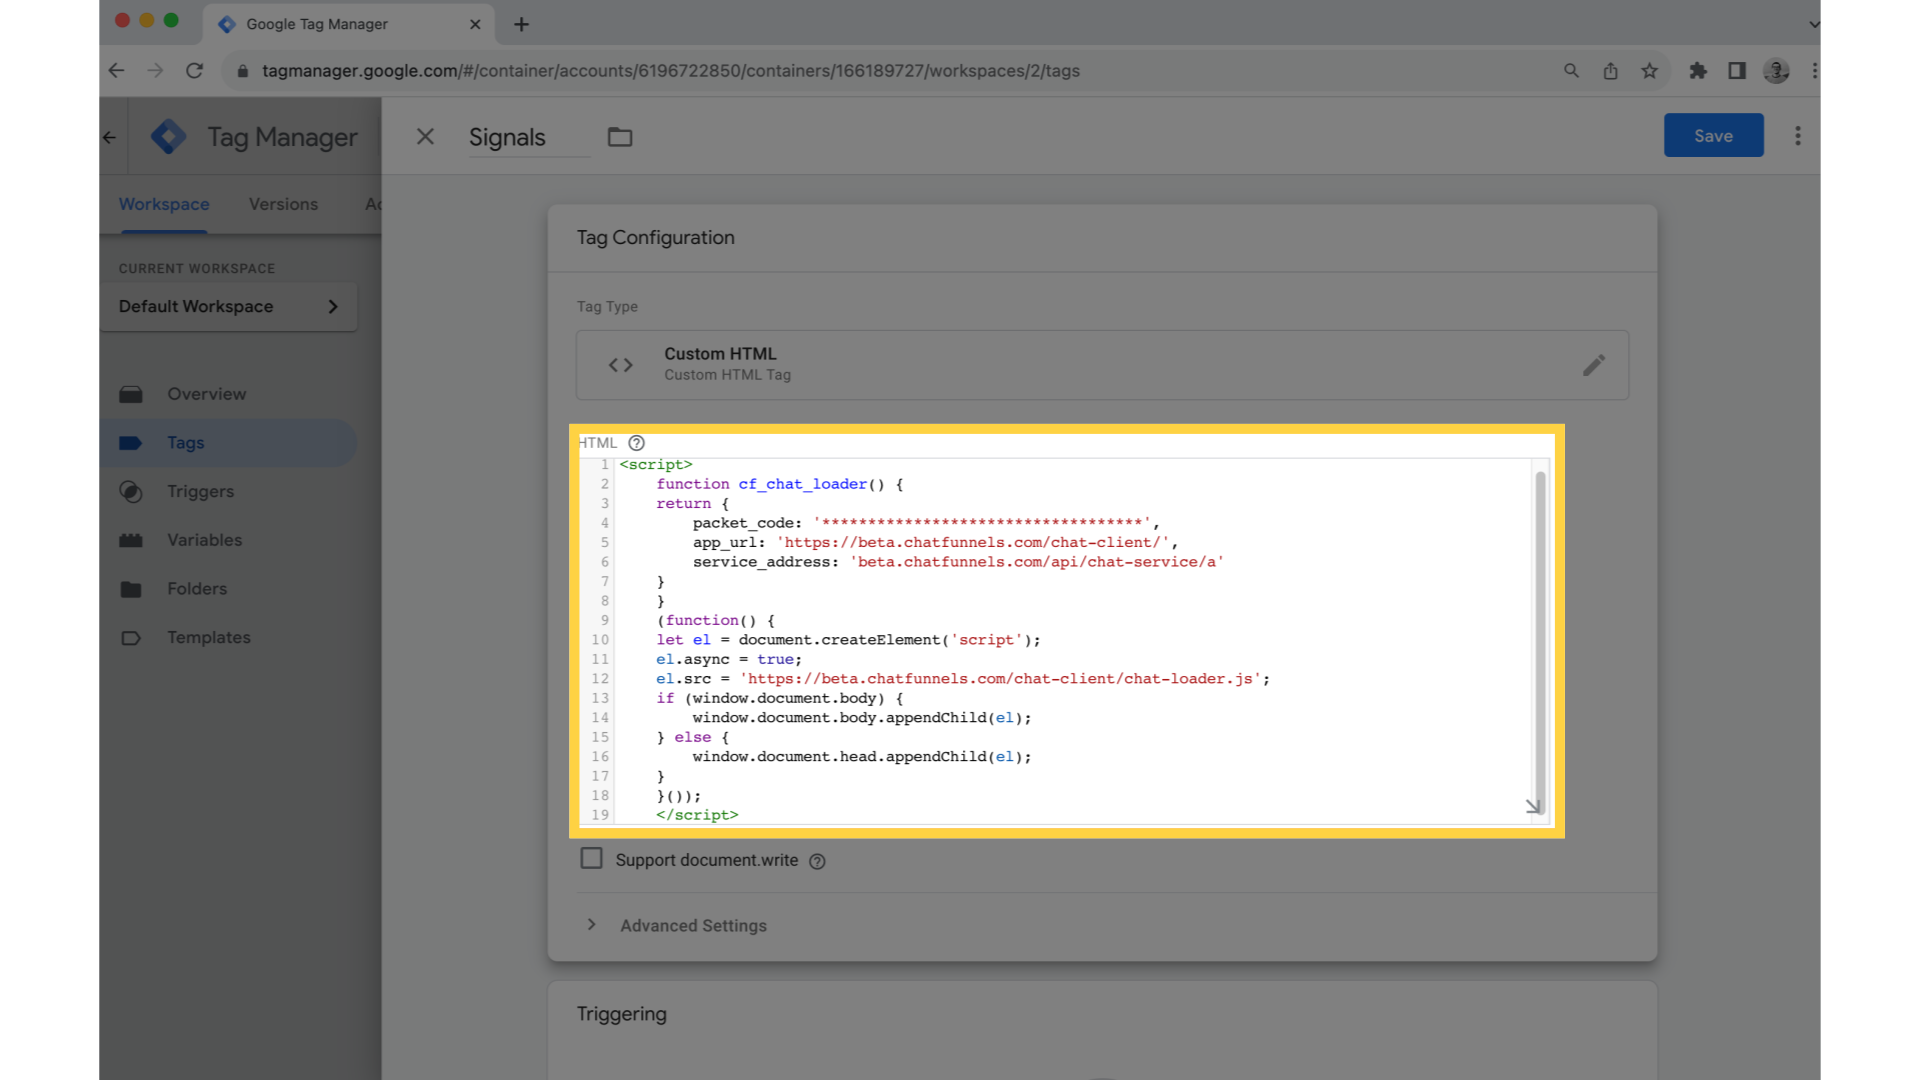
12. Paste the script into the HTML field
Paste the script into the HTML field in Google Tag Manager, and click "Save" in the top right.
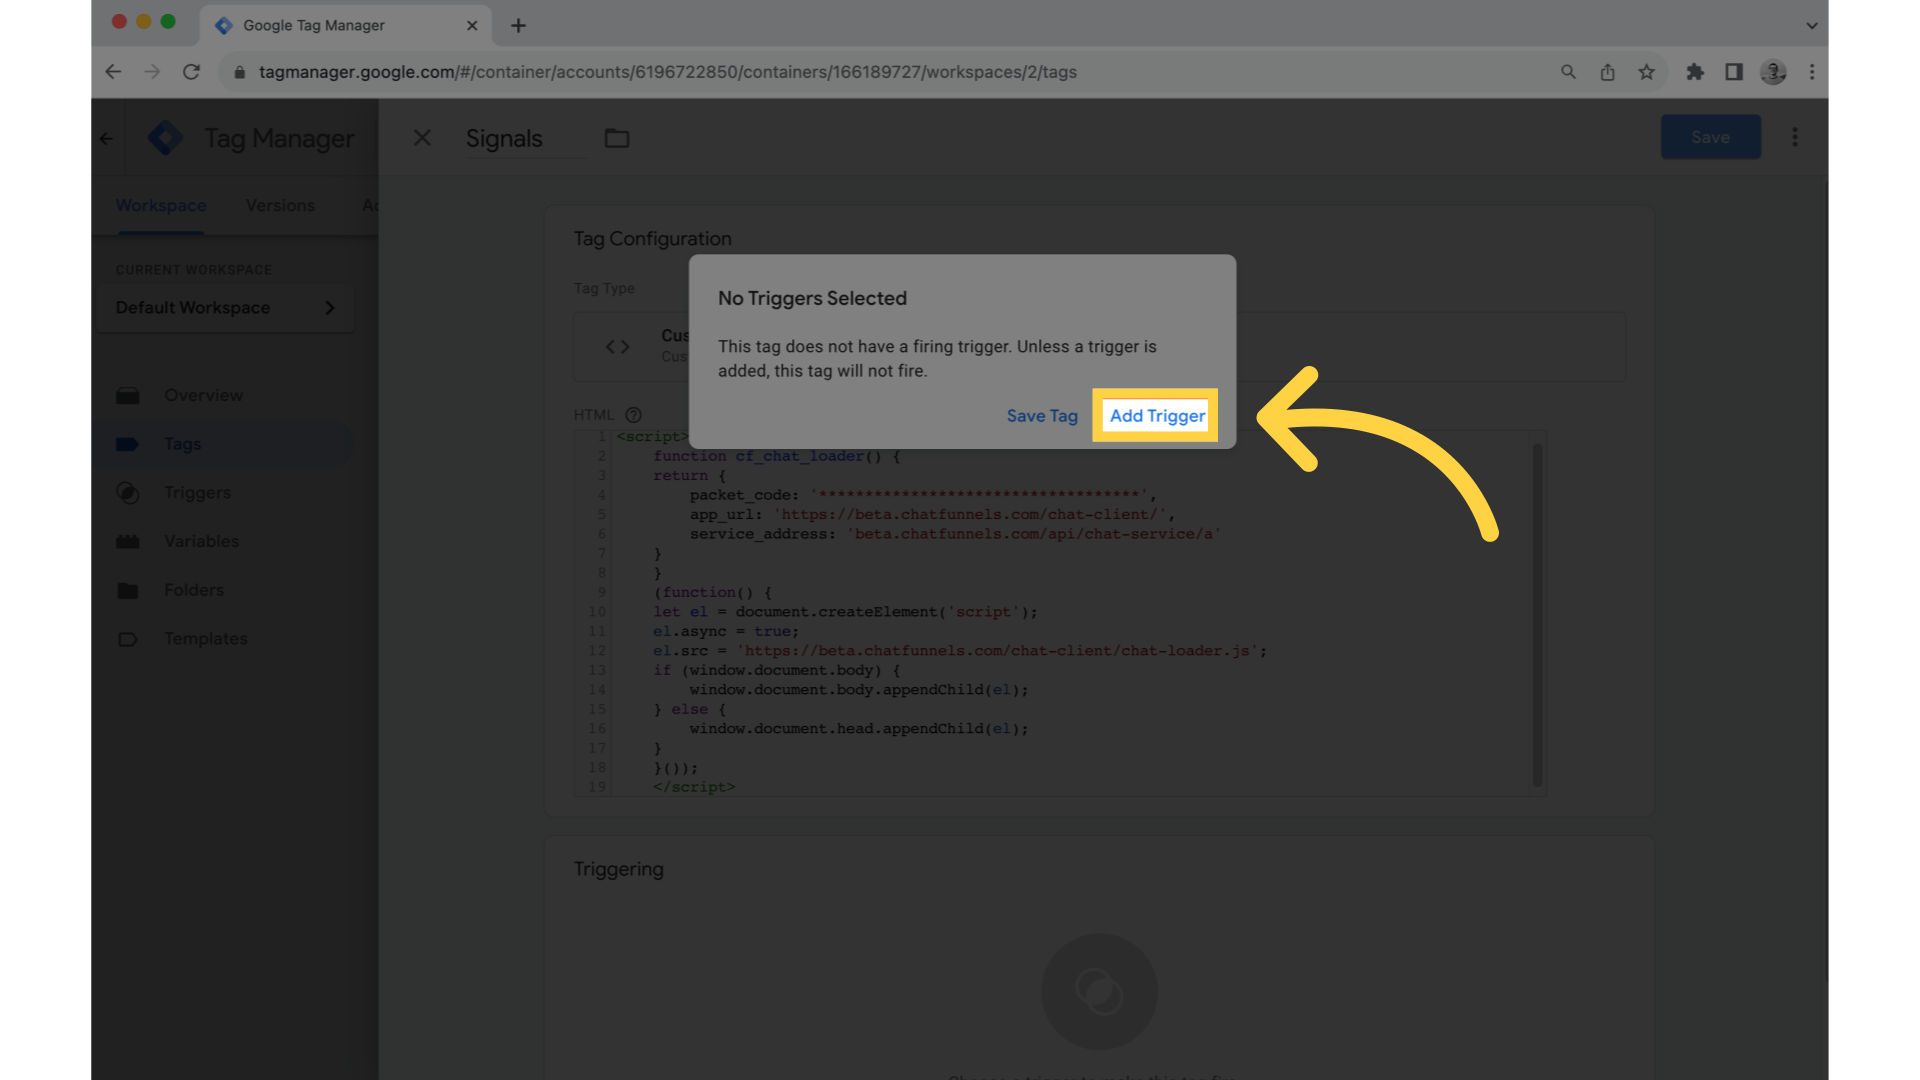
13. Click "Add Trigger"
When prompted to add a trigger, click "Add Trigger."
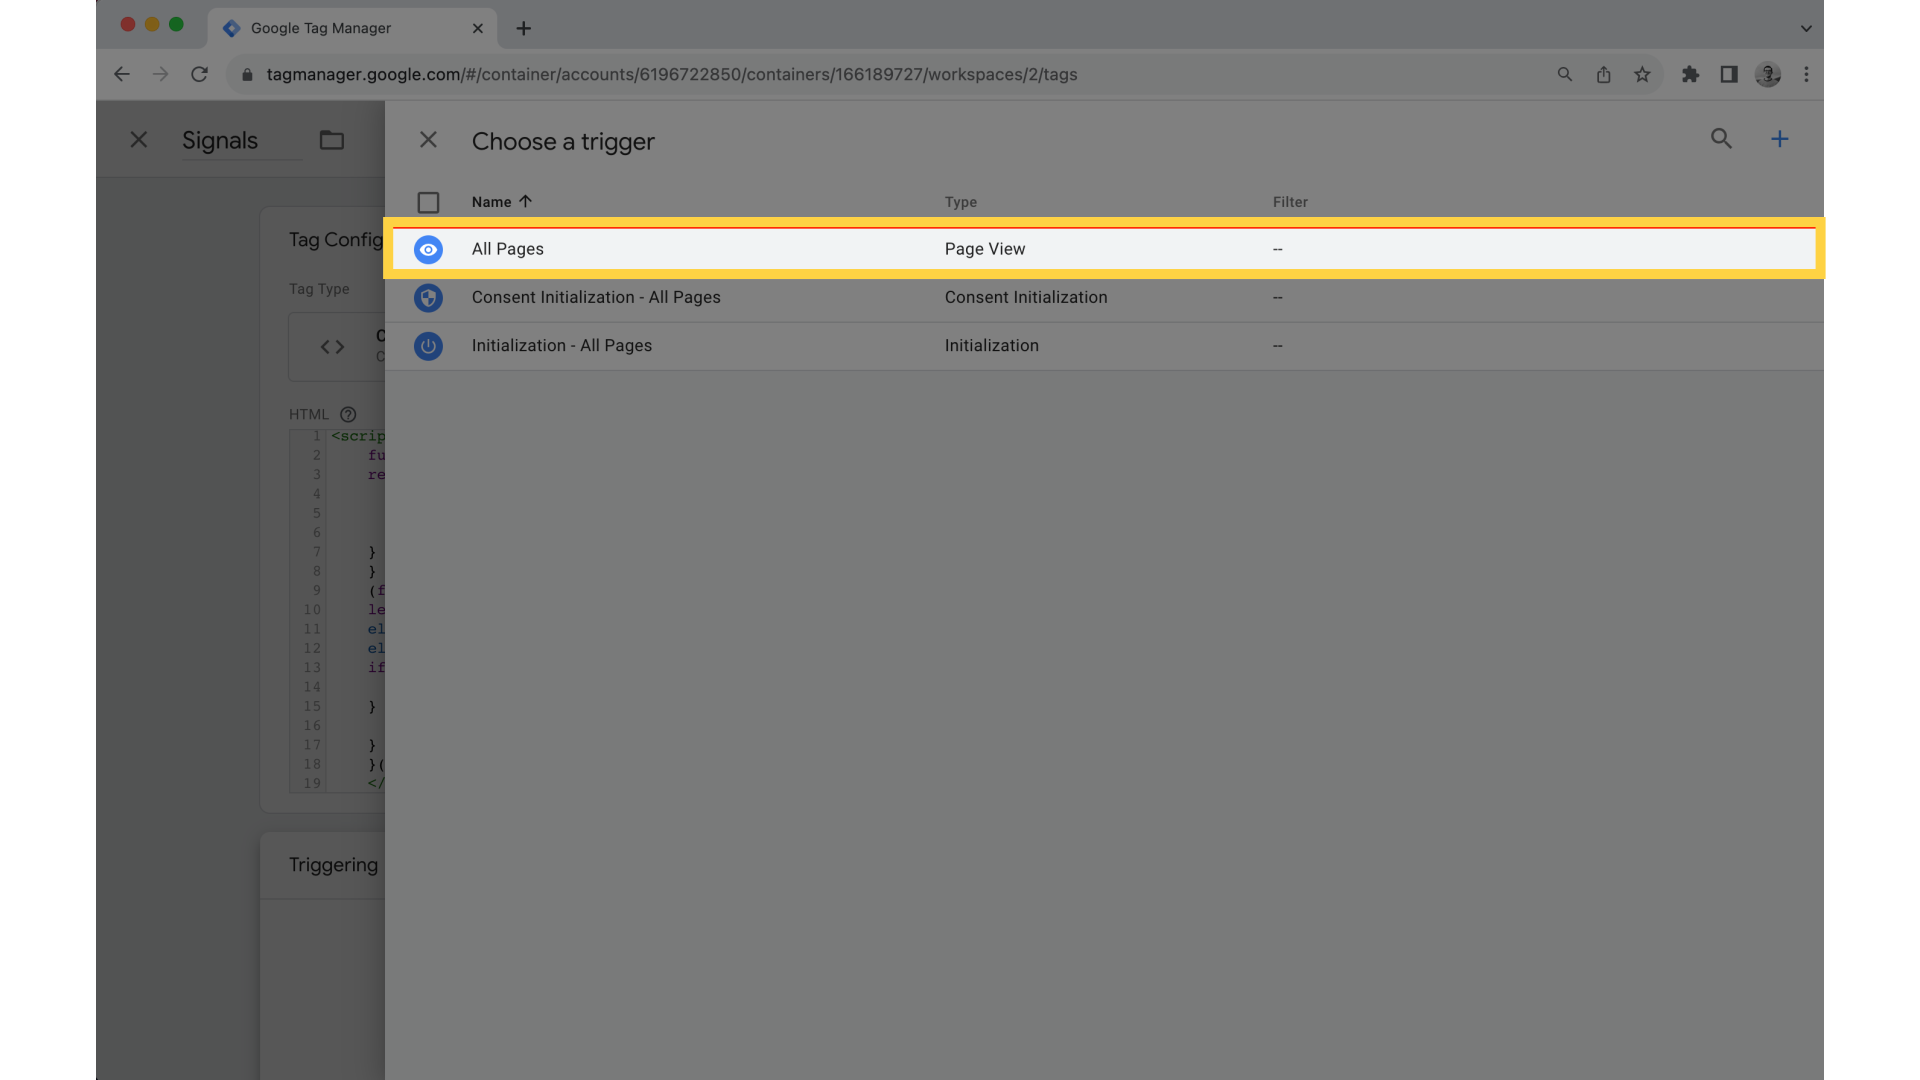
14. Select "All Pages"
Select "All Pages," then hit "Save."
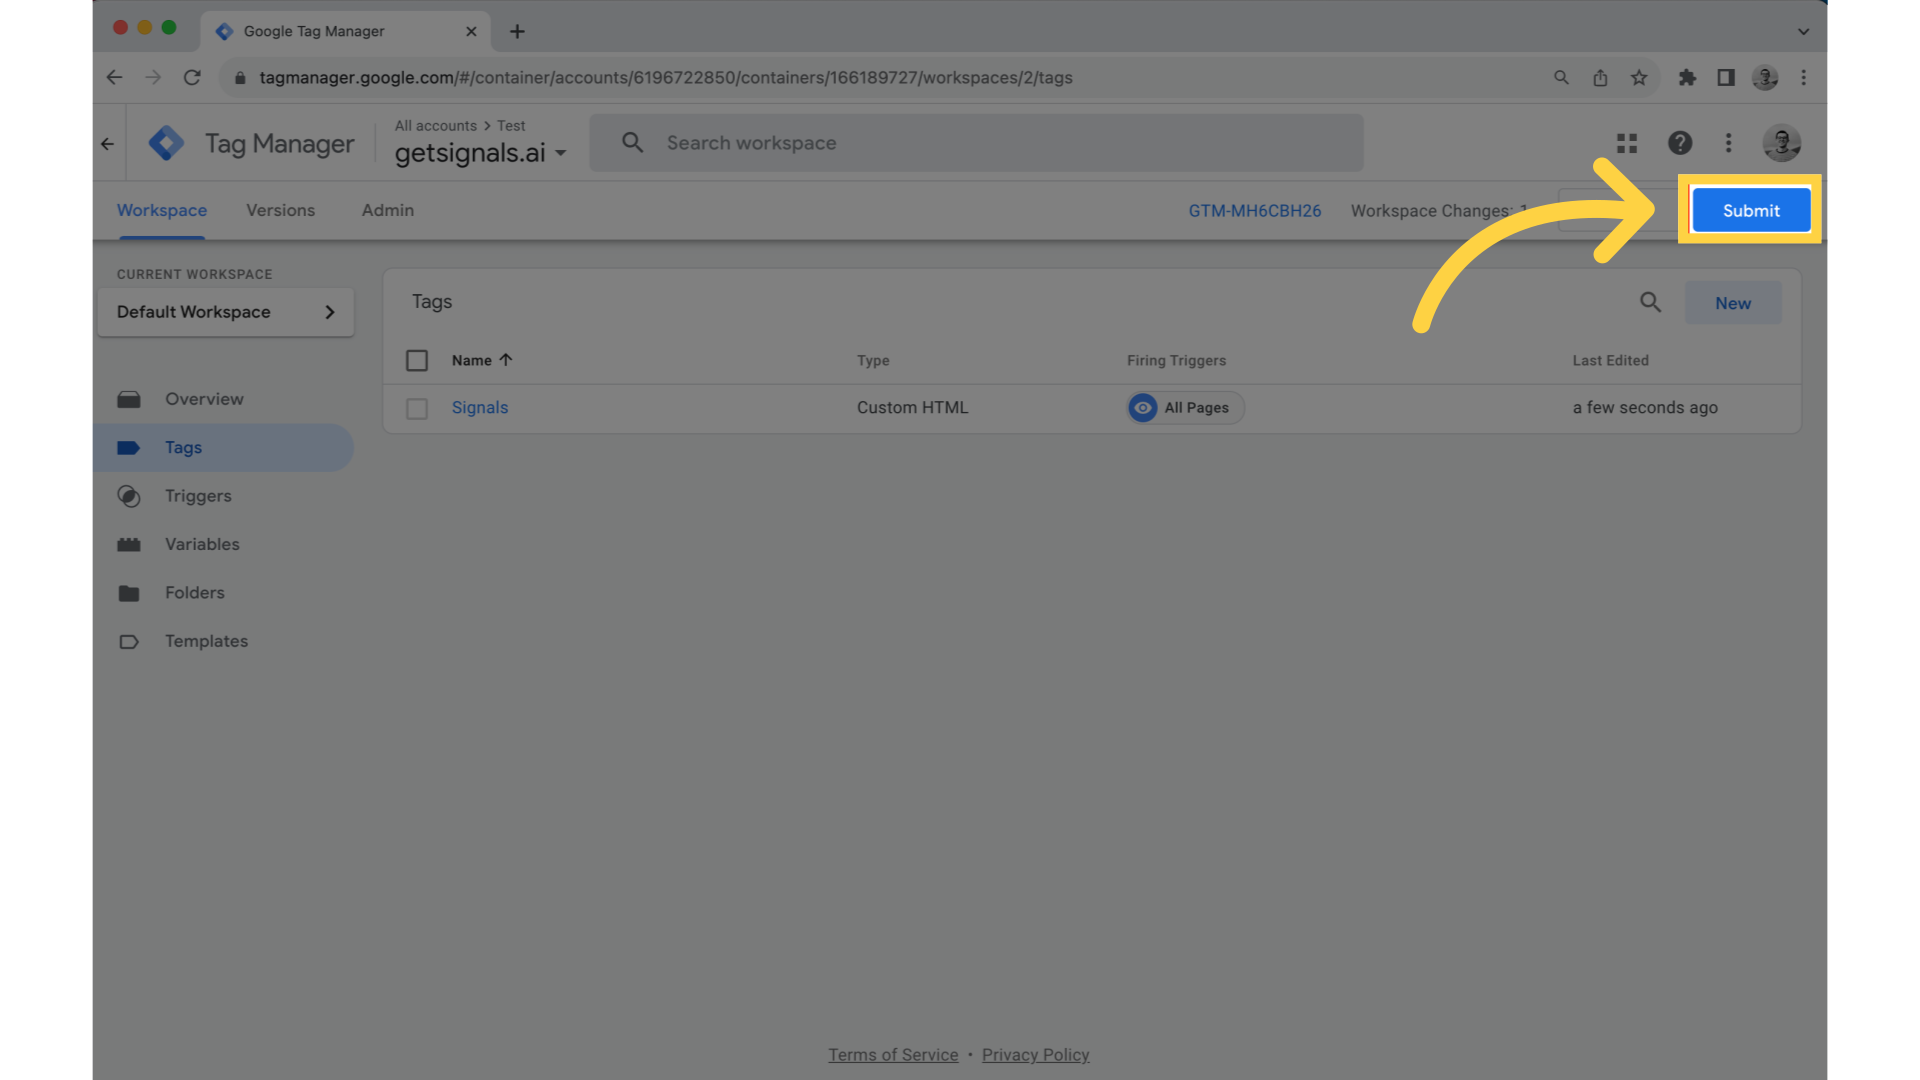
15. Click "Submit"
Click "Submit" in the top right.
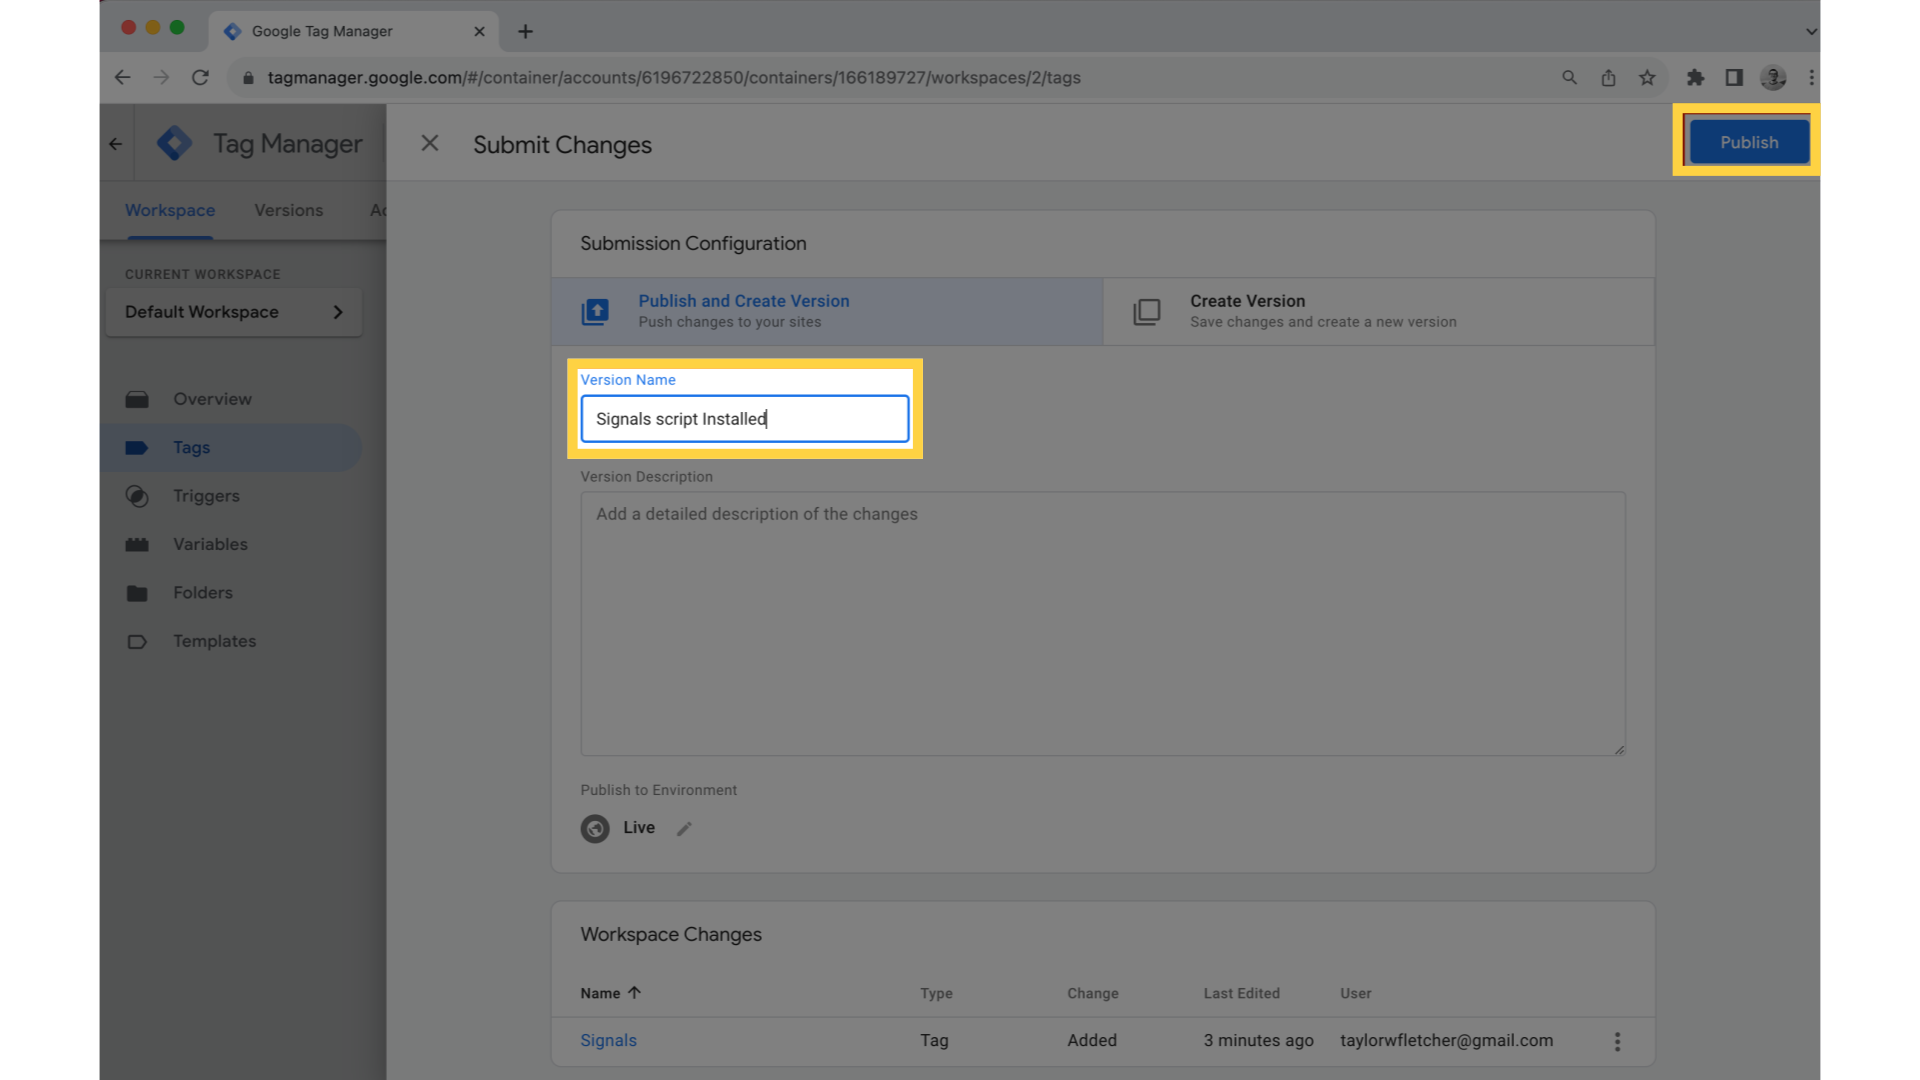
16. Name your version, then hit "Publish"
Name your version something like "Signals Script Installed" and click "Publish."