Salesforce
- CRM Integration: Salesforce
- Go to app.getsignals.ai
- 1. Introduction
- 2. Click on your Profile
- 3. Navigate to "Integrations"
- 4. Select "Salesforce"
- 5. Click on the drop-down under "Criteria"
- 6. Dropdown Options
- 7. Click "Campaign Name"
- 8. Select a delay time
- 9. Configure your "Event Settings"
- 10. Salesforce Task
- 11. Establish "Lead Owner Rules"
- 12. Click "Leads"
- 13. Configure "Field Mapping" sections
- 14. Click "Add Field"
- 15. Map your fields accordingly
- 16. Navigate to "Users"
- 17. Click "Add User"
- 18. Navigate to "Ownership"
- 19. Click "Add Segment Rule"
- 20. Click "Add another field"
- 21. Create fallback rules
- 22. Turn on your Salesforce Integration
- 23. Click "Chat"
- 24. Find a chat you want to sync to Salesforce
- 25. Click on the Salesforce icon to sync
- 26. Click "Edit Cards" and pin "Contact Info"
CRM Integration: Salesforce
This guide will walk you through how to set up your Salesforce integration with Signals.
Go to app.getsignals.ai
1. Introduction
First, log in to your Signals account.
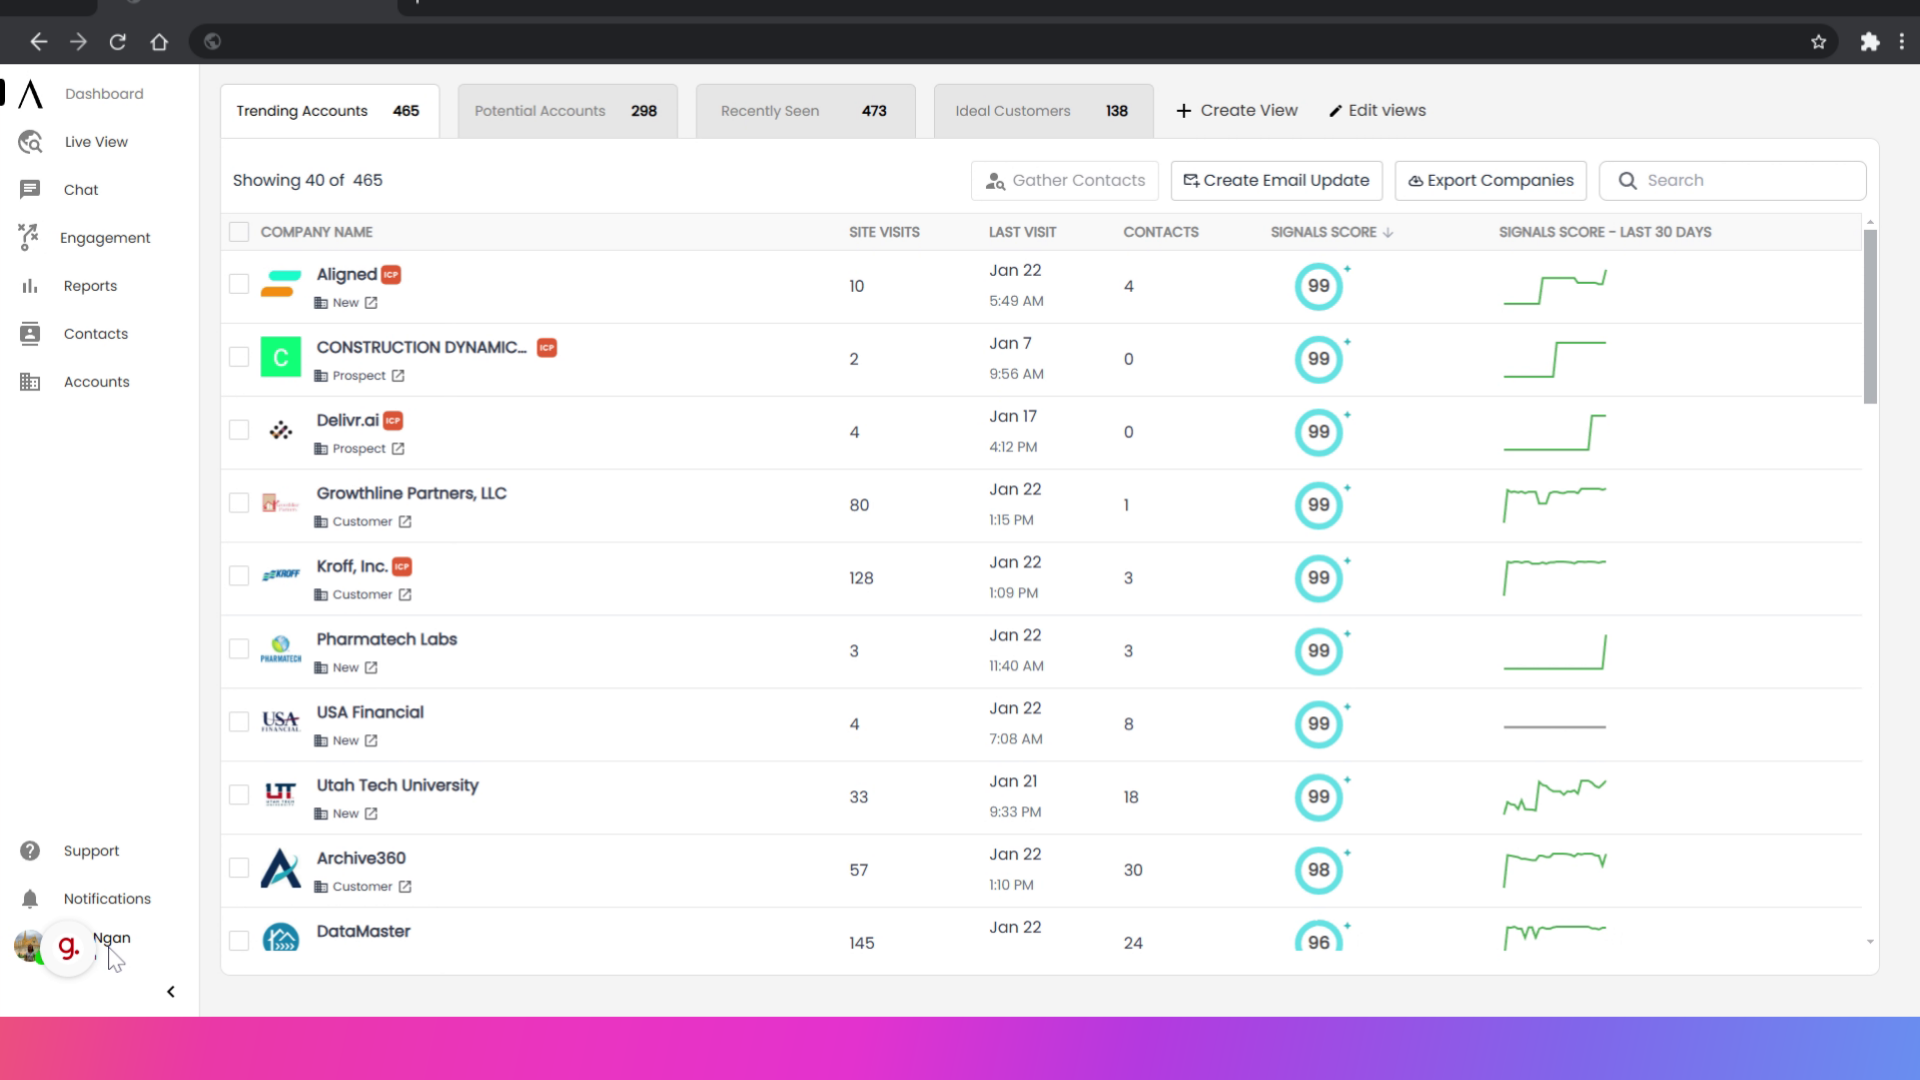
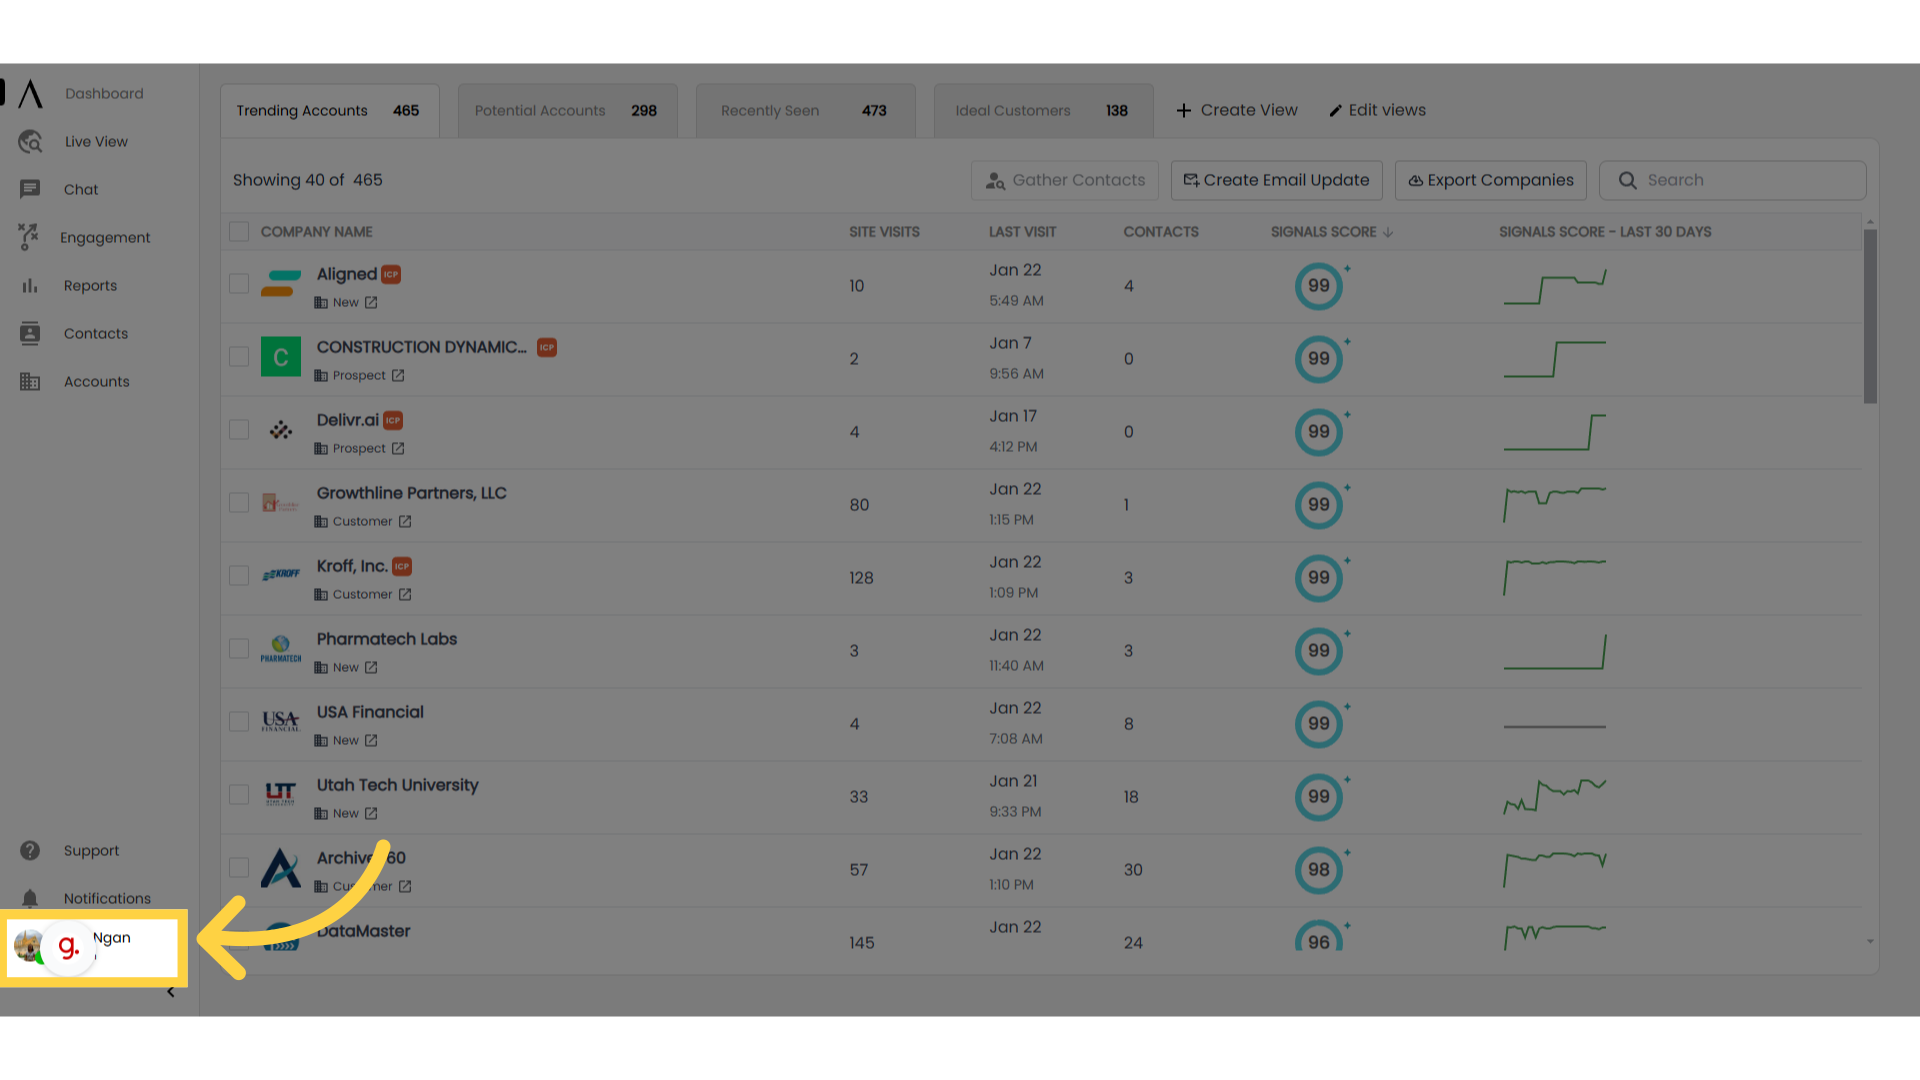
2. Click on your Profile
Click on your name in the bottom-left corner.
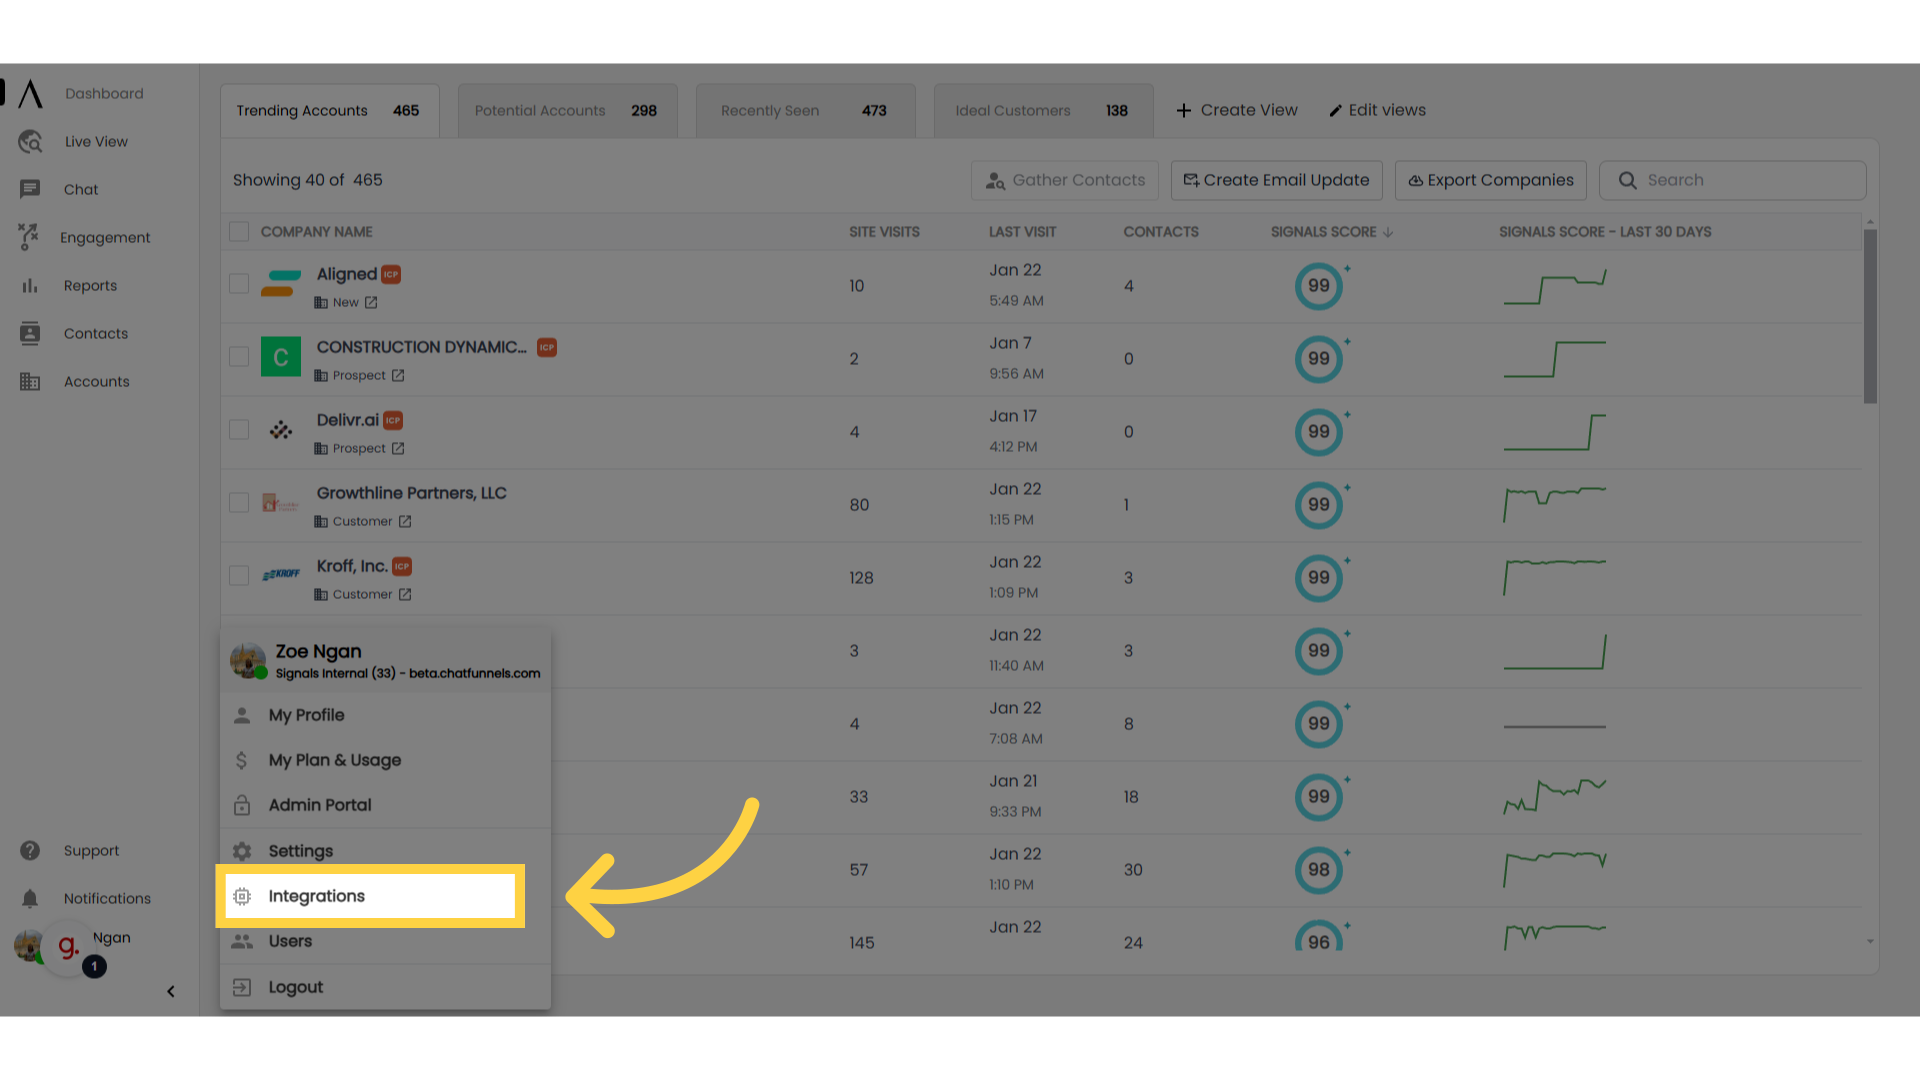
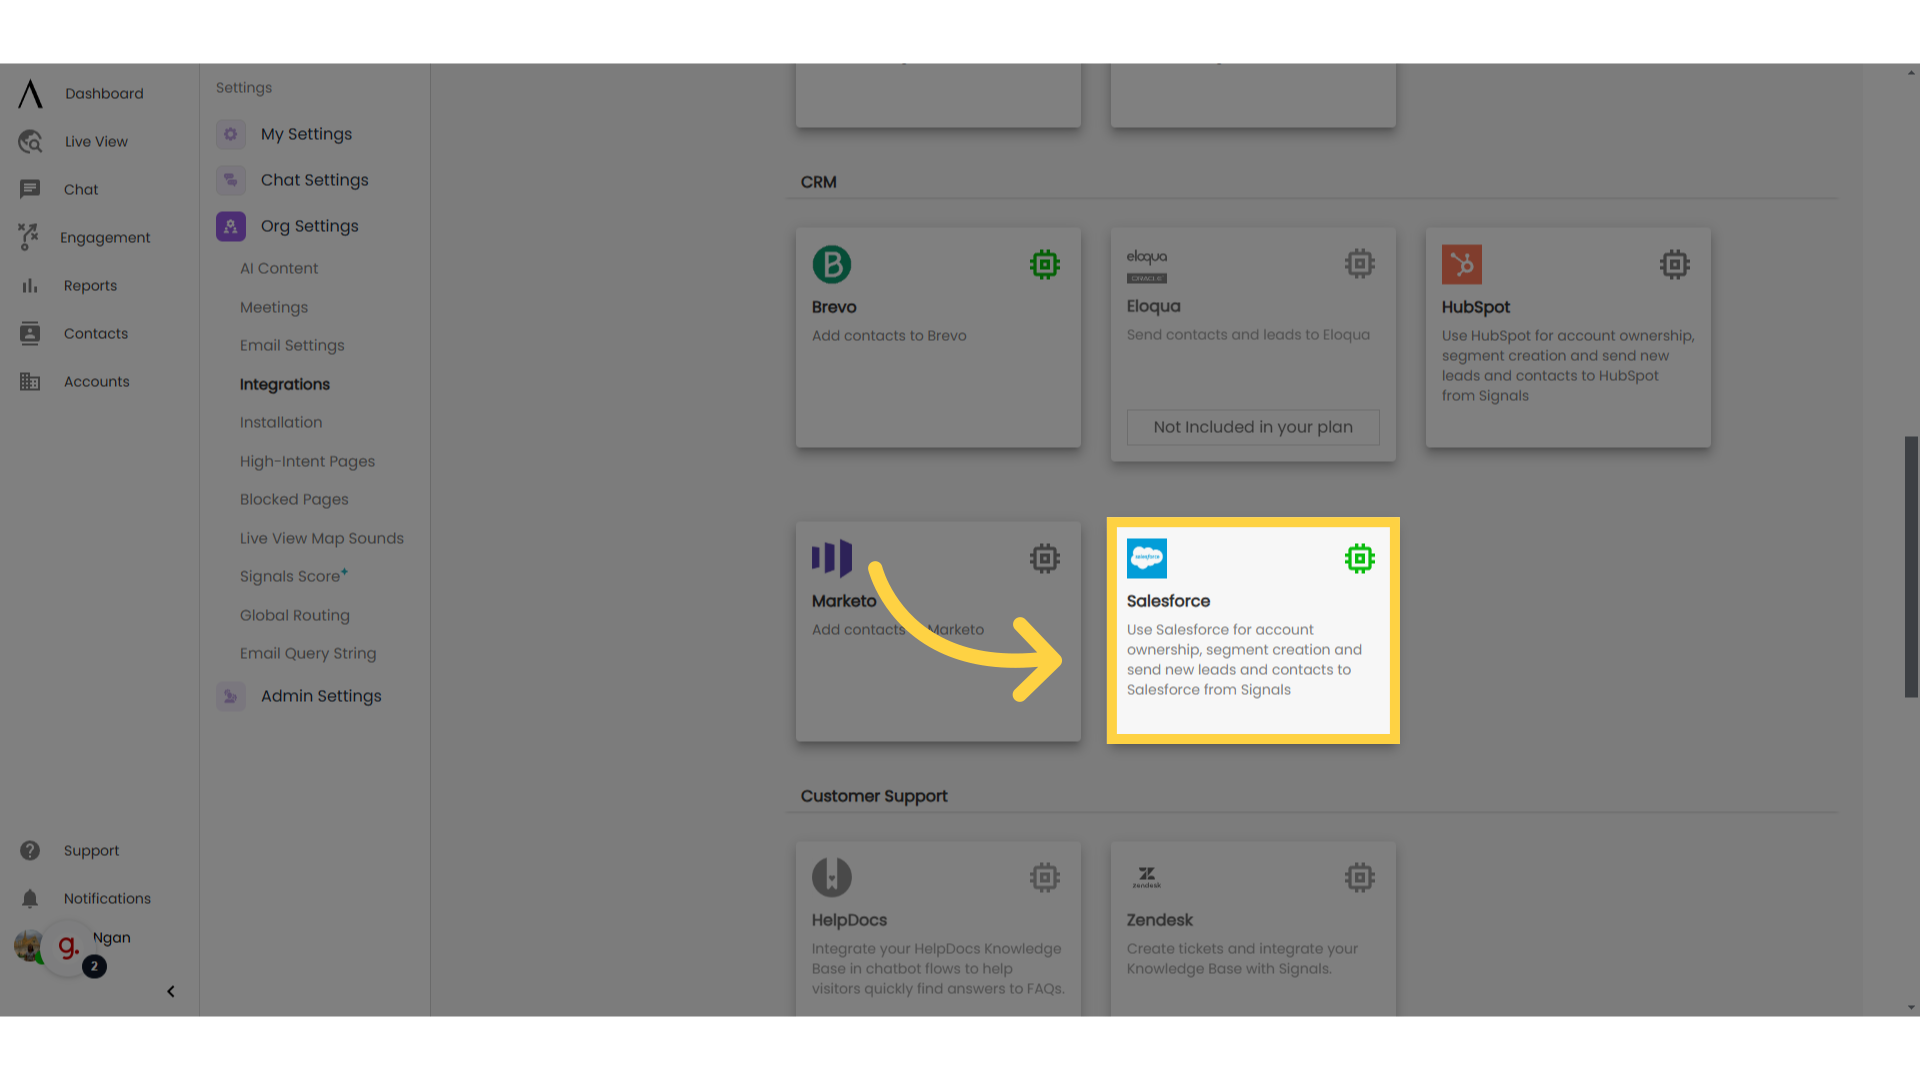
3. Navigate to "Integrations"
4. Select "Salesforce"
Scroll down to "CRM" and select "Salesforce."
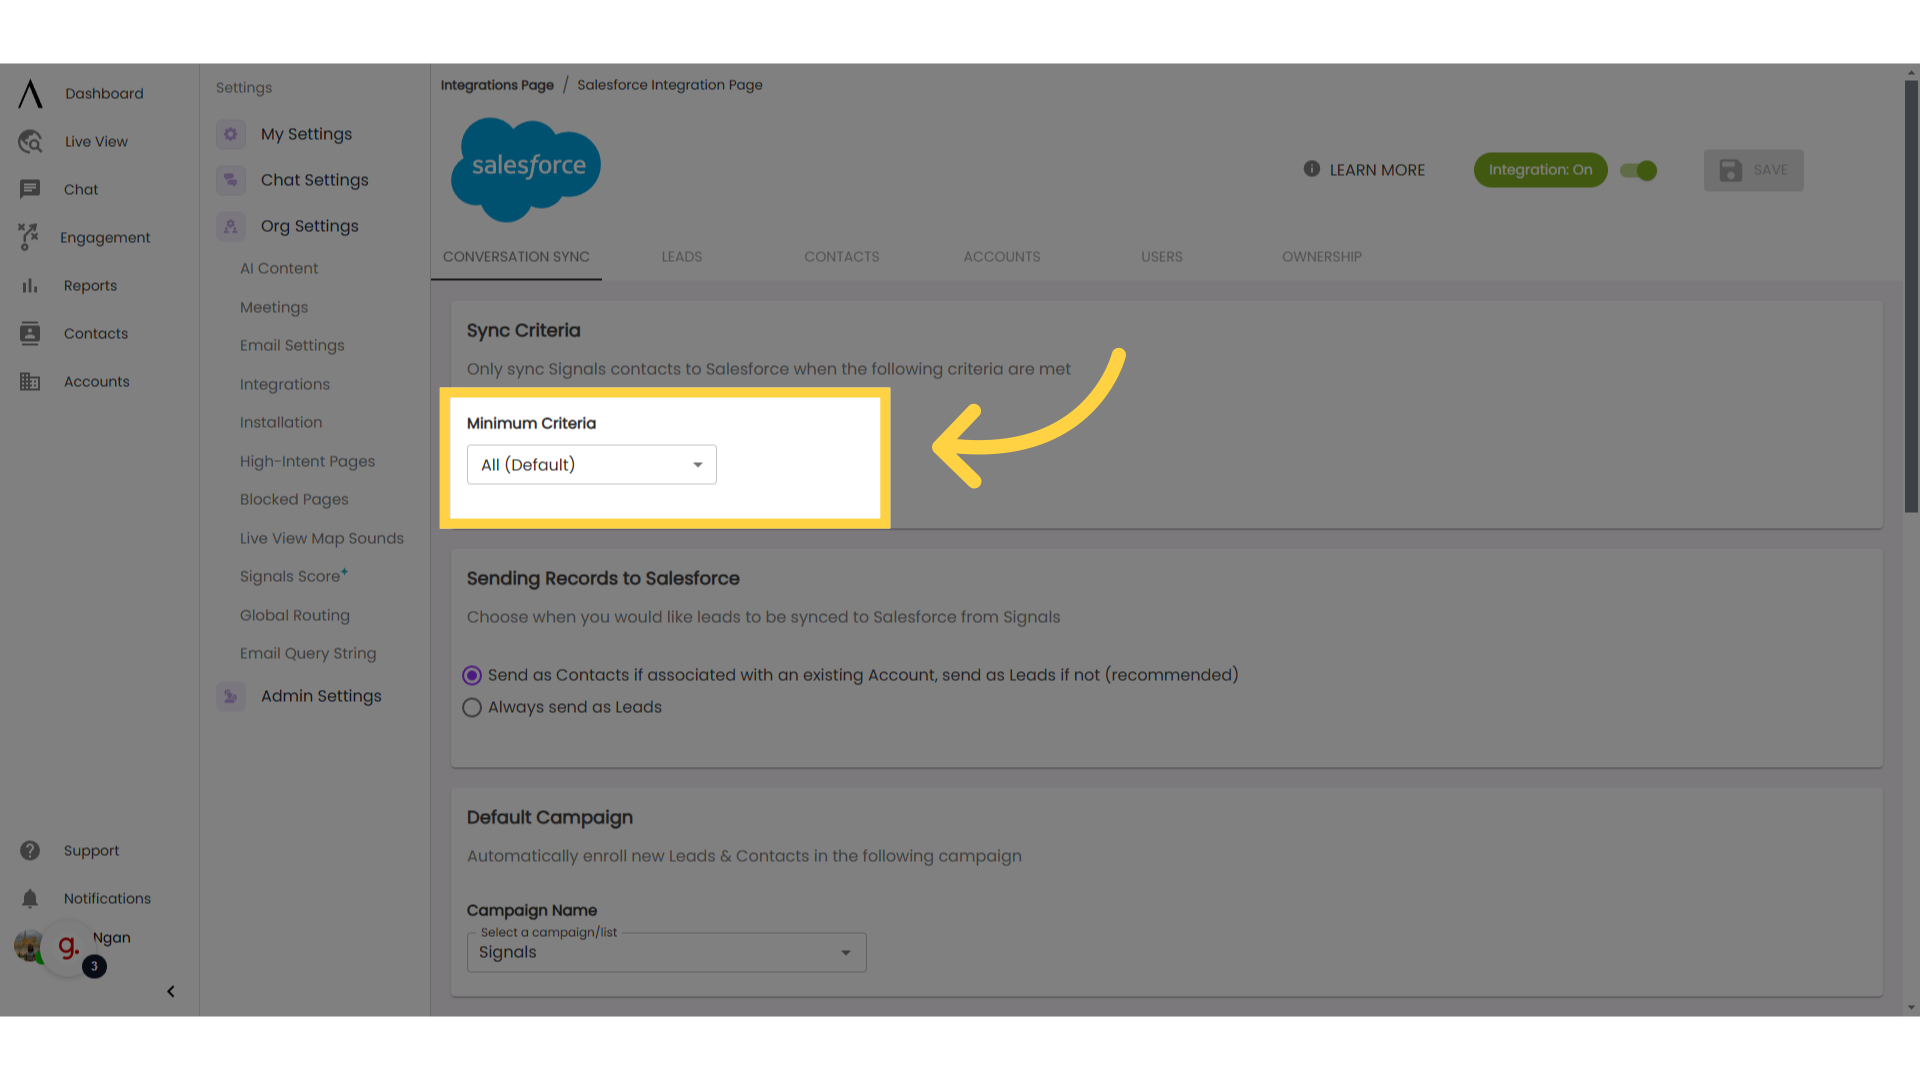
5. Click on the drop-down under "Criteria"
First, click the drop-down under the “Criteria” setting to set up the minimum requirements that web visitors must meet for the integration to send them to Salesforce. This specifies the minimum lead score a chat visitor needs to have the integration send the web visitor to Salesforce as a lead.
For more information on setting lead scores, see our HelpDocs video on setting lead scores.
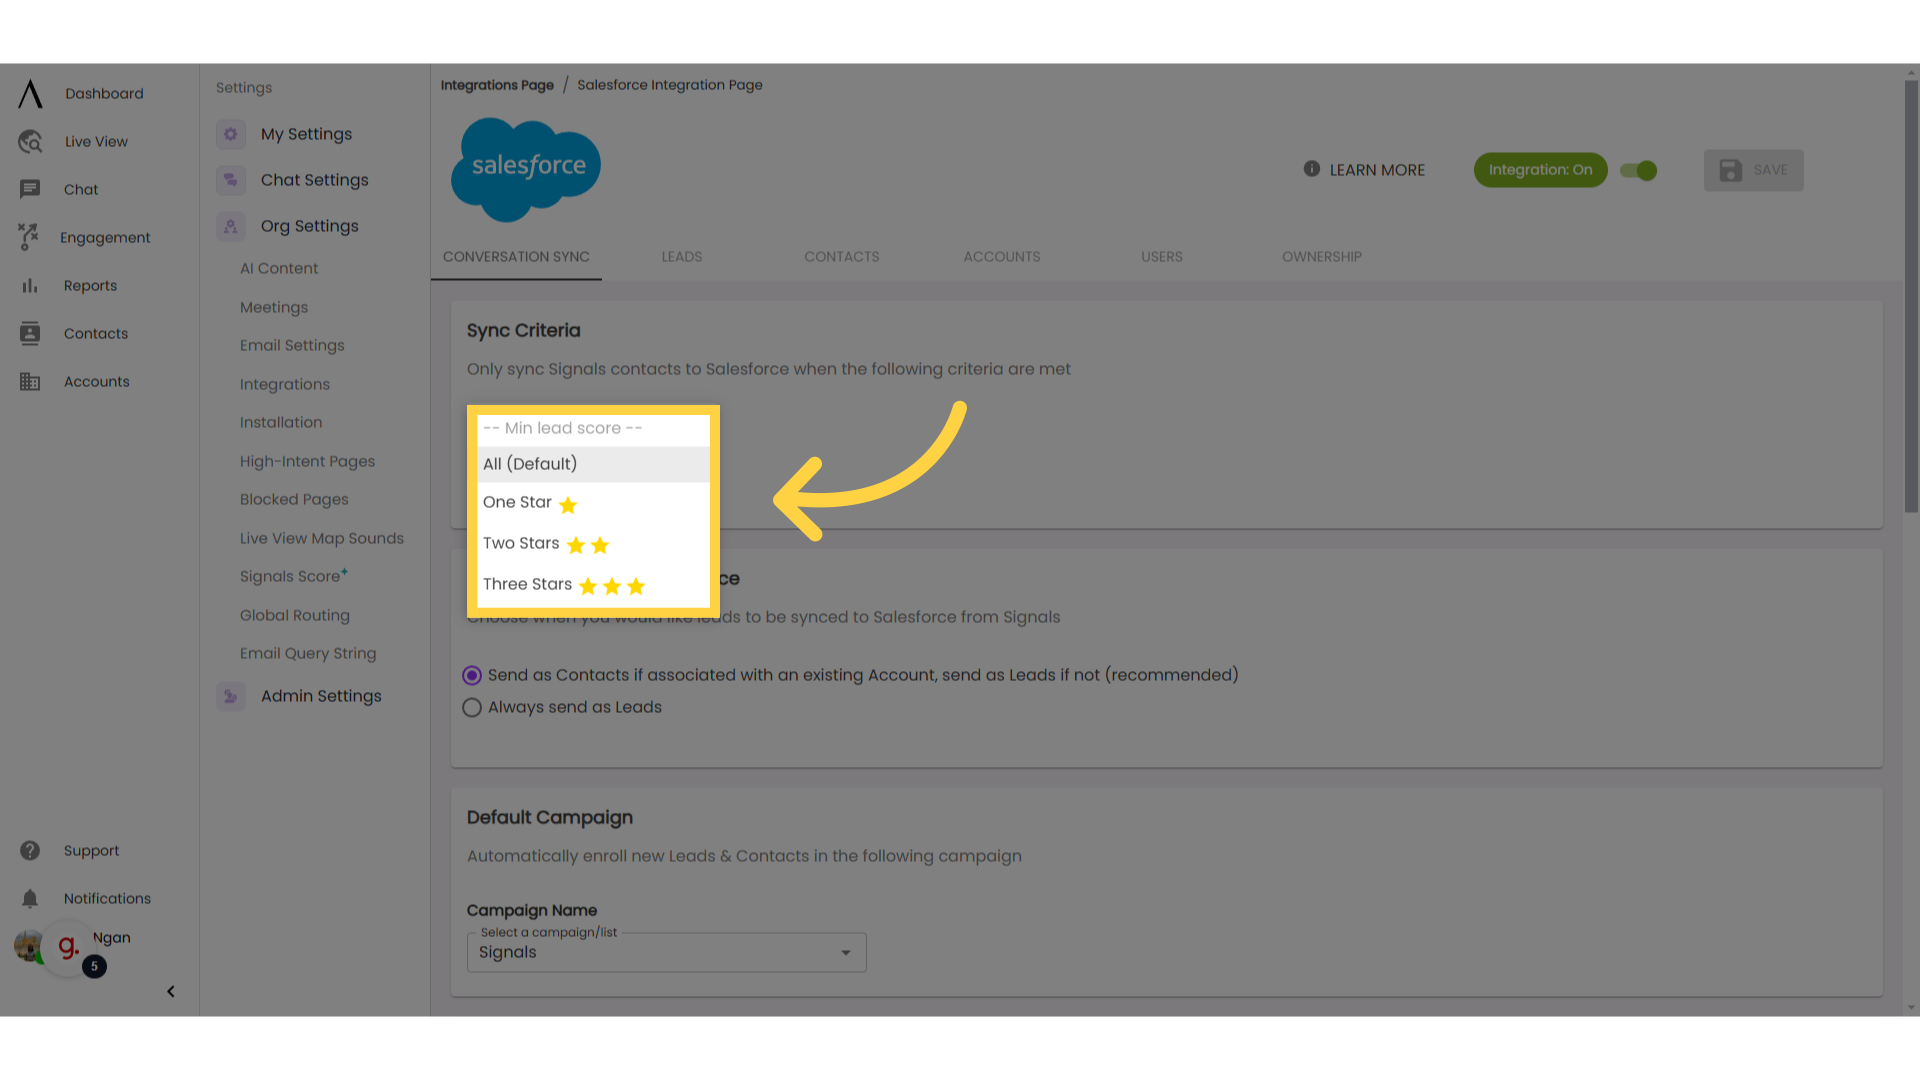
6. Dropdown Options
You can find these options in the "Criteria" dropdown. "All" will send each chat visitor to Salesforce as a lead.
"One Star" will send contacts who have at least one star as a Lead Score to Salesforce through the integration.
"Two Stars" will send contacts who have at least two stars.
"Three Stars" will send every contact to Salesforce who has a lead score of at least three stars.
7. Click "Campaign Name"
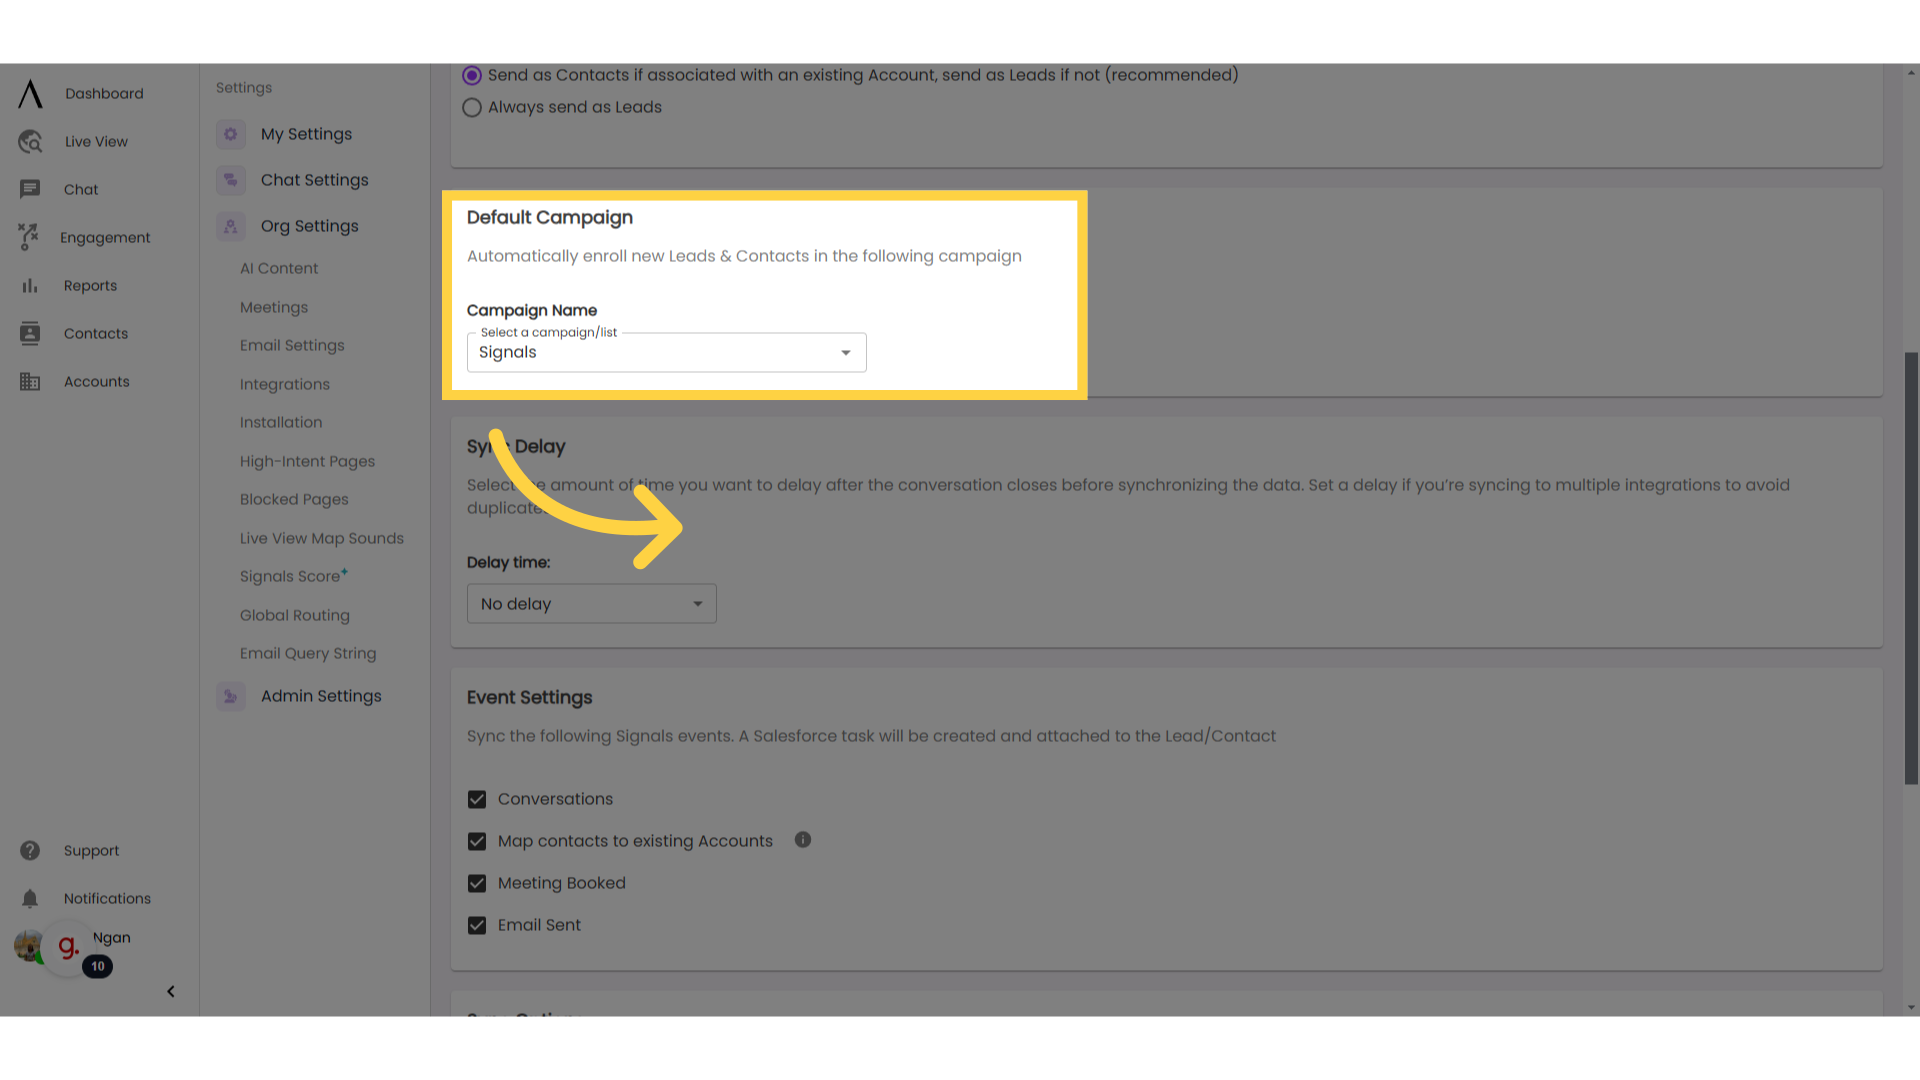
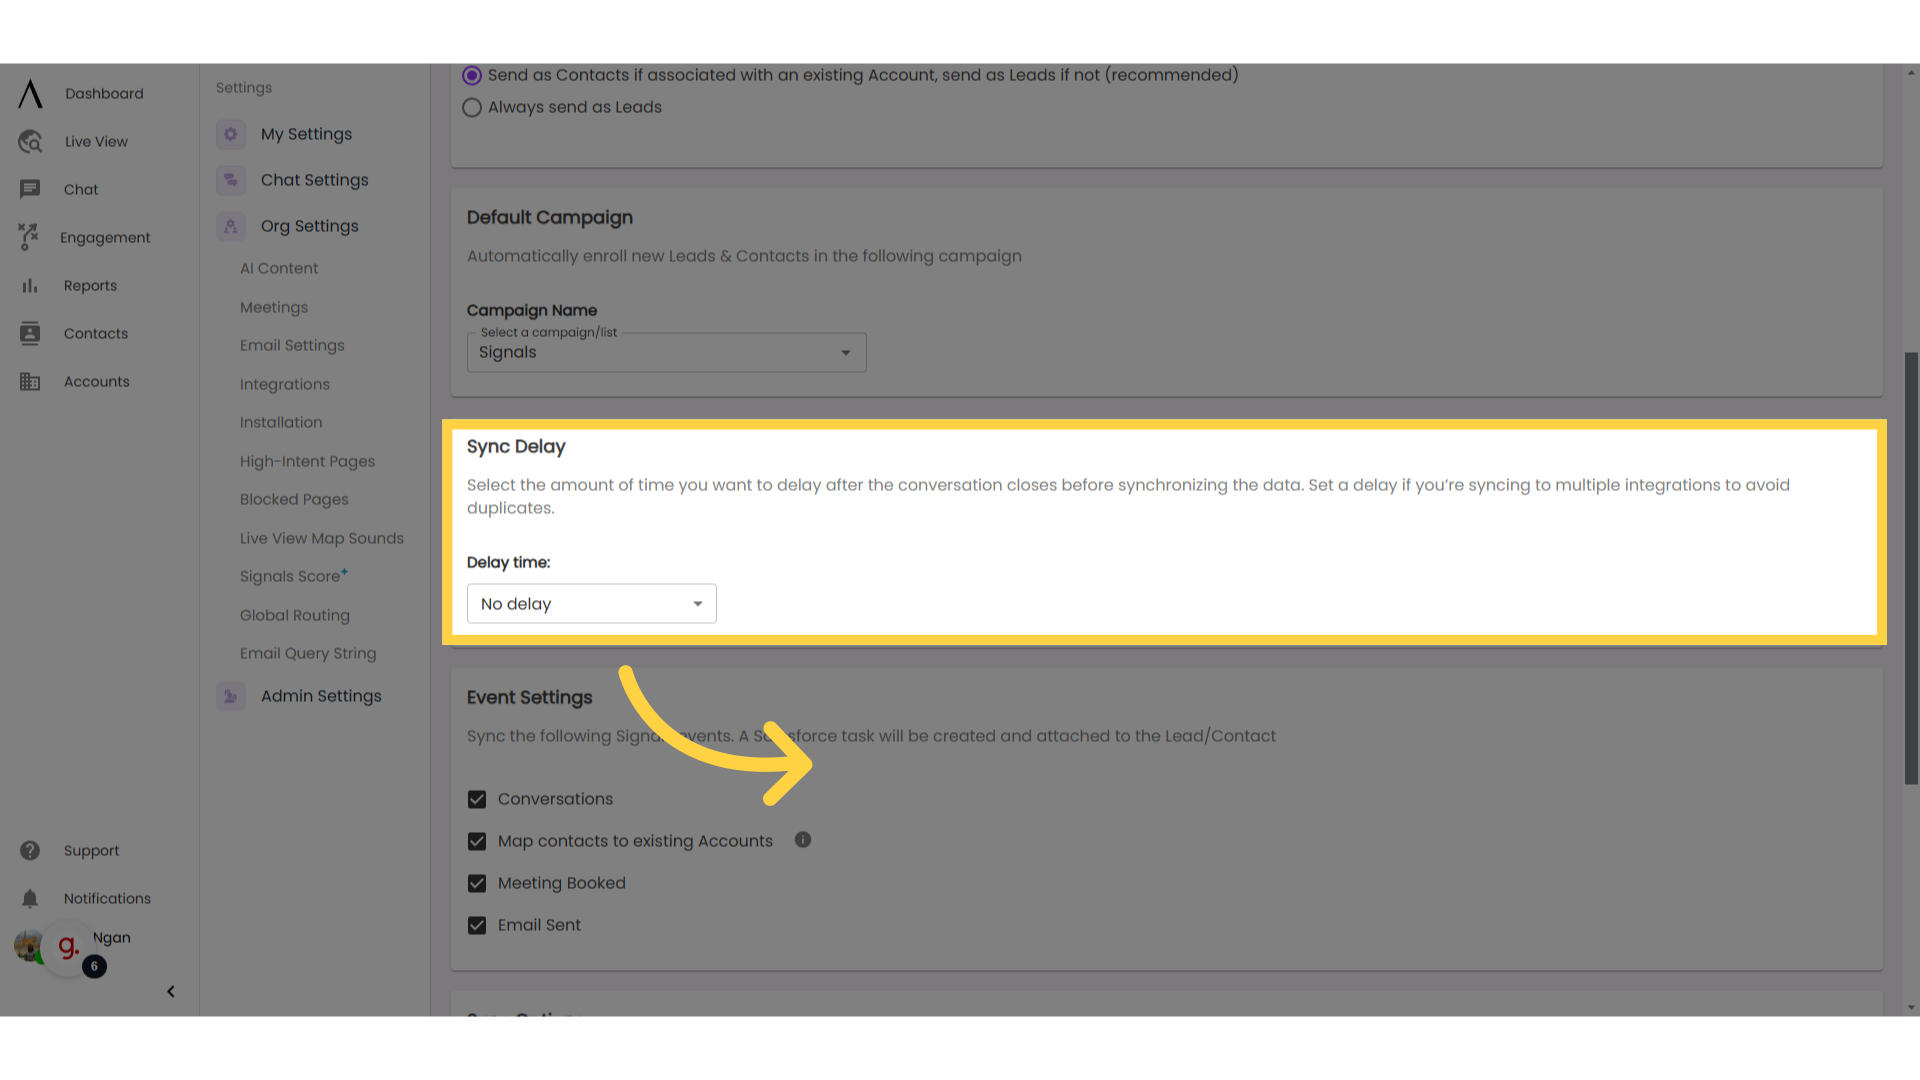
8. Select a delay time
In the next drop-down, select the Synchronization Delay, which is the amount of time that passes from when the web visitor becomes qualified as a lead and when the web visitor is actually sent to Salesforce as a lead.
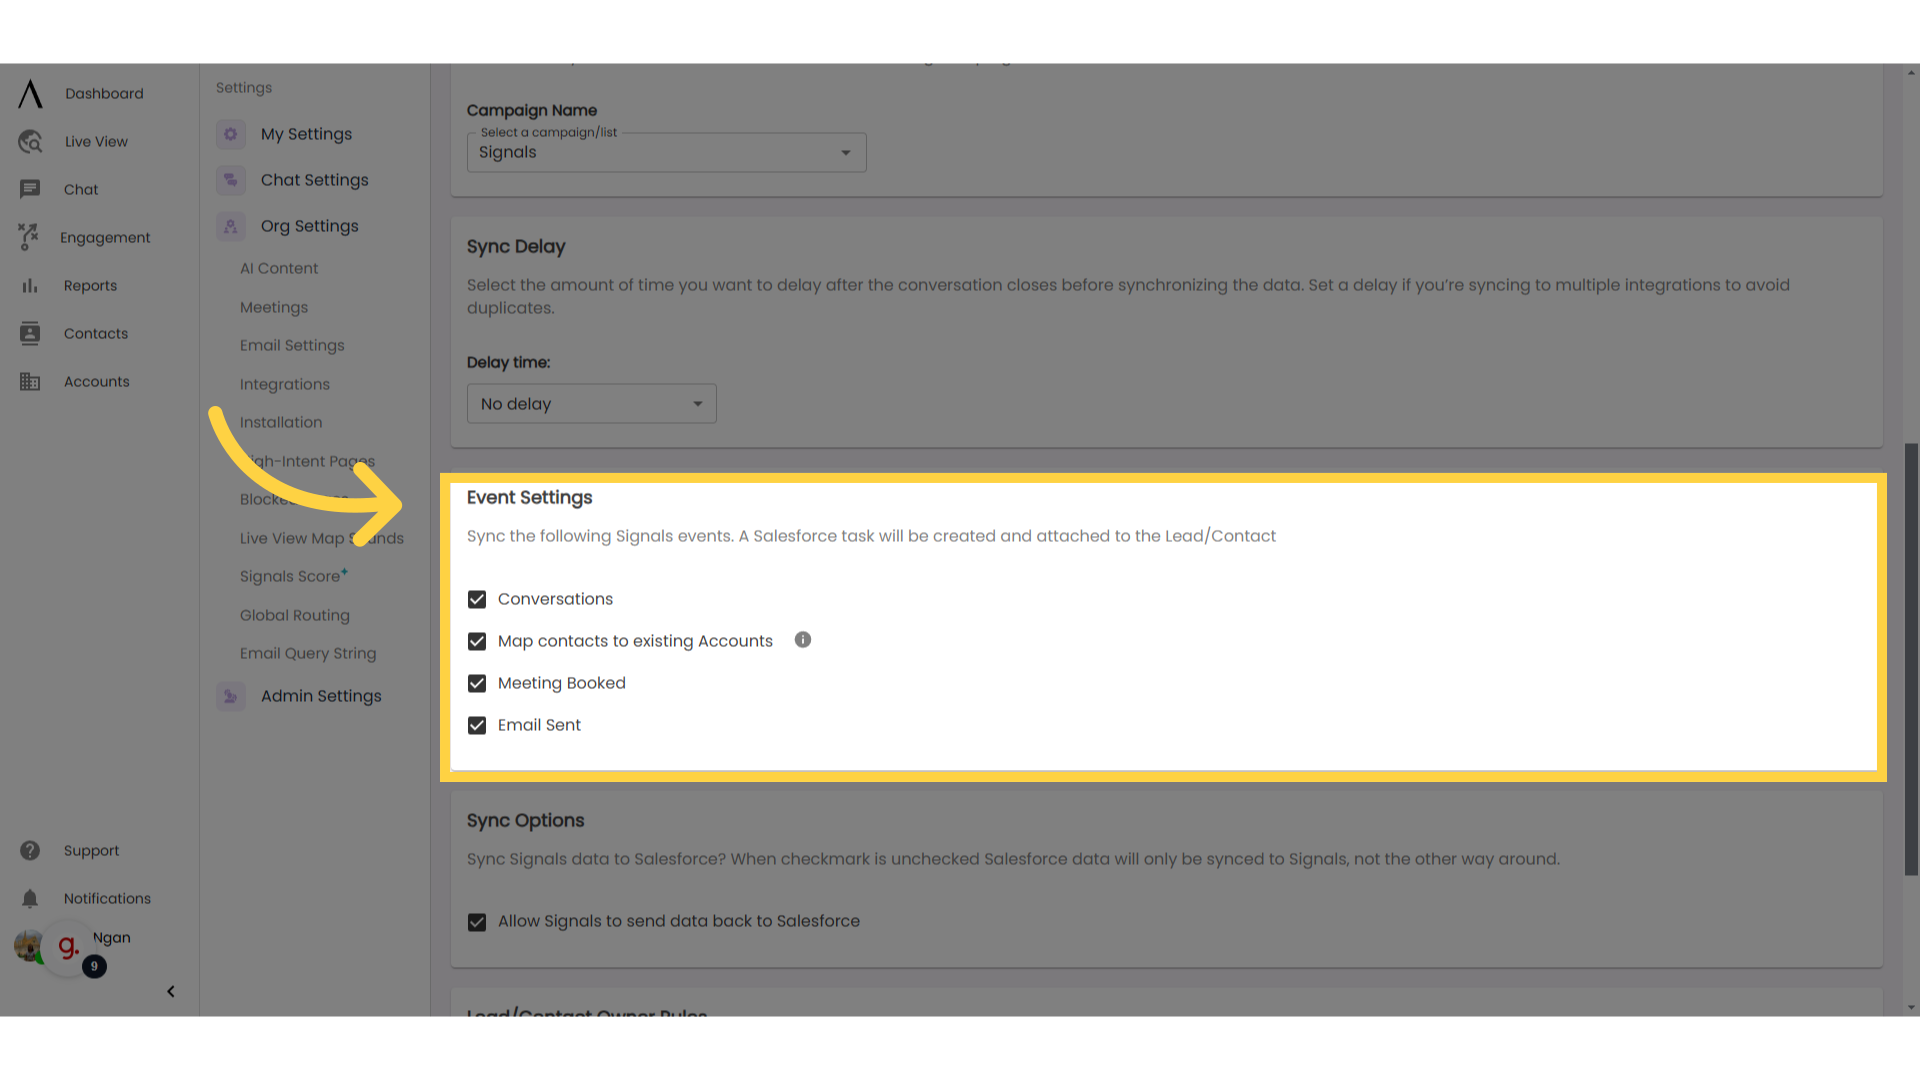
9. Configure your "Event Settings"
In the Event Settings section, select which Signals activities you would also like to send to Salesforce with the integration. This part is optional.
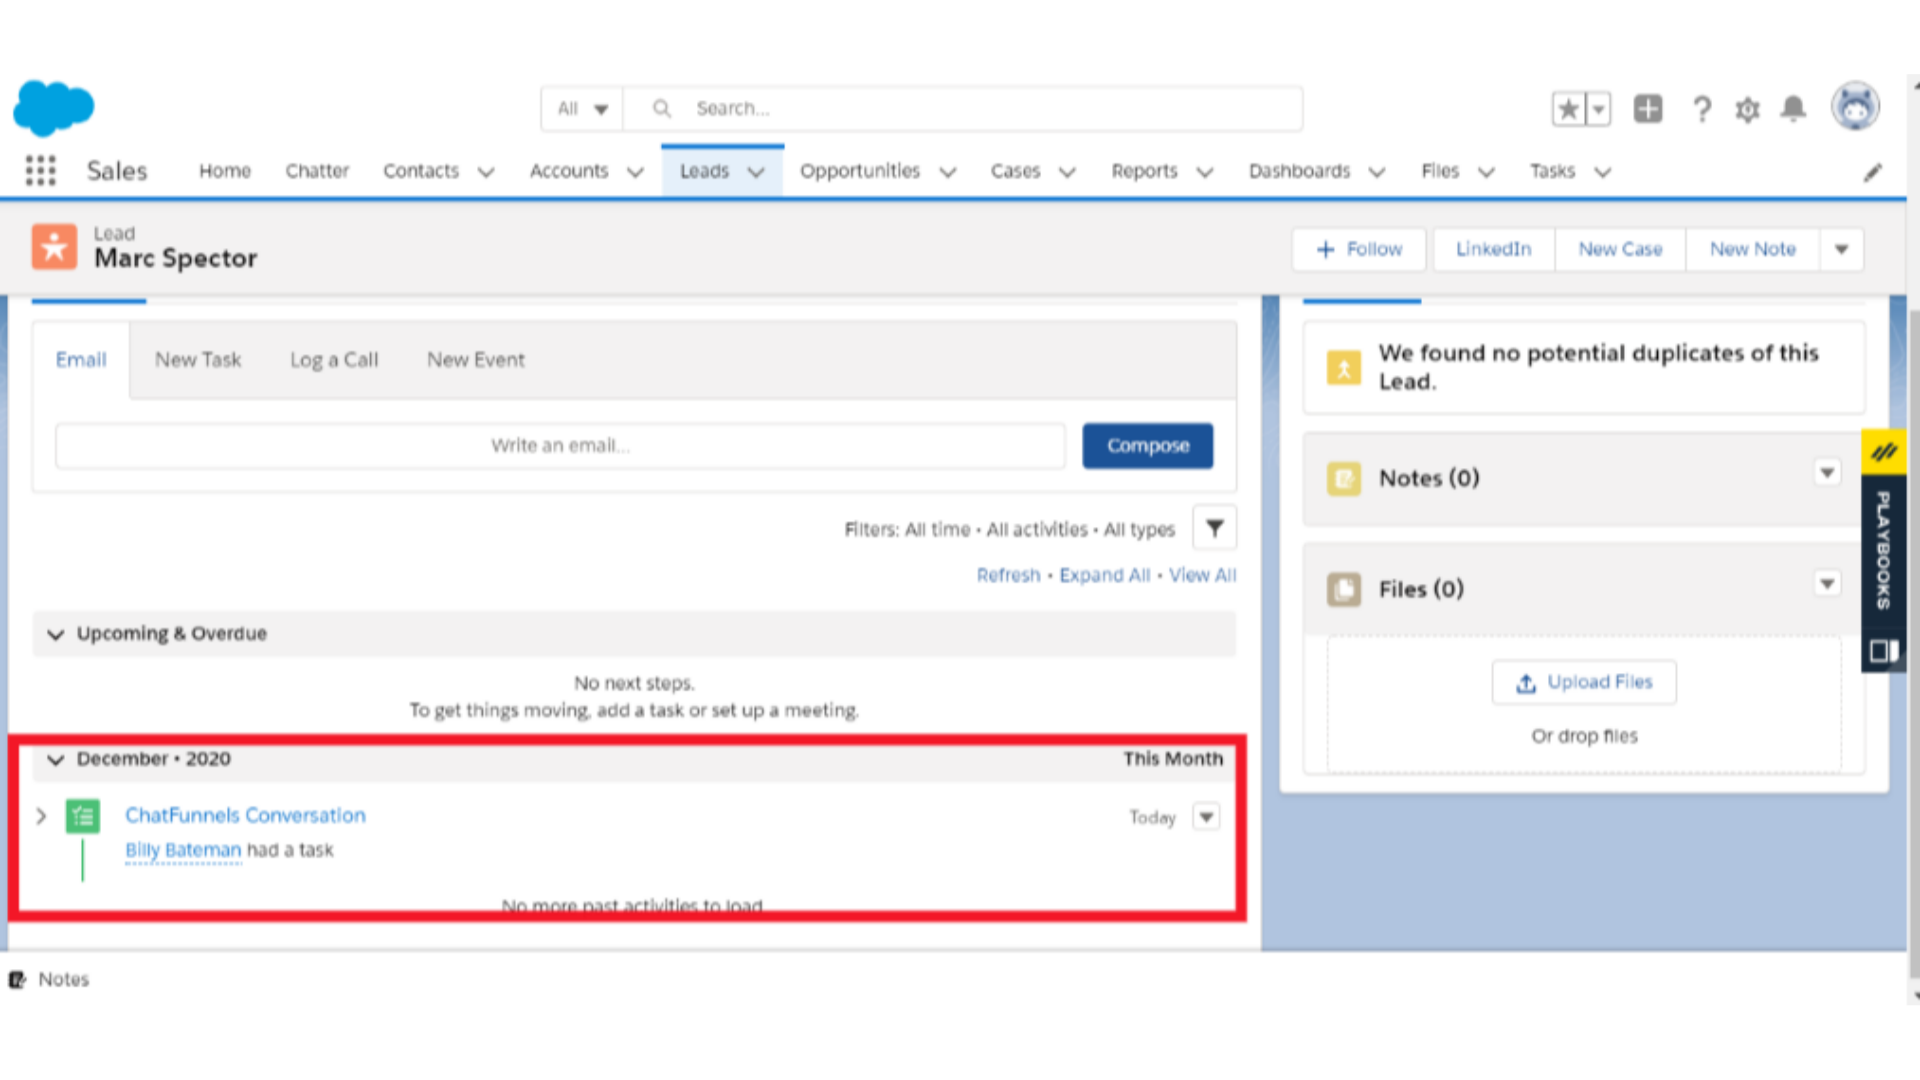
10. Salesforce Task
If you select one of these event options, the integration will connect the activity to the Salesforce record as a Salesforce task.
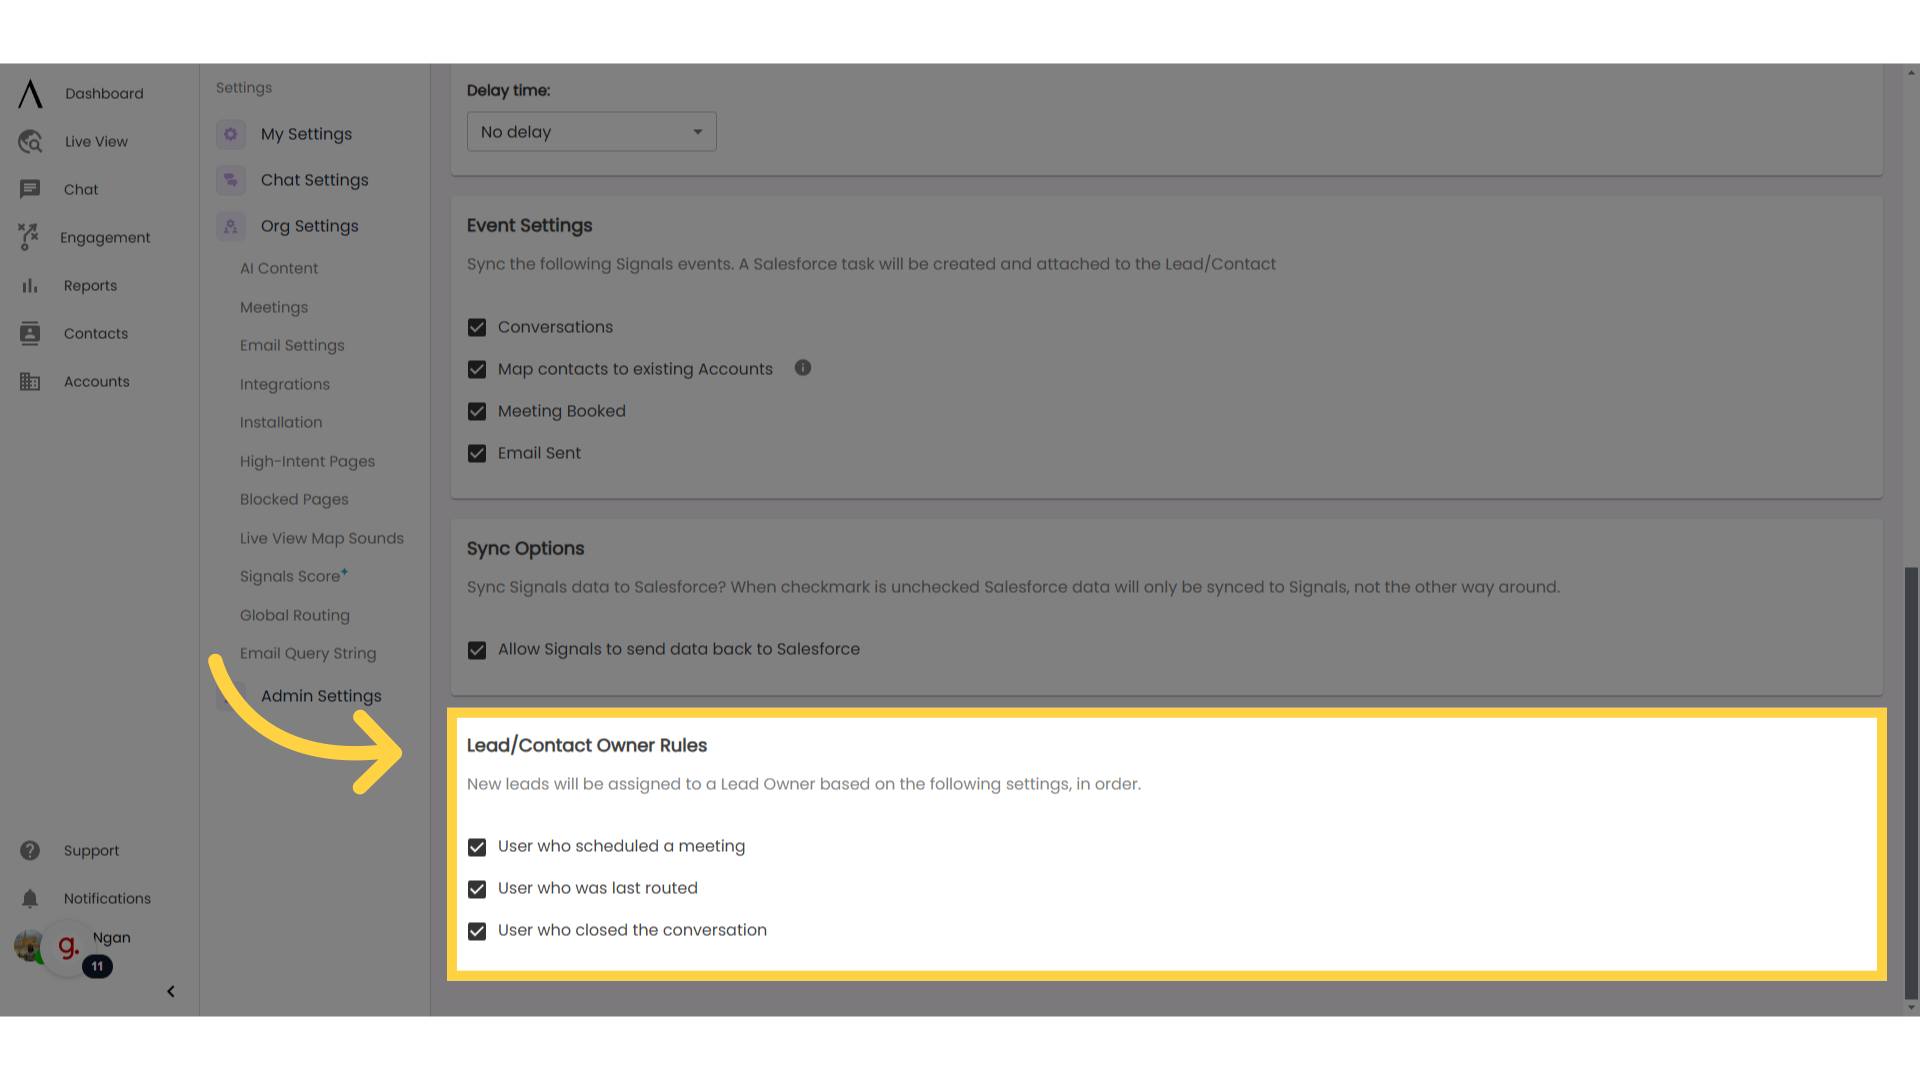
11. Establish "Lead Owner Rules"
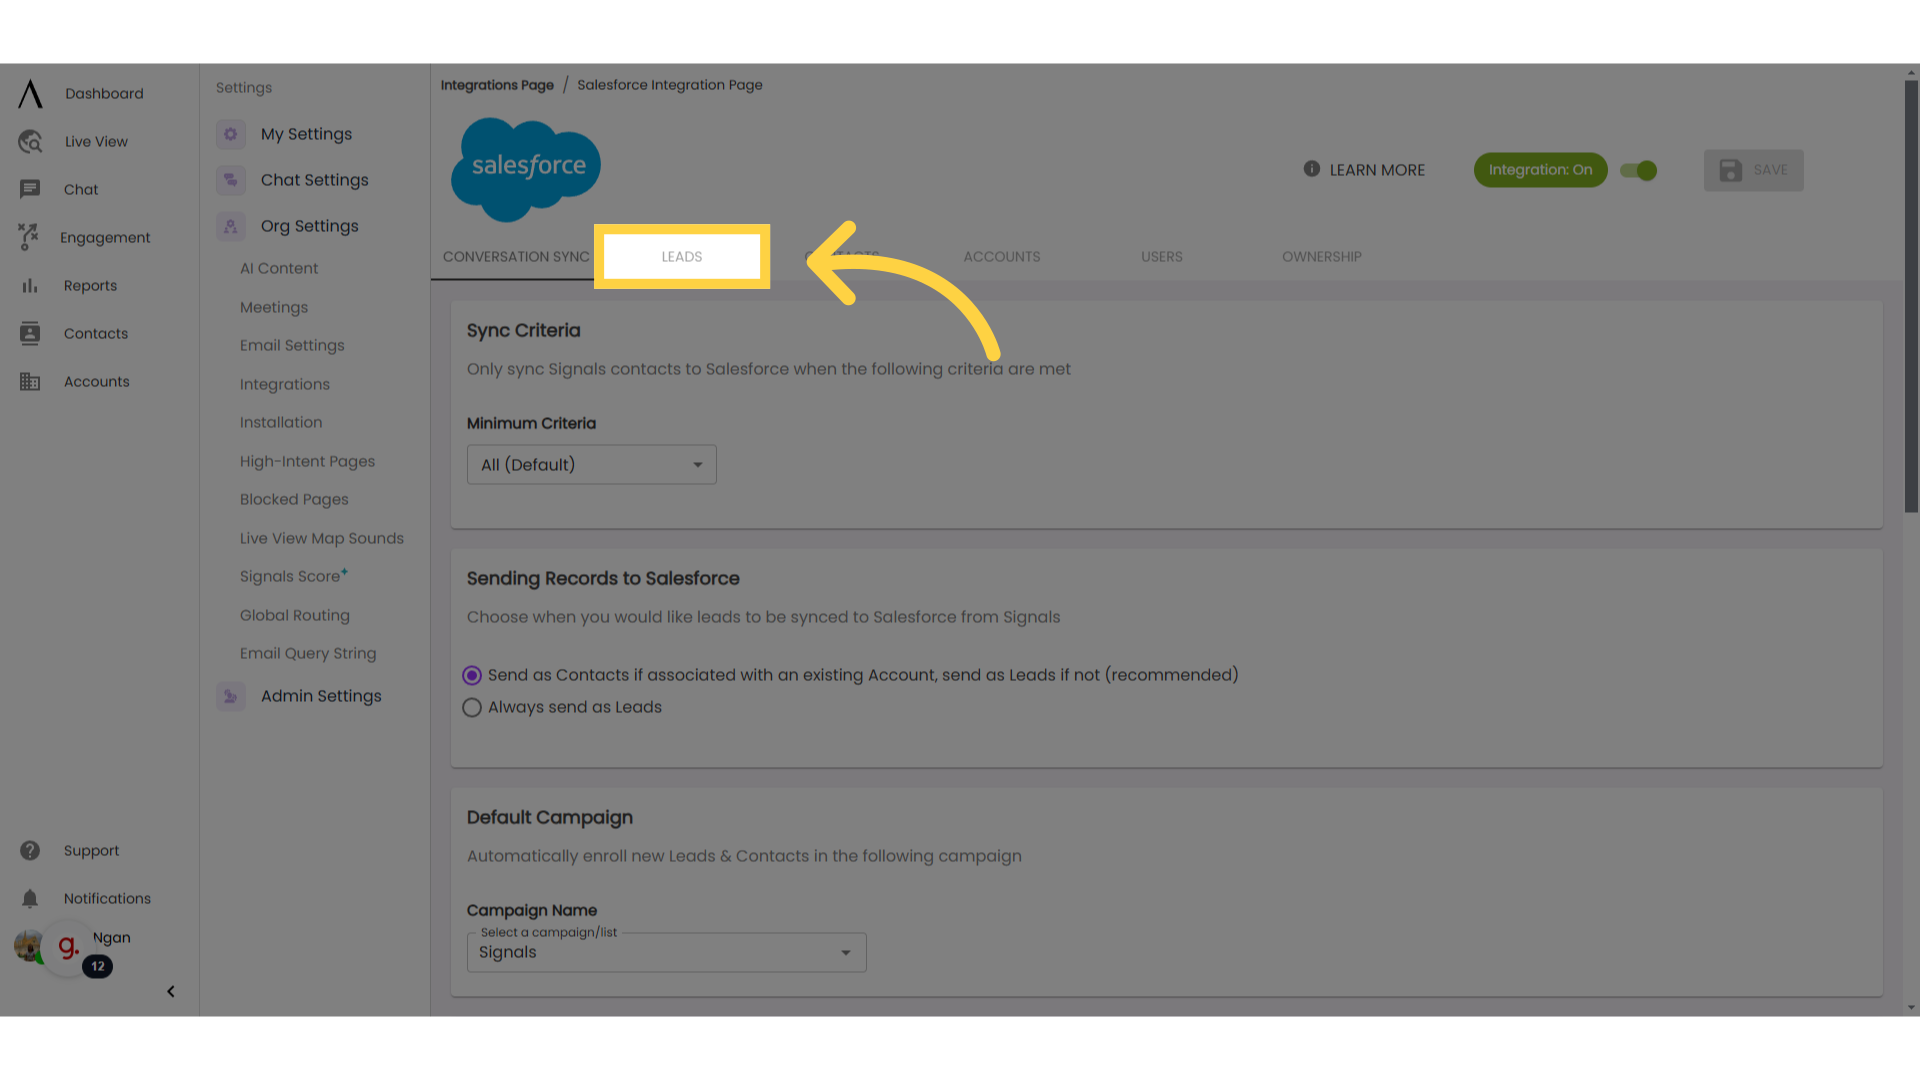
12. Click "Leads"
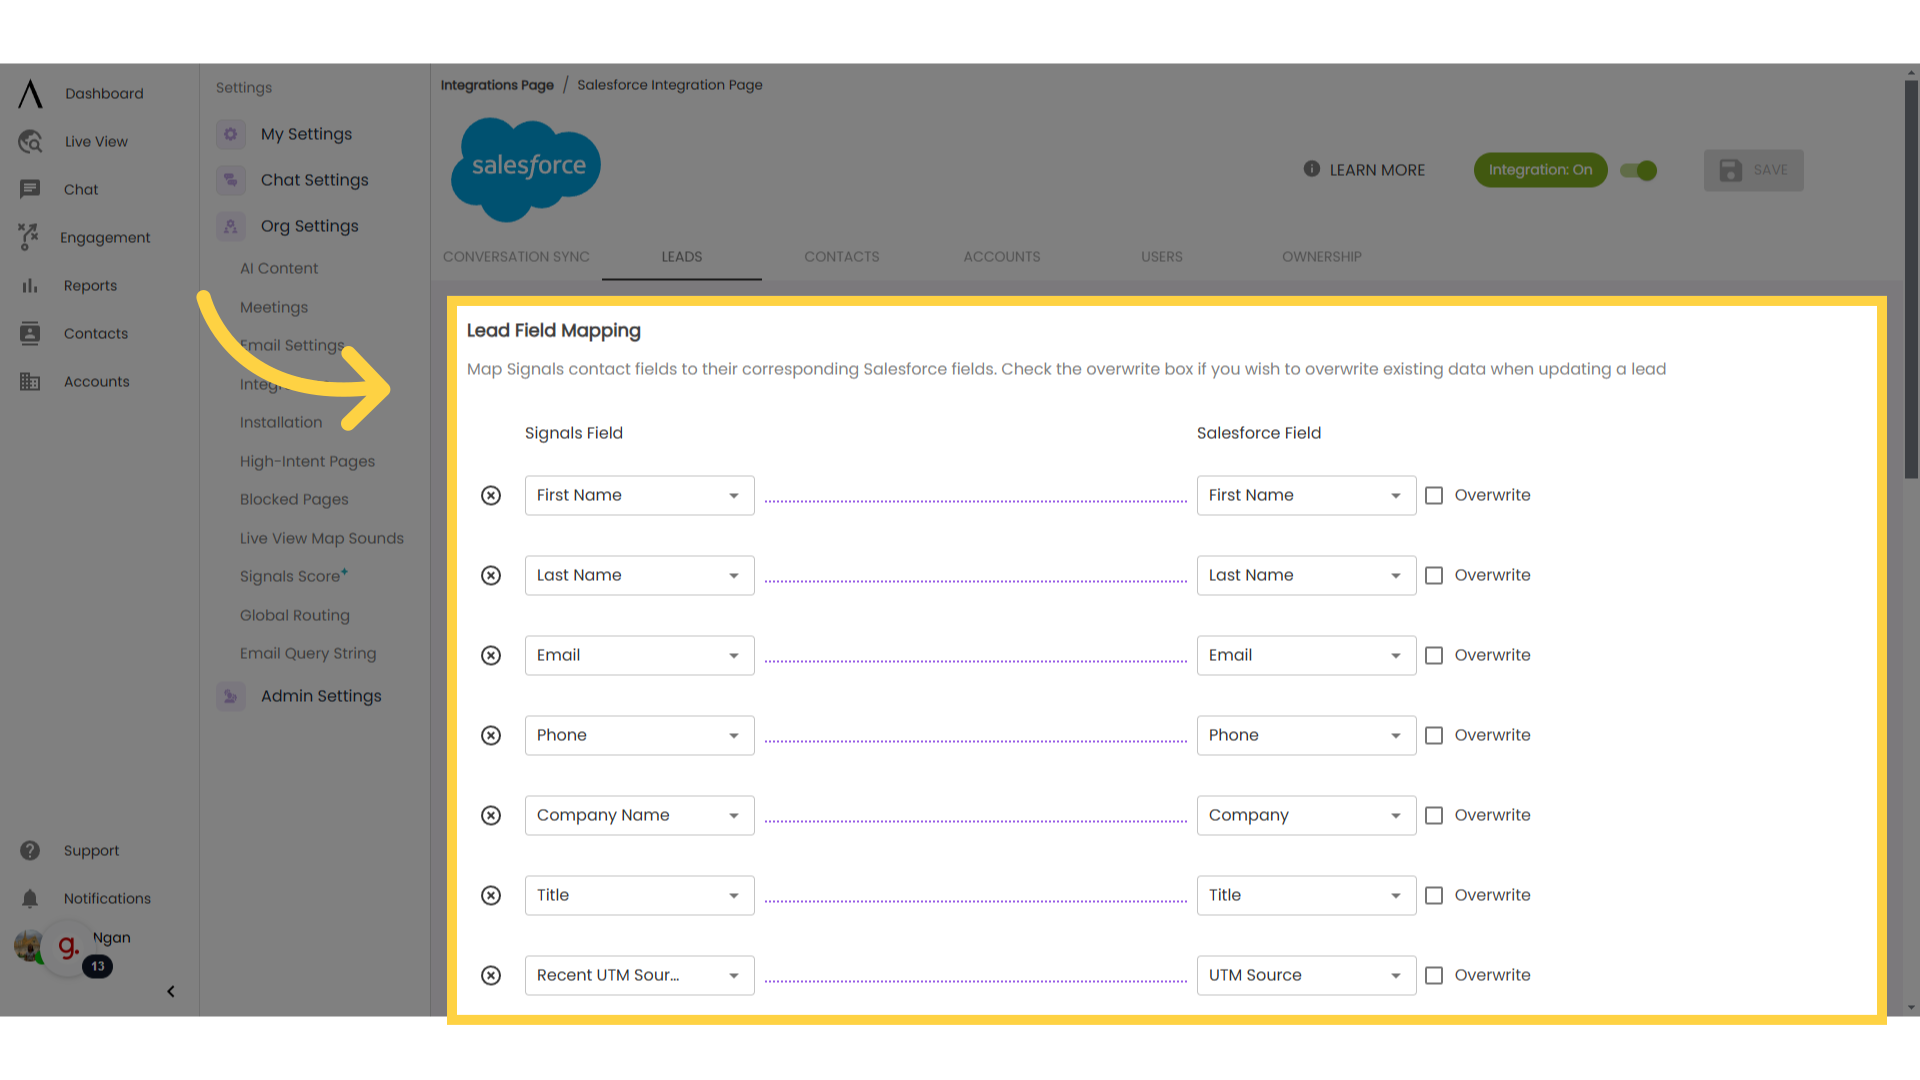
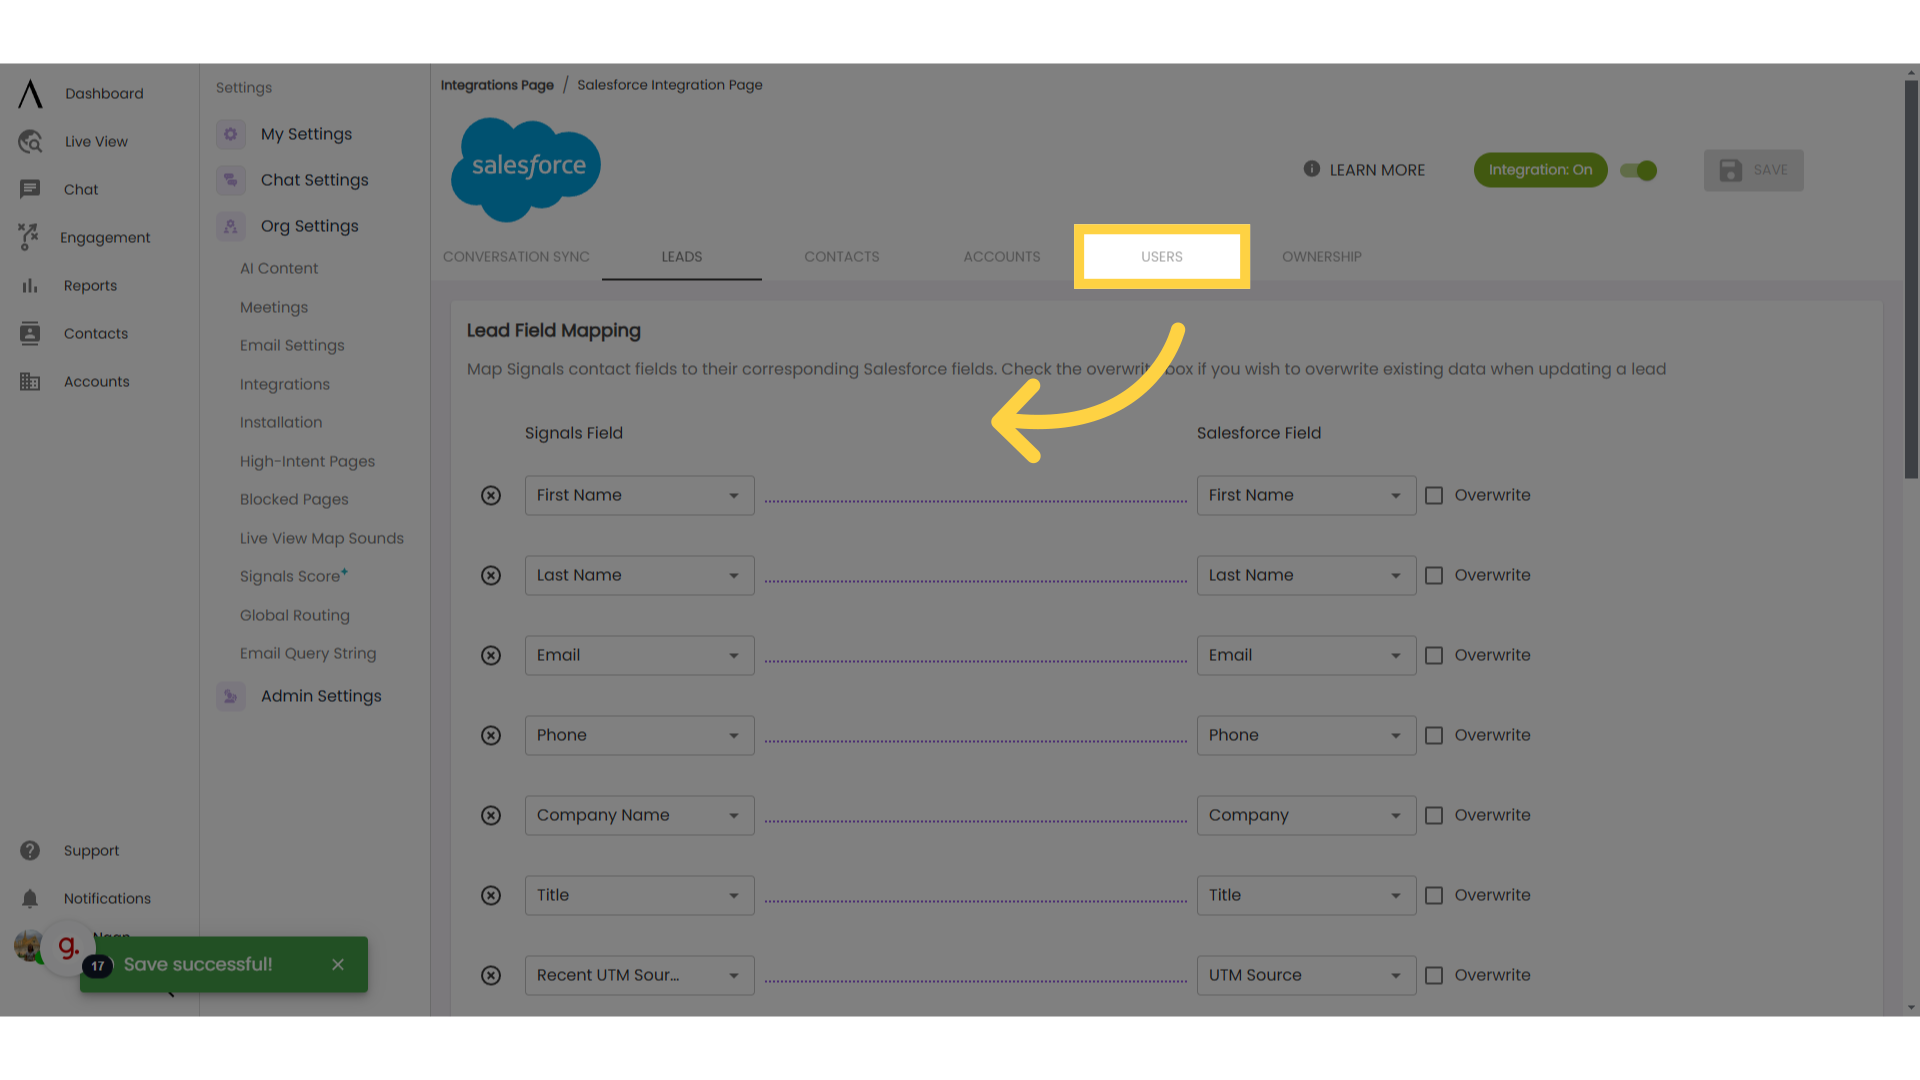
13. Configure "Field Mapping" sections
Configure the Field Mapping sections. Mapping these fields will determine which fields in Signals will populate your desired Salesforce fields for the record. For example, in the screenshot here, we’ve configured the Signals “First Name” contact field to populate the Salesforce “First Name” field for the record that the integration sends to Salesforce.
You also have the option to overwrite any field that the integration sends to Salesforce. Selecting "Overwrite" affects when a web visitor meets the minimum criteria for the integration and their email address is already saved in Salesforce as a Lead. If a web visitor inputs an email address that is already saved as the email field for one of your Salesforce Leads, the integration will update the fields in Salesforce that you have set to overwrite with the information provided from Signals.
Note: This option only updates information for Leads. For example, if a Salesforce Contact has an email address that one of your web visitors inputs, the integration will not update this Salesforce Contact.
Note: This option only looks at the Email for Salesforce Leads when deciding whether or not to overwrite fields. For example, if you have a Salesforce Lead named “John Doe”, if another web visitor named “John Doe” qualifies for the integration, they will be sent as a new Lead in Salesforce if they have input a different email field. You can remove any mappings you've created by pressing the "x" next to the field in the mapping.
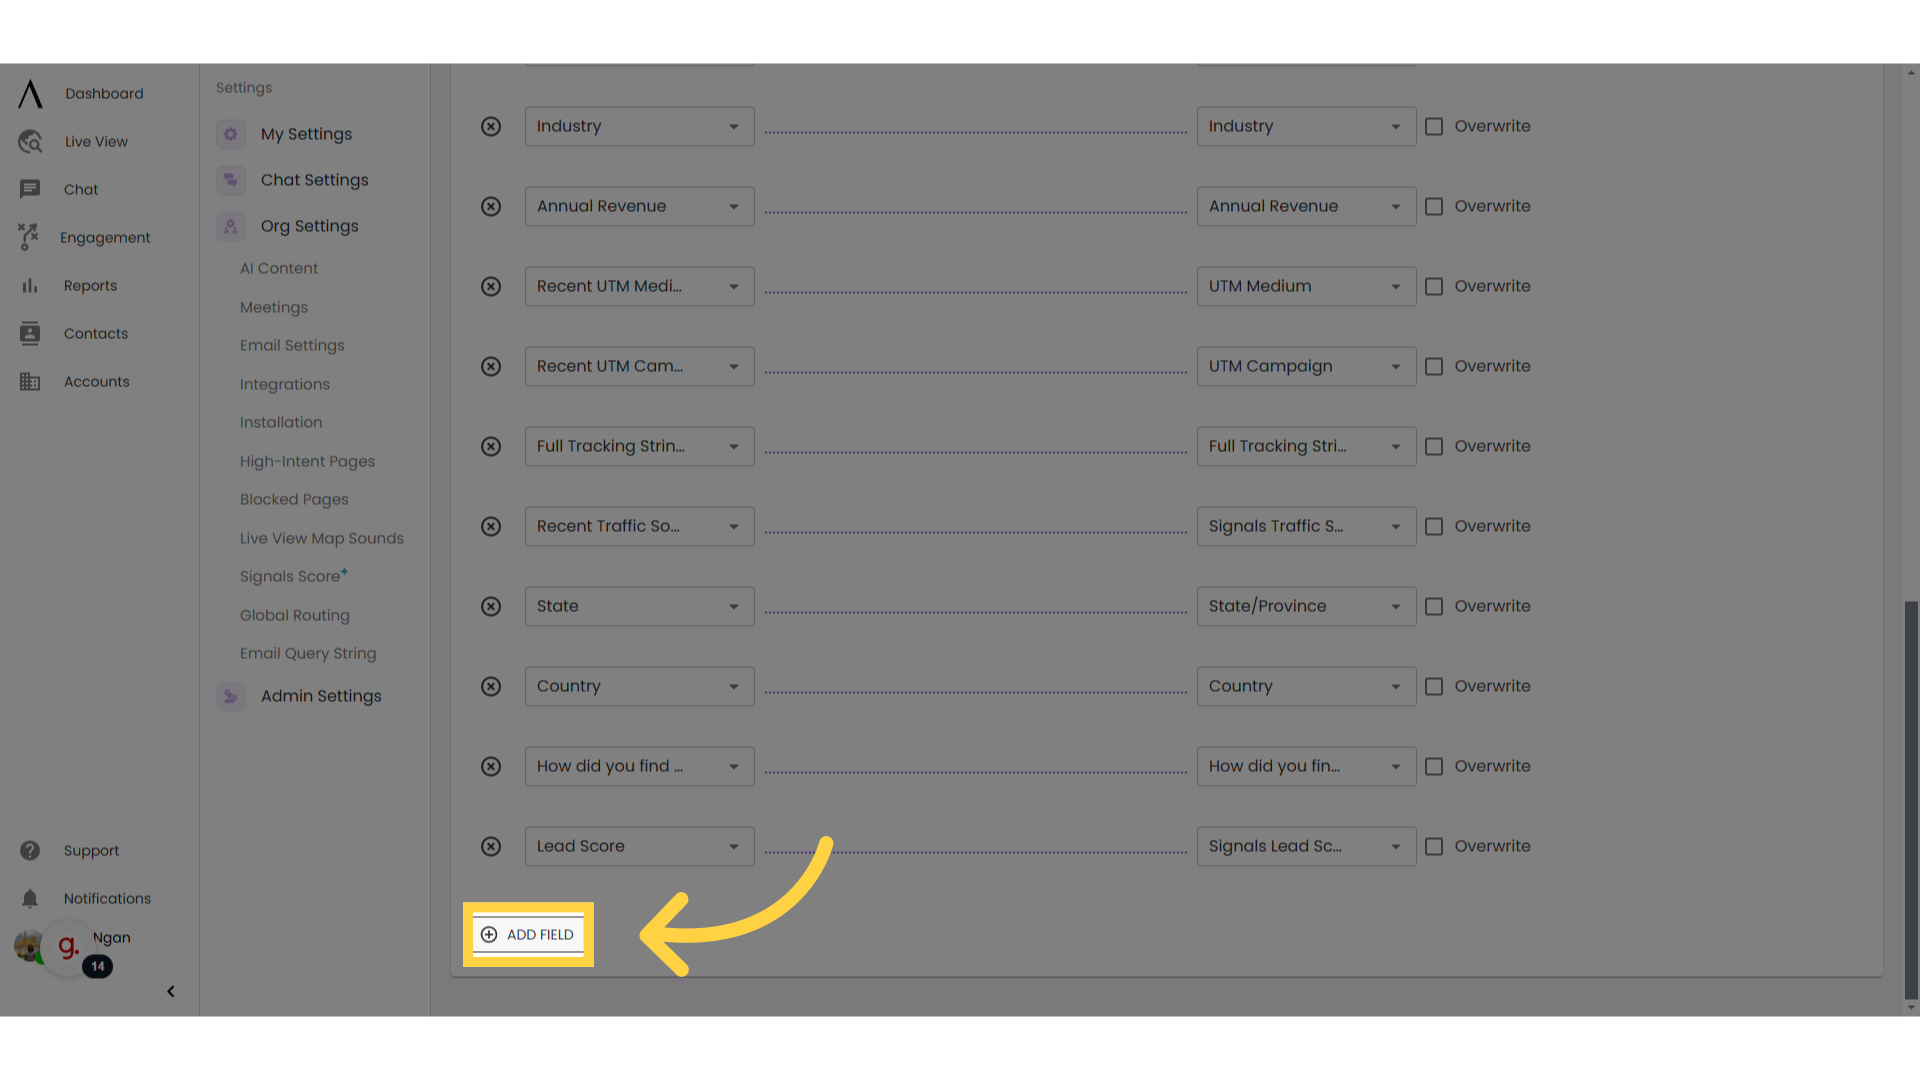
14. Click "Add Field"
You can also add a new mapping field by selecting the "Add Field" option at the bottom of the page.
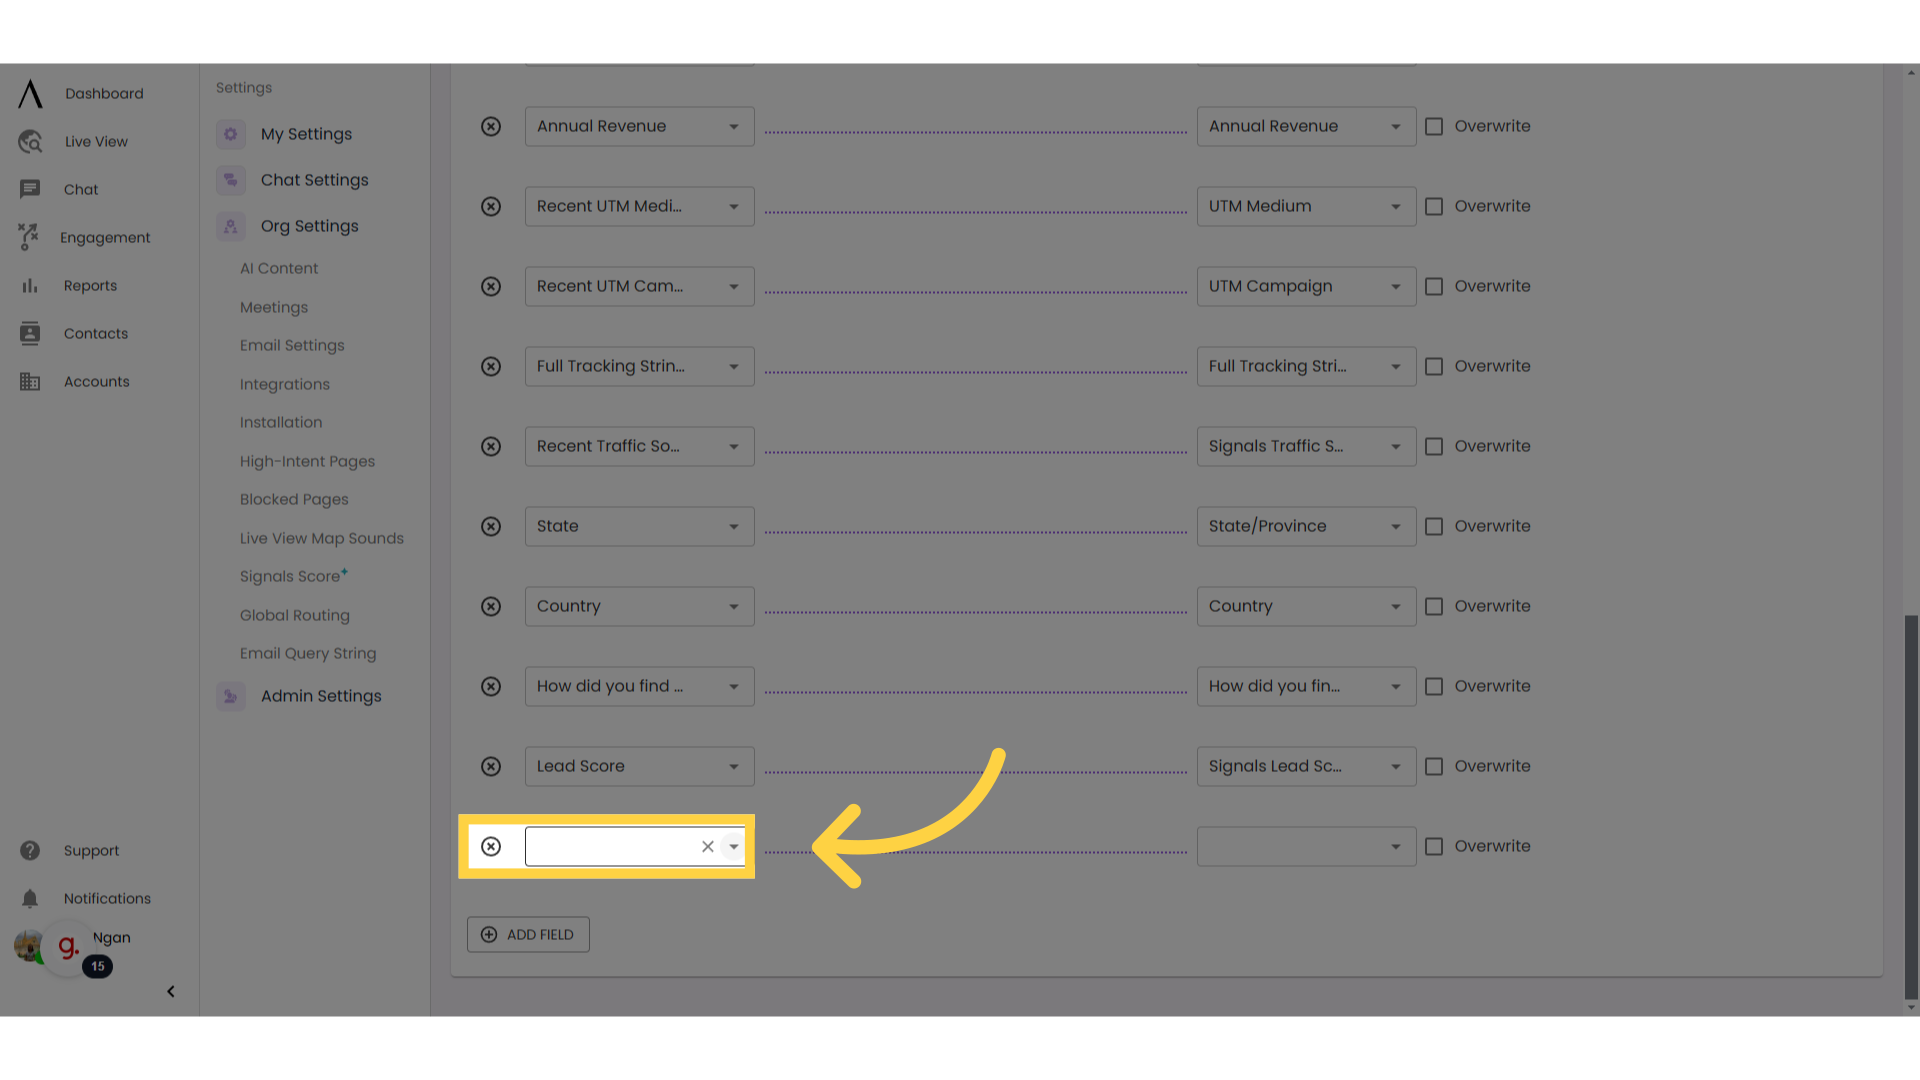
15. Map your fields accordingly
Once you have selected the “Add Field” option, simply select which Signals field will map to which Salesforce field by selecting the corresponding drop-down menus. Don't forget to click "Save" at the top of your screen!
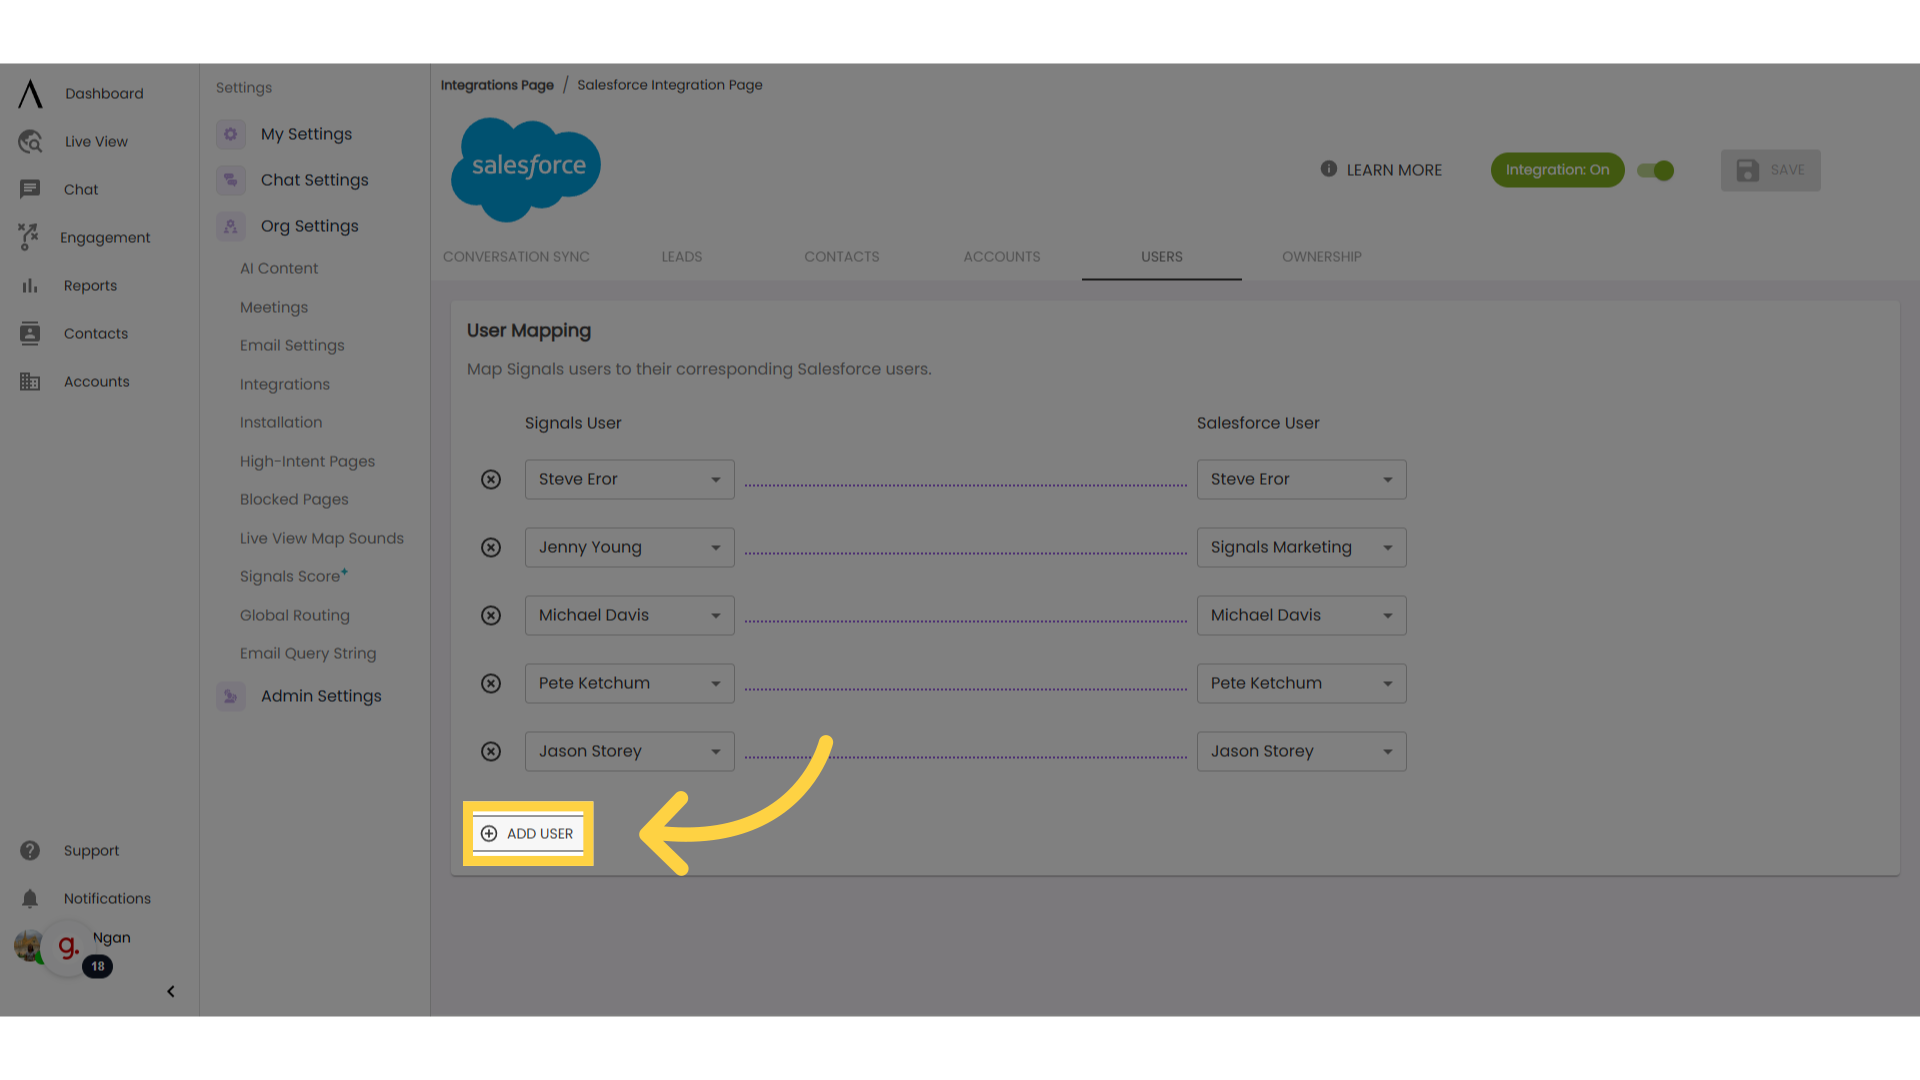
16. Navigate to "Users"
17. Click "Add User"
User mapping is similar to field mapping. Click "Add User" to map Signals users to their corresponding Salesforce users.
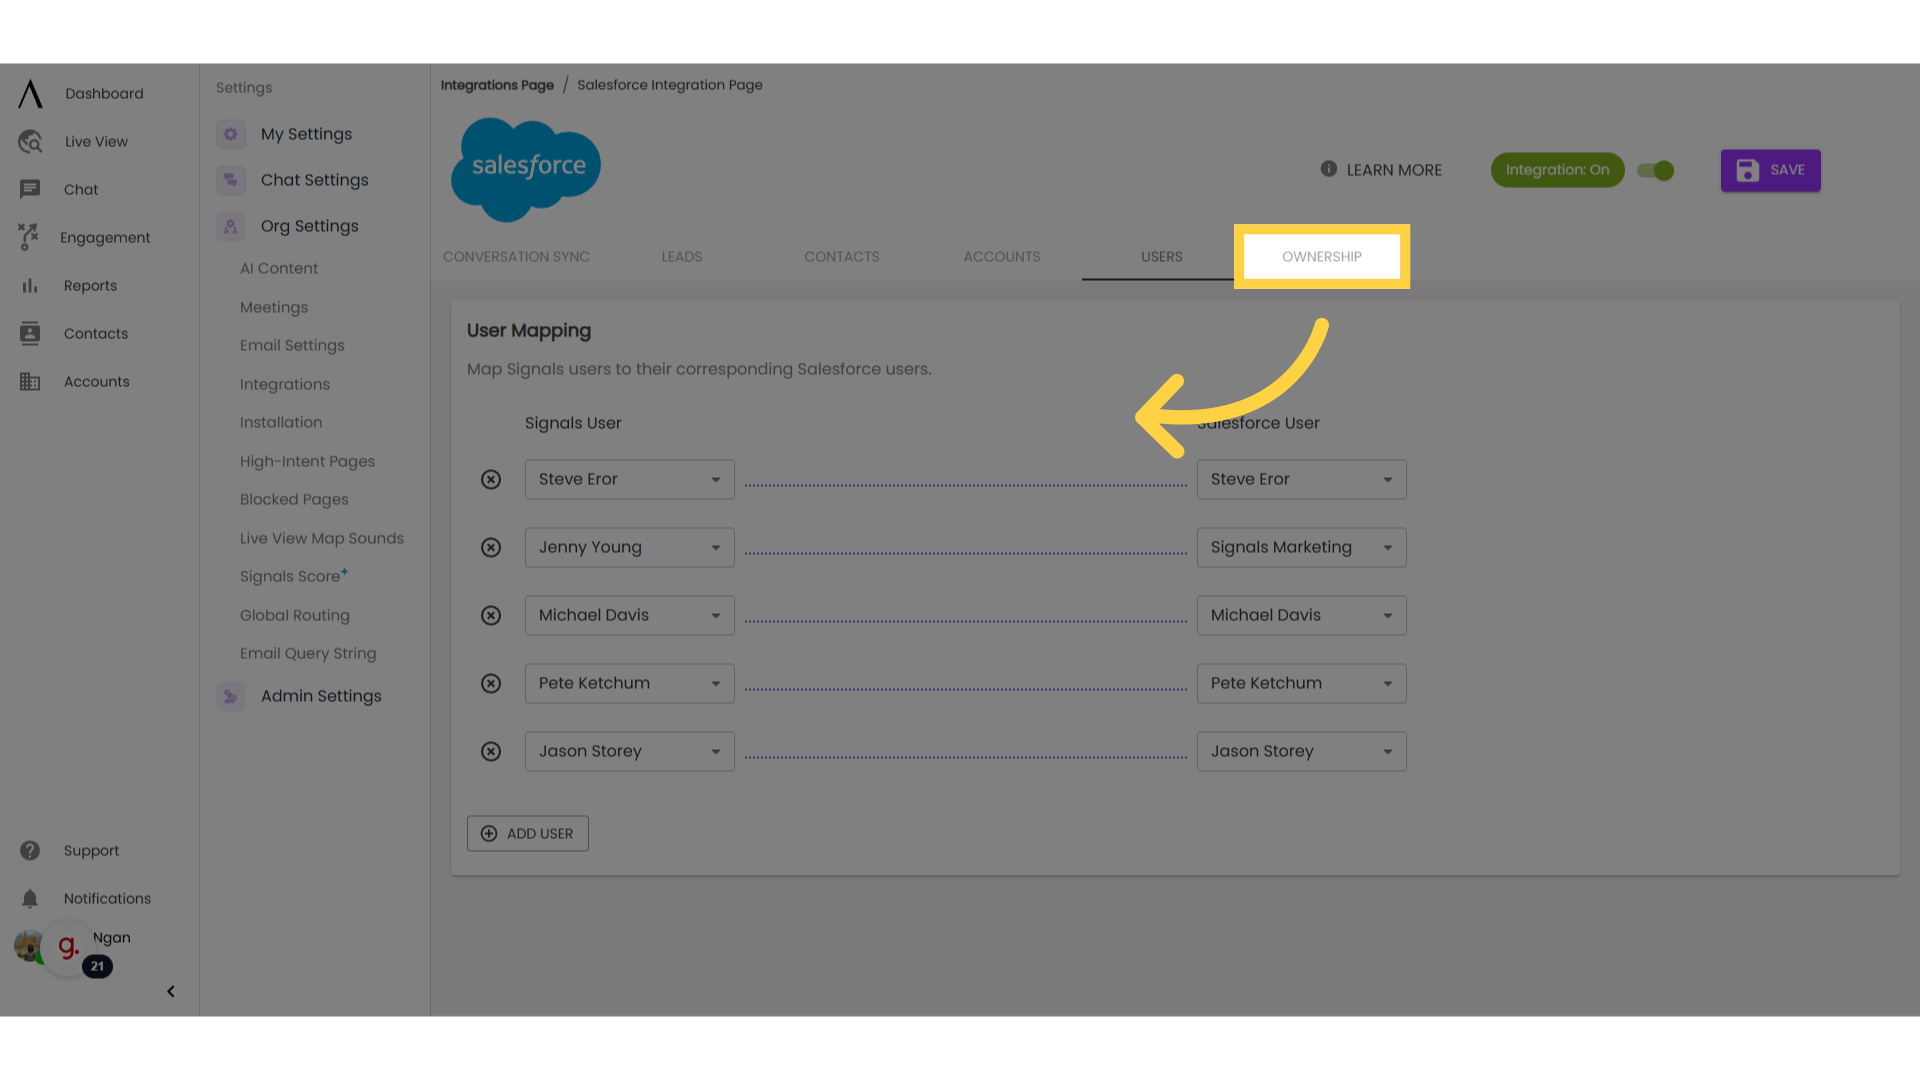
18. Navigate to "Ownership"
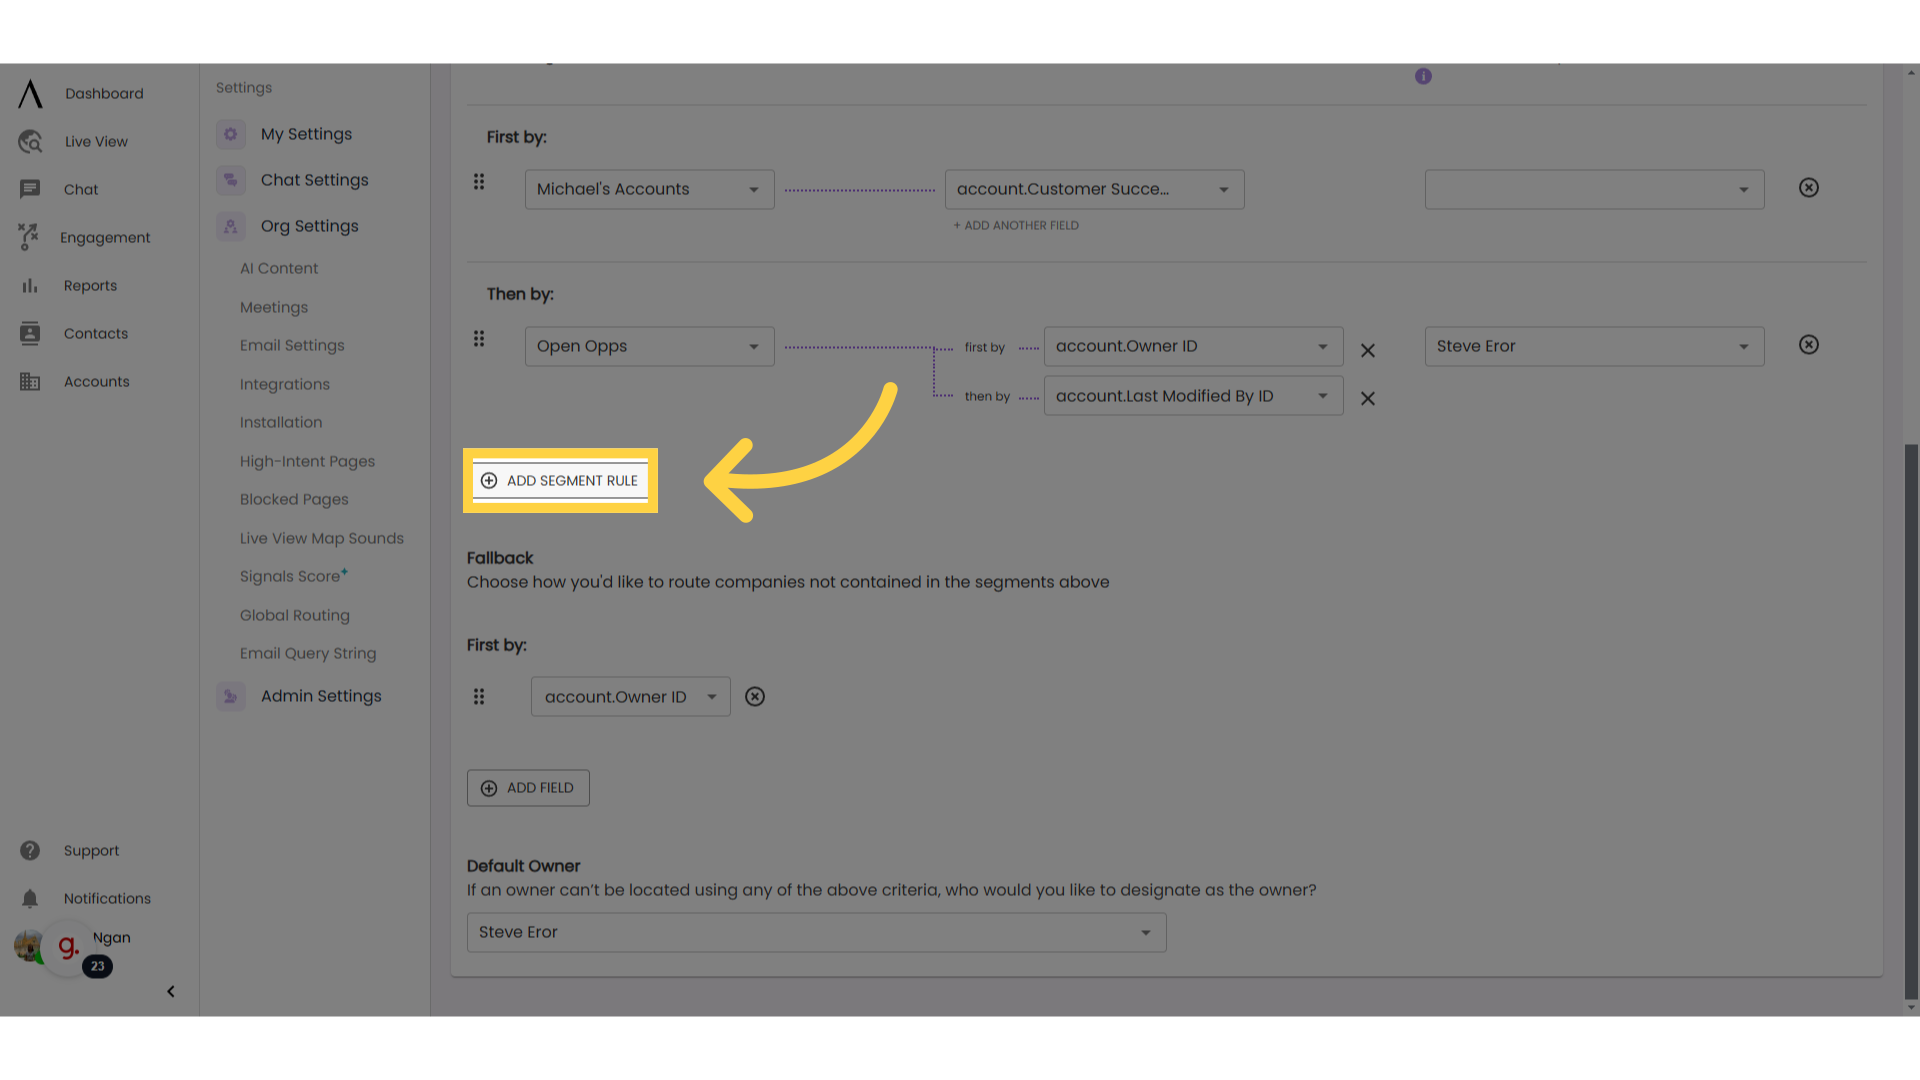
19. Click "Add Segment Rule"
To create a new account ownership rule, select "Add Segment Rule," and pick a segment from the drop-down menu. If you don't have company segments created, you will need to create those first. Be sure to check out our HelpDocs video on creating a company segment if you have any questions!
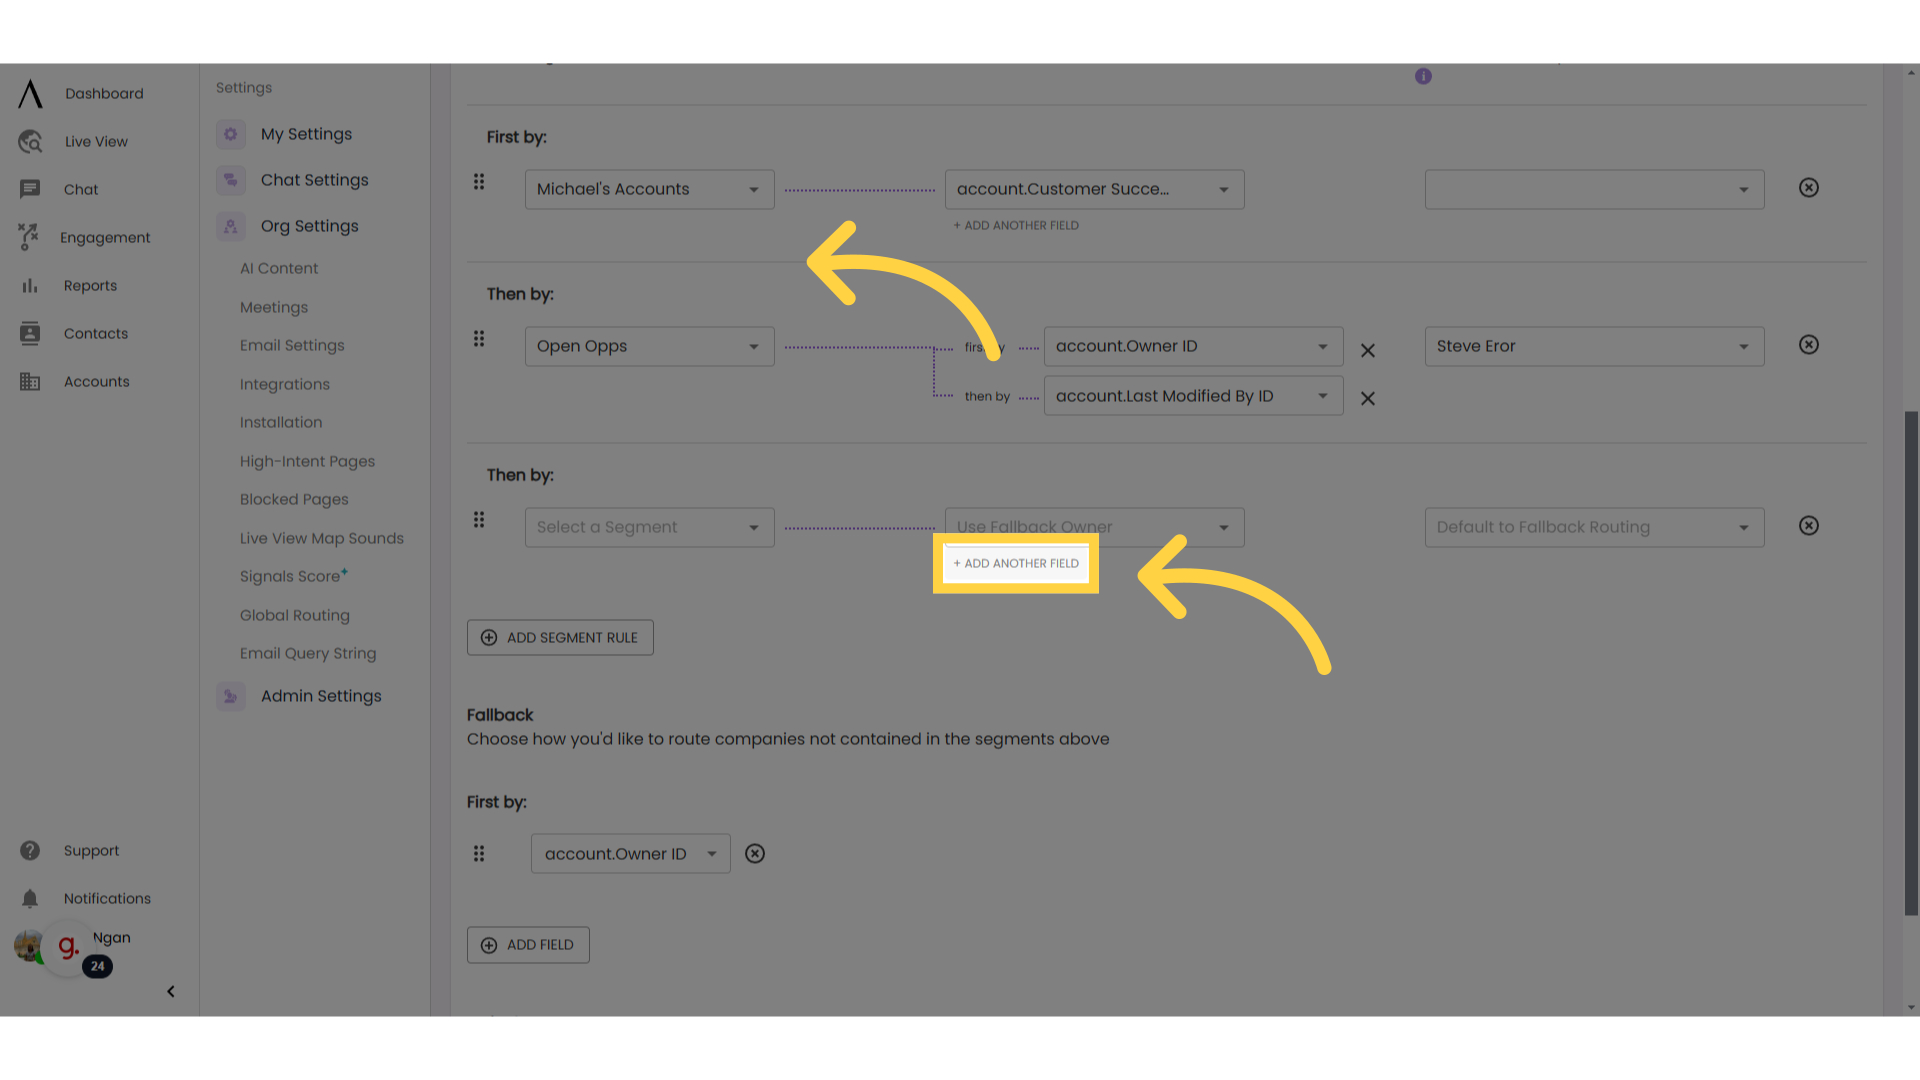
20. Click "Add another field"
You can have up to two fields here. Click "Add another field" and select a "then by" owner. This will work as a fallback in the case that there is no match for the first designated field.
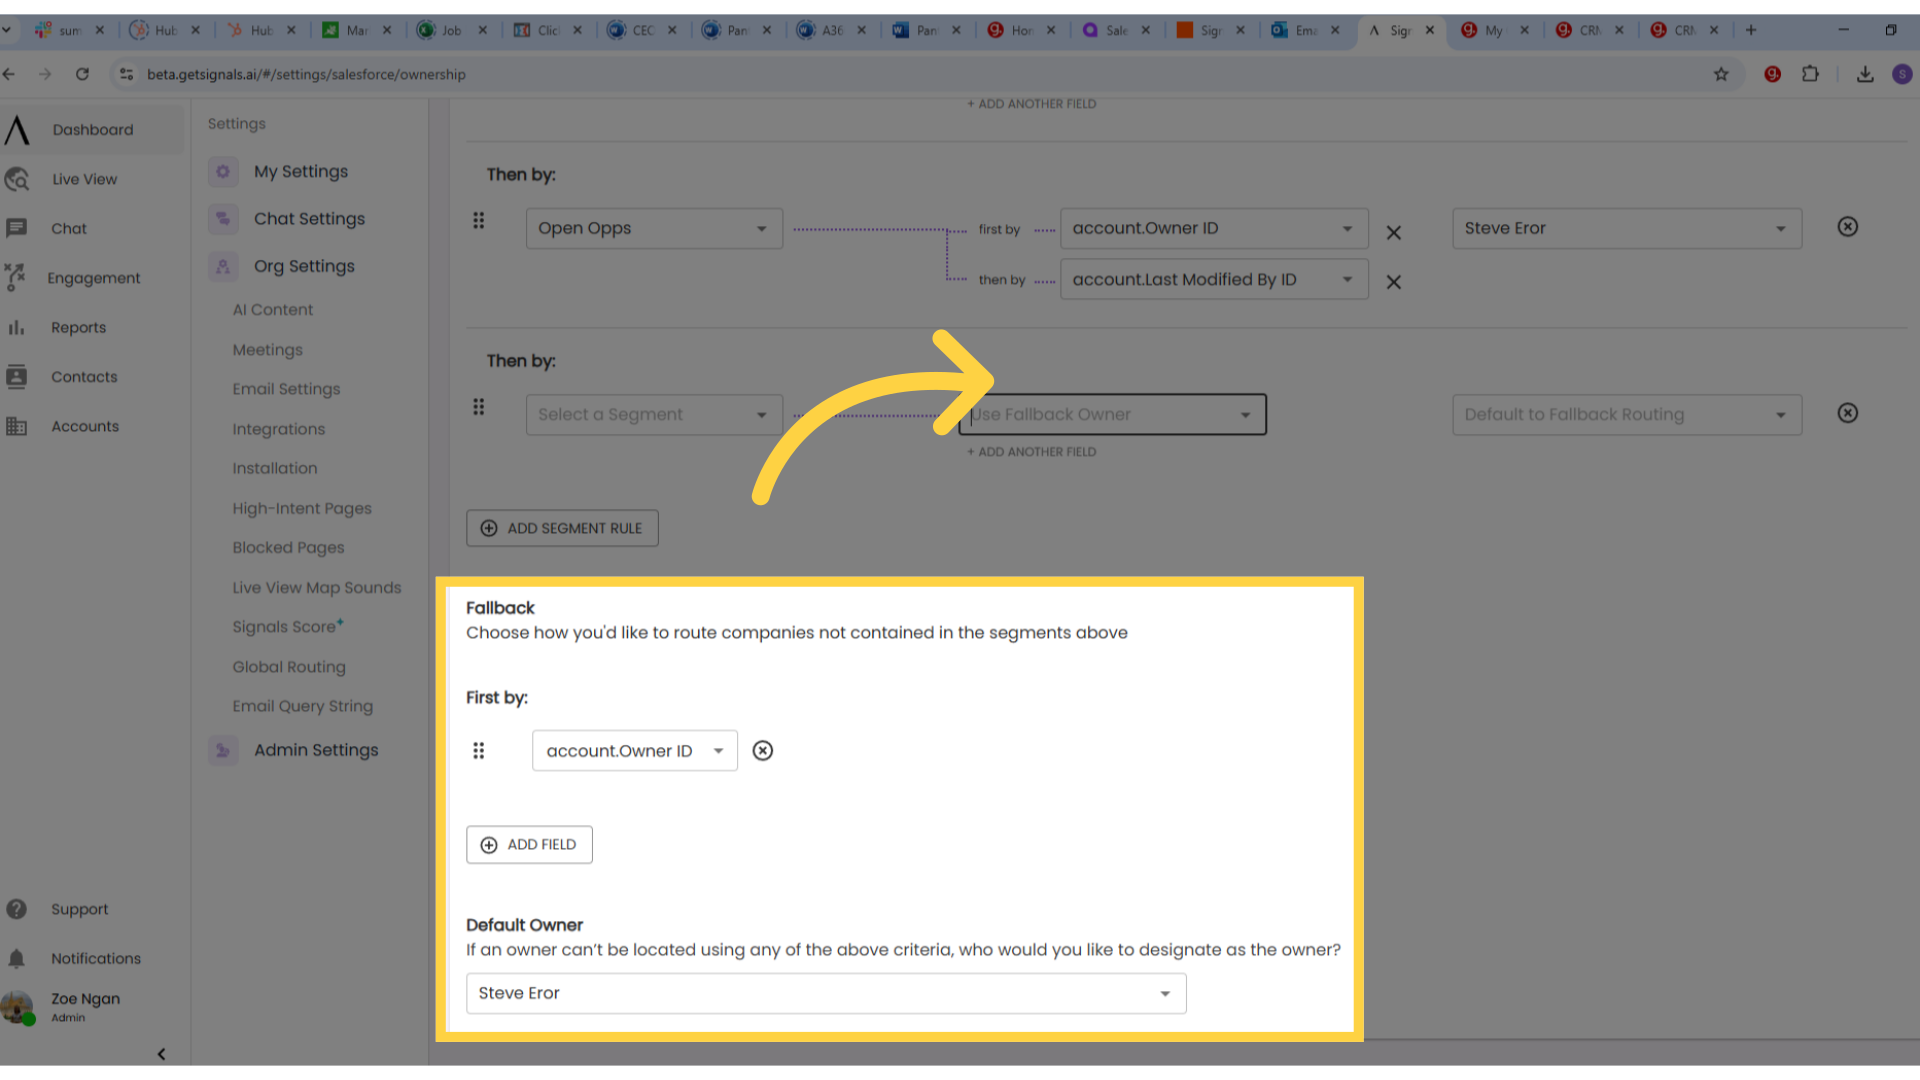
21. Create fallback rules
Select a Fallback Routing rule. This will be a specific Signals user who will be assigned as the Account Owner in the case that the Account Owner in your CRM is not a Signals user. Lastly, select Fallback criteria in the case that a company does not match the specified segments that you set up in step 2.
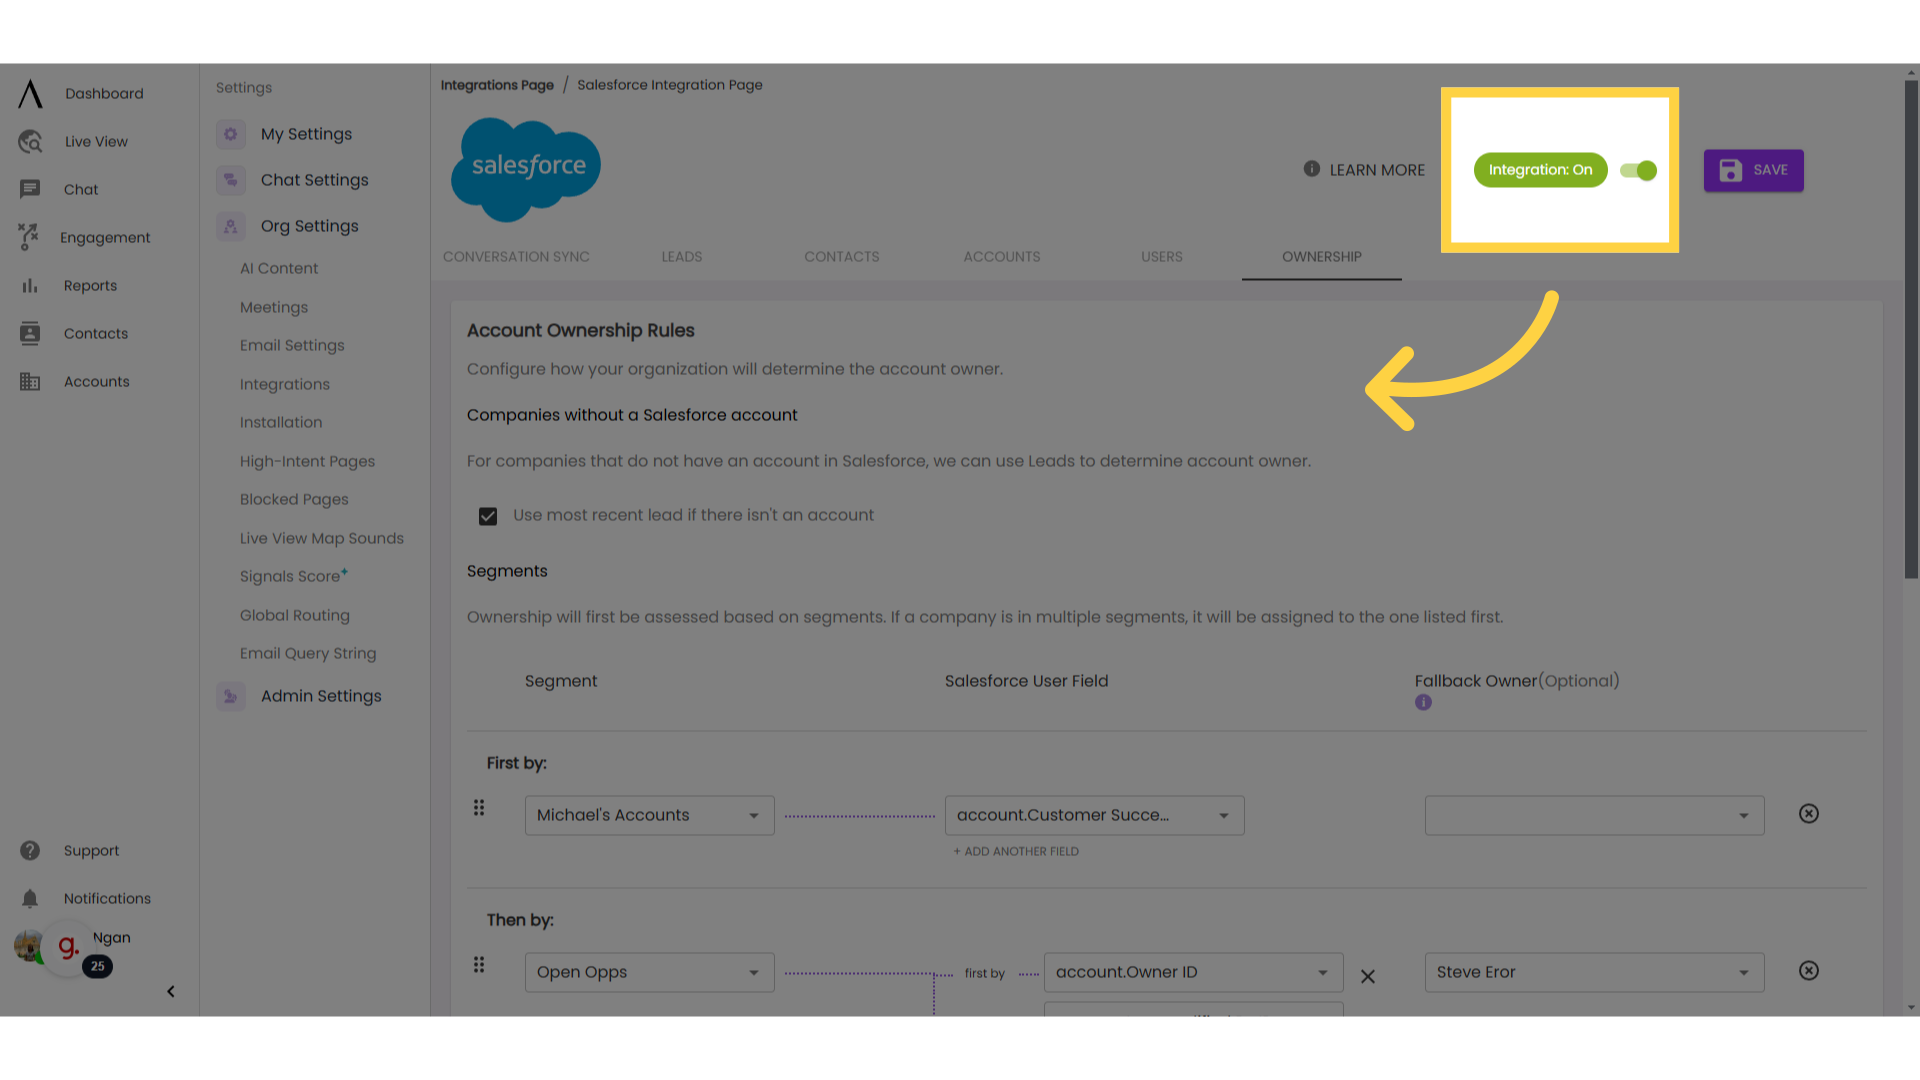
22. Turn on your Salesforce Integration
When you’re ready to turn your Salesforce integration on, simply select the “Integration On” switch at the top of the page so that the switch is toggled on.
23. Click "Chat"
You also have the option to manually connect a web visitor’s information to Salesforce. This is helpful when your bot is not configured to capture the web visitor as a Lead but when reviewing their chat transcript, you see that they are a good lead you want to capture in Salesforce. To do this, click "Chat" in the first sidebar.

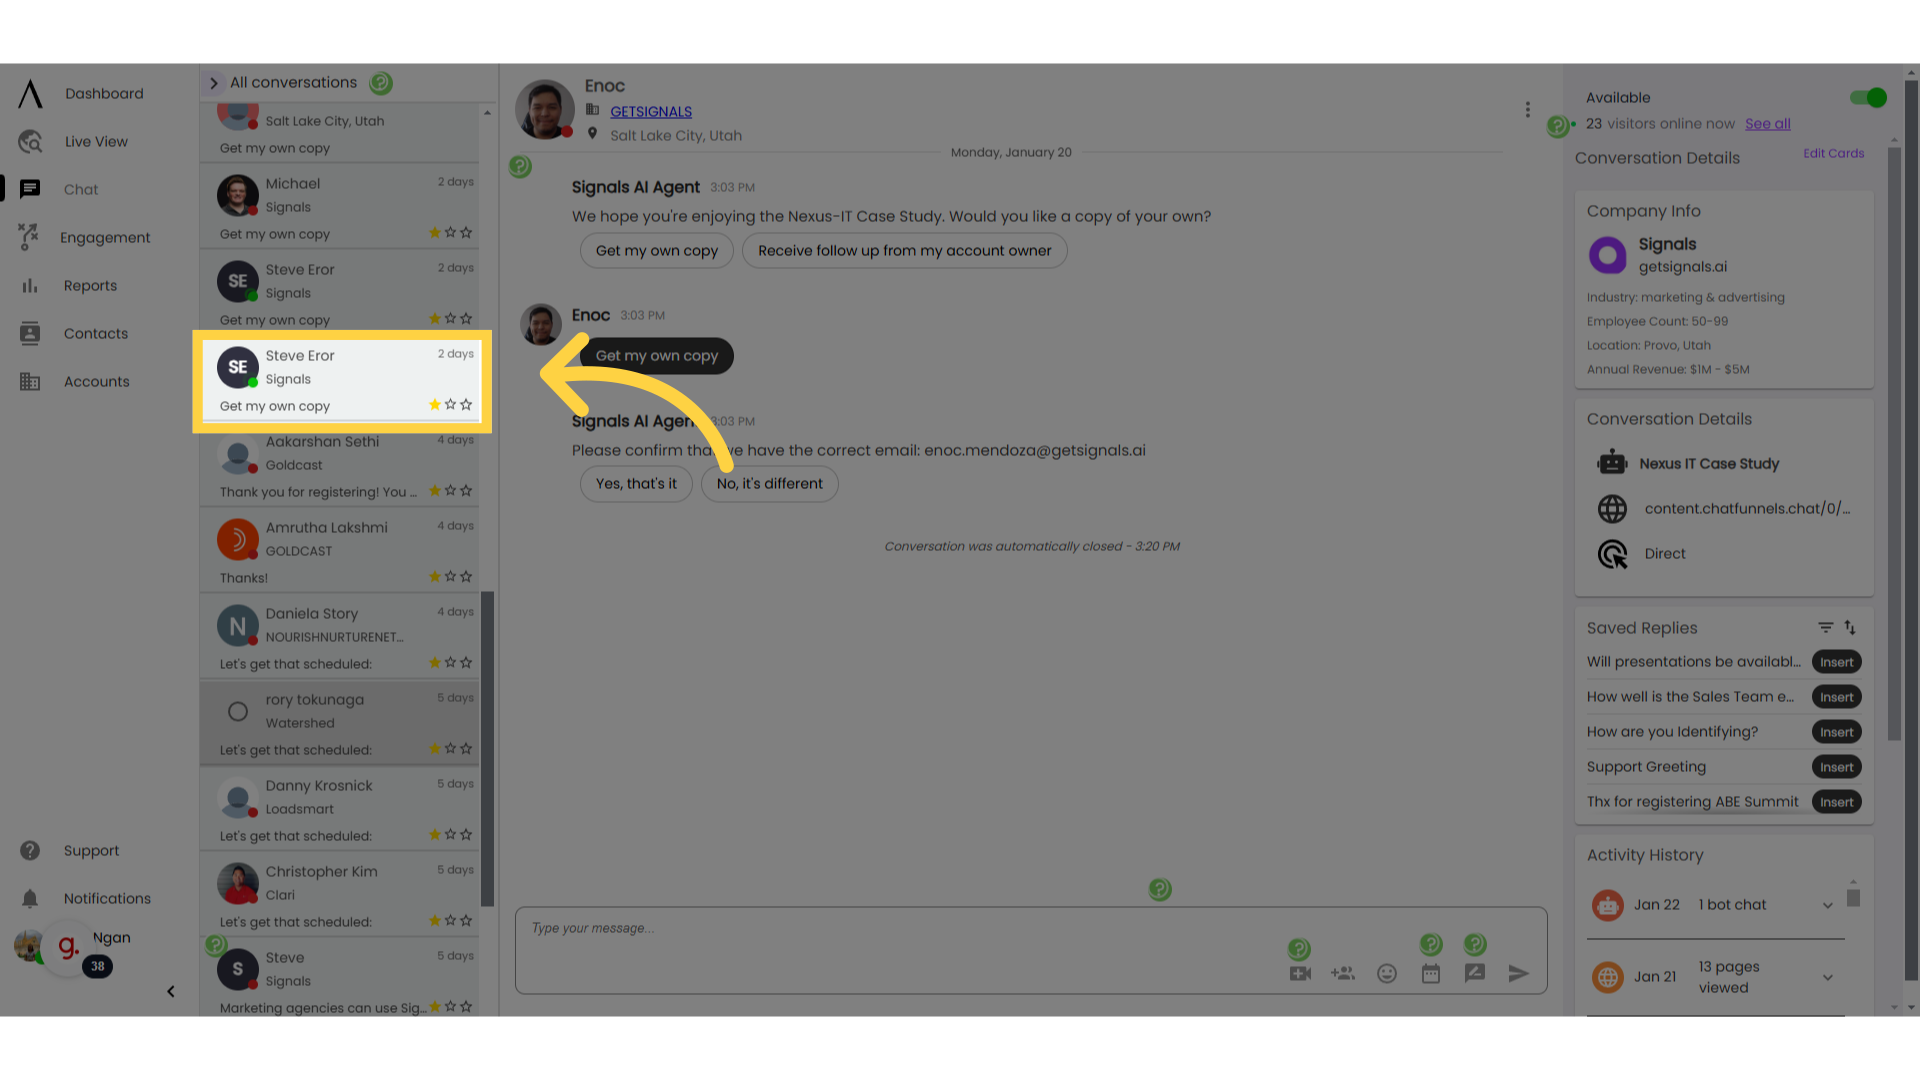
24. Find a chat you want to sync to Salesforce
Find the chat with the web visitor information you want to connect to Salesforce.
25. Click on the Salesforce icon to sync
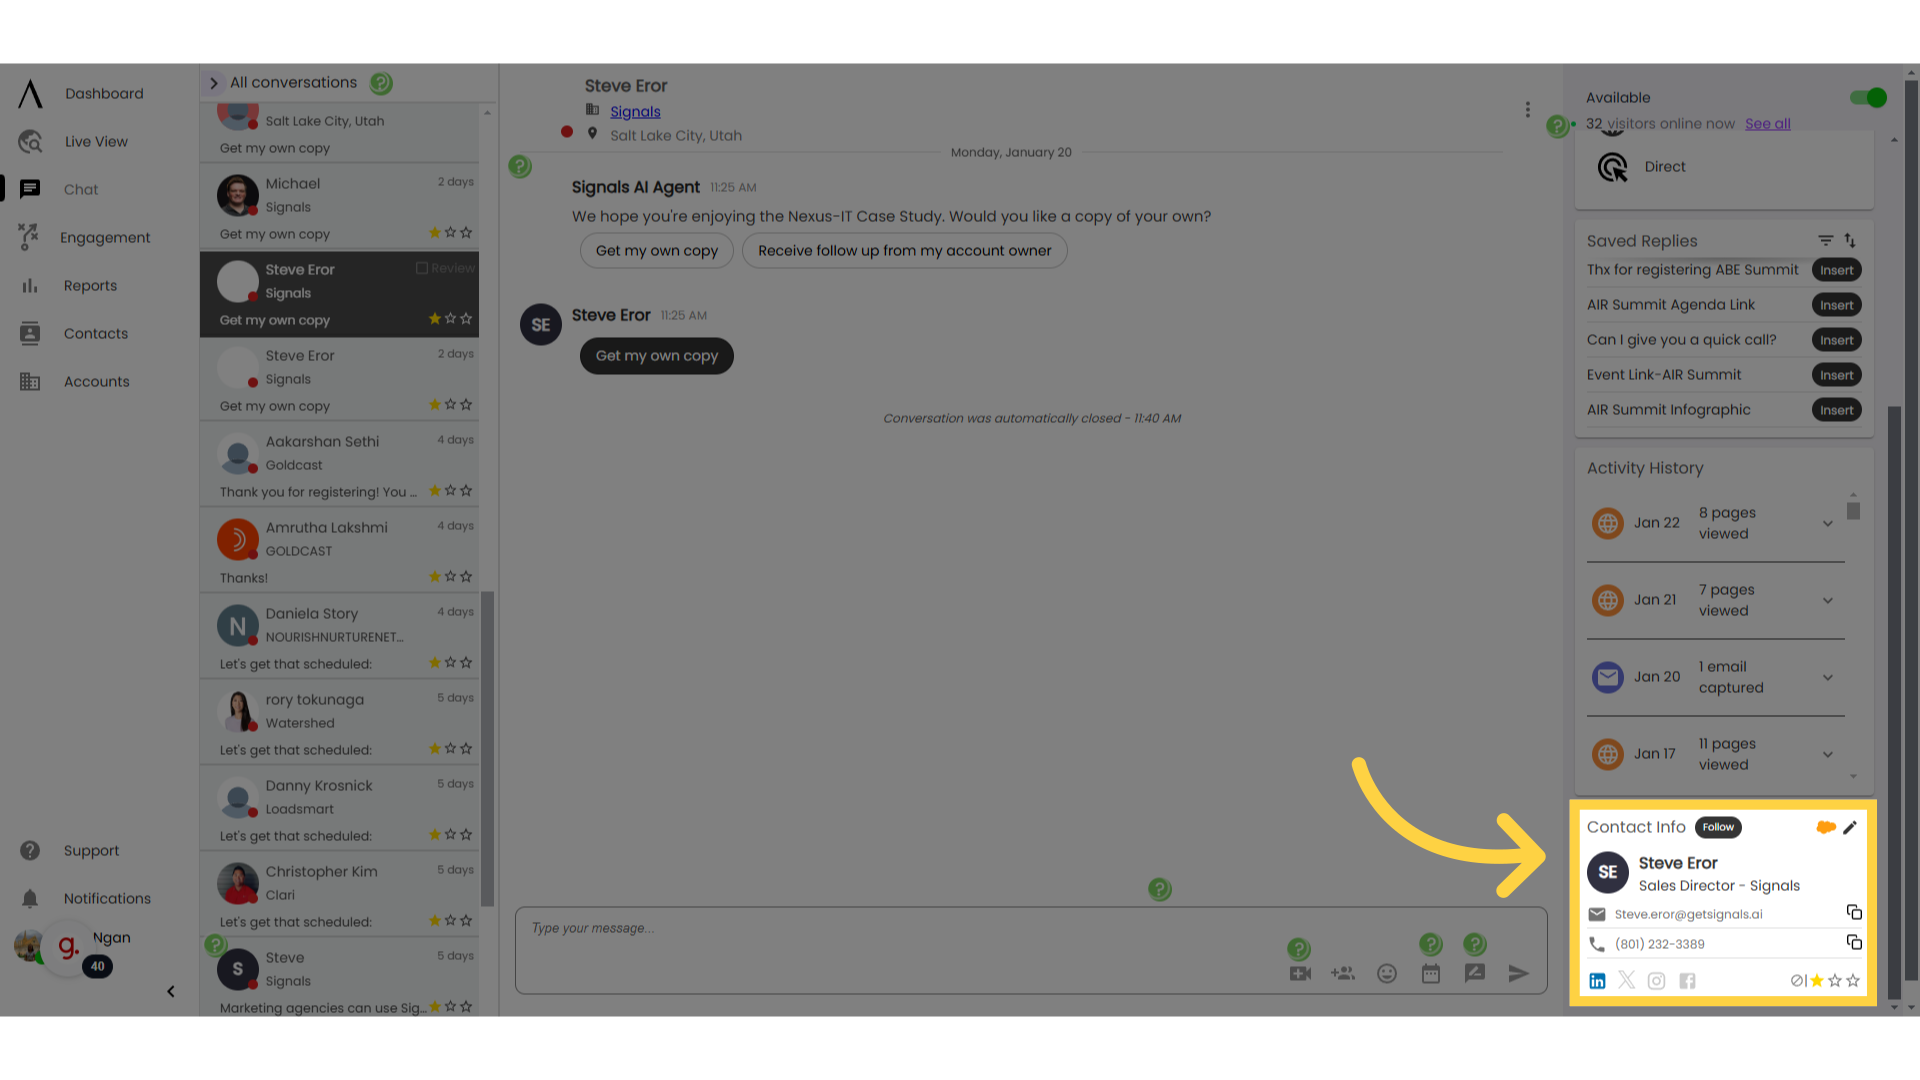
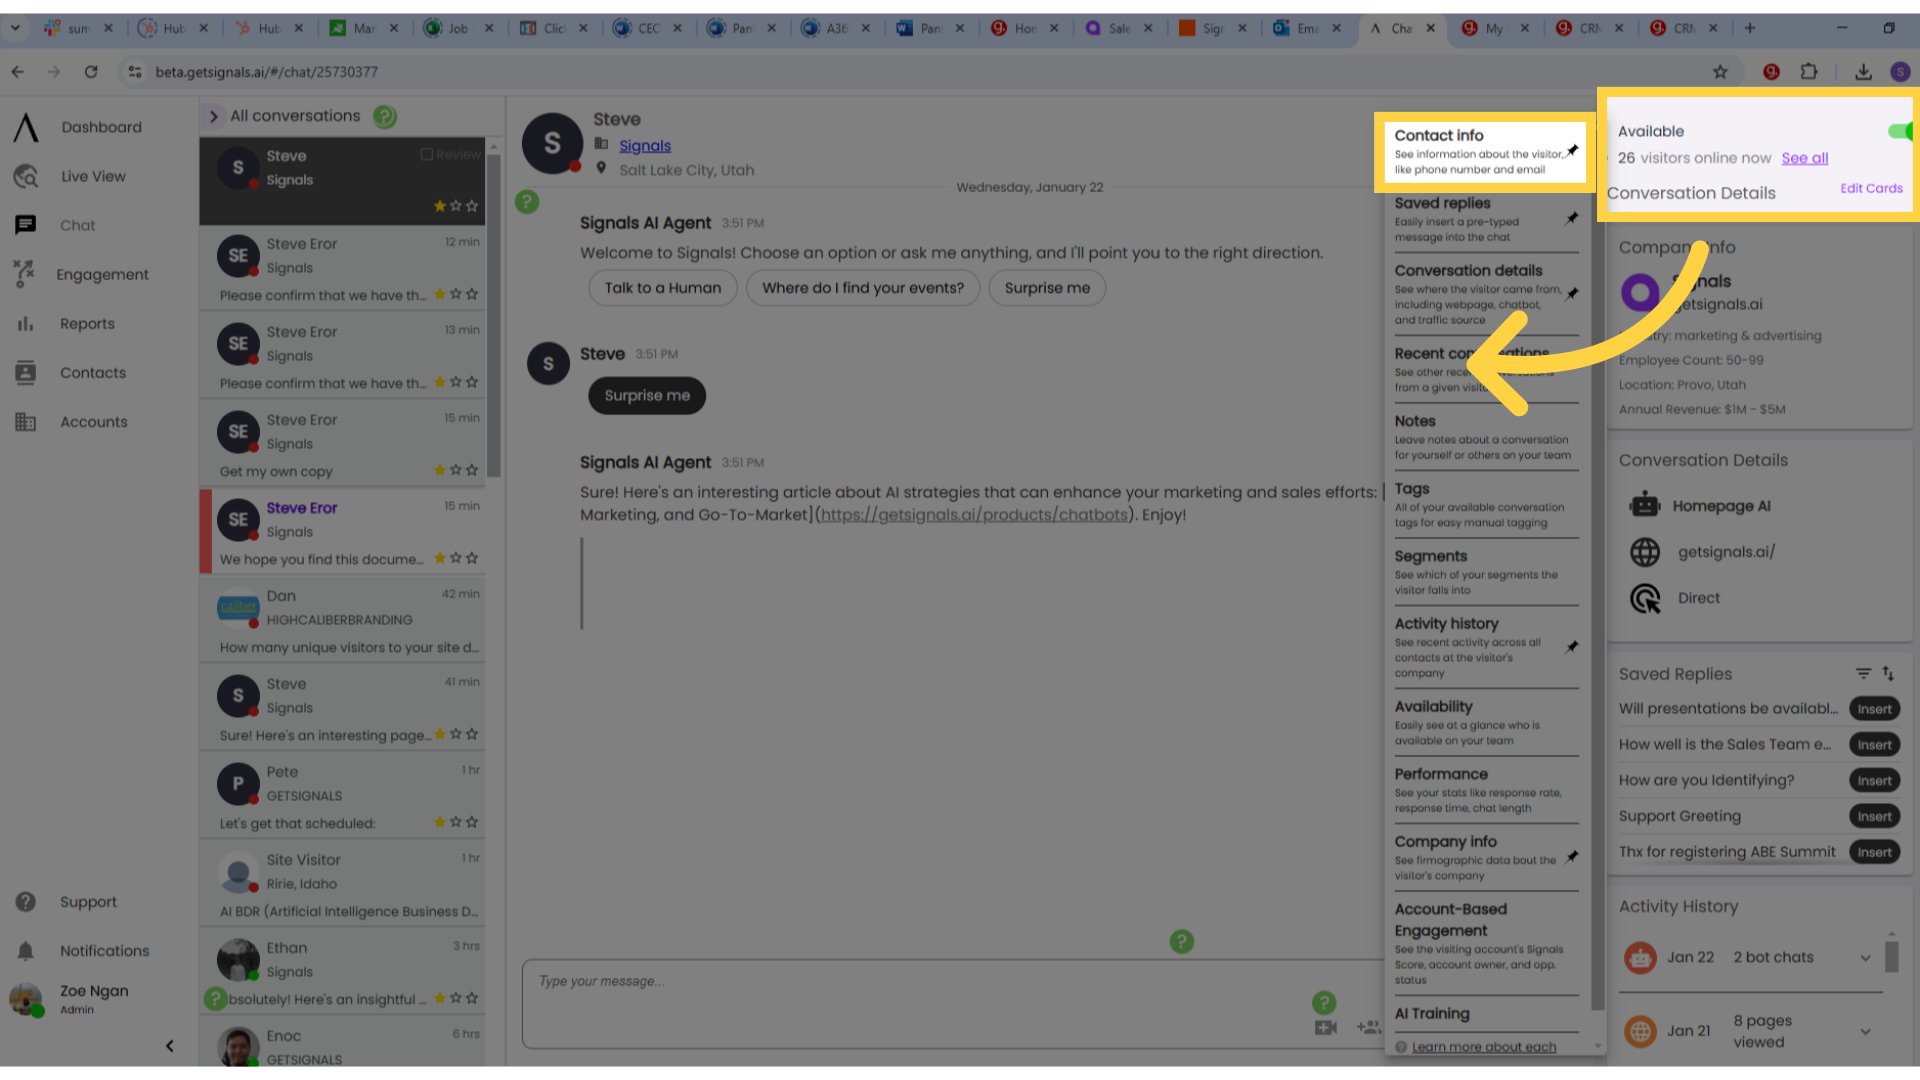
26. Click "Edit Cards" and pin "Contact Info"