Custom Contact Fields
Custom Contact Fields
Go to app.getsignals.ai
1. Introduction
Create custom contact fields to ensure that the chatbot collects the right information and maps it to the right fields in your CRM.
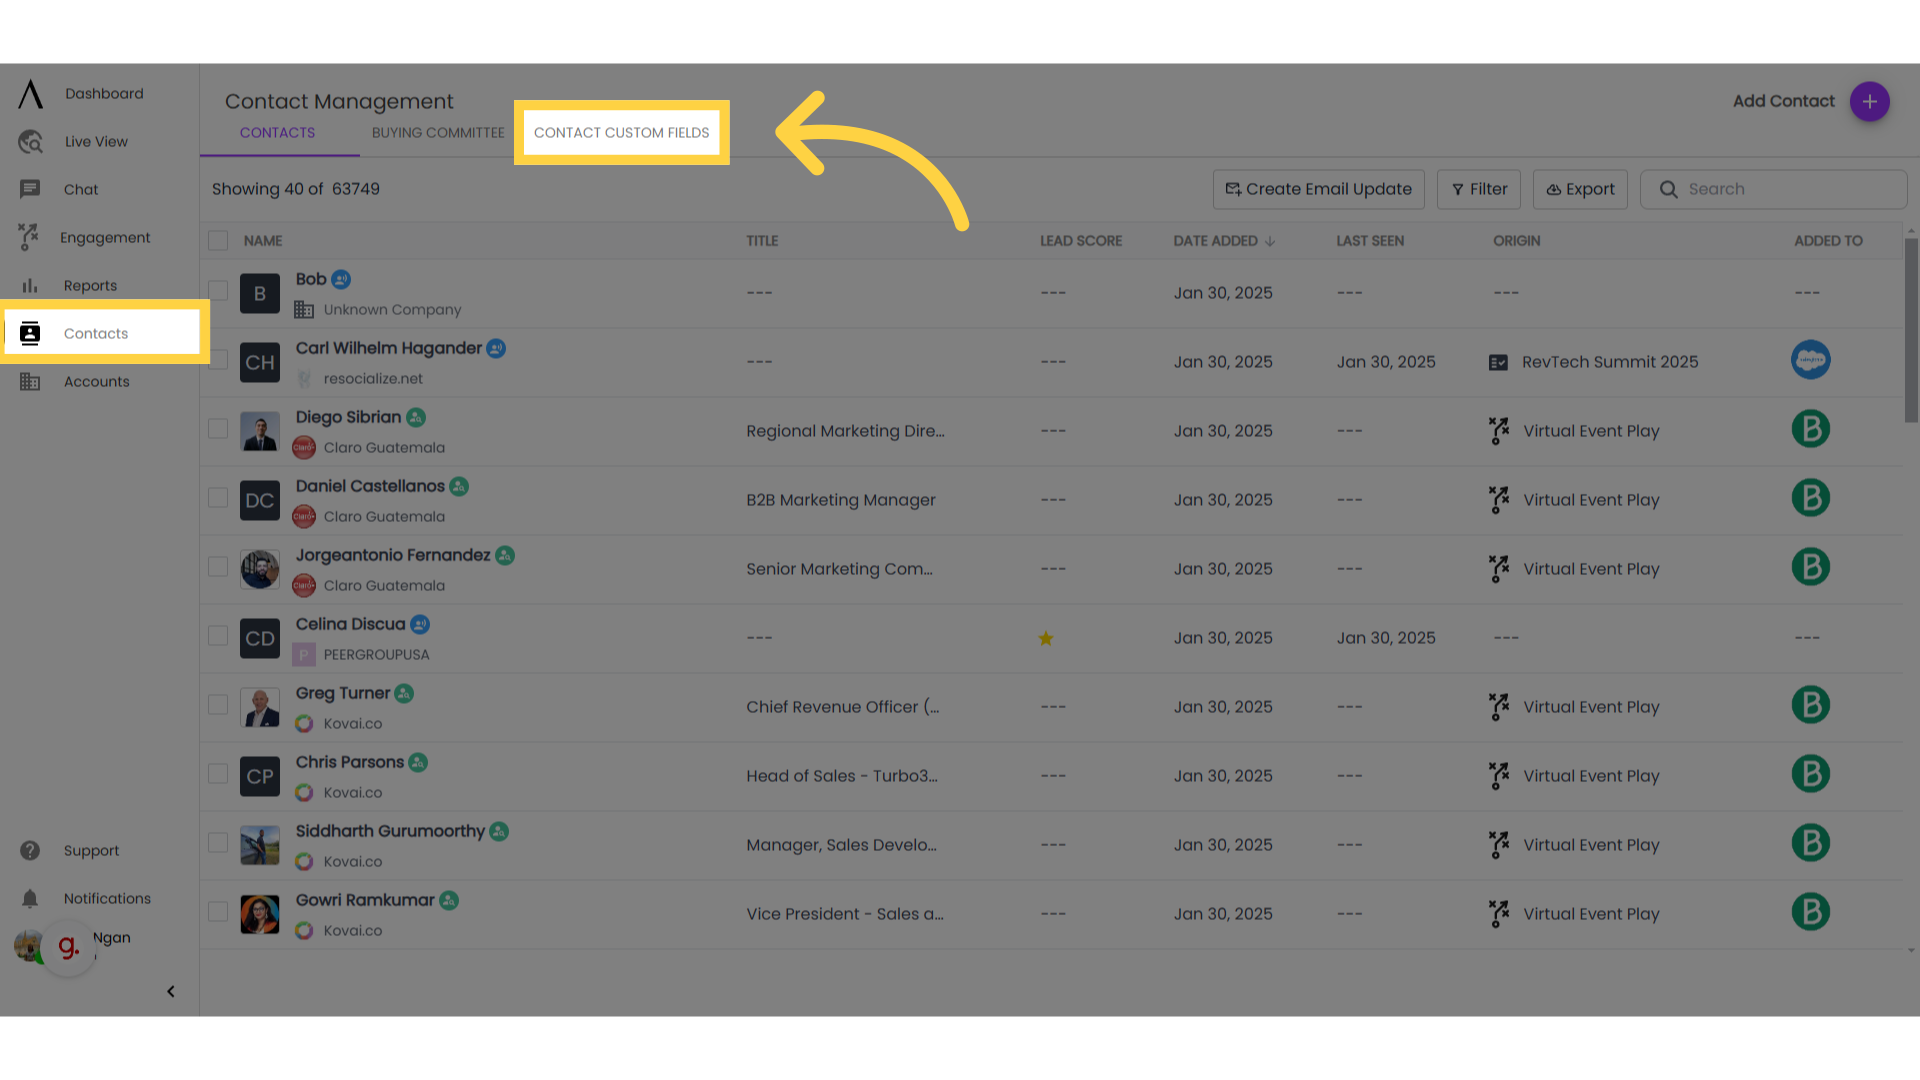
2. Click "Contact Custom Fields"
To access the page where you can create custom fields, navigate to "Contacts" in the left sidebar, then click "Contact Custom Fields."
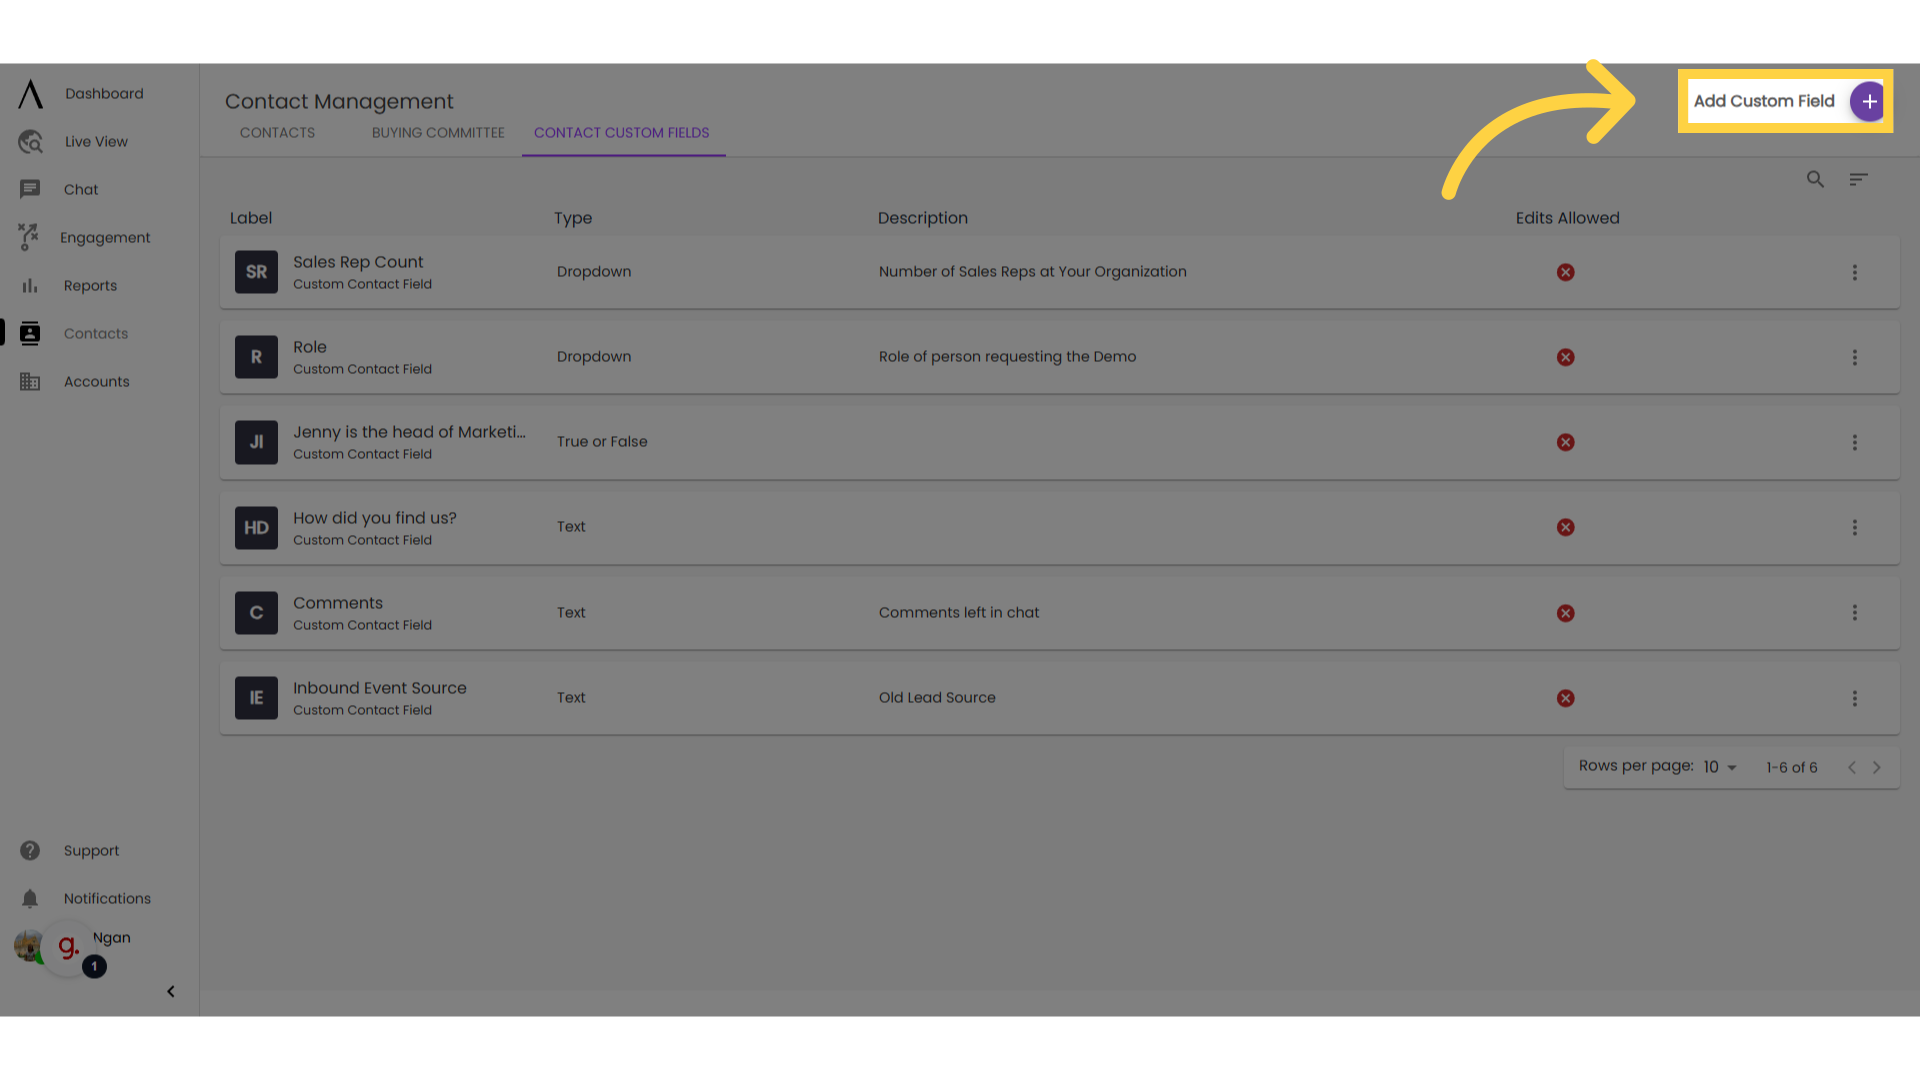
3. Select "Add Custom Field"
Select "Add Custom Field" in the top right corner of the screen.
4. Fill in information
Select "Add Custom Field" in the top right corner of the screen.

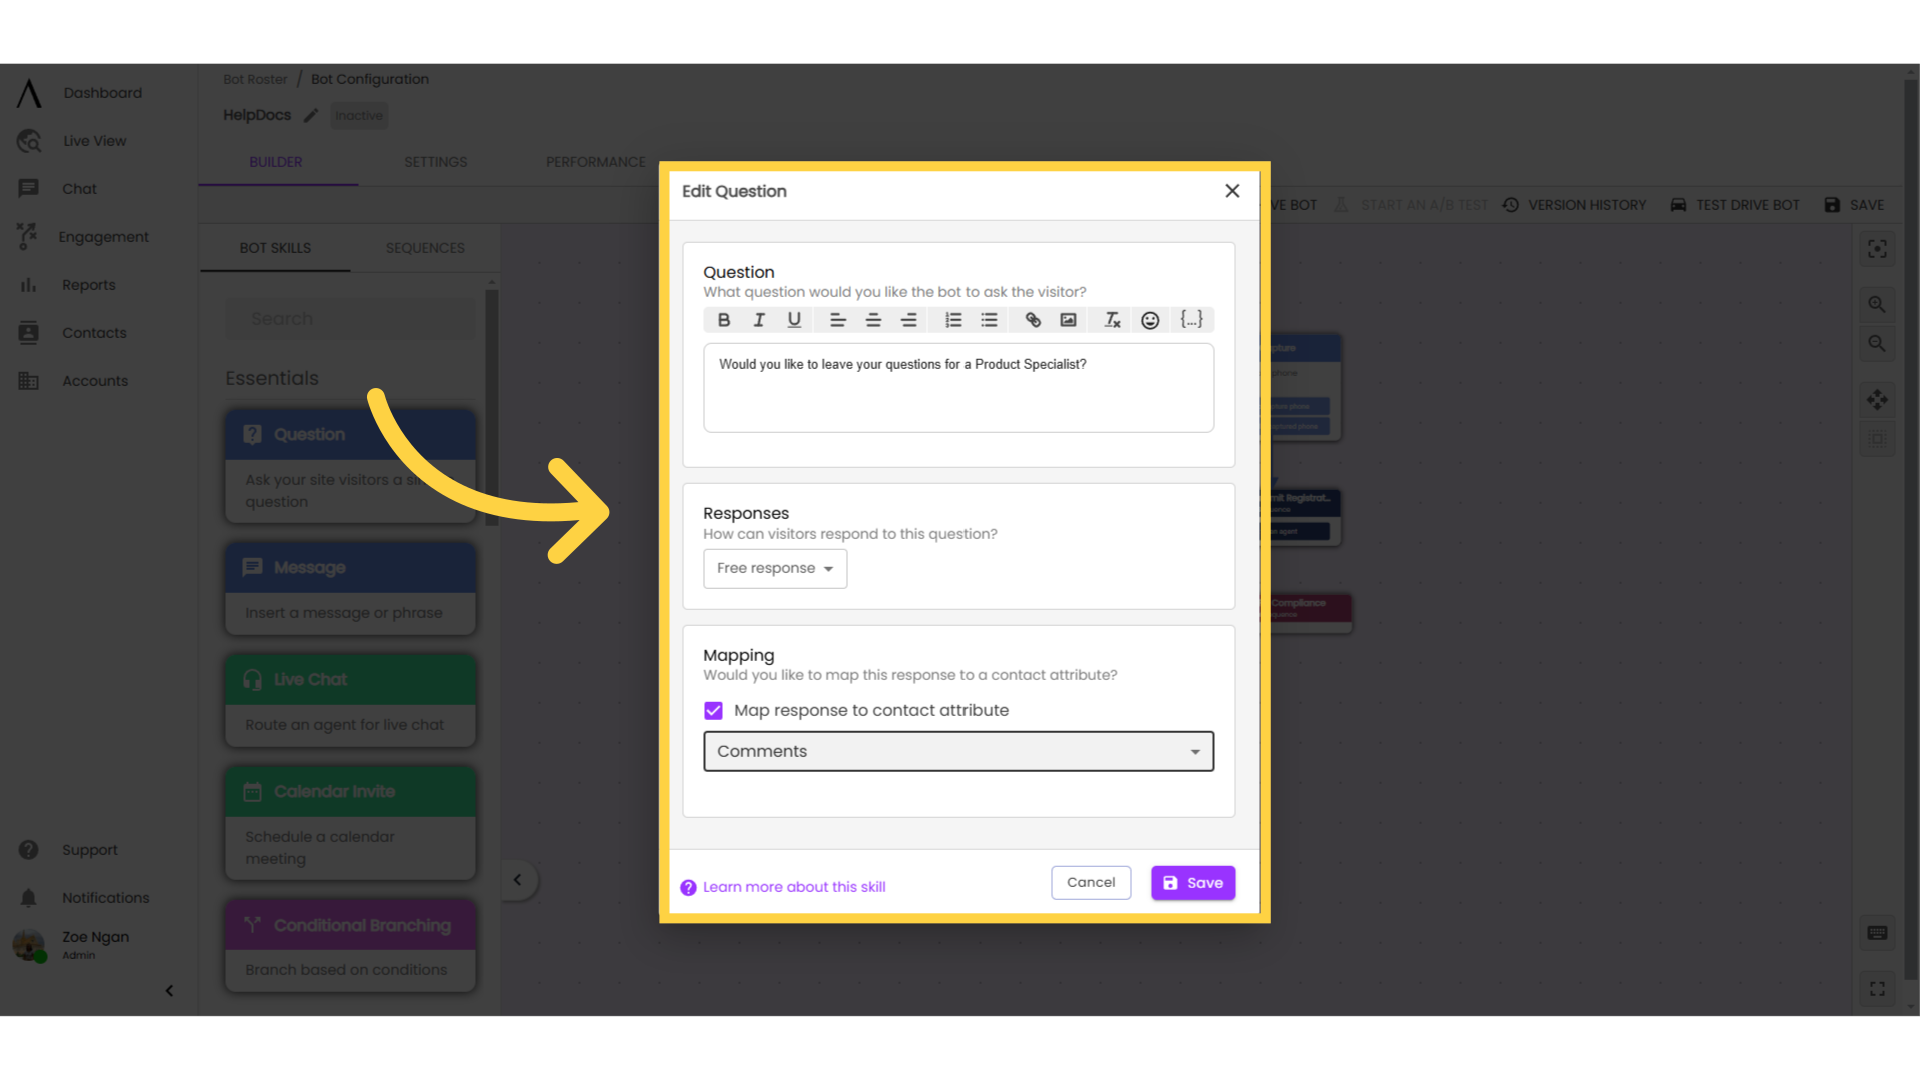
5. Use Case
One of the most common uses for custom fields is when asking a visitor for any comments or questions after scheduling a meeting or at the end of a bot flow. In your bot flow, use a question skill to ask the visitor to leave comments or questions they have. Select the "Map response to contact attribute". Select the field you created (such as Comments) from the dropdown list of contact fields.
Similar techniques can be used to ensure you make the most of Signals by pushing information that is important to you into your CRM.