Global Routing
Global Routing
This guide will walk you through configuring your Global Routing settings in Signals.
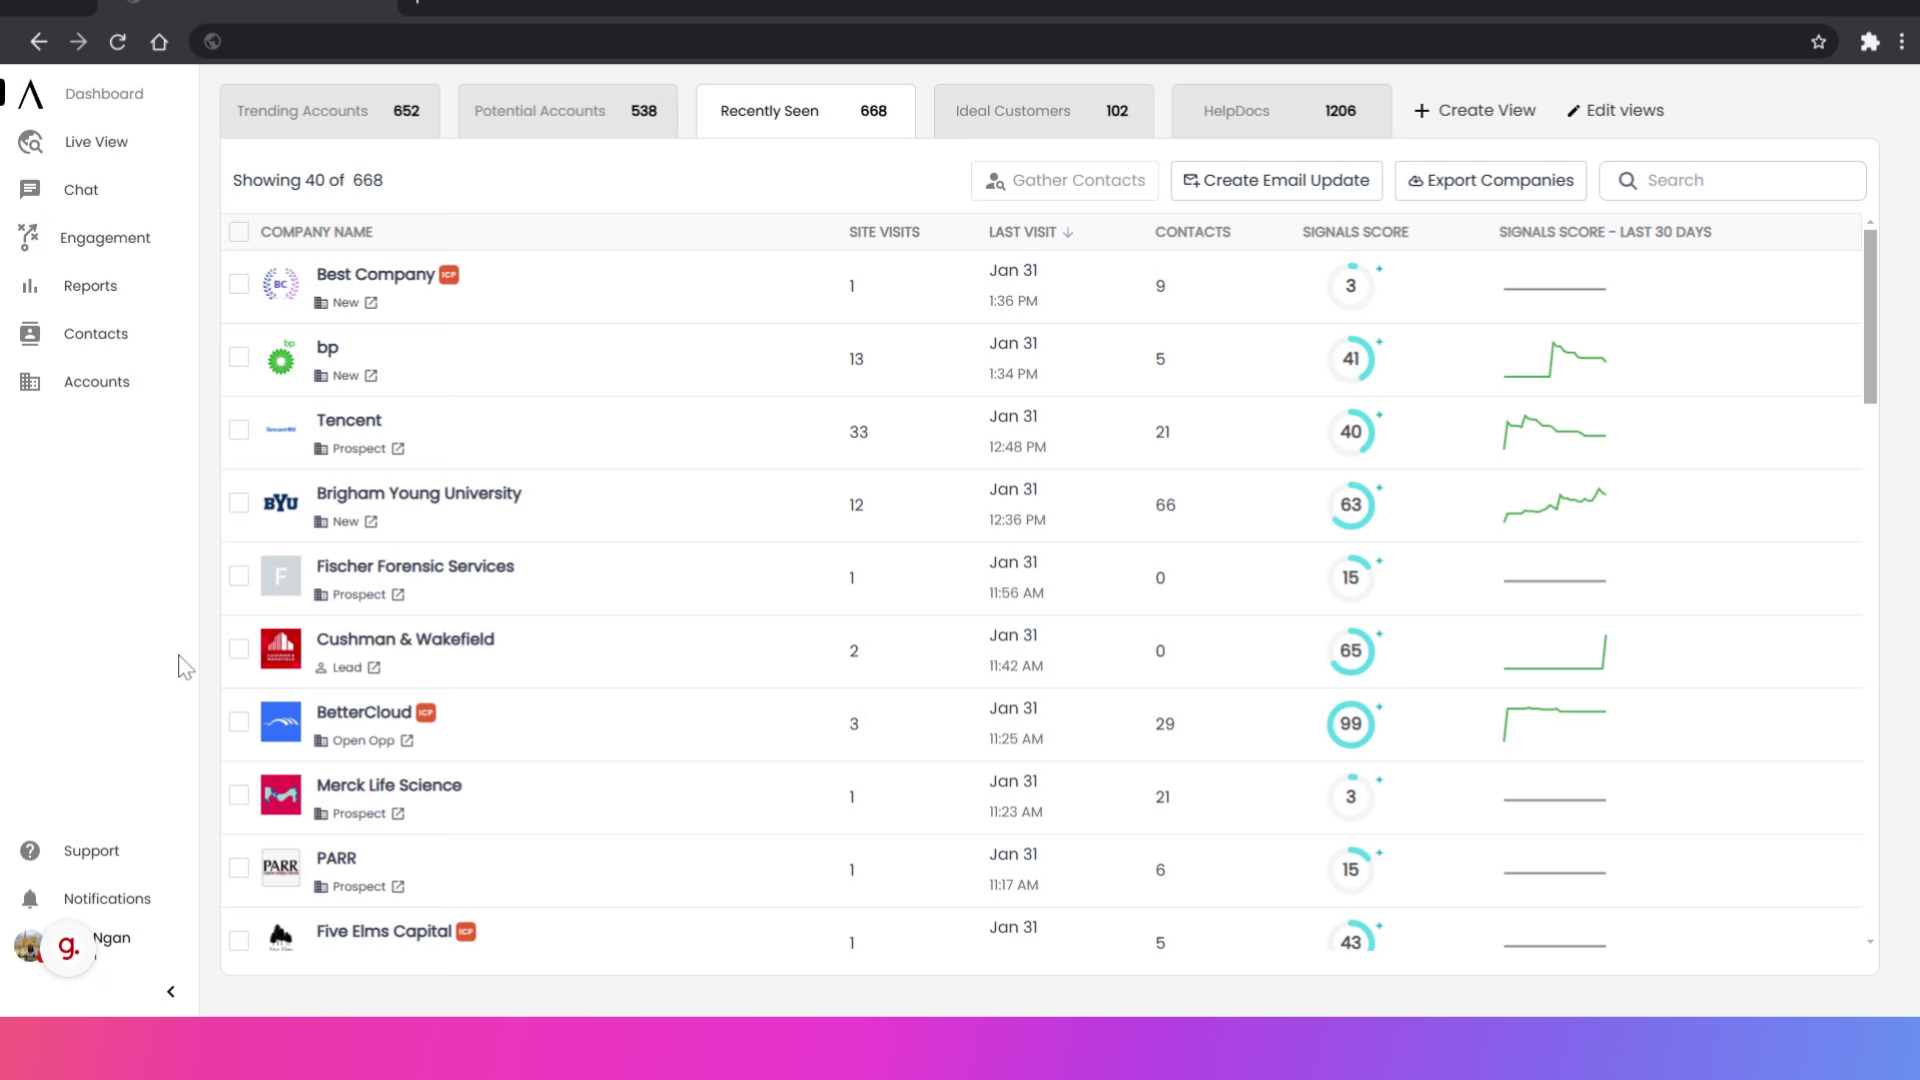
Go to app.getsignals.ai
1. Introduction
Global Routing rules allows you determine who will be routed for alerts, live chat, and meetings based on segments.
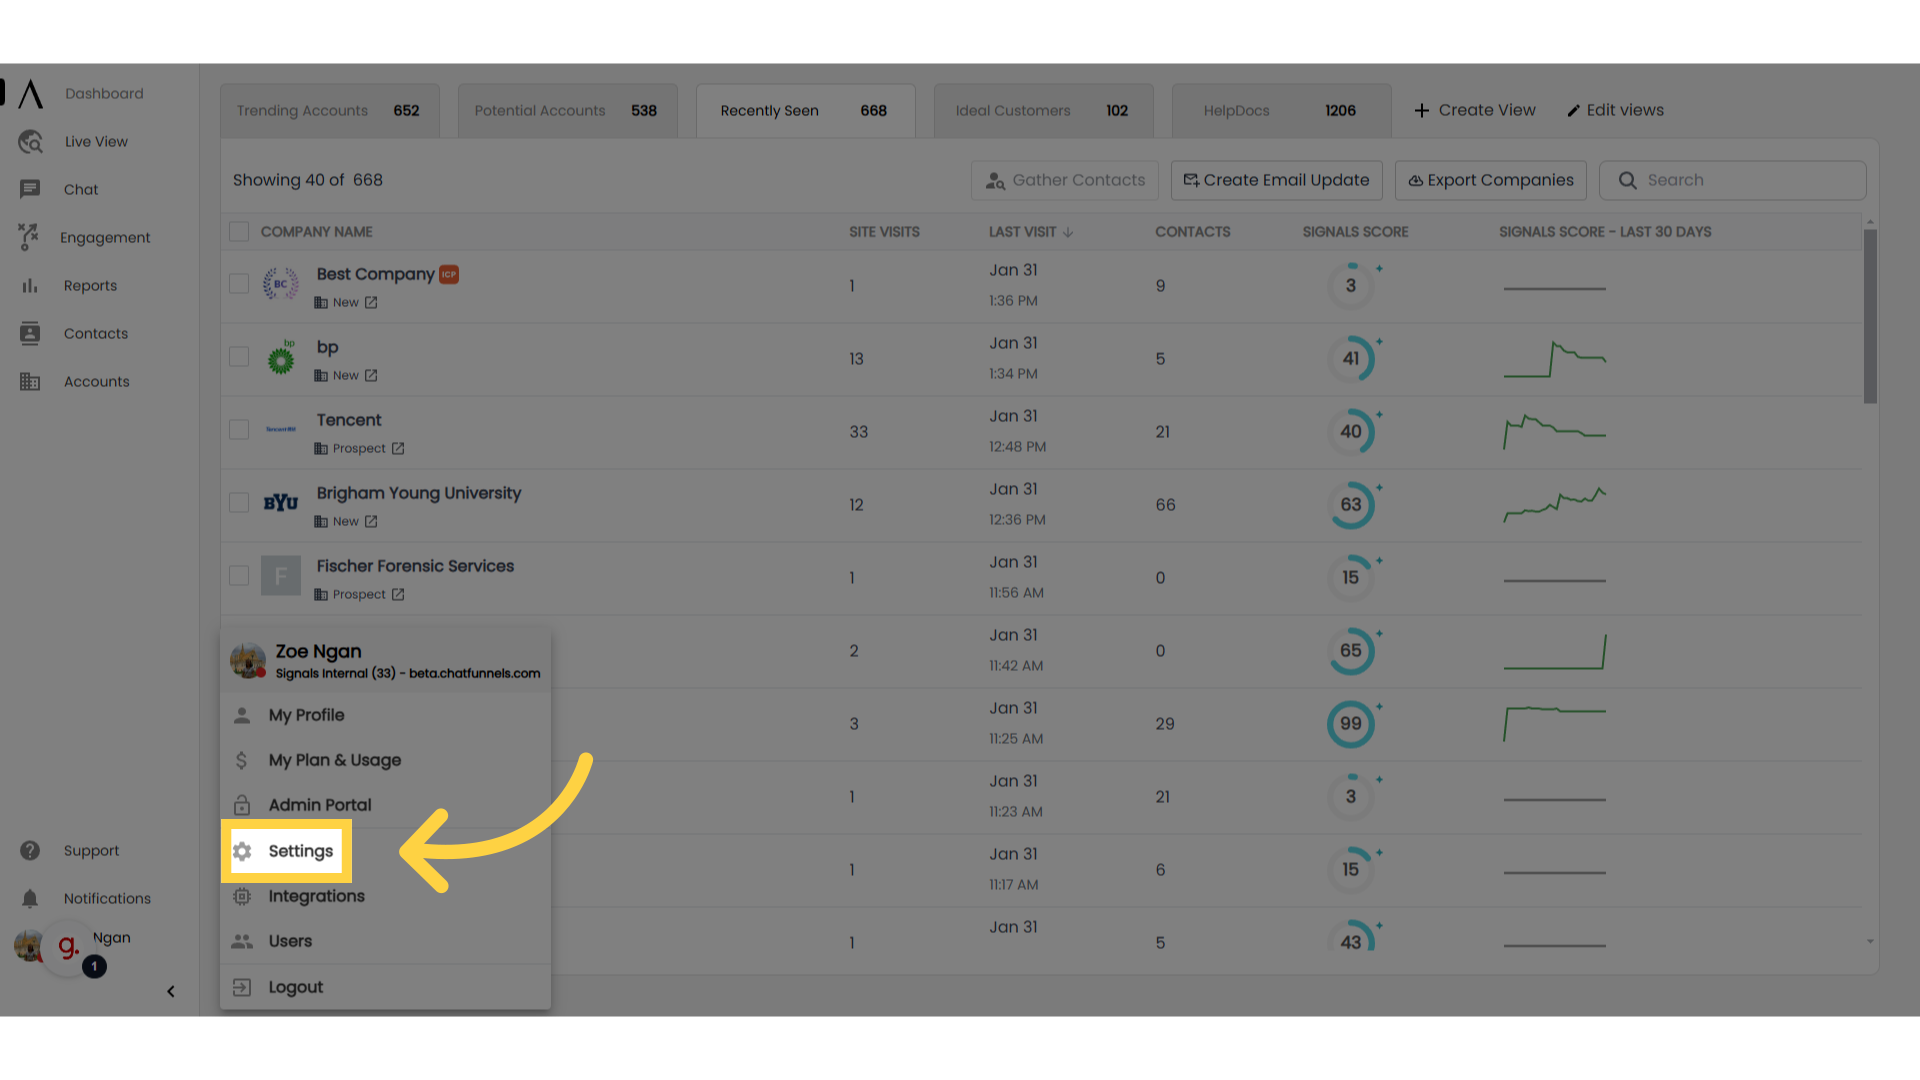
2. Click "Settings"
To start, click on your Profile in the bottom left corner, then click on Settings.
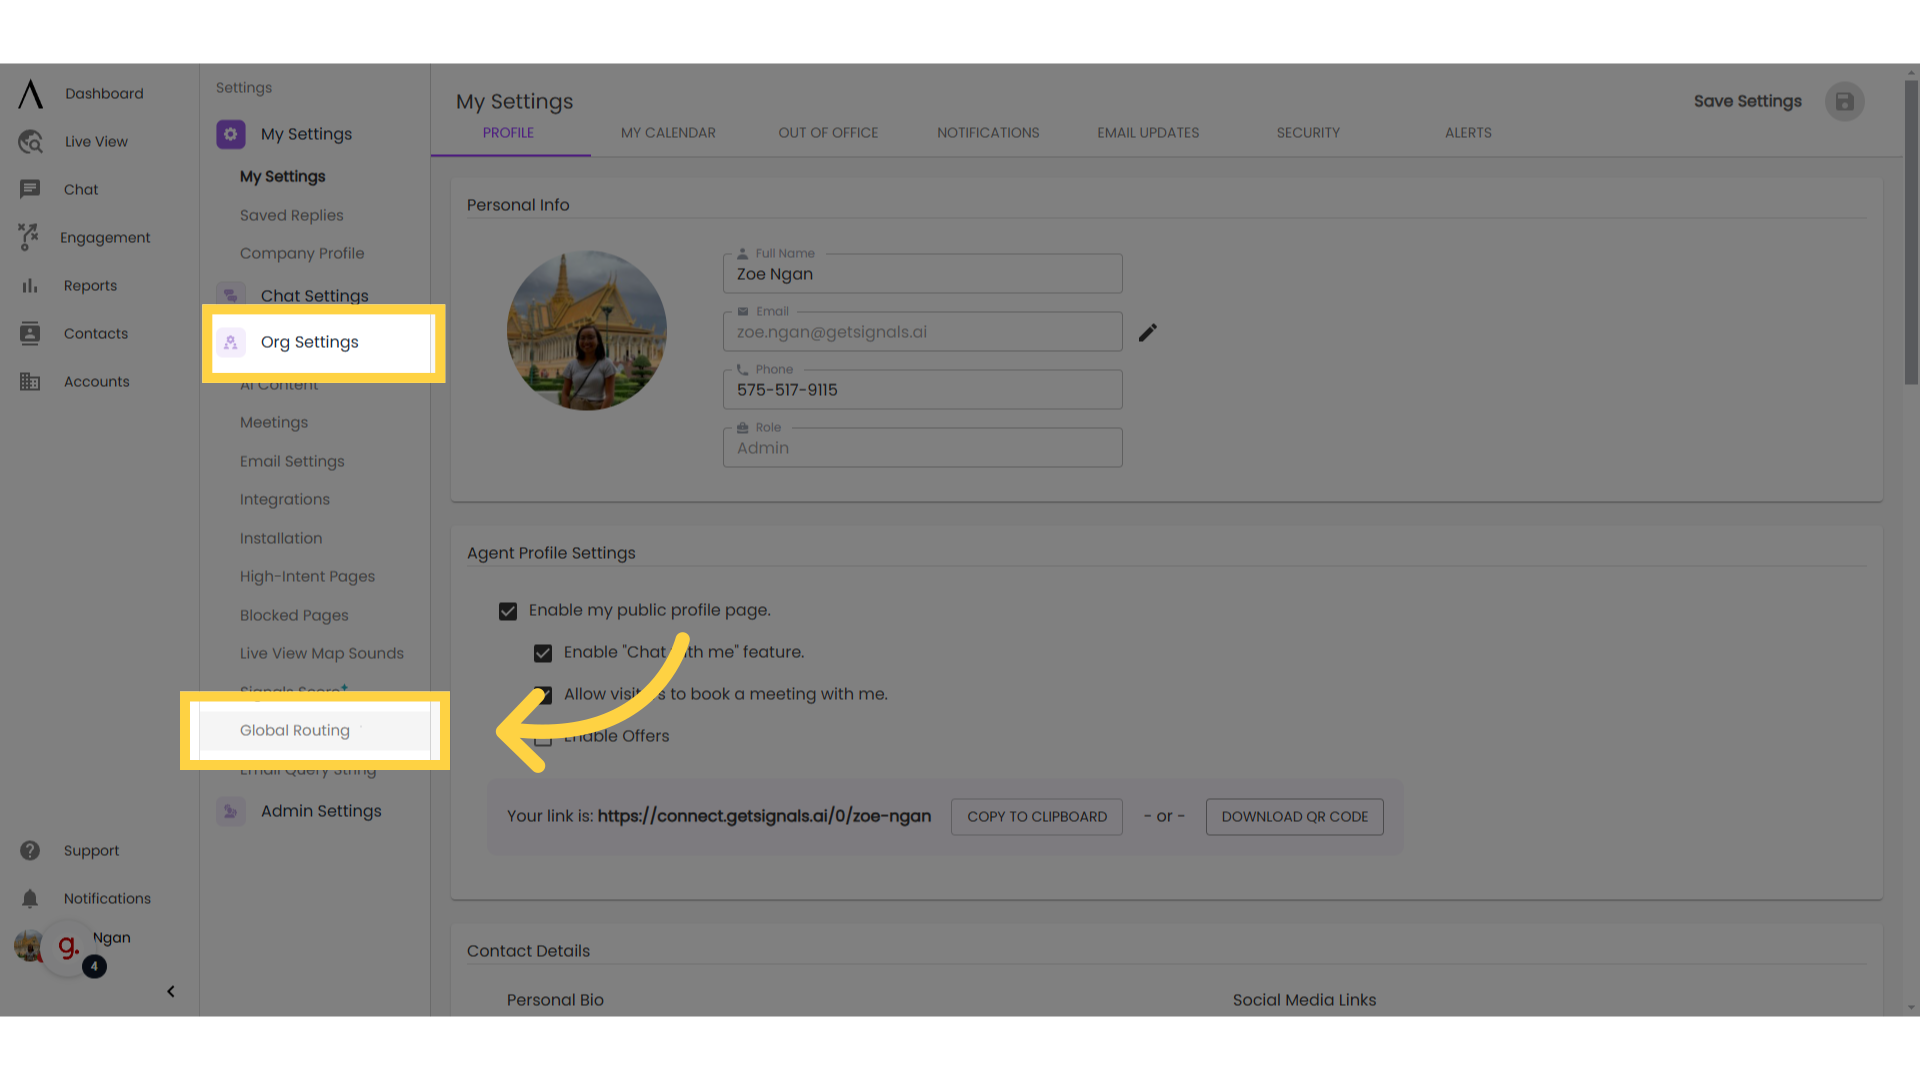
3. Go to "Global Routing"
Navigate to Org Settings toward the left of your screen under "My Settings", then go to Global Routing towards the bottom of the dropdown.
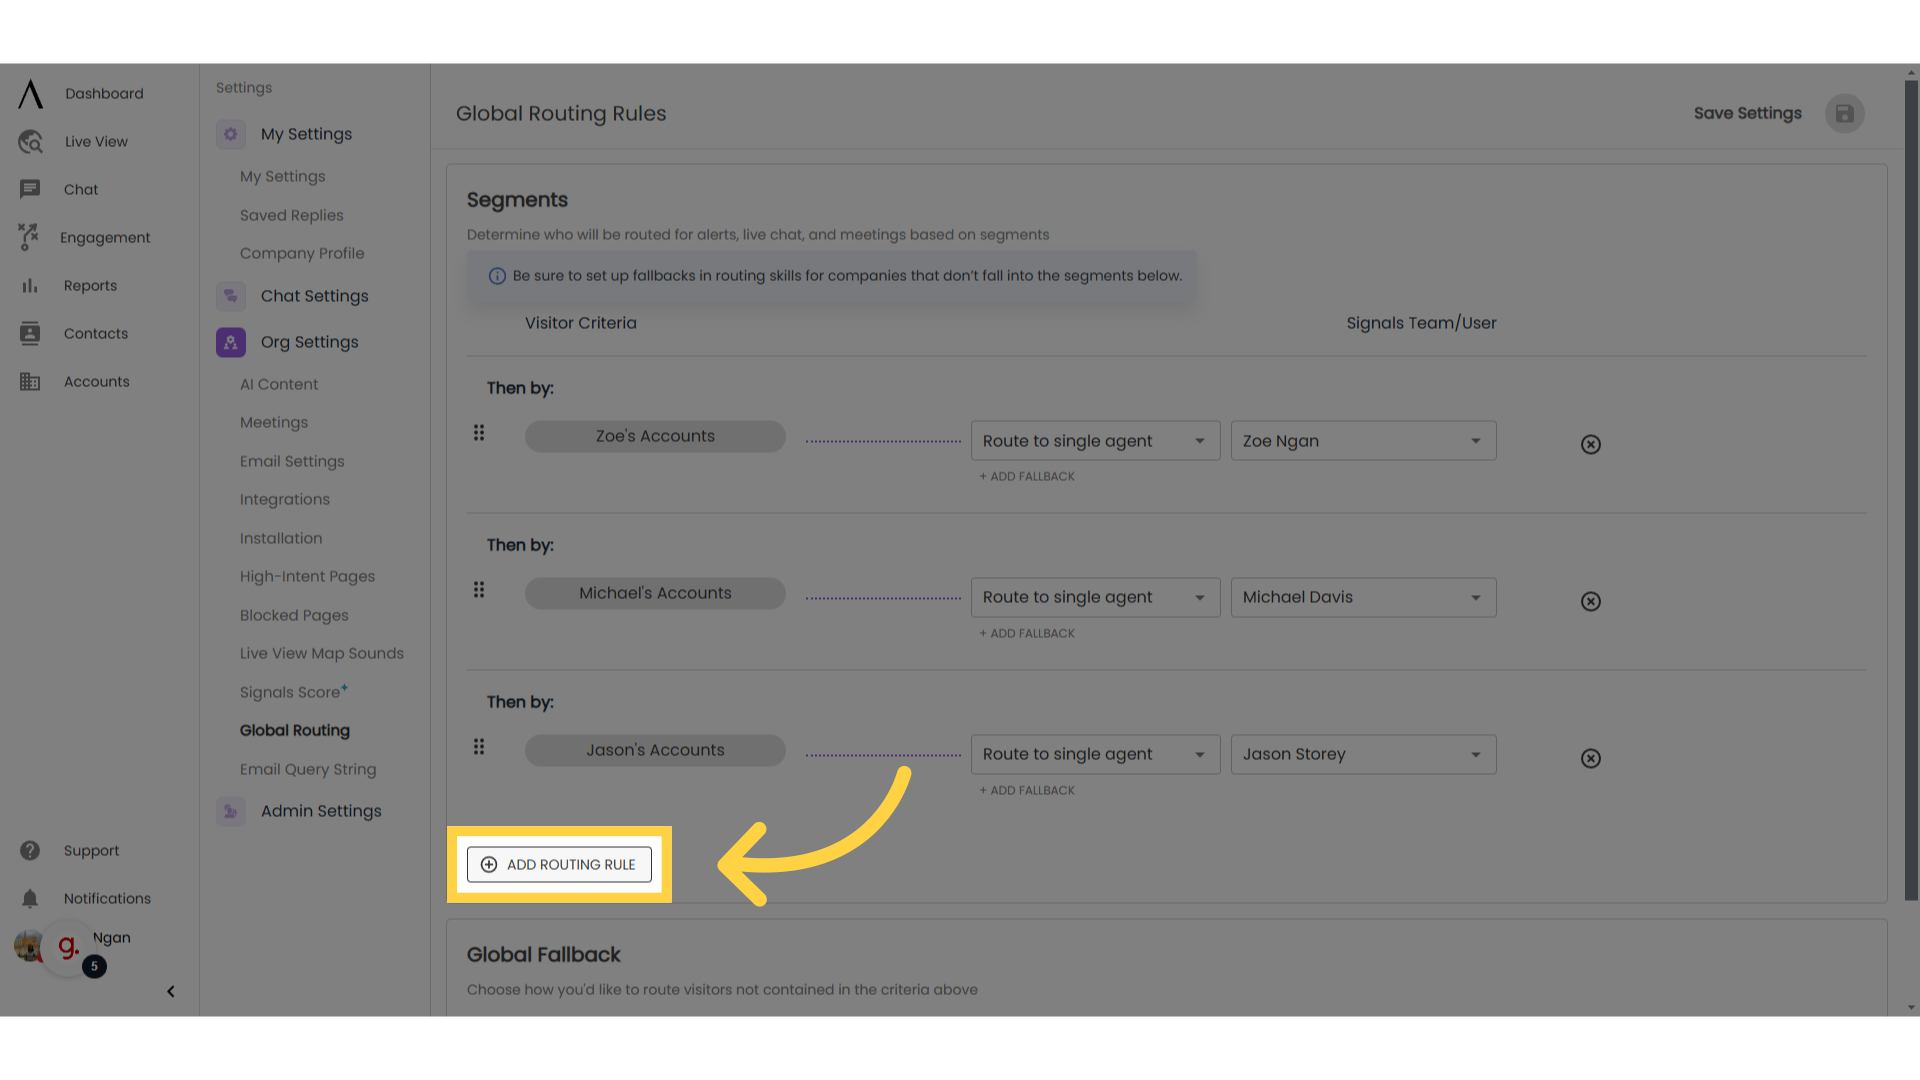
4. Select "Add Routing Rule"
Click "Add Routing Rule" within the large "Segments" box.
5. Determine routing rules
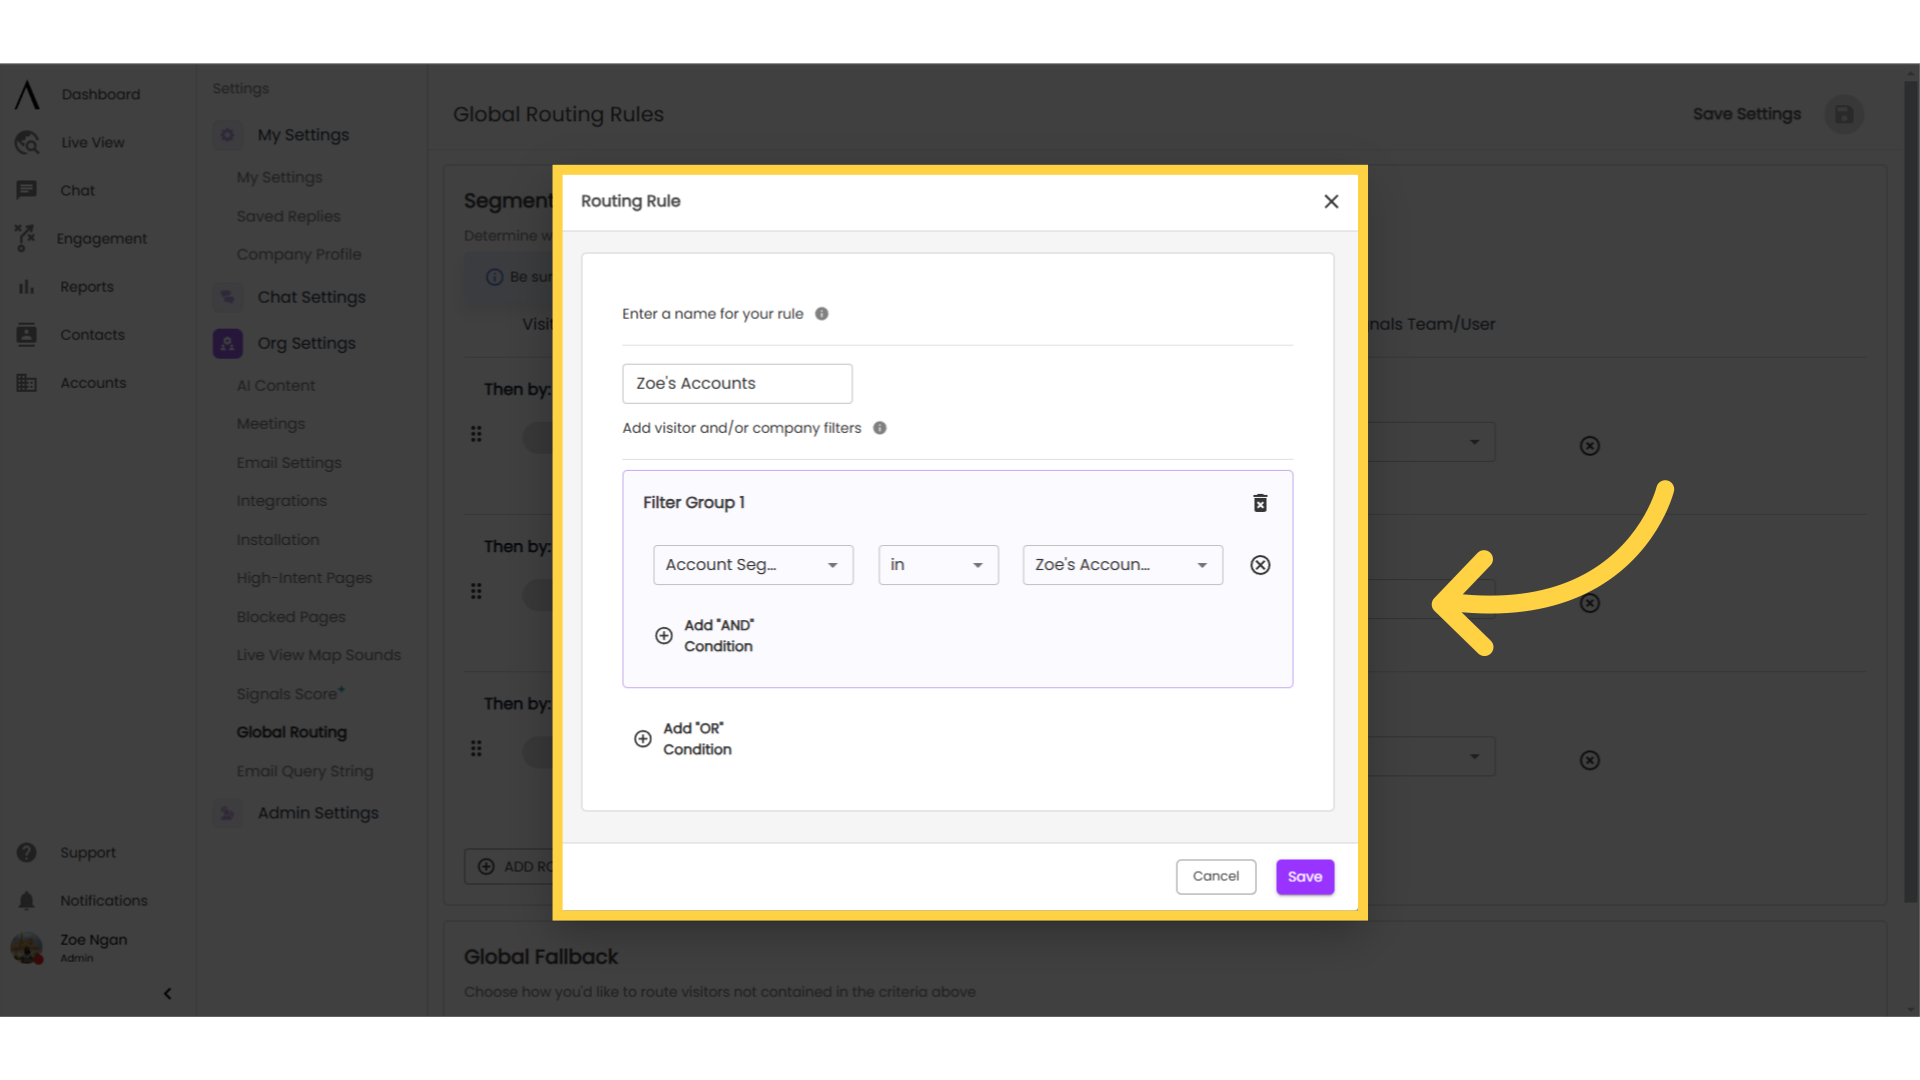
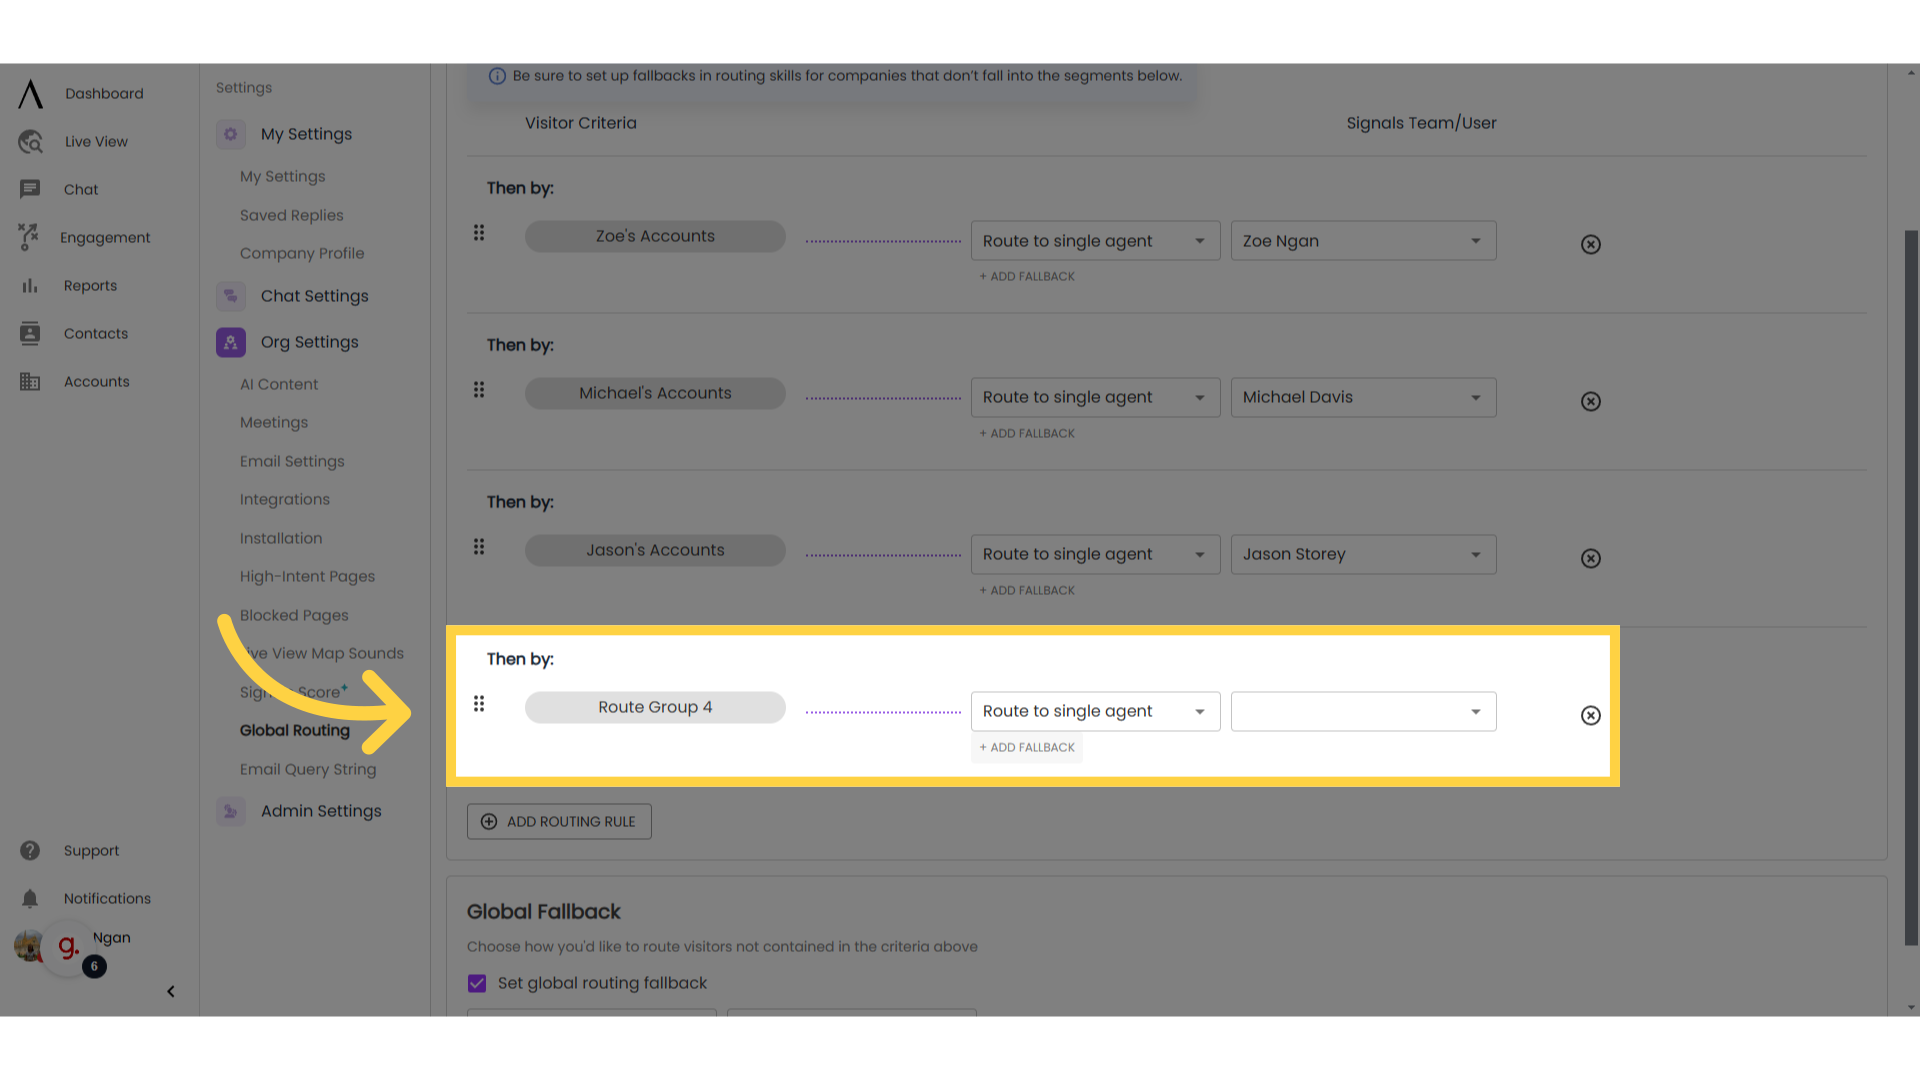
Click on the routing group (in this case, Route Group 4).

6. Routing Filters:
Set up the filters you'd like to use for routing. You can choose between account segments, HQ location, countries, US state, or Canadian province. You can also have multiple filter groups.
7. Determine routing rules
Next, choose whether you'd like to route an individual agent, a team, or an assigned owner. You can add fallback rules here.
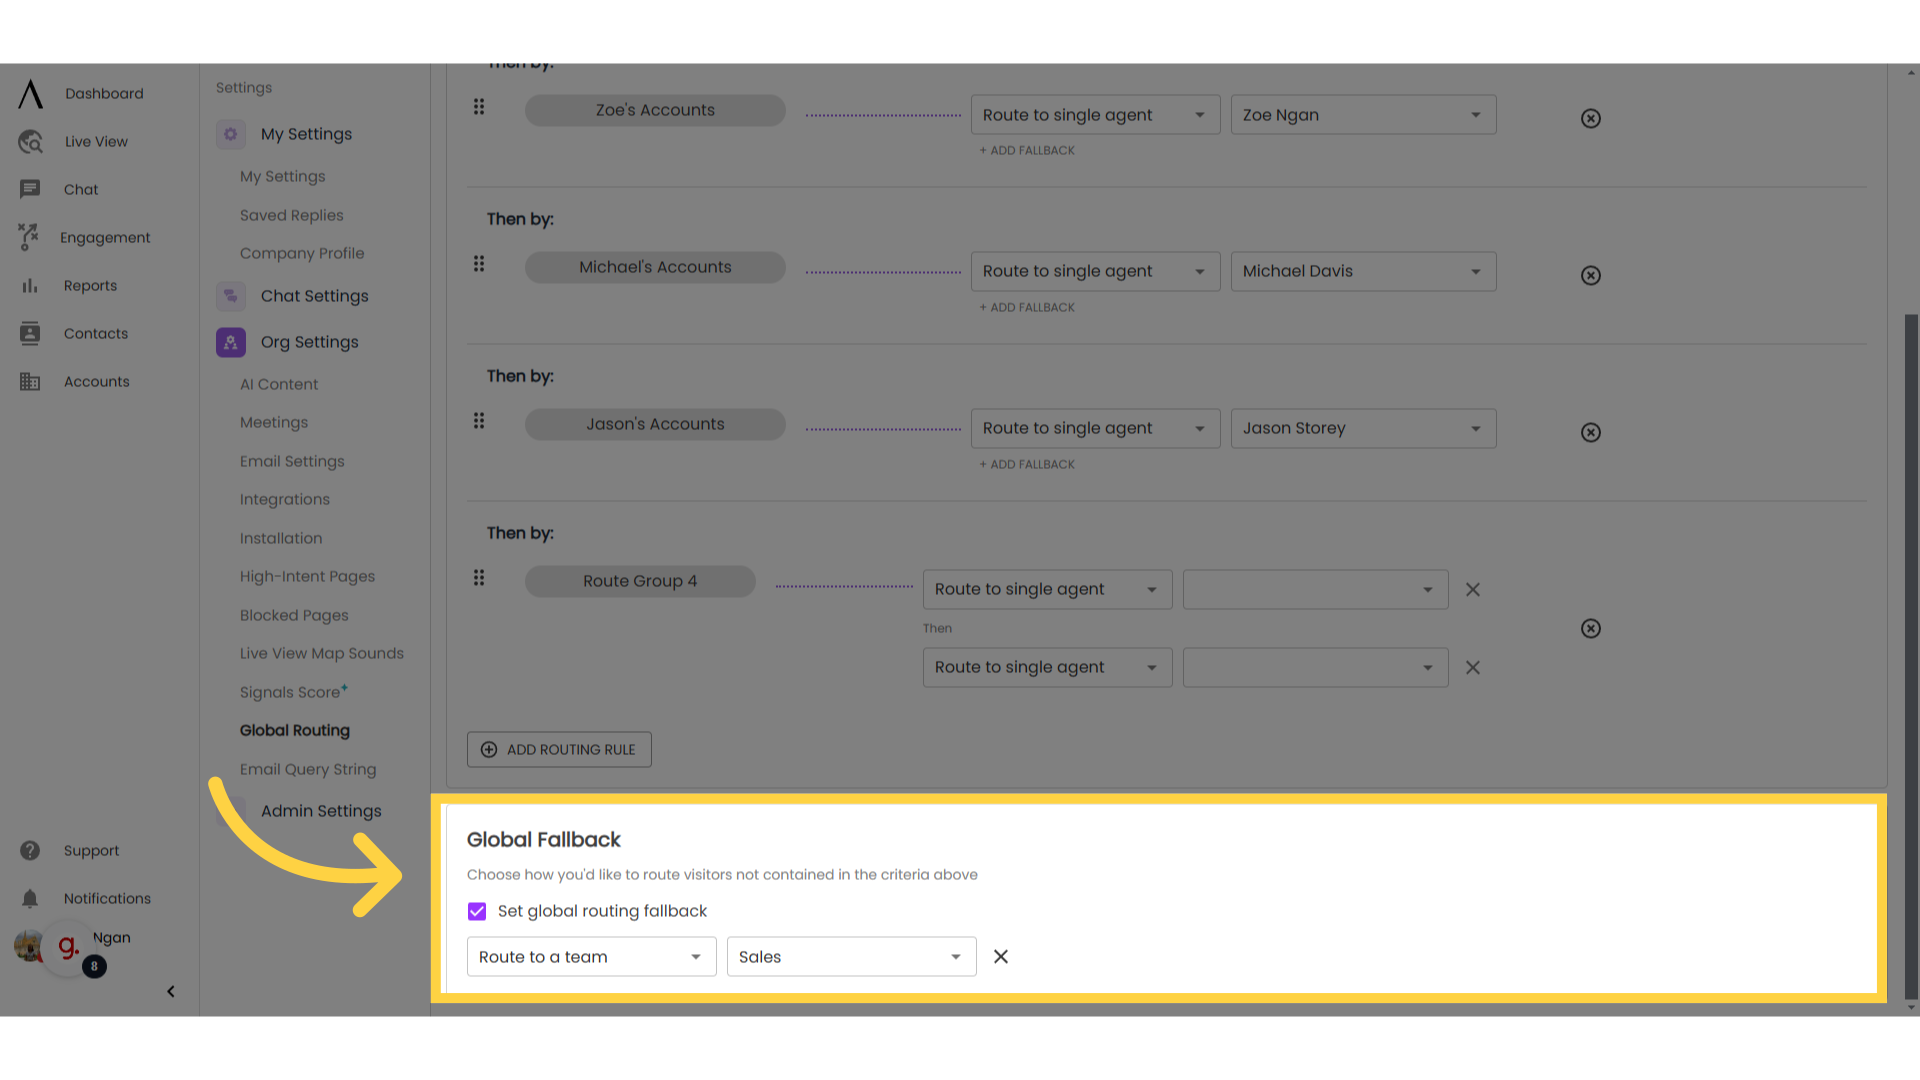
8. Set up Global Fallback
Next, set up Global Fallback on the bottom of your screen. This will help you route visitors not contained in the criteria above.
Don't forget to scroll up to the top of the page and save your settings.
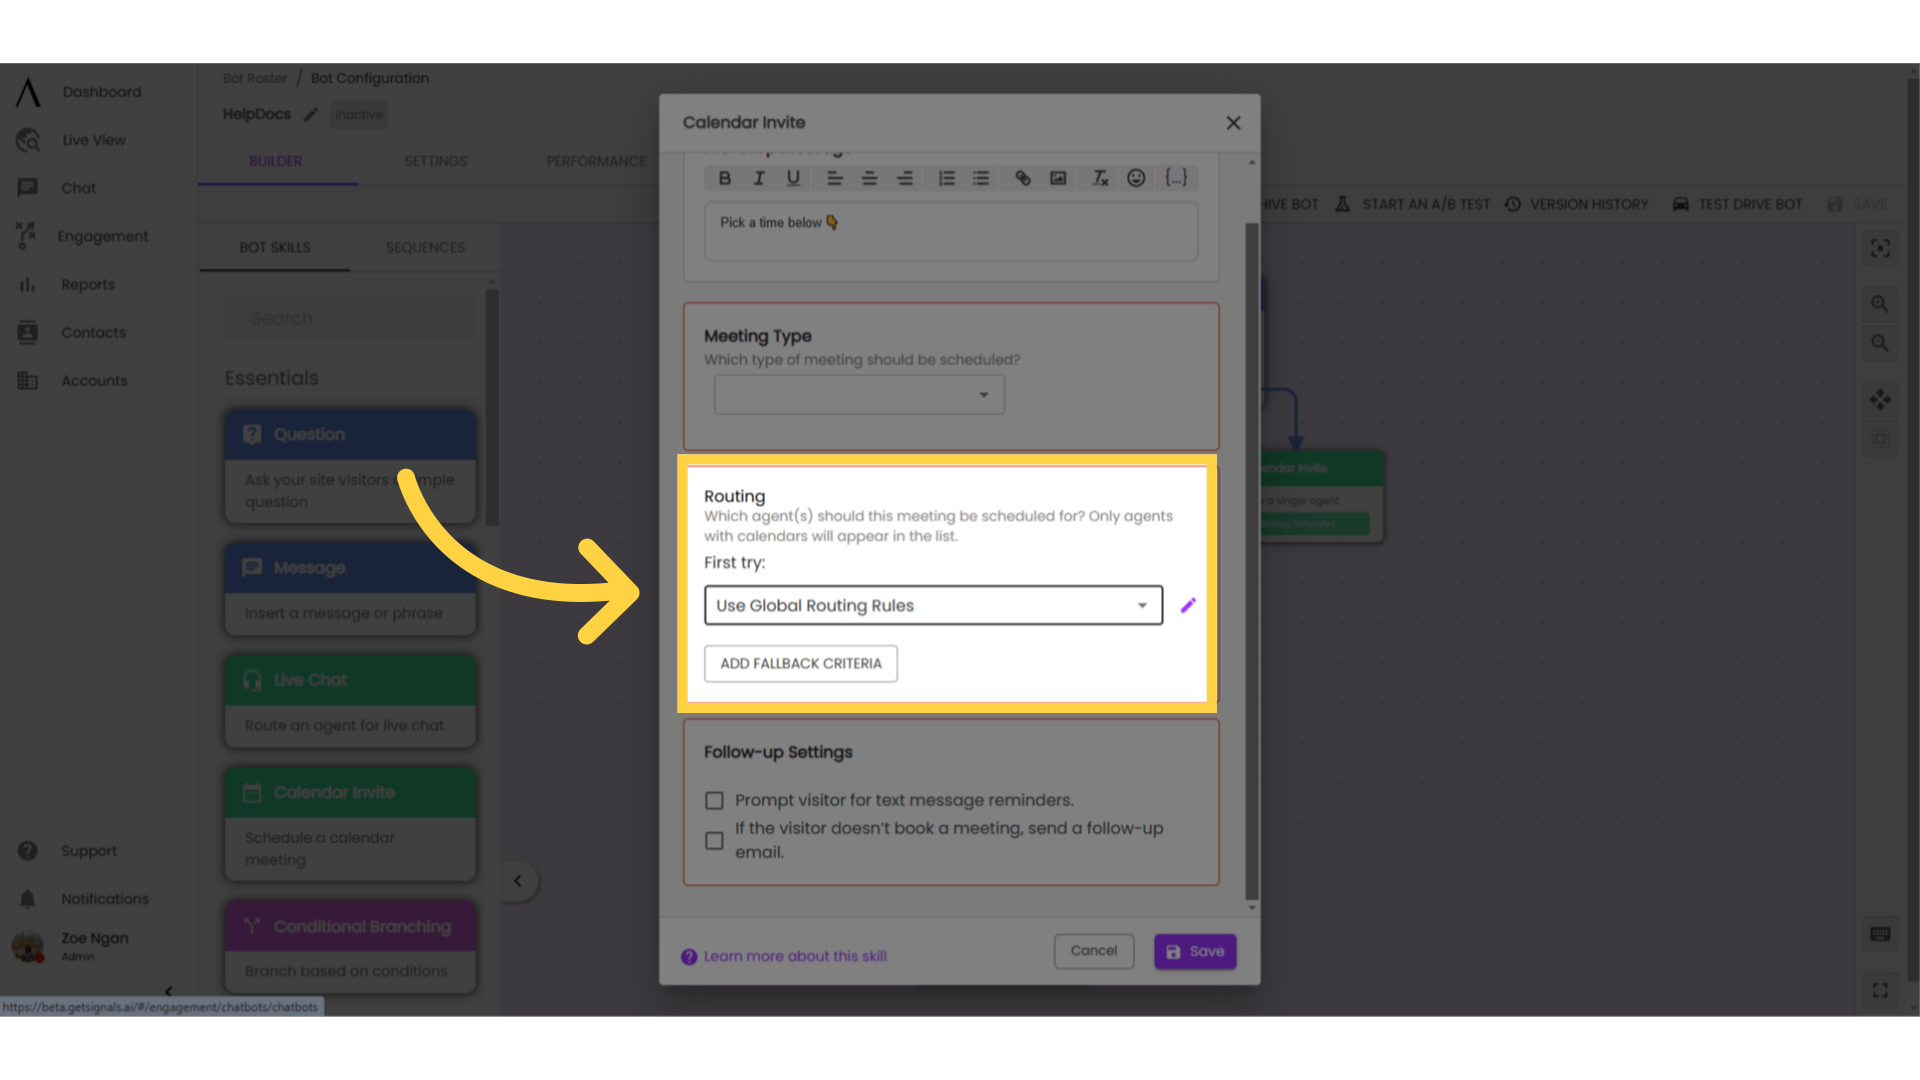
9. Use Case: Live Chat
Global Routing rules are especially useful in the Live Chat and Calendar Drop skills in bot builder. Choose "use global routing rules" when configuring that skill's routing, which will save you from having to input routing for individuals/teams every time.