My Calendar
- My Calendar
- Go to app.getsignals.ai
- 1. Go to "Settings"
- 2. Click "My Calendar"
- 3. Choose your calendar's provider
- 4. Linking your calendar
- 5. Edit availability
- 6. Update unavailability
- 7. Configure meeting settings
- 8. Connect Conferencing Provider
- 9. Establish buffer and lead times
- 10. To delete a calendar:
- 11. Click the "x"
- 12. Select "Relink"
My Calendar
Chatbots can present a calendar to web visitors so that web visitors can book meetings from directly on your site. This guide will explain how to connect your calendar to your account.
Go to app.getsignals.ai
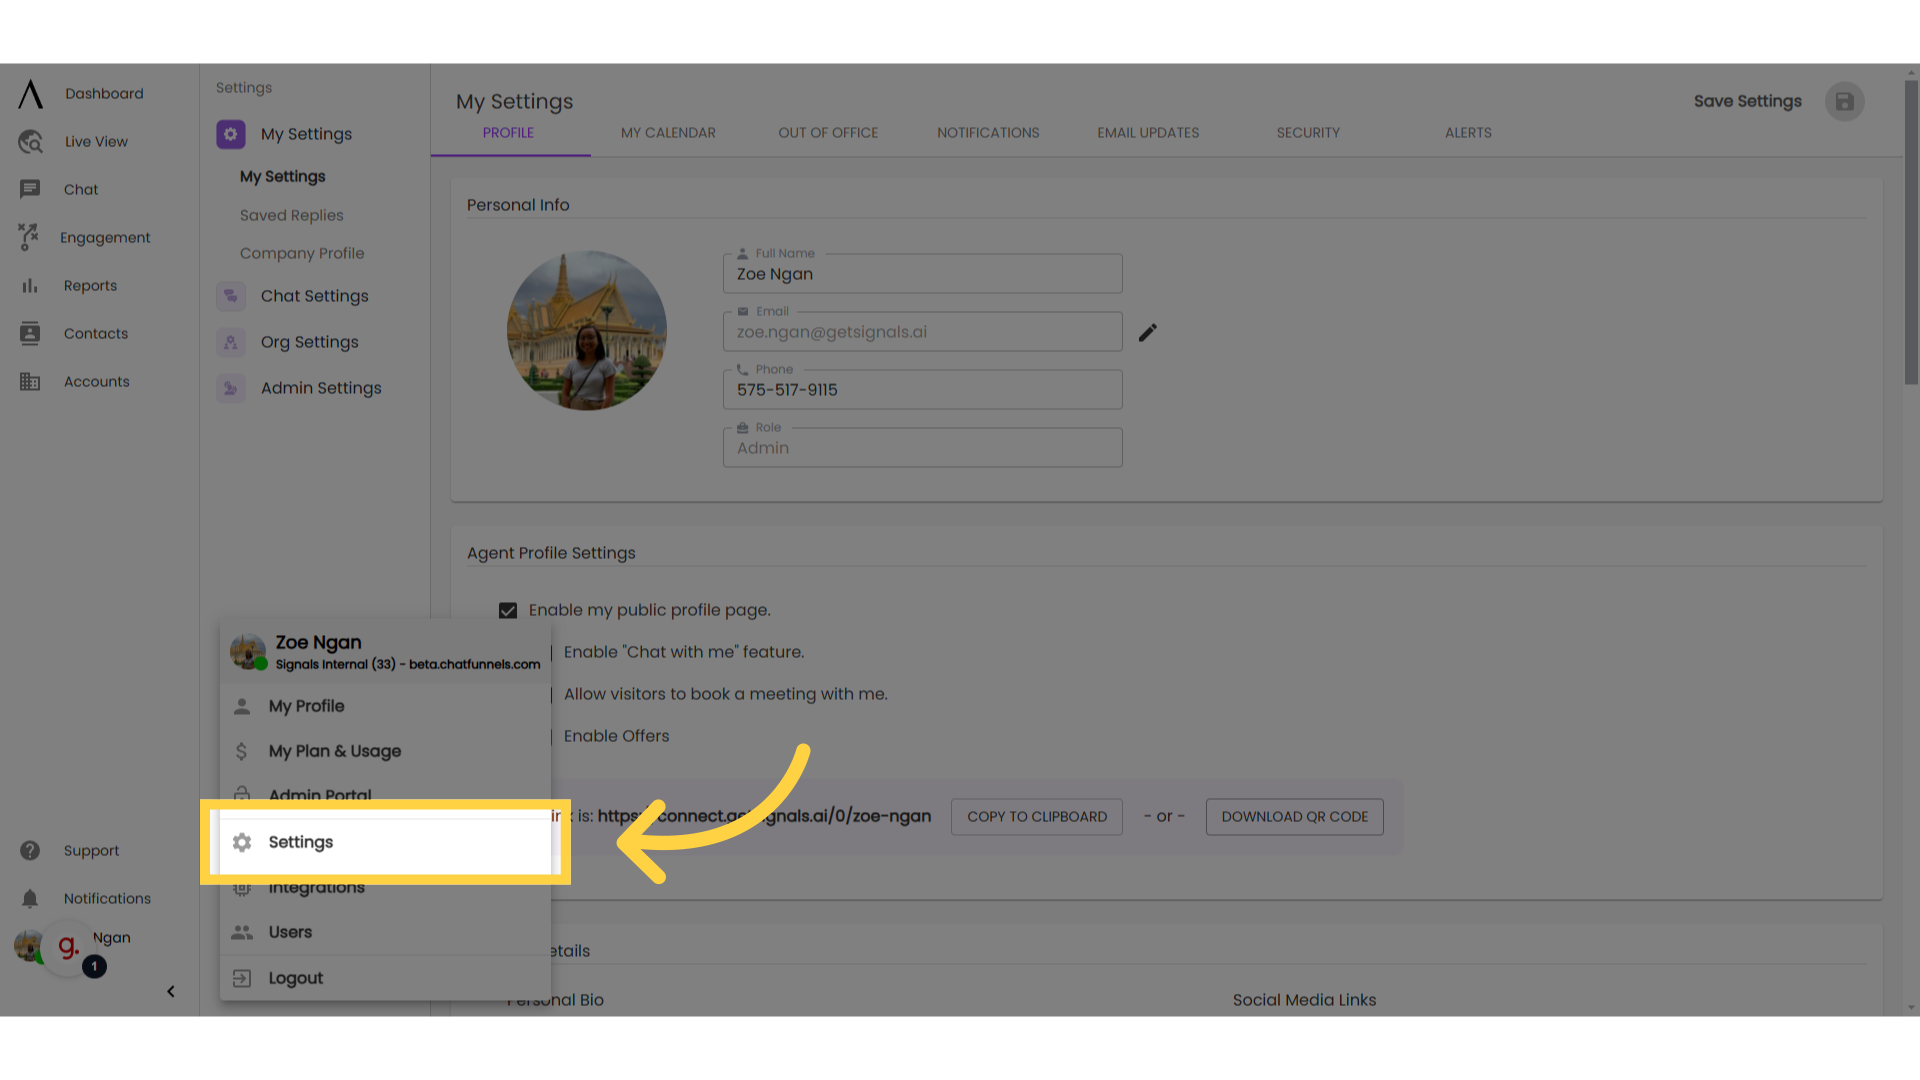
1. Go to "Settings"
To start, click on your Profile in the bottom left corner, then go to "Settings."
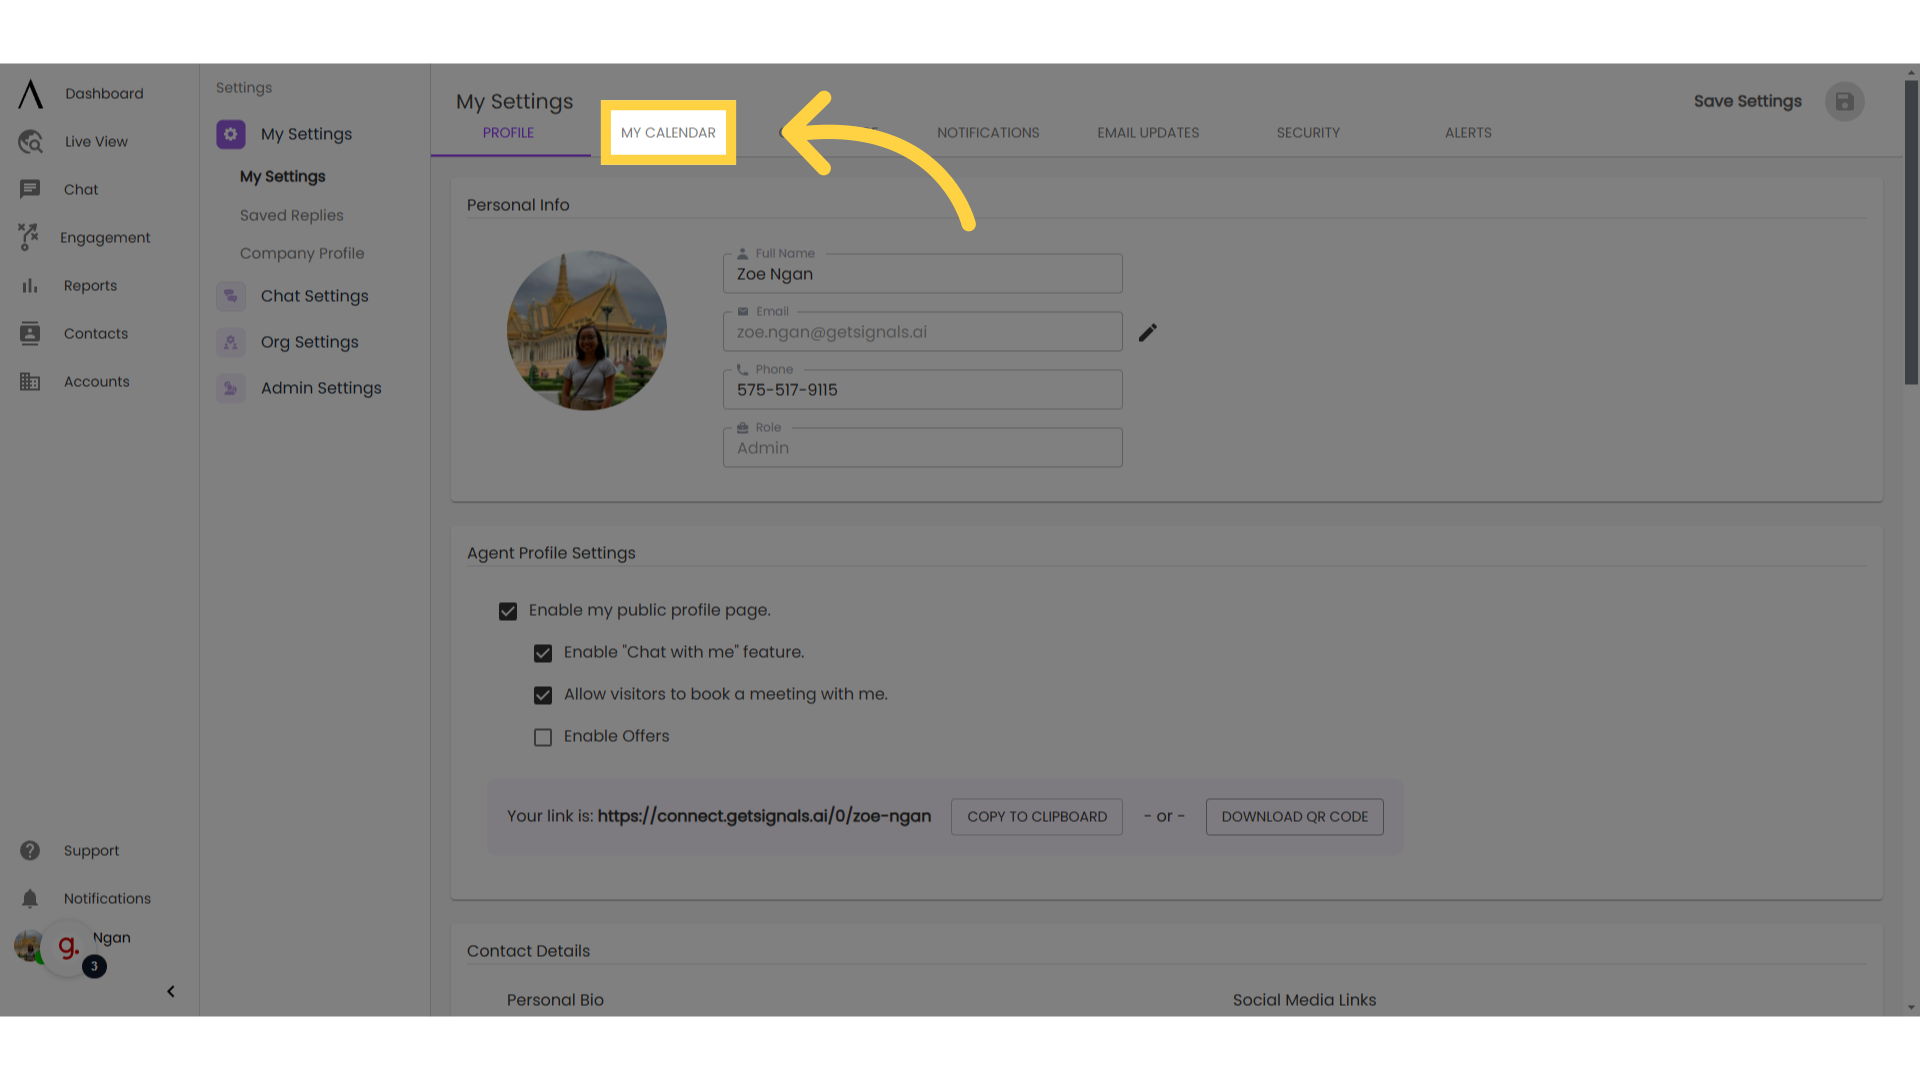
2. Click "My Calendar"
Click on the "My Calendar" tab.
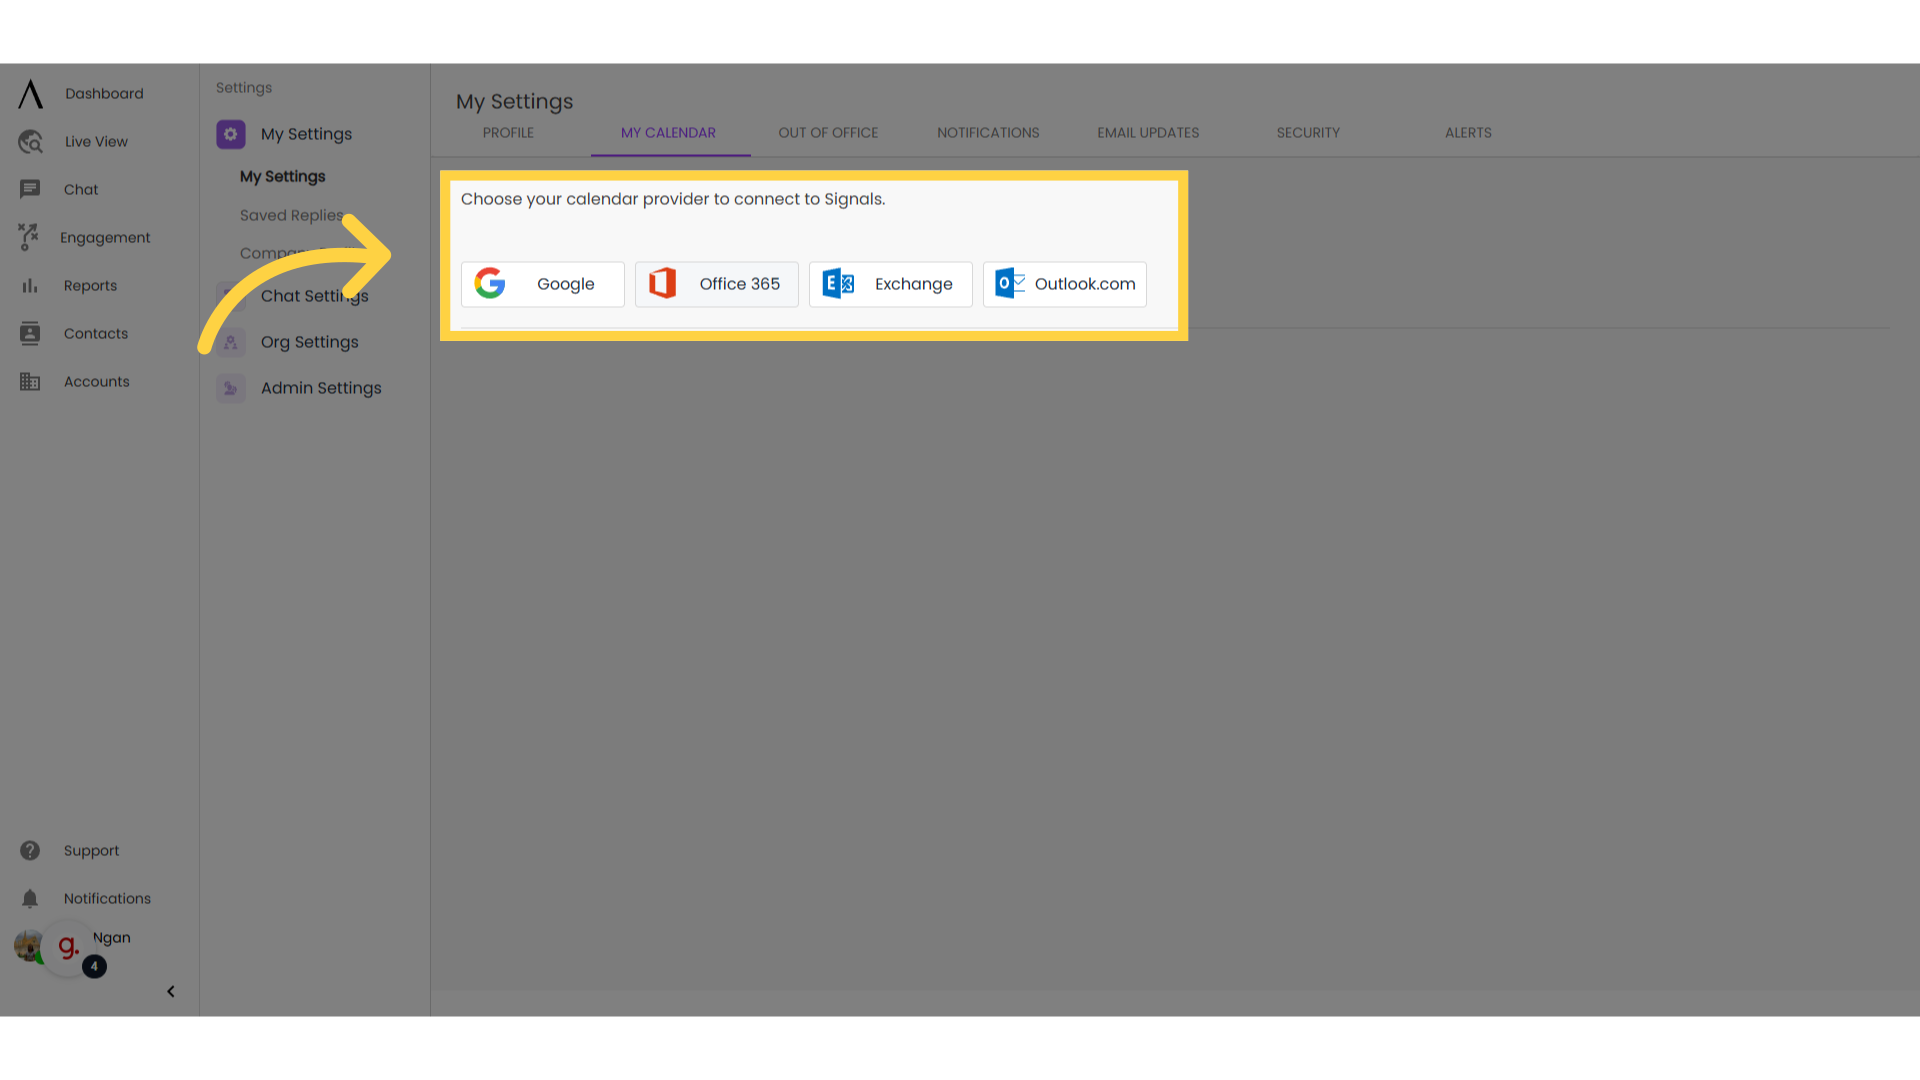
3. Choose your calendar's provider
Choose your calendar's provider from this list. Only Google, Office 365, Exchange and Outlook calendars are compatible with this feature.
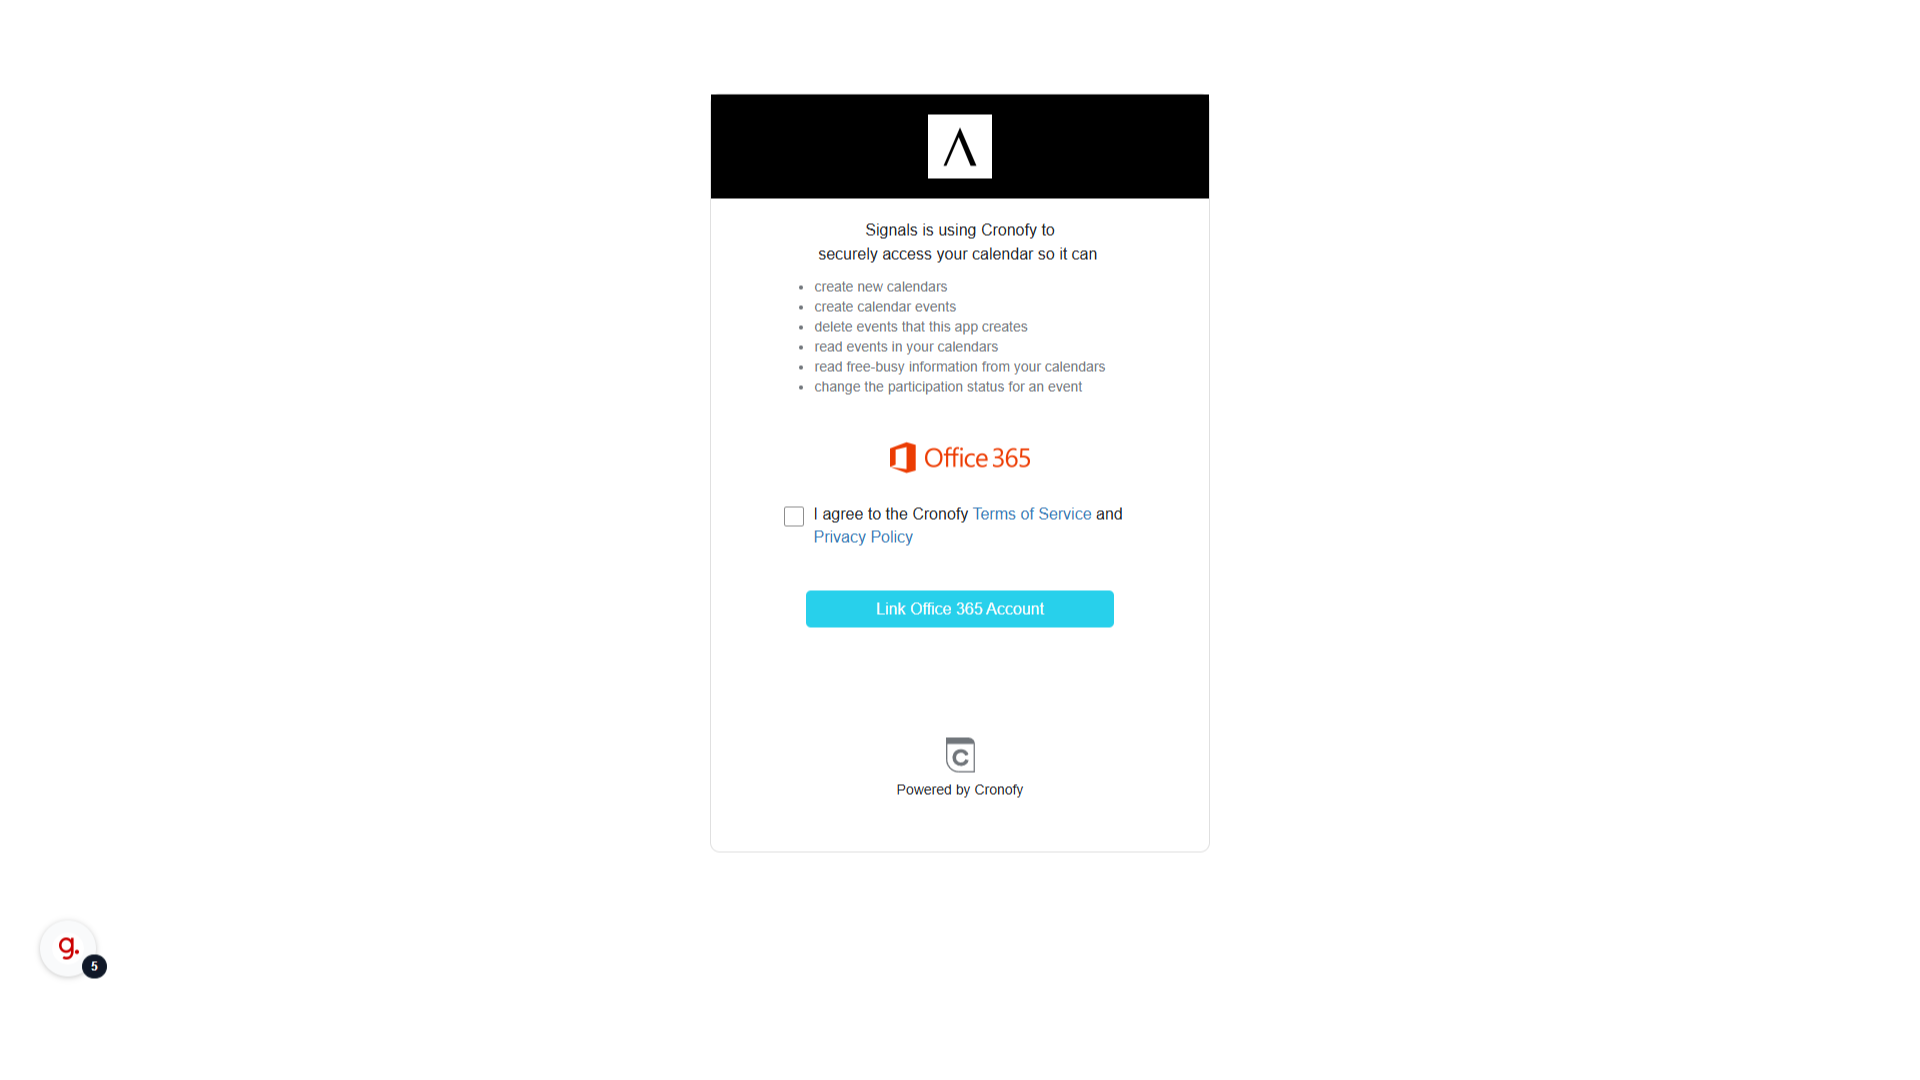
4. Linking your calendar
You'll be taken to this page. Agree to the conditions and select to link the account. You will be asked to enter your credentials to access your calendar.
5. Edit availability
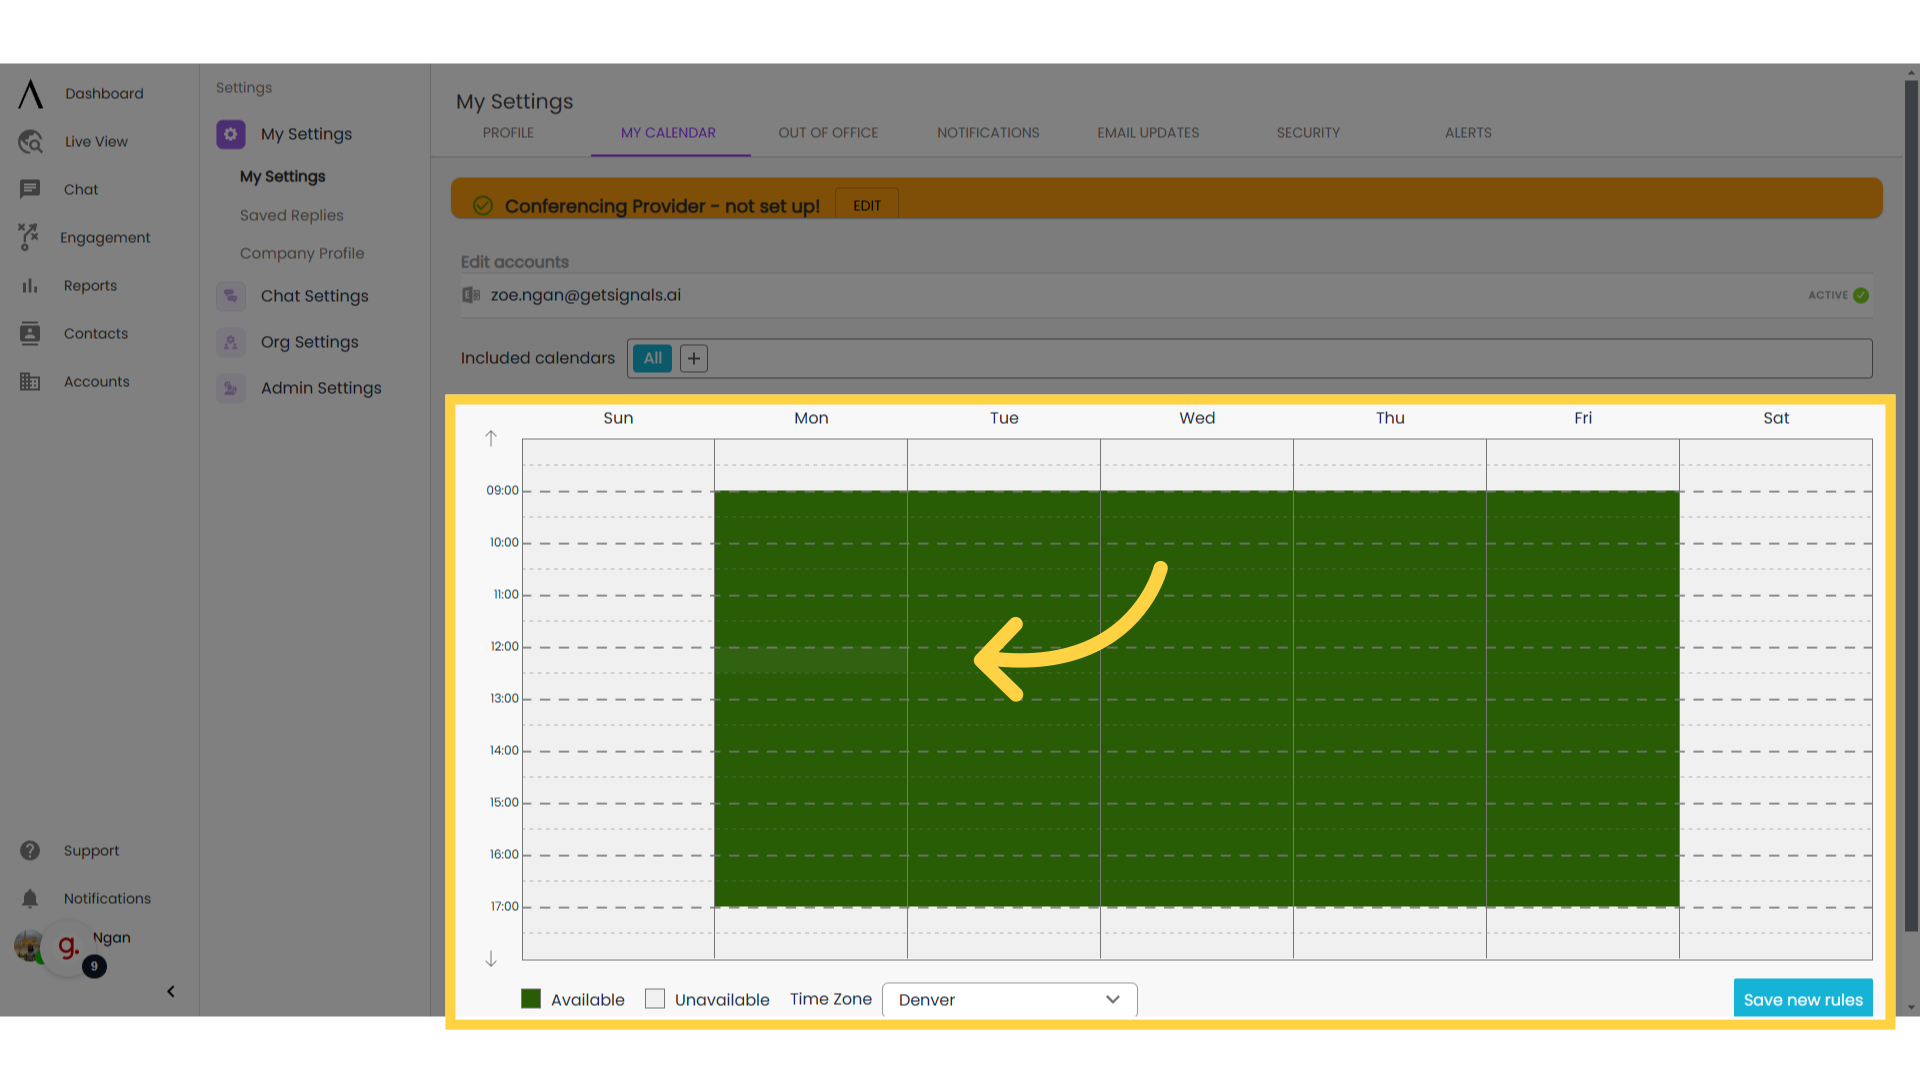
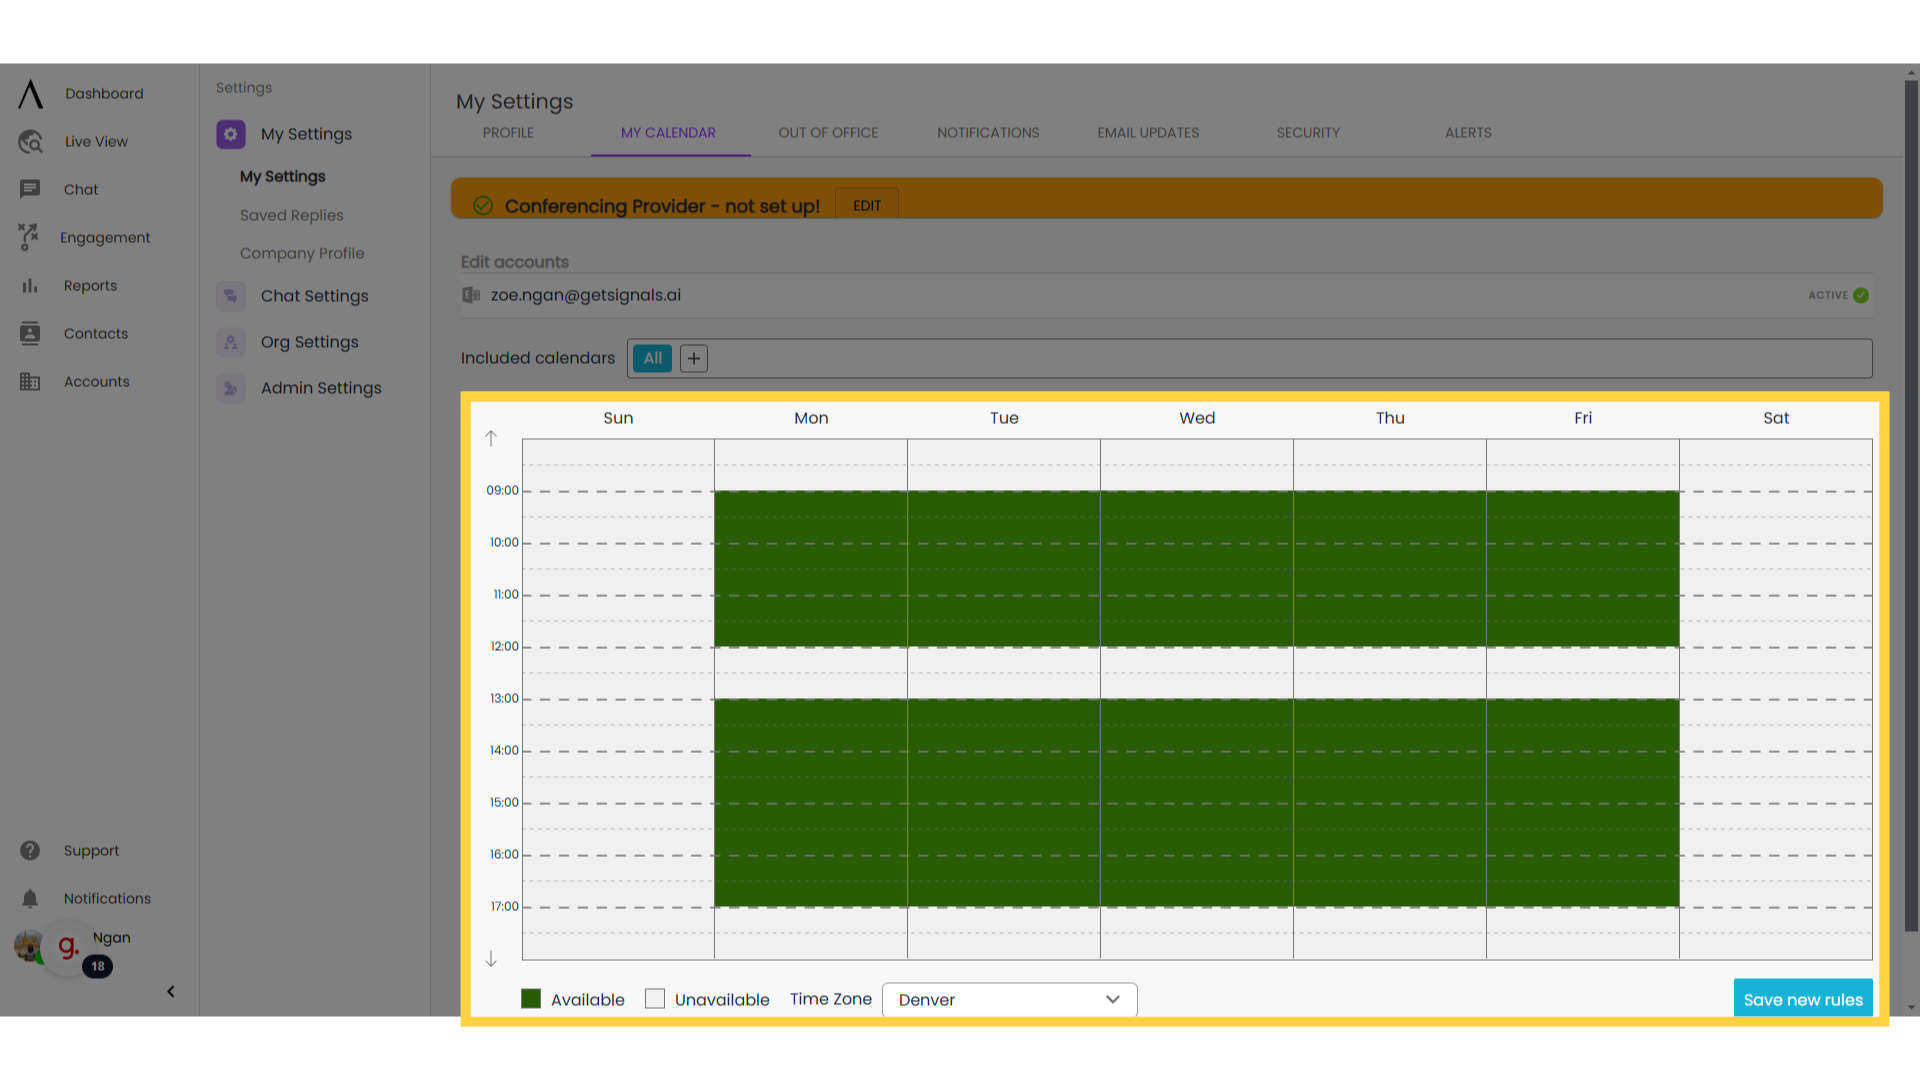
Once you have connected a calendar, you can automatically place times of the week when you are or are not available to have meetings booked on your calendar.
By default, the system sets your calendar as available to receive meetings 9 am – 5 pm MST. Green sections on this calendar are when you are available to take meetings. Gray sections are when you are unavailable.
6. Update unavailability
To update your availability, click on a half-hour interval when you are habitually unavailable to meet and then click “Save new rules” at the bottom right corner of the page.
Note: Your linked calendar will not appear on this page while editing your availability and edits made to this calendar will not edit the linked calendar. This option is only to set routine your availability to have meetings booked on your calendar.
Note: Web visitors cannot see events on your calendar. They will only see time slots that are available for them to book meetings on your calendar.
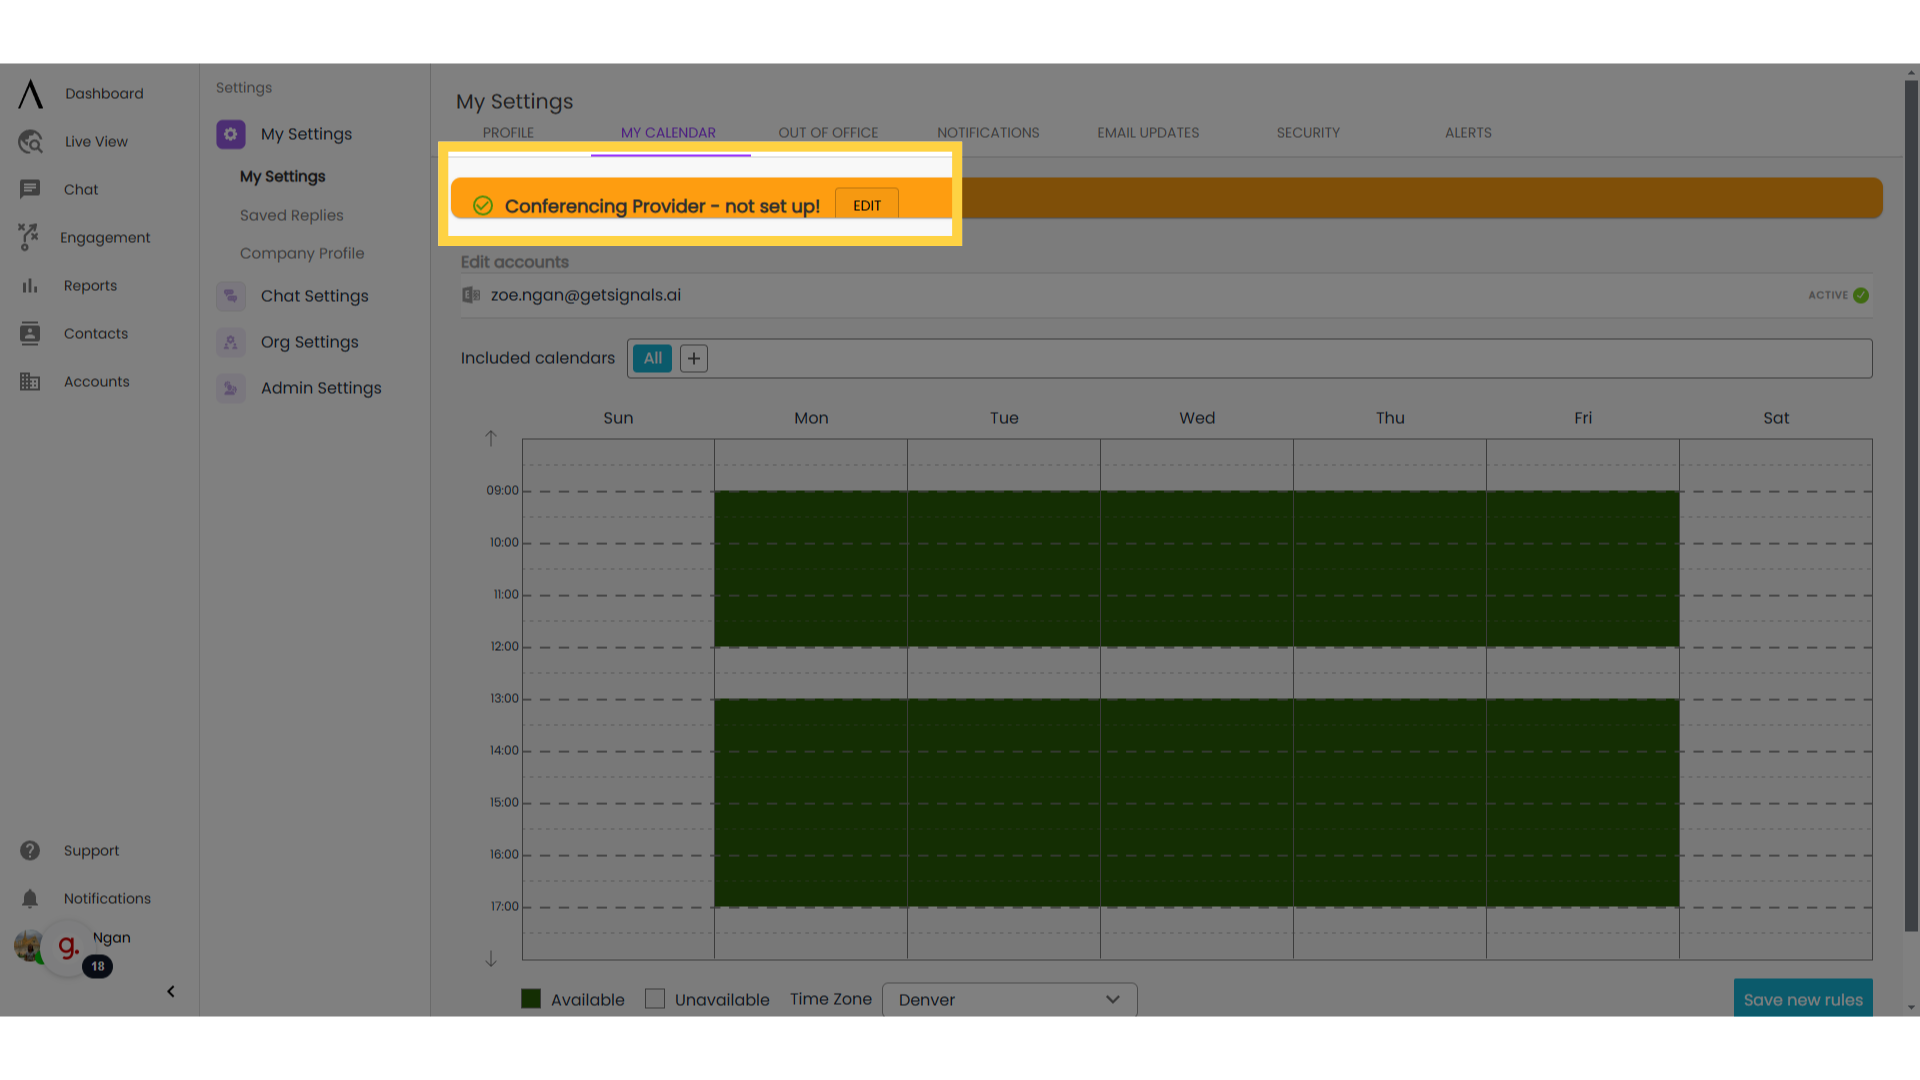
7. Configure meeting settings
The Meetings Settings option allows you to further personalize the meetings that are scheduled through chatbots. Specifically, you can personalize what is sent in calendar invites to web visitors.
To access your Meetings Settings, click on the “Edit” button at the top of the page of the My Calendar section.
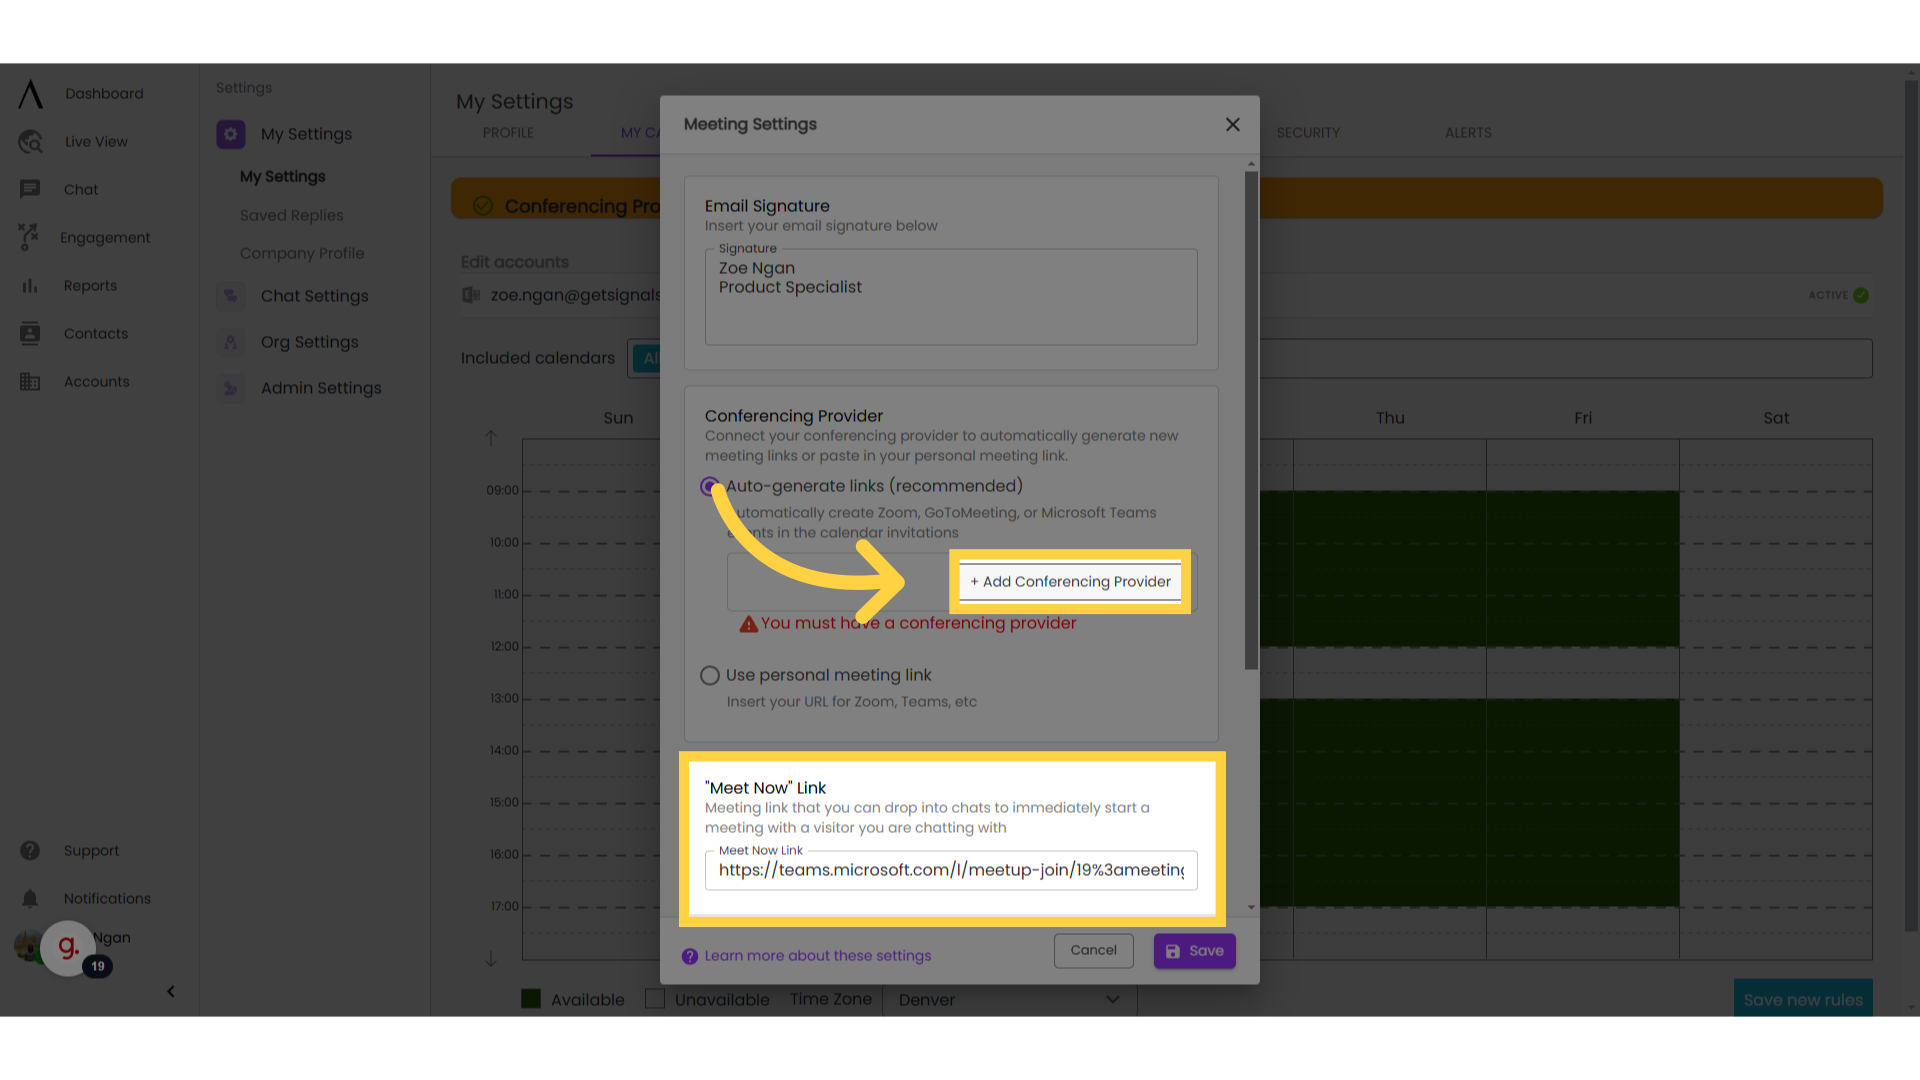
8. Connect Conferencing Provider
Connect your conferencing provider(Zoom, Microsoft Teams, or GoToMeetings) to your account. Doing this will create a unique conference link and place this link in the Location section of the meeting invitation for every meeting that is scheduled using the specified conferencing provider.
Alternatively, you can use a personal meeting link. This is a good option if you have a static virtual link that you would like to include in your meeting invitation. You can place that in the Meeting URL section of Meeting Settings and that static link will appear in the Location section of meeting invitation.
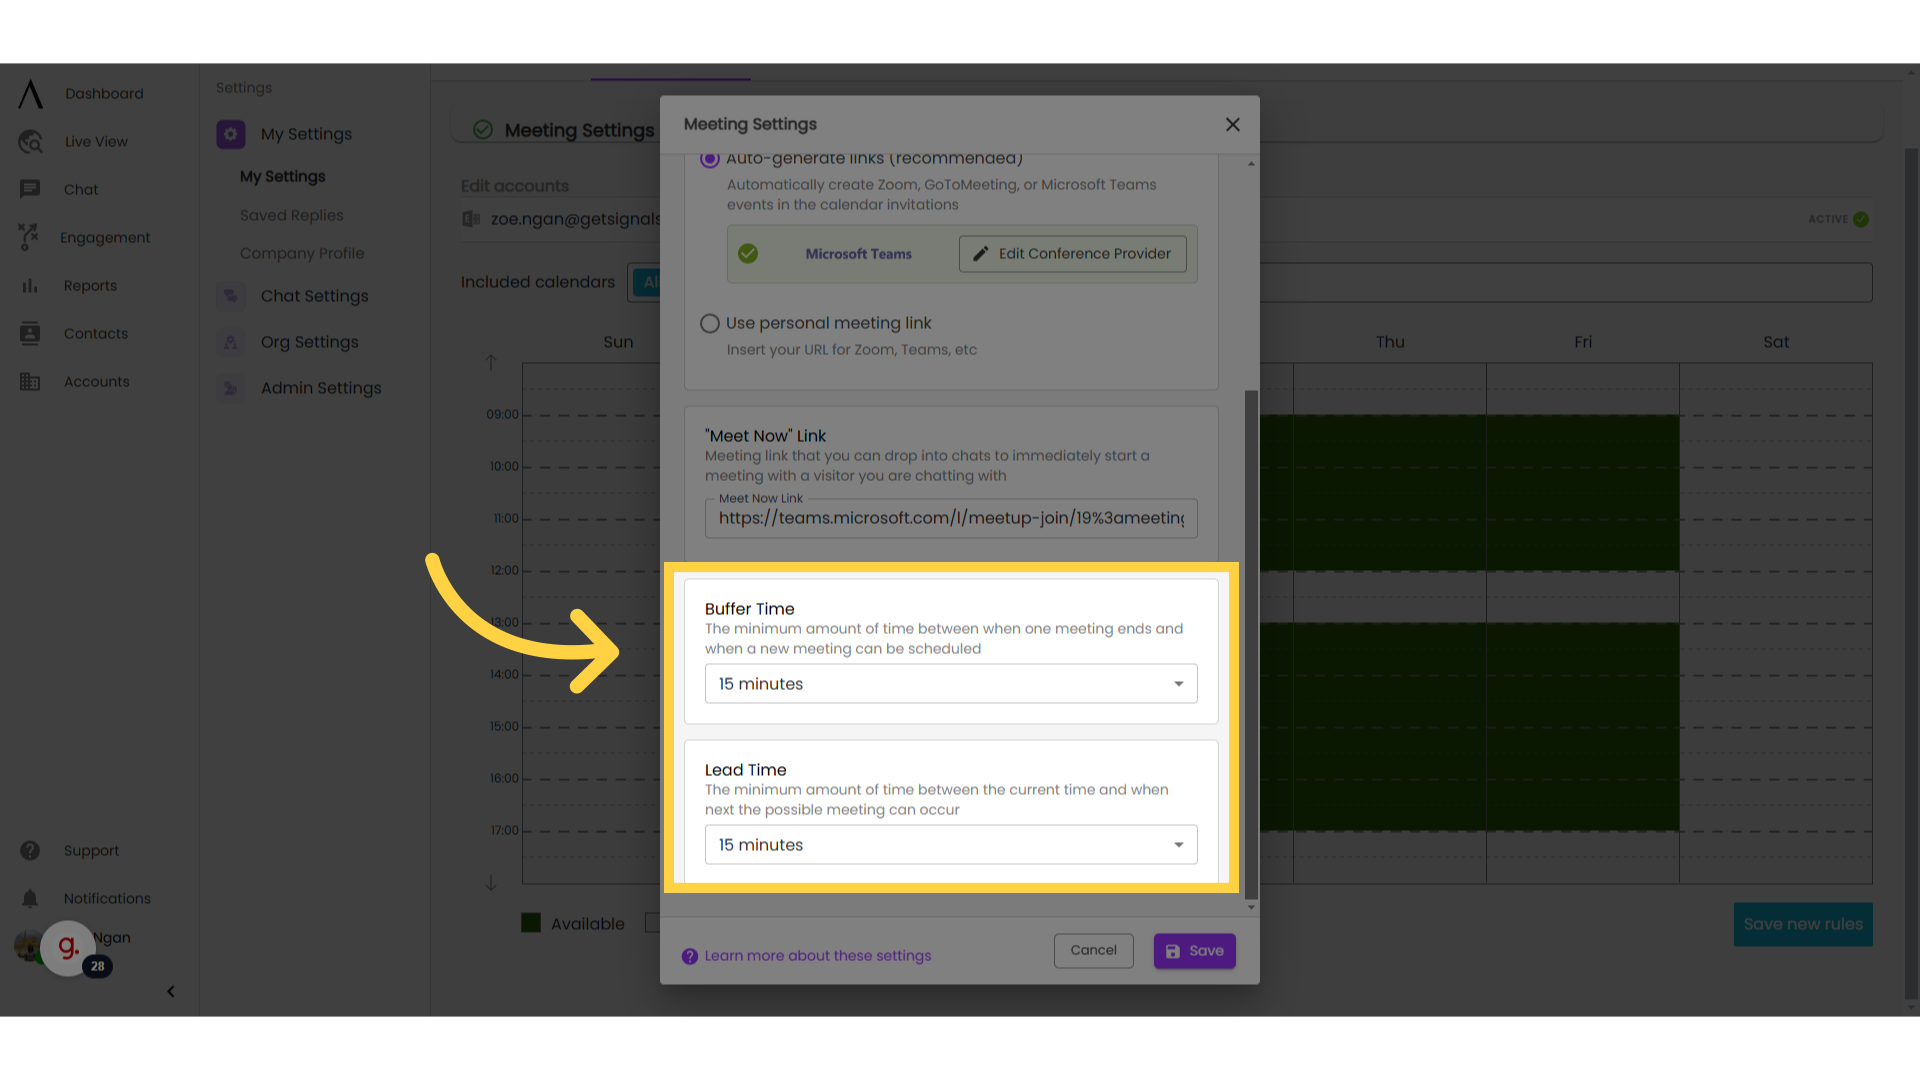
9. Establish buffer and lead times
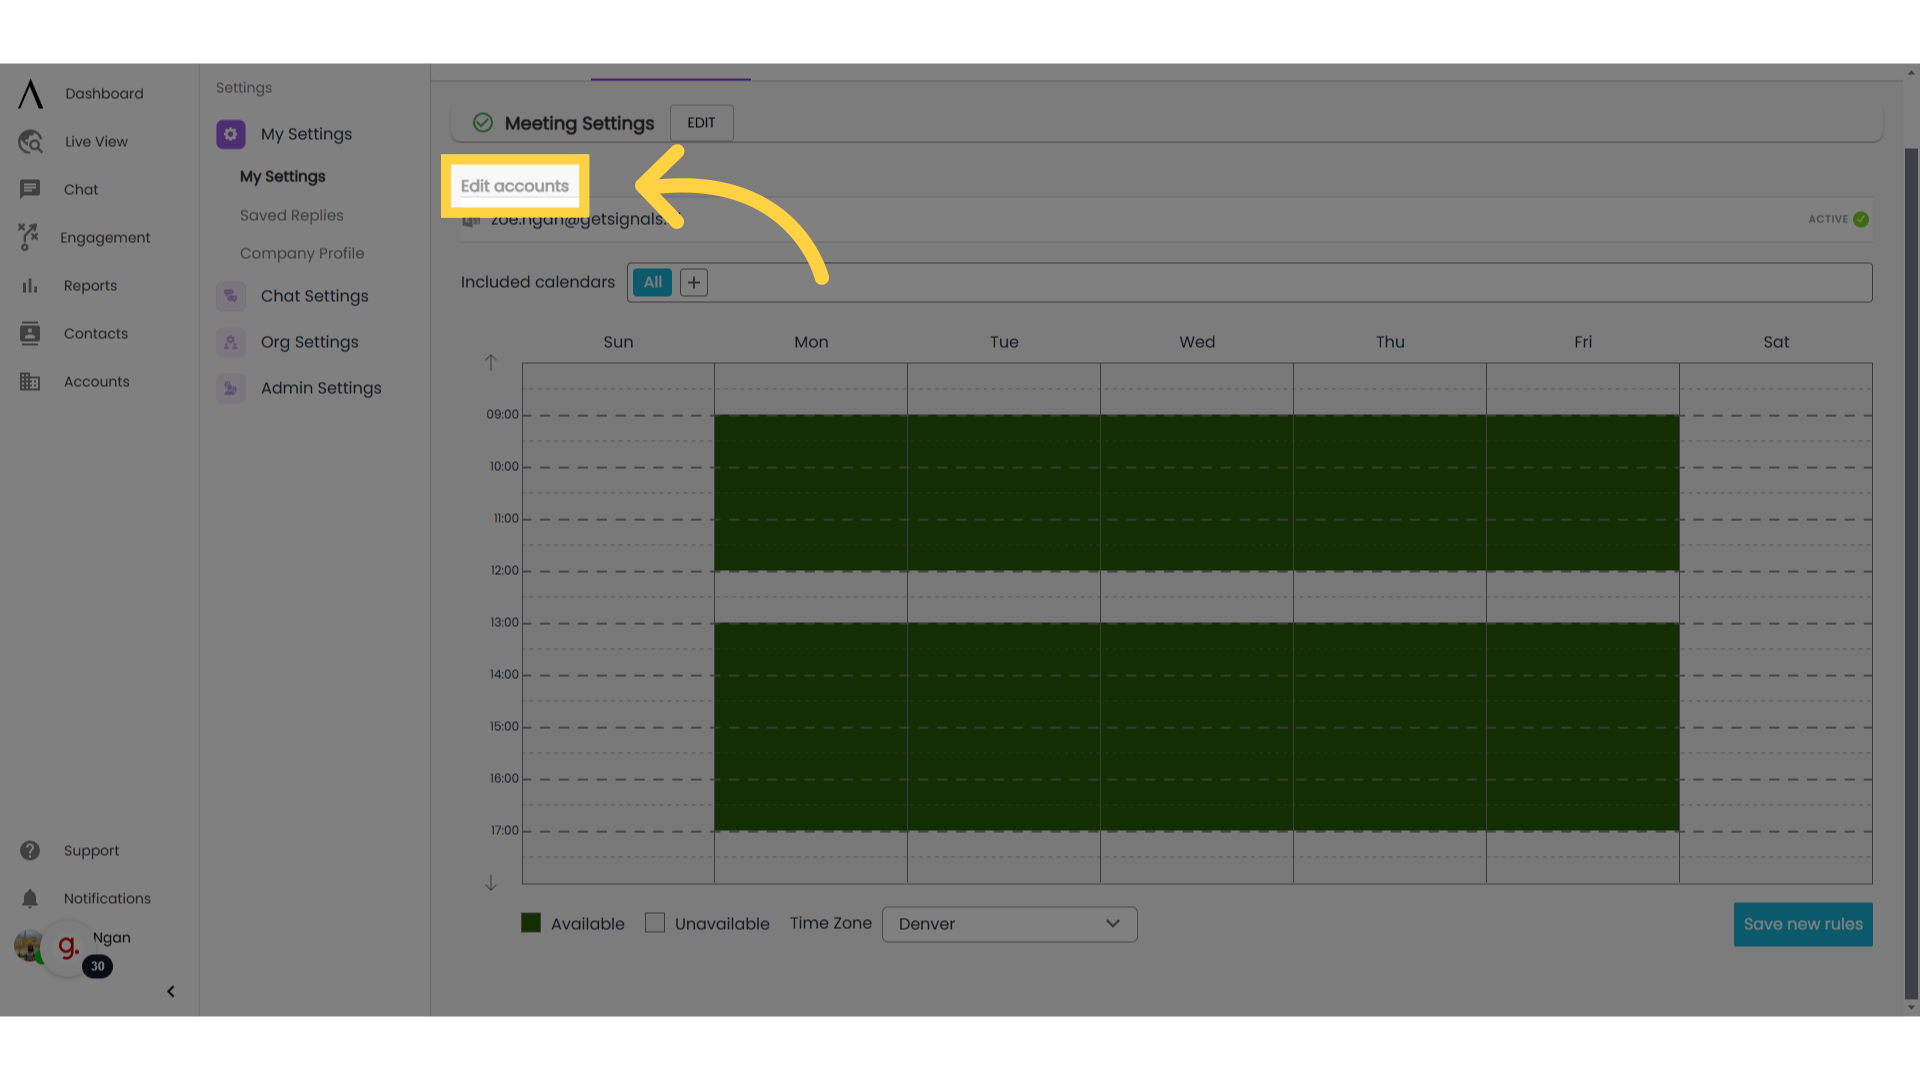
10. To delete a calendar:
To remove a calendar linked to your account, click "Edit Accounts."
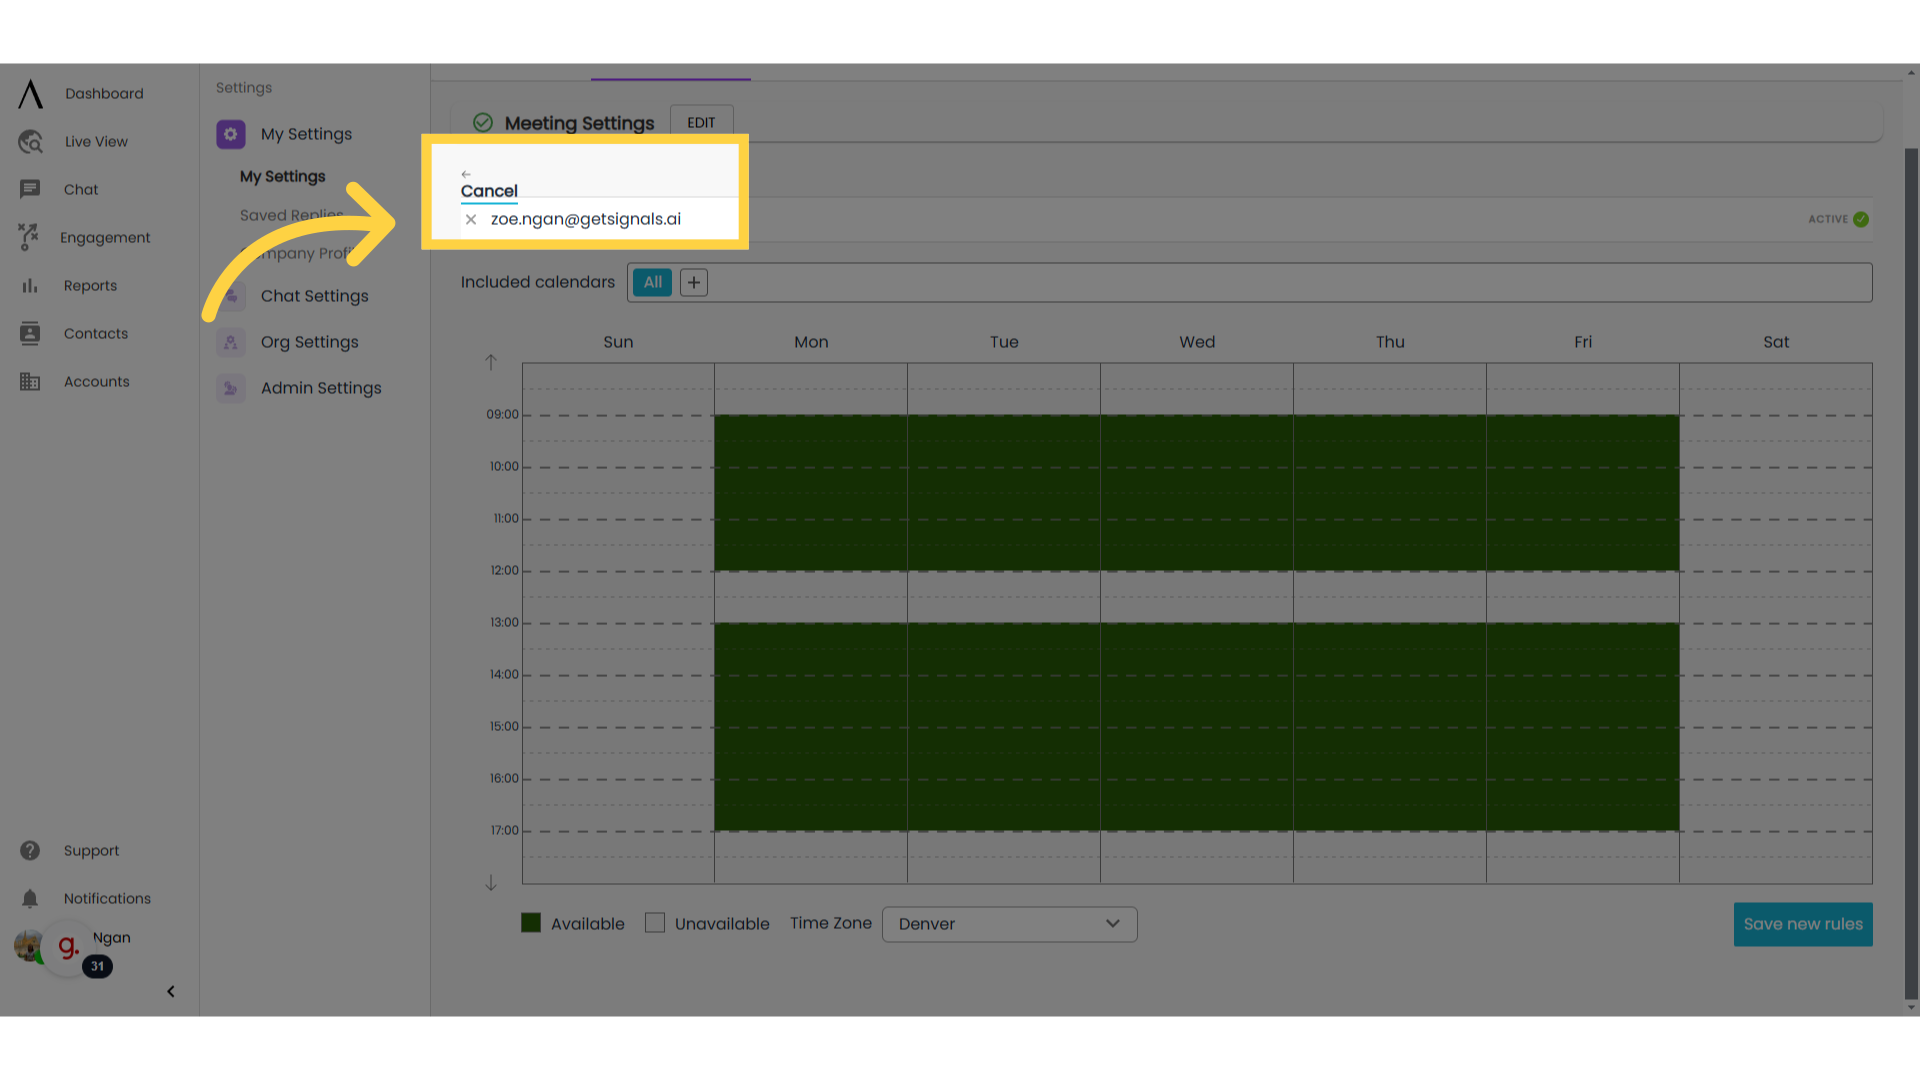
11. Click the "x"
Click the “X” that appears next to the calendar name.
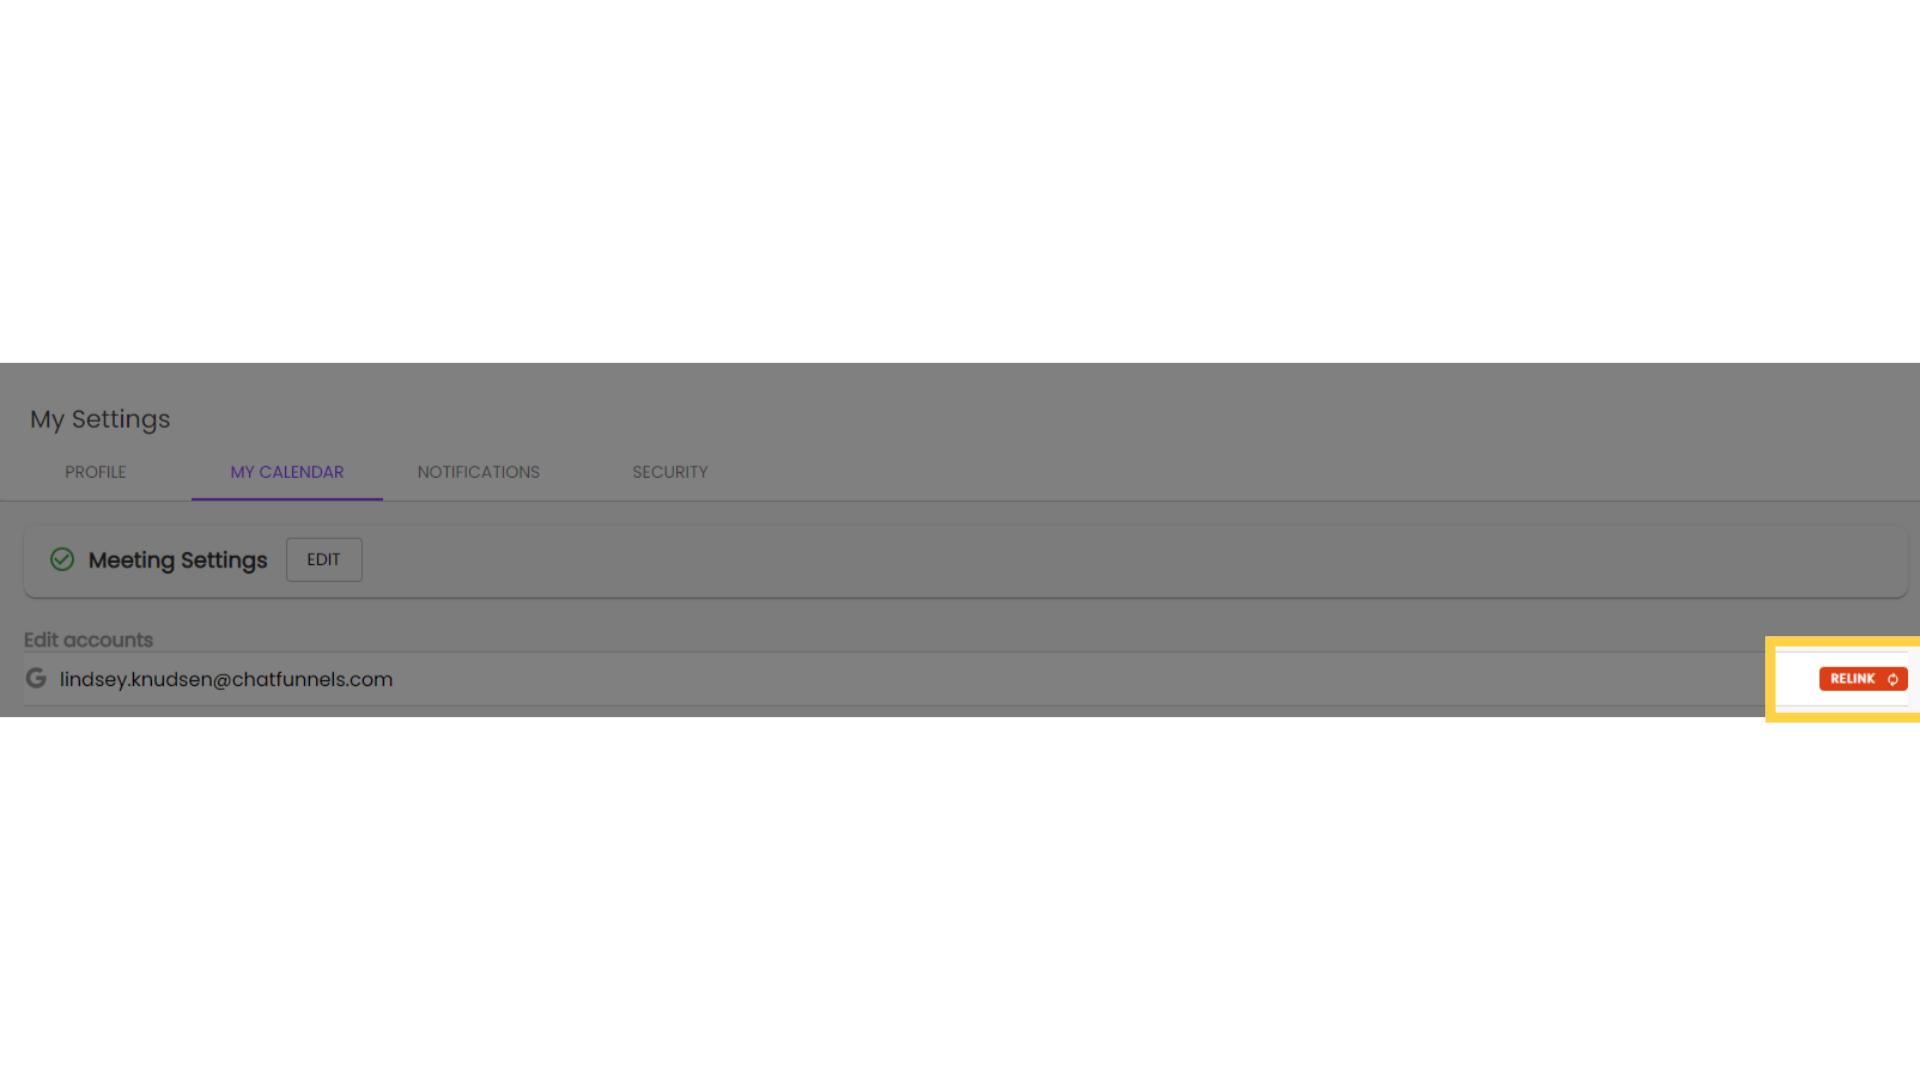
12. Select "Relink"
Occasionally your connection to Cronofy (the calendaring system that our system uses to book meetings for you) is interrupted. This can happen because of changes in permissions in your email or for a variety of reasons. When your calendar needs to be relinked, you'll get a warning email.
To relink your calendar, click the red button to the far right that says "Relink." Cronofy will then present you with modals to reestablish the link so that chatbots can book meetings to your calendar.