Customizing Conversation Details
- Customizing Conversation Details
- Go to app.getsignals.ai
- 1. Introduction
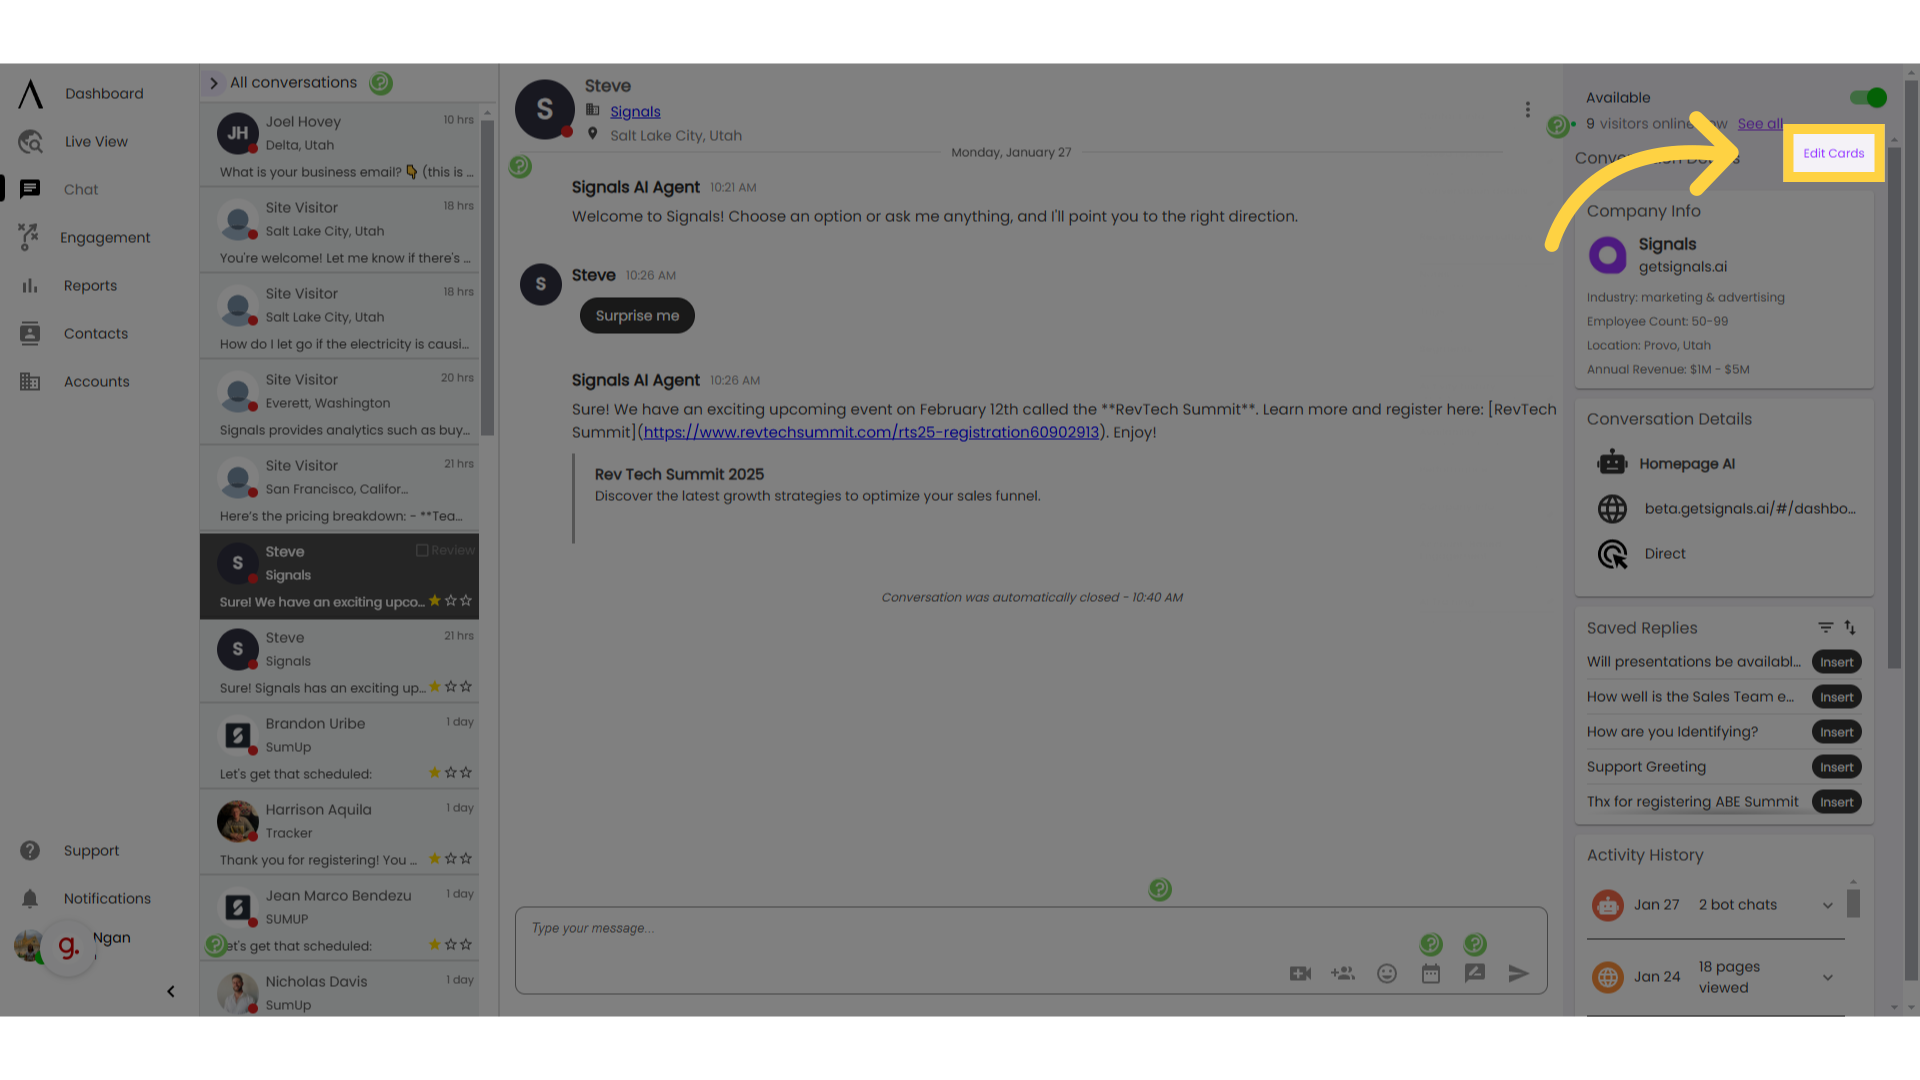
- 2. Select "Edit Cards"
- 3. Click to pin/unpin
- 4. Drag your cards around here:
- 5. Contact Info Card:
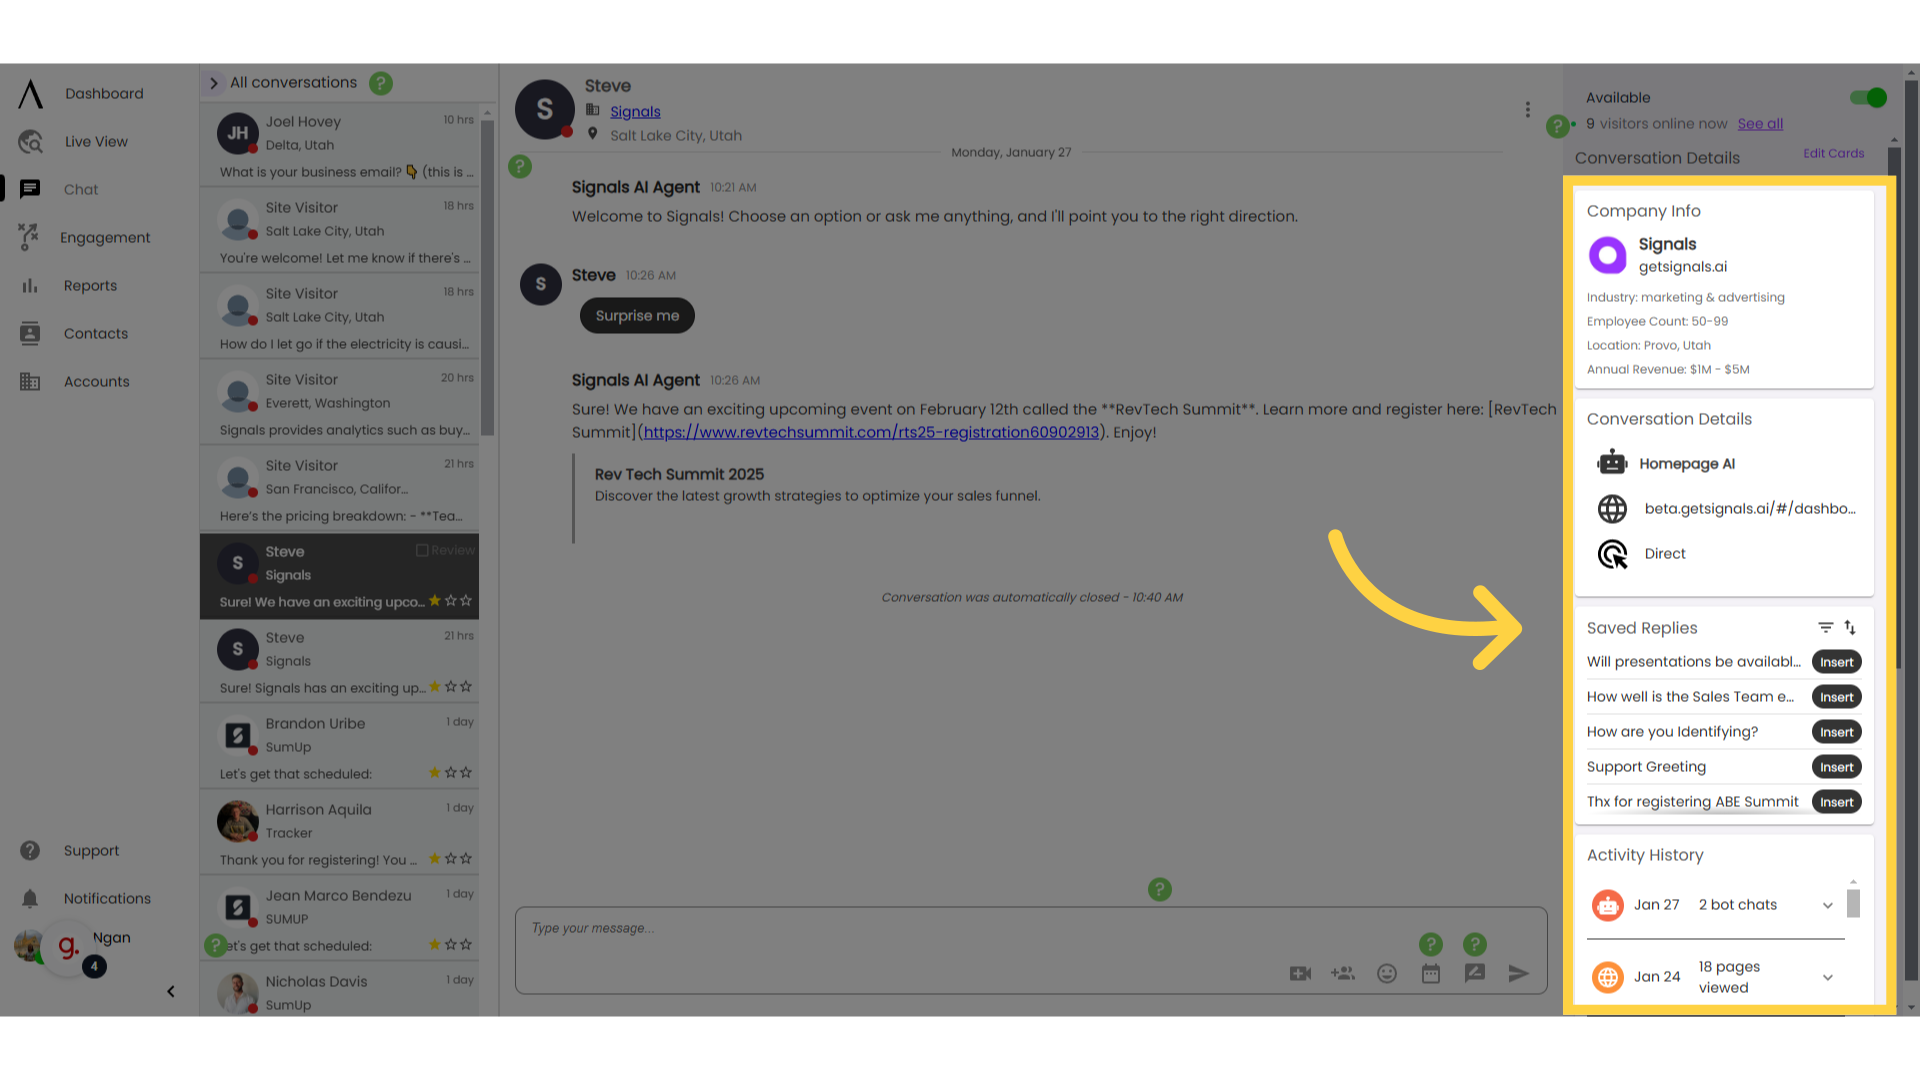
- 6. Saved Replies Card:
- 7. ConversationDetails Card:
- 8. Recent Conversations Card:
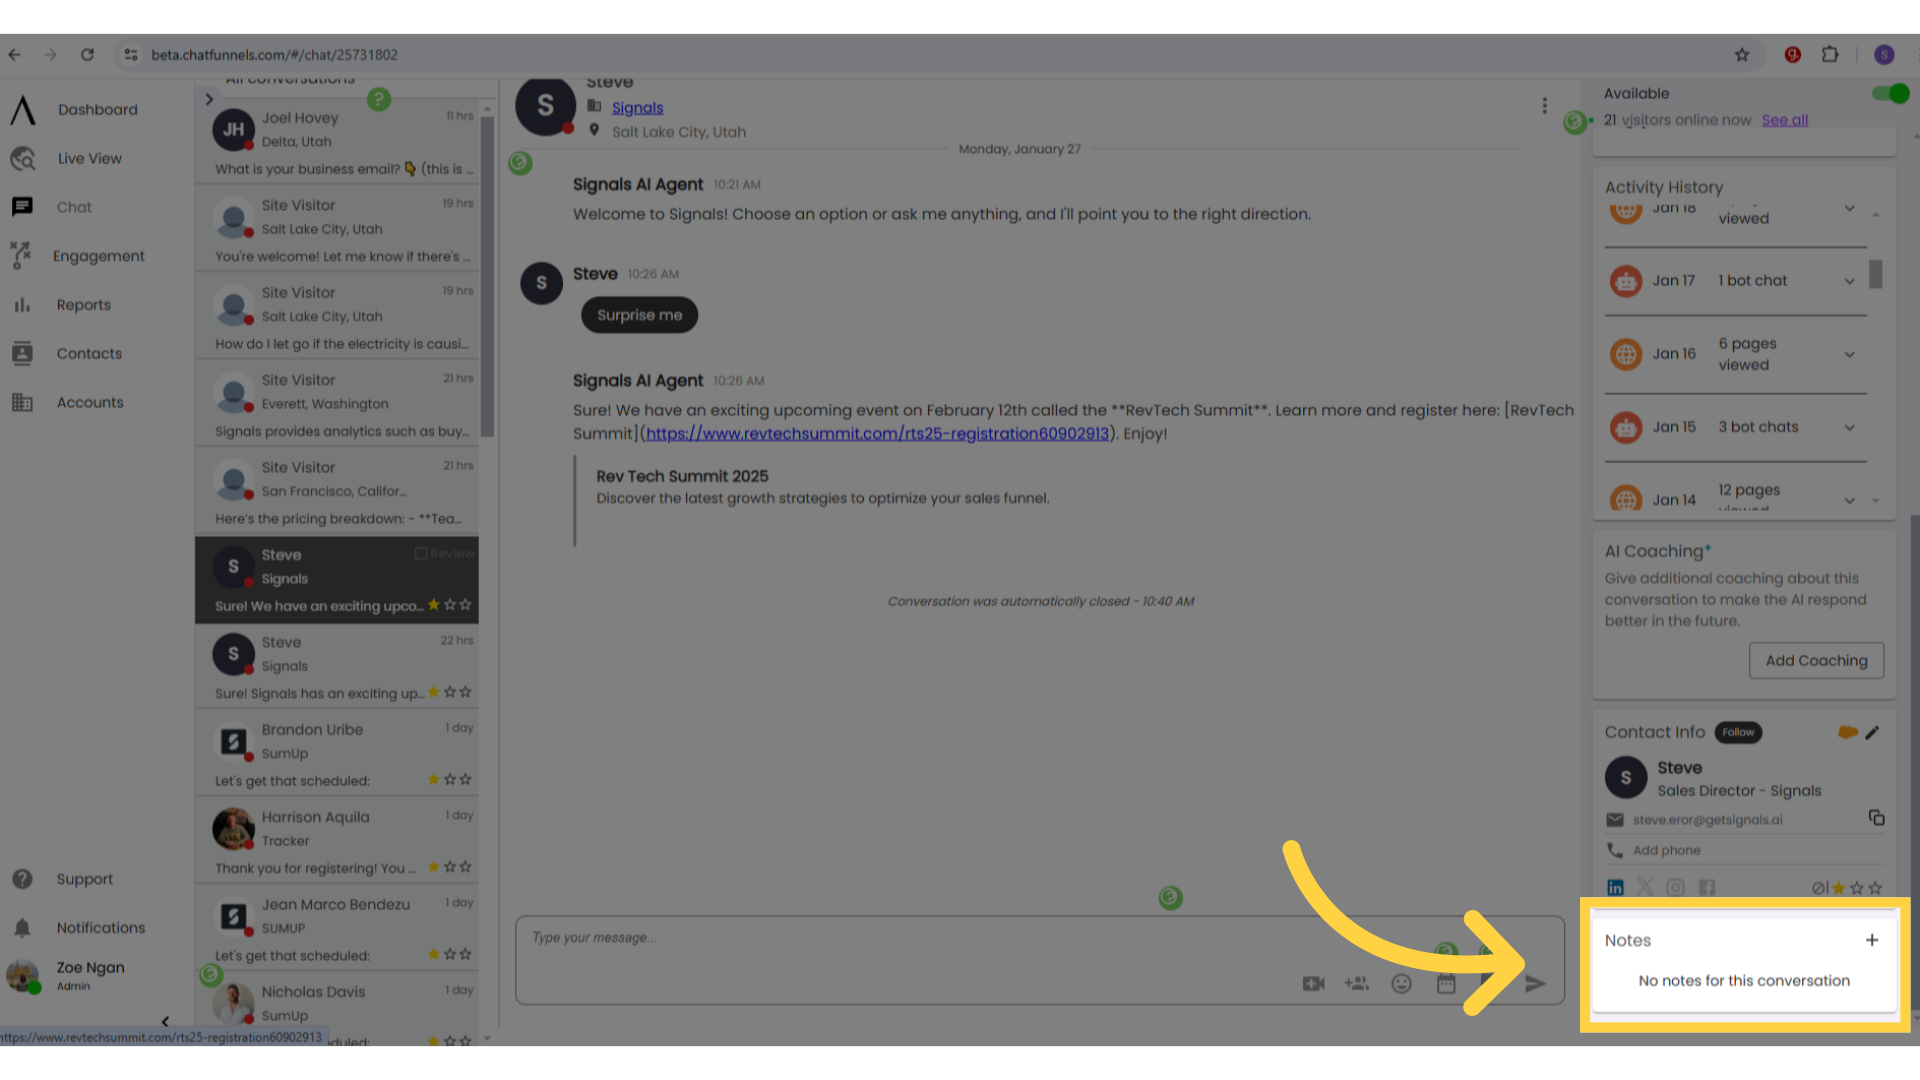
- 9. Notes Card:
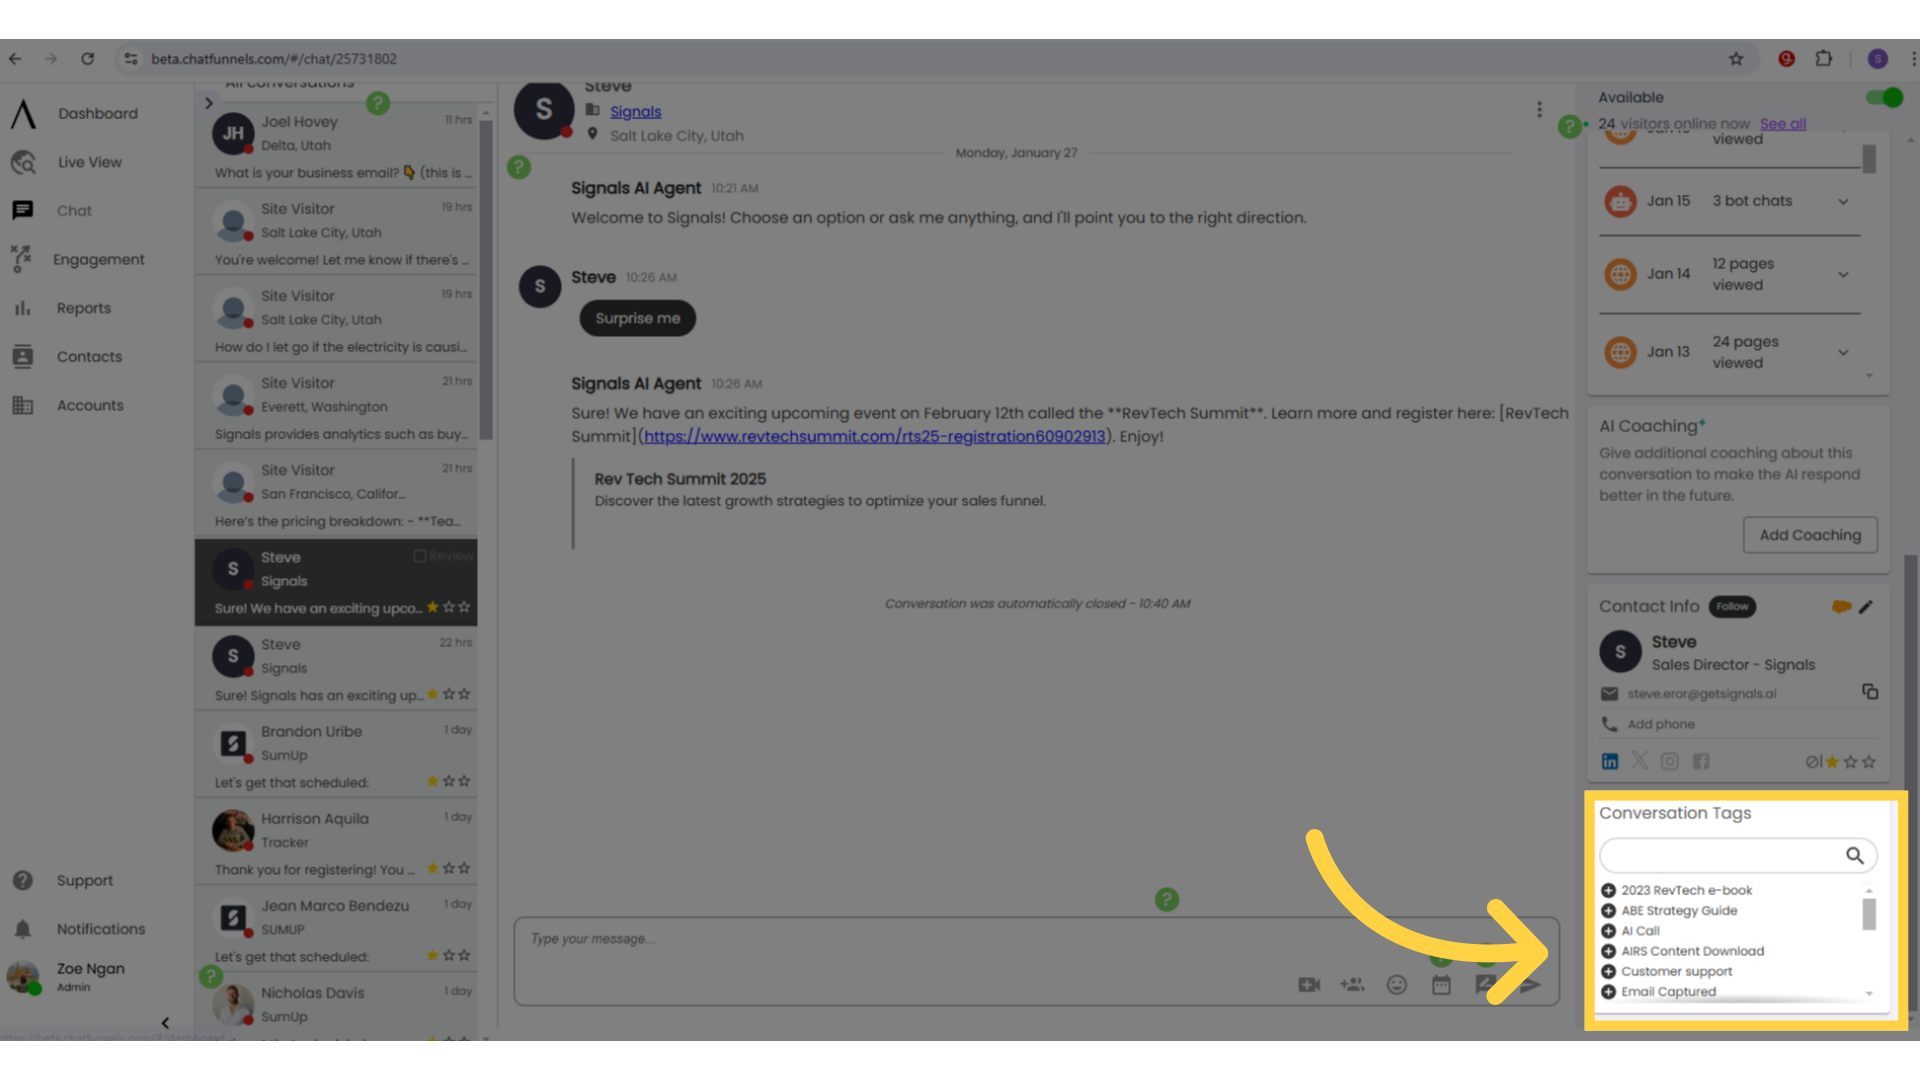
- 10. Conversation Tags Card:
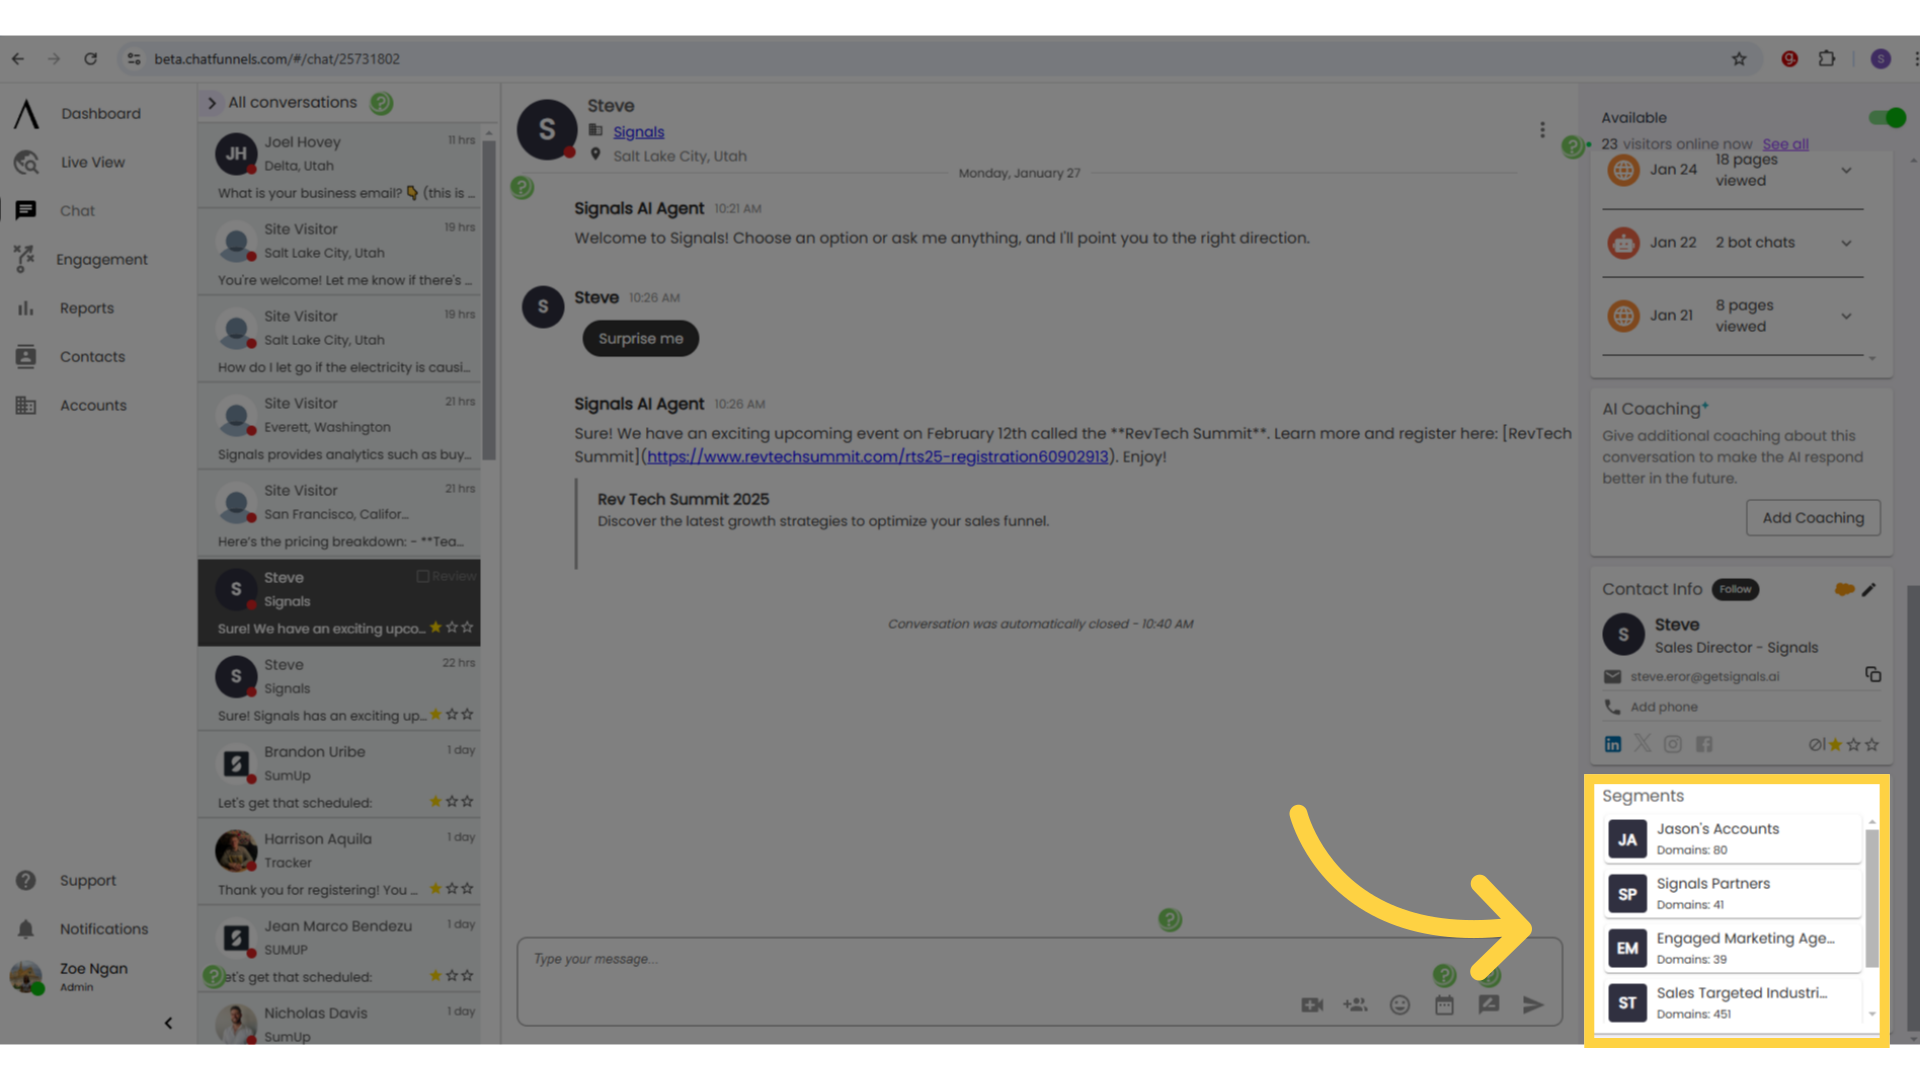
- 11. Segments Card:
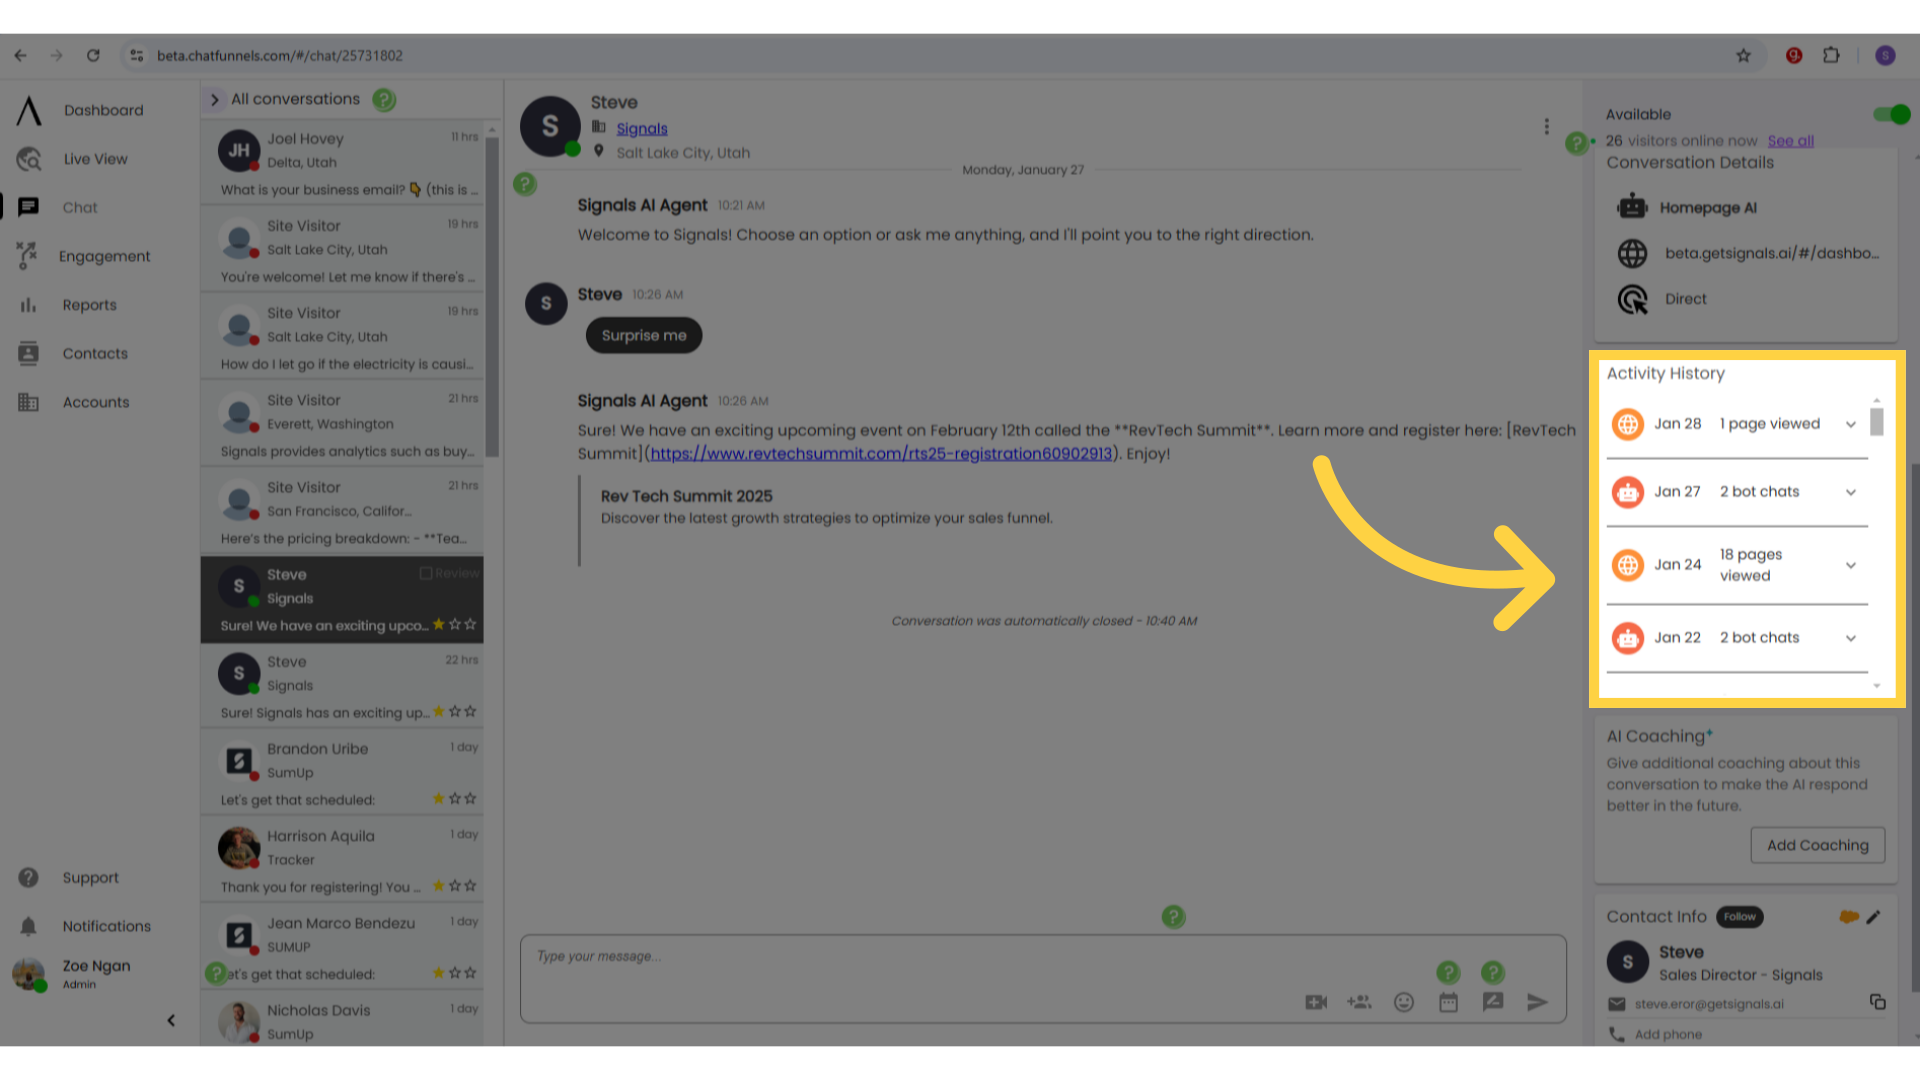
- 12. Activity History Card:
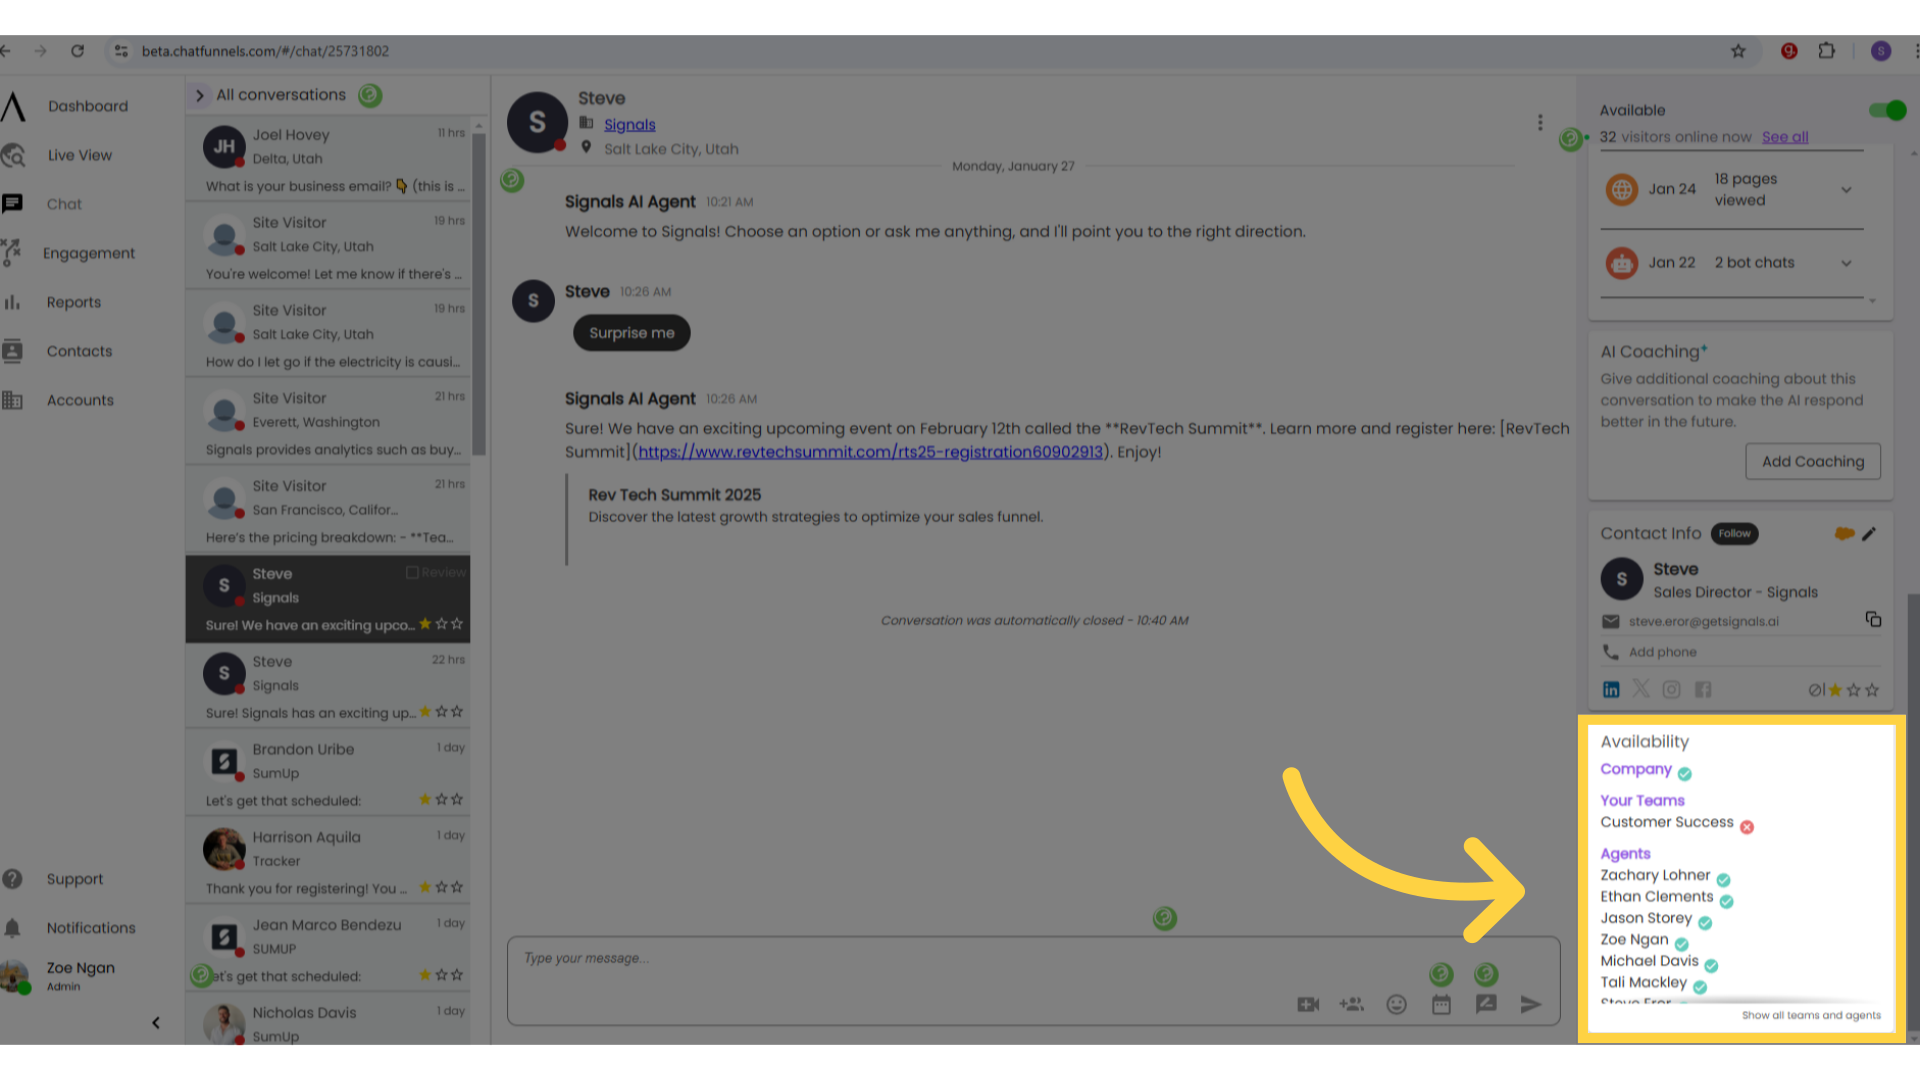
- 13. Availability Card:
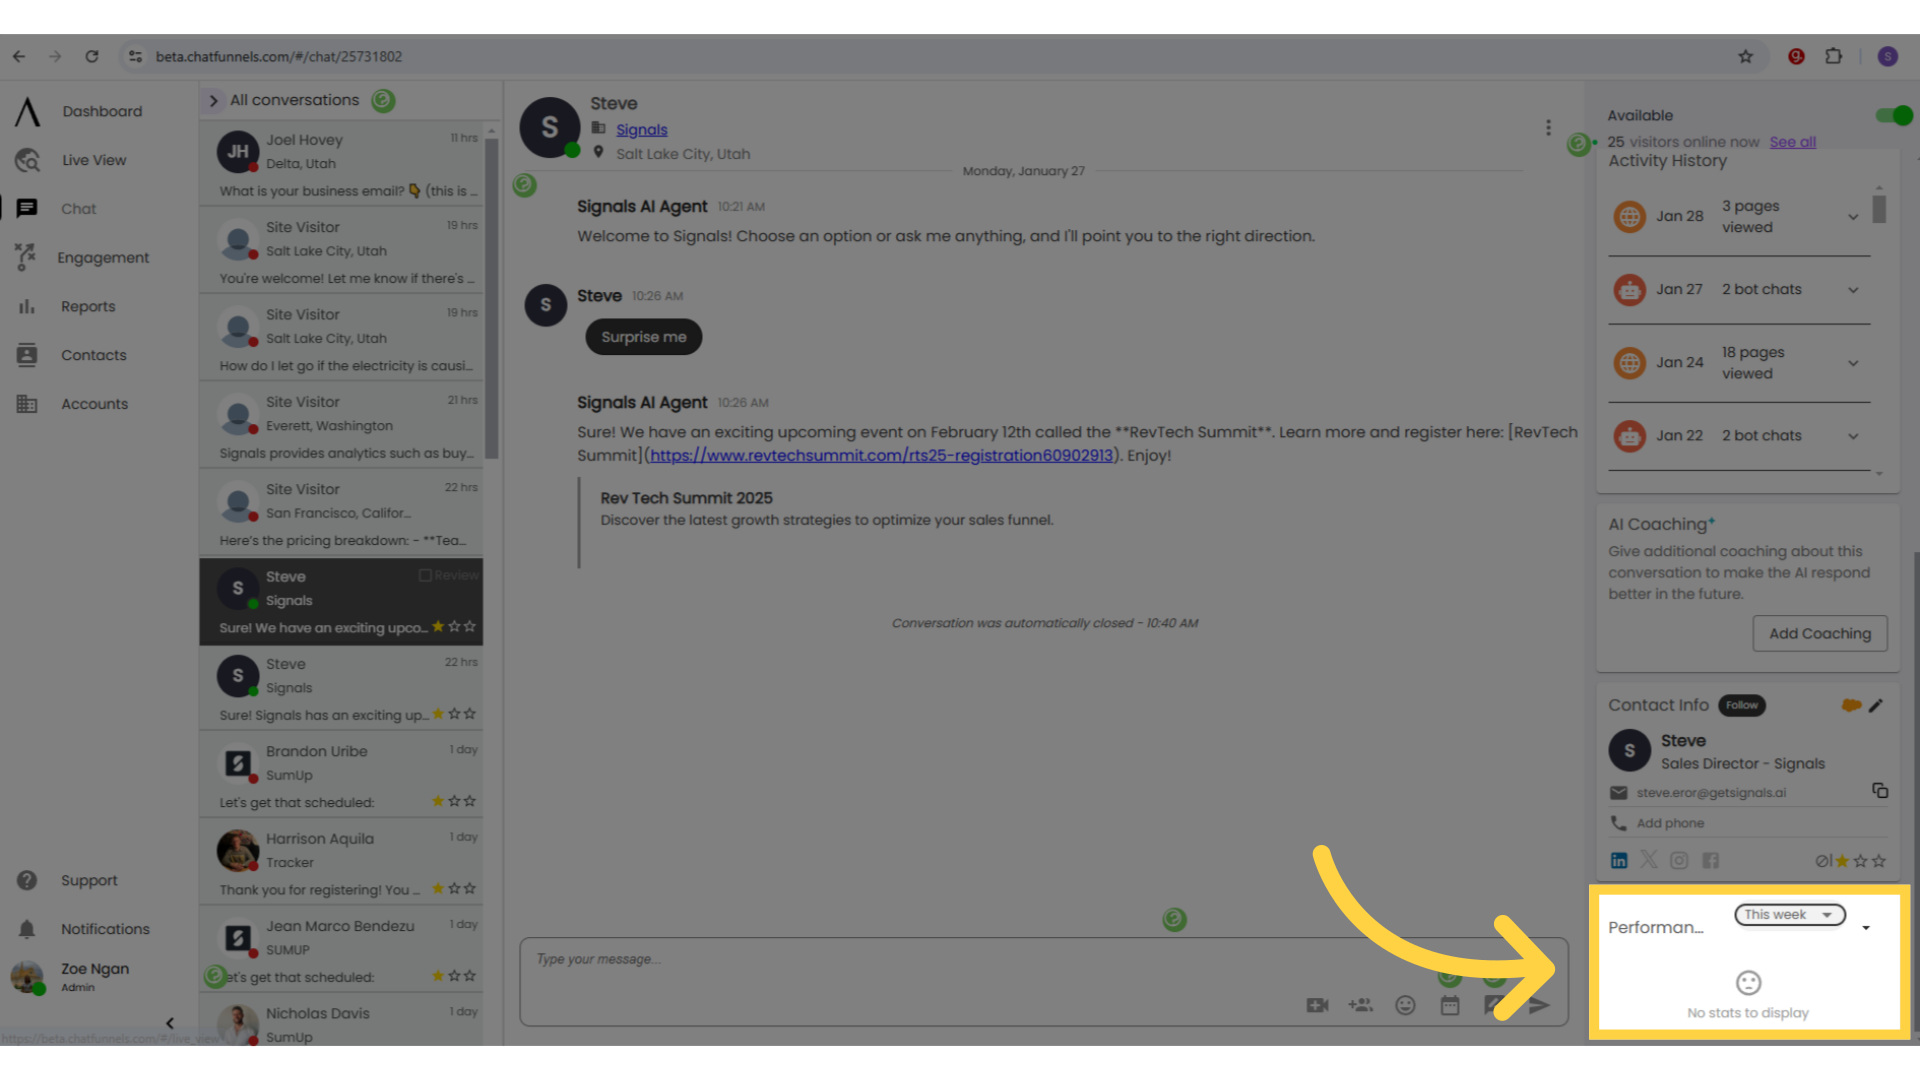
- 14. Performance Card:
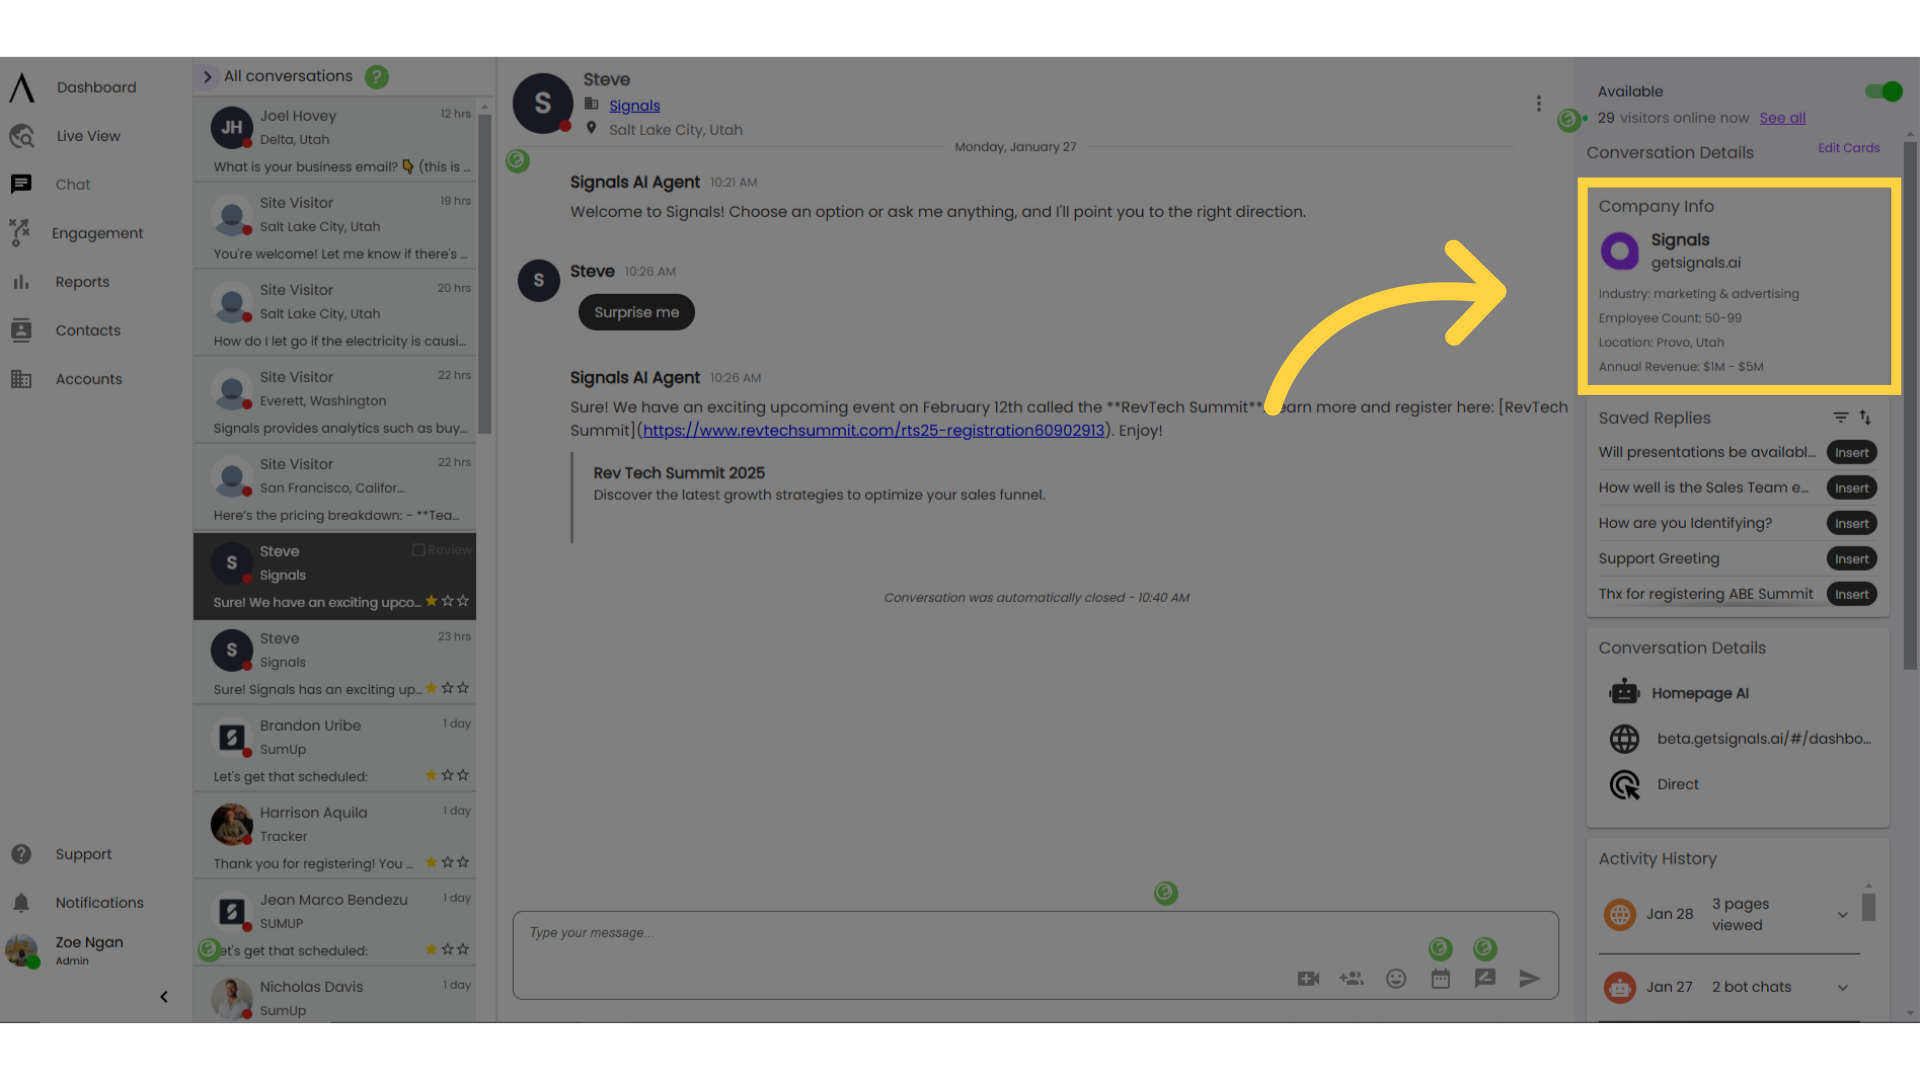
- 15. Company Info Card:
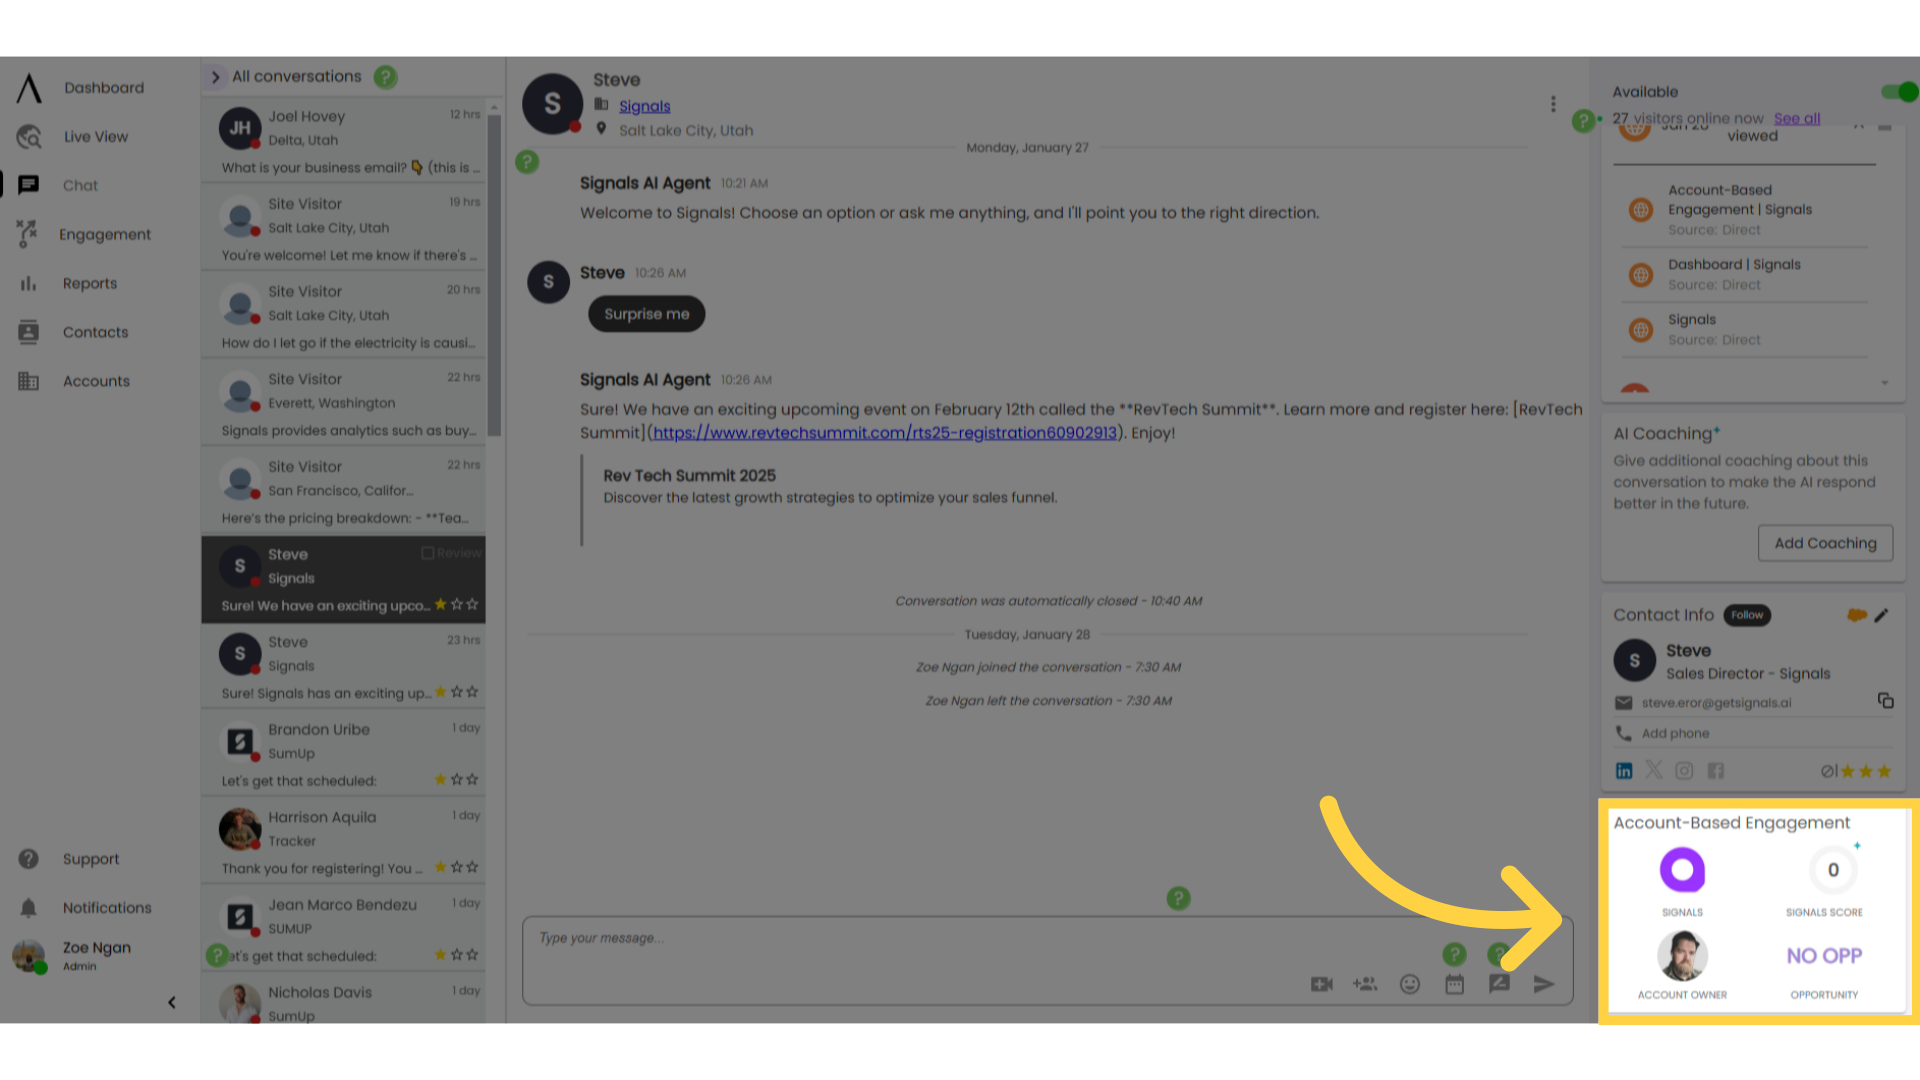
- 16. ABE Card:
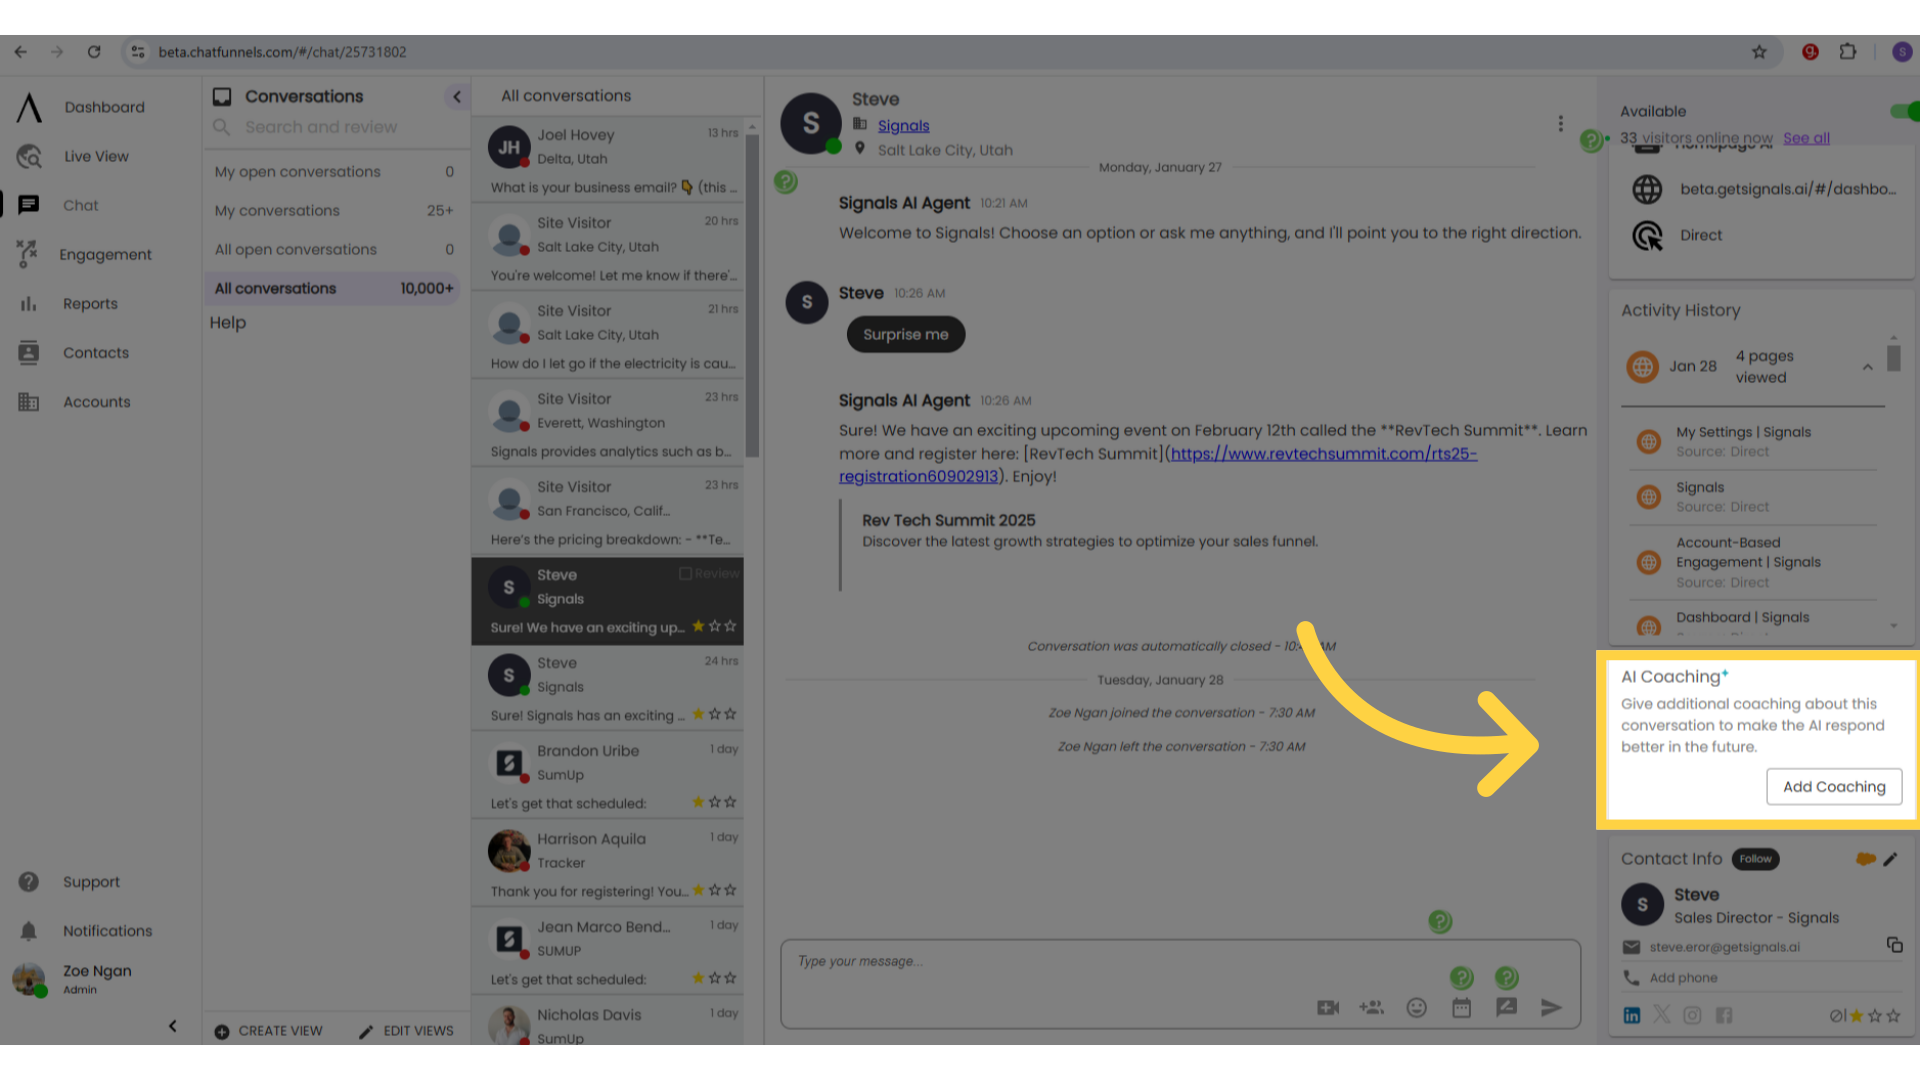
- 17. AI Coaching Card:
Customizing Conversation Details
This video will explain how to customise conversation details and what individual conversation cards mean.
Go to app.getsignals.ai
1. Introduction
First log in to Signals and click on "Chat" in the left sidebar.
2. Select "Edit Cards"
Once you've selected a conversation, select "Edit Cards" in the top right corner of the window.
3. Click to pin/unpin
Click any cards in the menu to pin and click again to unpin.

4. Drag your cards around here:
You can also change the order of cards by clicking and dragging them into your preferred order. All changes will auto-save.
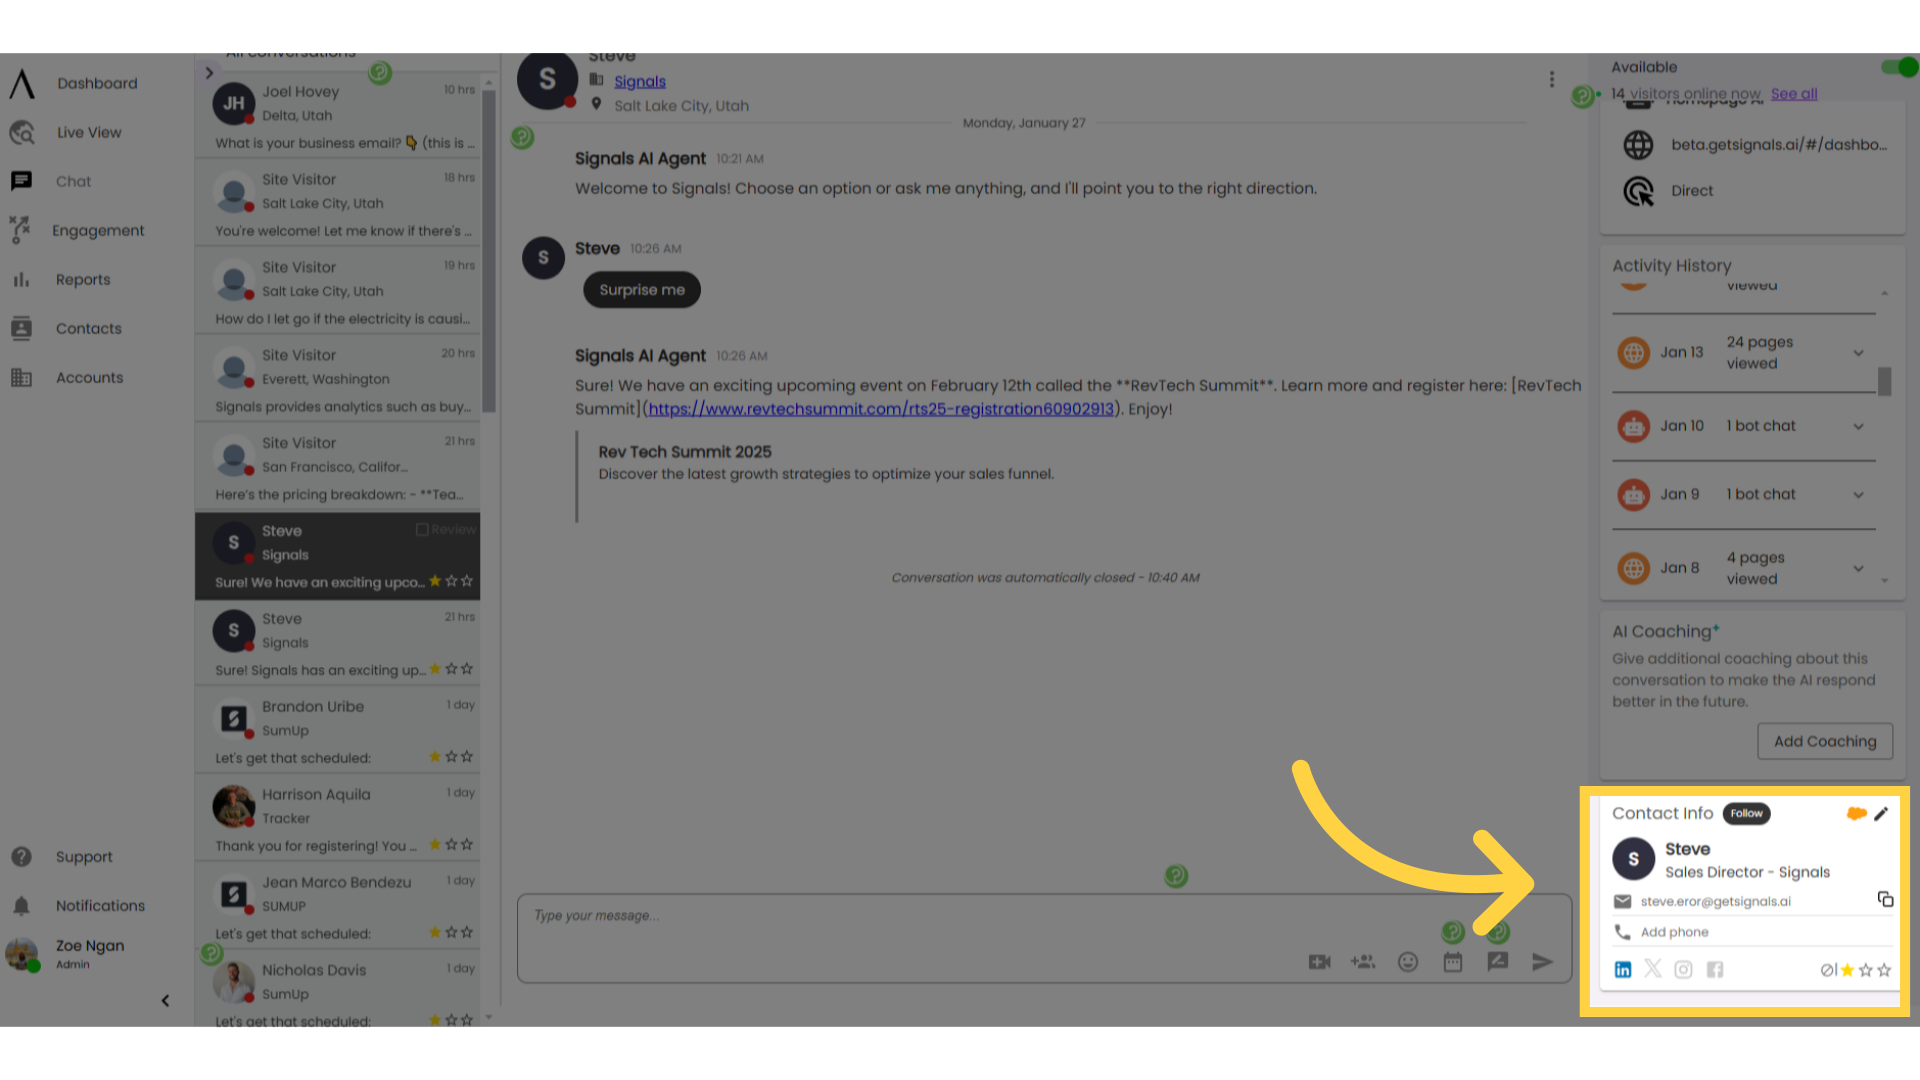
5. Contact Info Card:
The Contact Info card shows name, company, email, phone, social media links (associated with the given email), and lead score, if known. You can edit any of these fields by clicking on the field. Any changes will auto-save.
Contacts sync to CRM (if integrated) when the conversation closes. You can sync manually by clicking the CRM icon at the top right of the card. If you run into any problems, you can troubleshoot CRM syncing issues with our CRM-specific HelpDocs.
Follow this visitor by clicking the button to the right of "Contact Info". This will allow you to receive updates when this specific visitor comes to the site. Check out our HelpDocs video on Notifications to modify your notification settings.
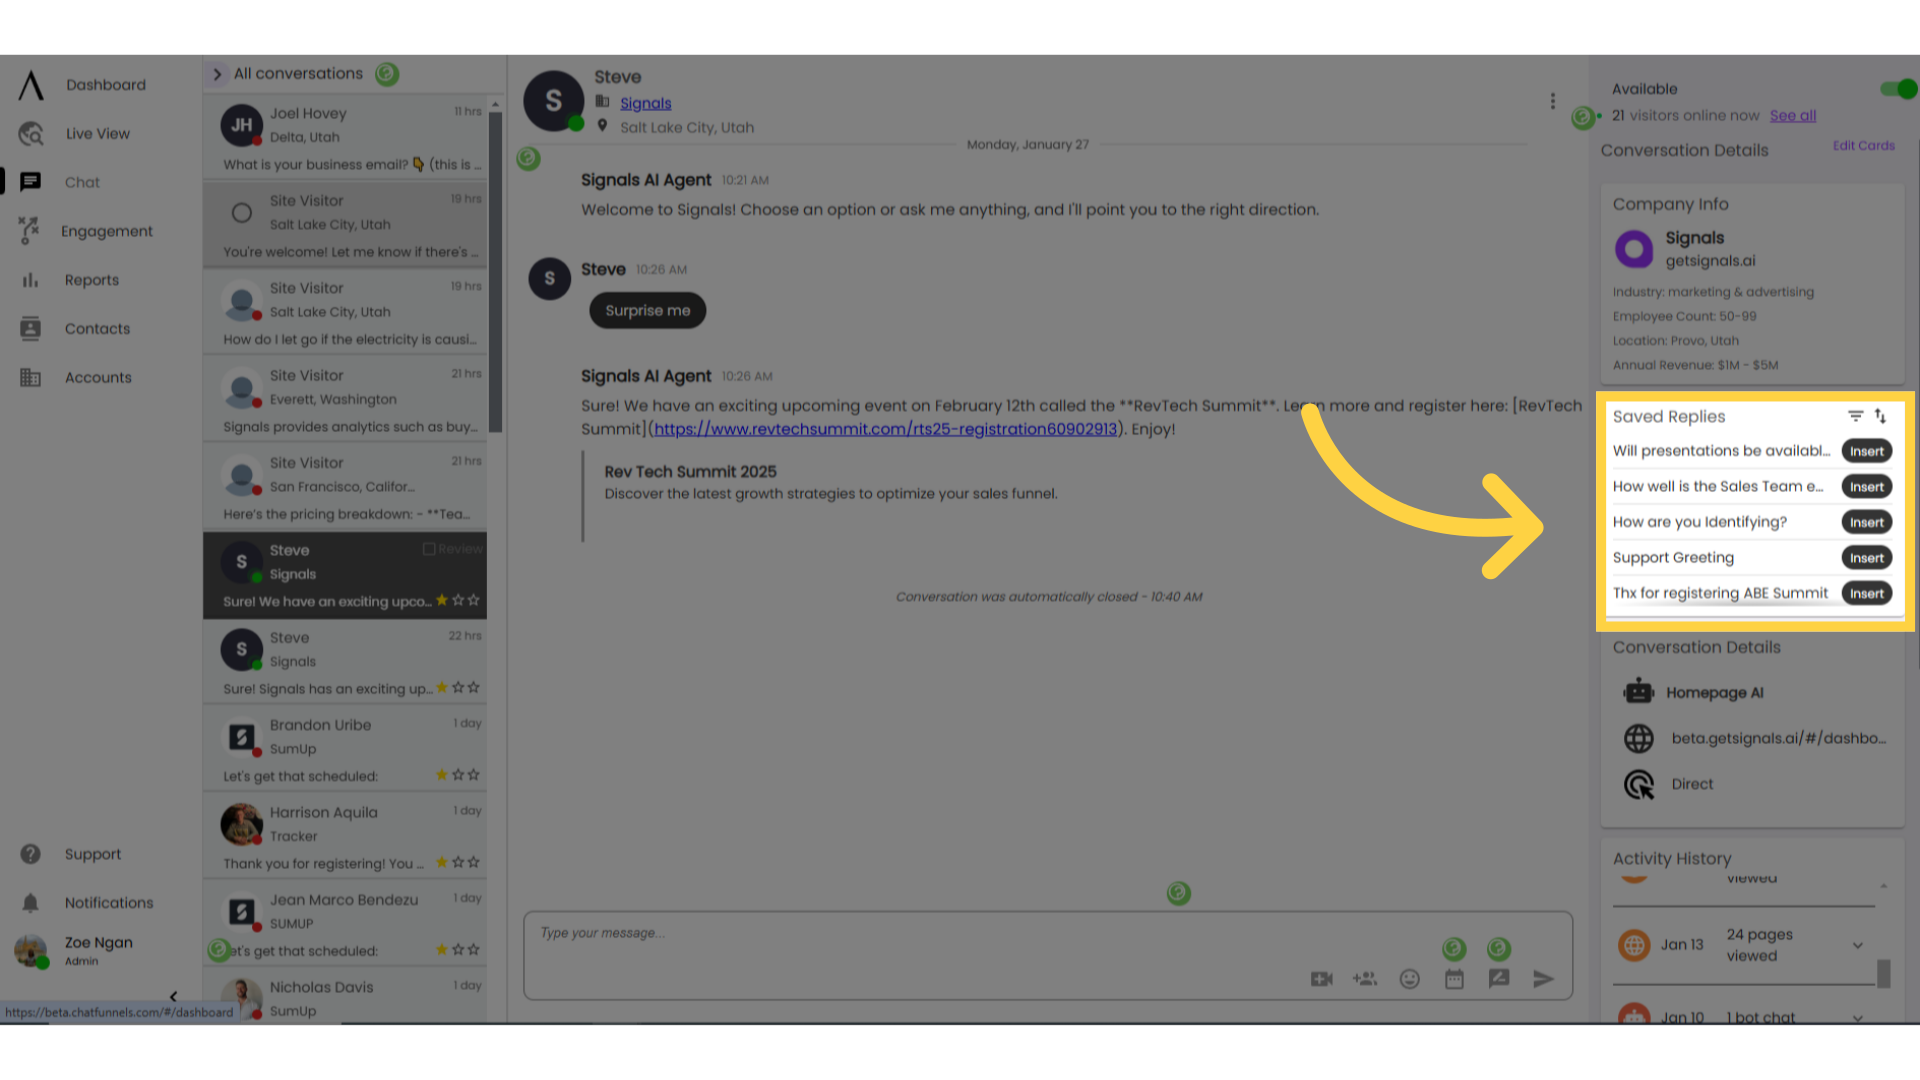
6. Saved Replies Card:
The "Saved Replies" card shows a list of all saved replies. Scroll with mouse over the card to view additional saved replies. Click "insert" and then hit enter to quickly send one of your saved replies.
For more about using and managing Saved Replies, we have a HelpDocs video called "Using Saved Replies in Chat" that you can reference.
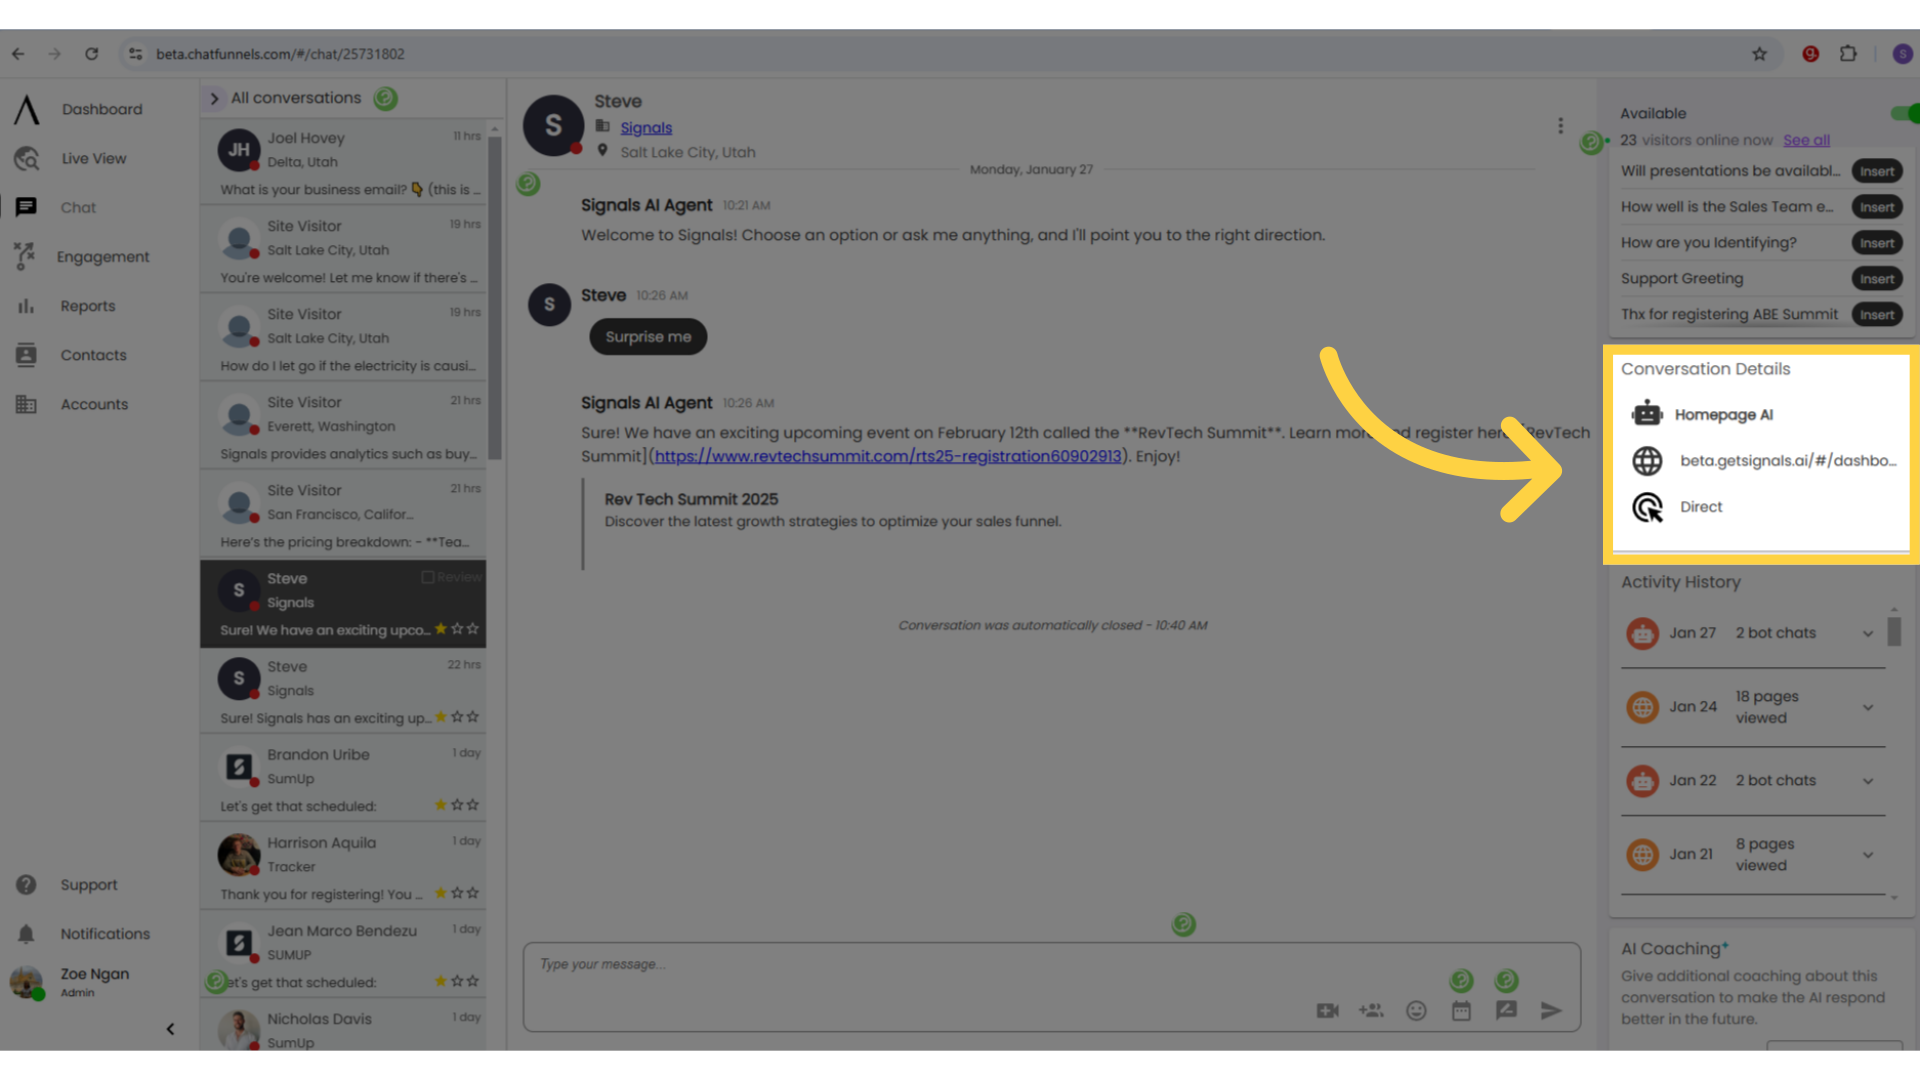
7. ConversationDetails Card:
The Conversation Details card will auto-populate with 3 things:
The bot that the person is engaging with (this is a link which will take you to the bot builder if your user permissions include bot building and editing).
The conversation start URL. Once you engage with it, the bot will follow you from page to page, so the person chatting might not still be on that page, but this is where the conversation started.
Traffic Source - This will let you know how the person got to your site, giving you more context for your conversation.
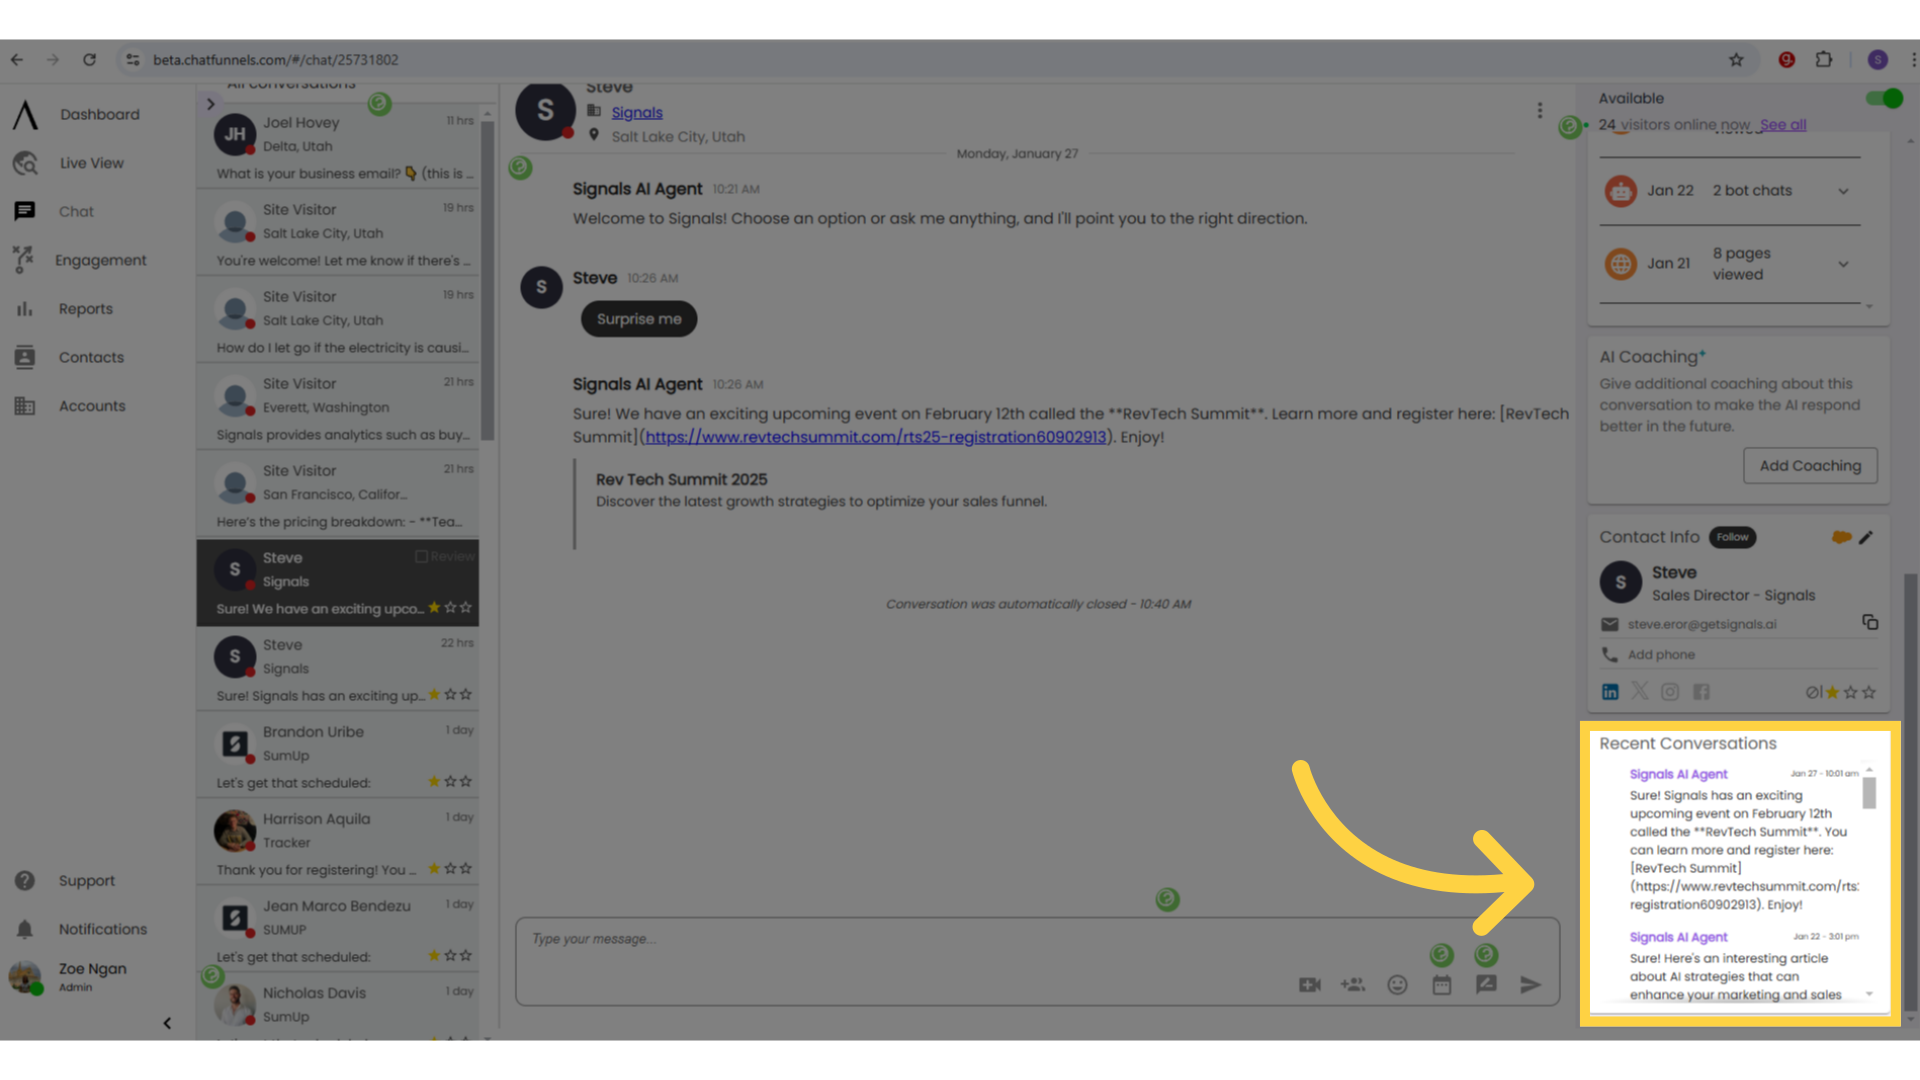
8. Recent Conversations Card:
The Recent Conversations card shows a list of all previous conversations with this site visitor. This includes the last message sent in the conversation, the date and time, and a link to that previous conversation.
9. Notes Card:
The Notes card allows for easier internal communication linked to specific chats. Nothing in this card is visible to the person who chatted in.
Hit the "+" button in the top right corner of this card to add a note and tag any additional users you want to include in the conversation. You also have the option to respond to the note, resolve the note, or delete the note altogether in the pop-up modal.
10. Conversation Tags Card:
The Conversation Tags card displays all conversation tags already applied to the conversation and all other tags in your account, with a search bar for easy access.
To add a tag, simply find the tag you want to add and hit the black "+" button to the left of the tag text. To remove a tag, click the "x" to the left of the tag text in the list of applied tags.
11. Segments Card:
The Segments card displays a list of all company segments in your organization. Click on any segment to open that segment in a separate tab.
12. Activity History Card:
The Activity History card displays a list of all activity that site visitor has had on your site. This includes page visits, bot interactions, live chats, and contact information capture.
Click the drop-down on the right to view details. All entries are live link that will take you to either the conversation or the web-page they were on.
13. Availability Card:
The Availability card displays all levels of availability: Company, Team, and Individual. Groups or agents with a green check mark to the right are currently available for live chat, groups or agents with a red "x" to their right are currently marked unavailable for live chat.
14. Performance Card:
The Performance card tracks your individual chat agent performance. Select a time frame from the drop-down menu in the top right corner of the card. The options are today, this week, or last 30 days.
You can view your ranking in response time, email capture rate, total conversations you were routed to, response rate, and meeting booked rate.
15. Company Info Card:
The Company Info card displays the following information about the site visitor's company: name, domain & log, industry, employee count, location, and annual revenue.
These fields are pulled from our data providers based on the site visitor's IP address that we identified. If the account exists in the system, the Company Name will link to the account page.
16. ABE Card:
The ABE card displays a quick summary of the account from an ABE perspective, including: company name & logo, account owner, and opportunity status.
It also shows the ABE score, which is out of 100 and is based on the percent of employees who have visited the site, number of total visits, number of chat conversations, and opportunity status from CRM.
17. AI Coaching Card:
The AI Coaching card allows you to give feedback about AI conversations to help the AI respond better in the future. To manage coaching in more depth, check out our HelpDocs on managing AI content.