Managing Regional Routing Rules
- Managing Regional Routing Rules
- Go to app.getsignals.ai
- 1. Introduction
- 2. Drag and drop "Conditional Branching" into the flow
- 3. Click "Add New Branch"
- 4. Configure branch settings
- 5. Drag and drop "Live Chat" into the bot flow
- 6. Configure live chat settings
- 7. Configure live chat settings
- 8. Create a sequence
- 9. Configure sequence details
- 10. Sequence
- 11. Recommendations
- 12. Go to "Sequences"
- 13. Edit your sequence
Managing Regional Routing Rules
Routing refers to the system by which live chat or calendar requests are assigned to agents.
Go to app.getsignals.ai
1. Introduction
If your organization wishes to assign live chat requests and calendar drops based on the visitor's geography, an additional bot skill will be required.
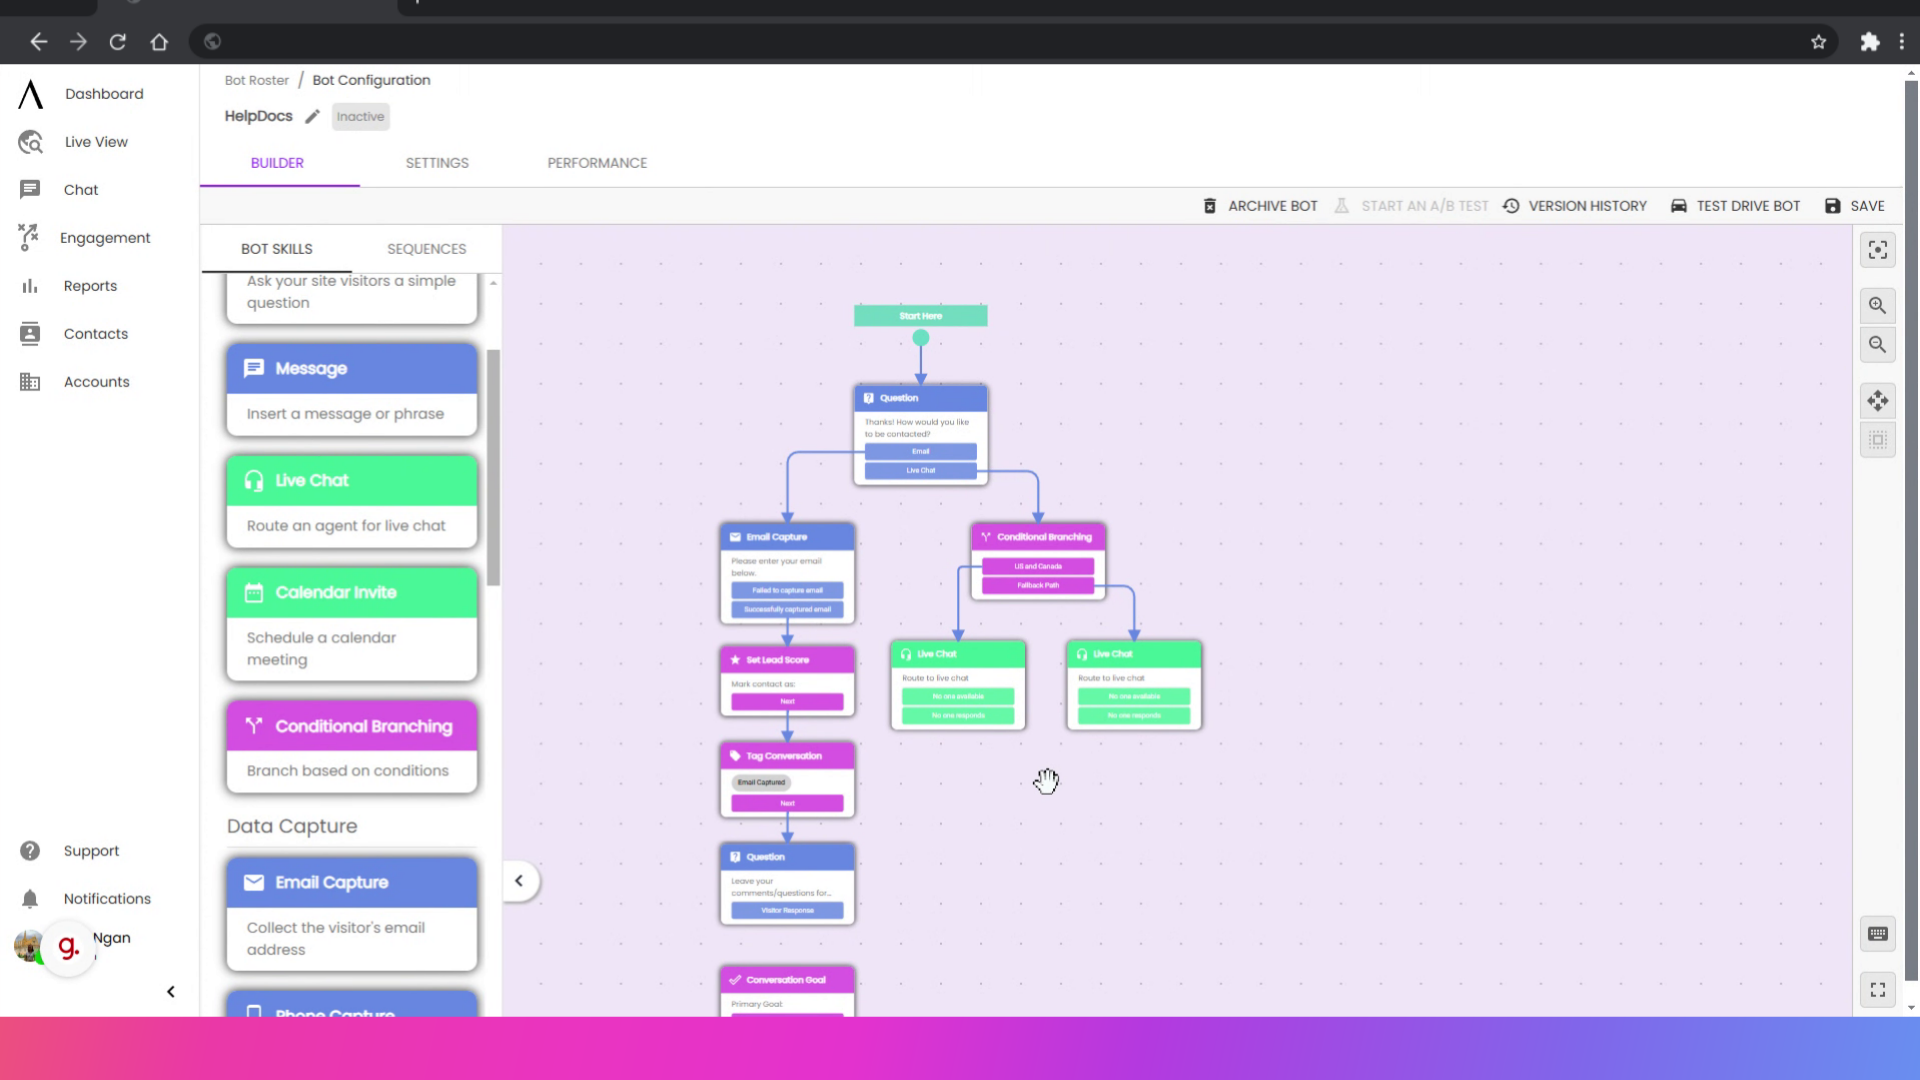
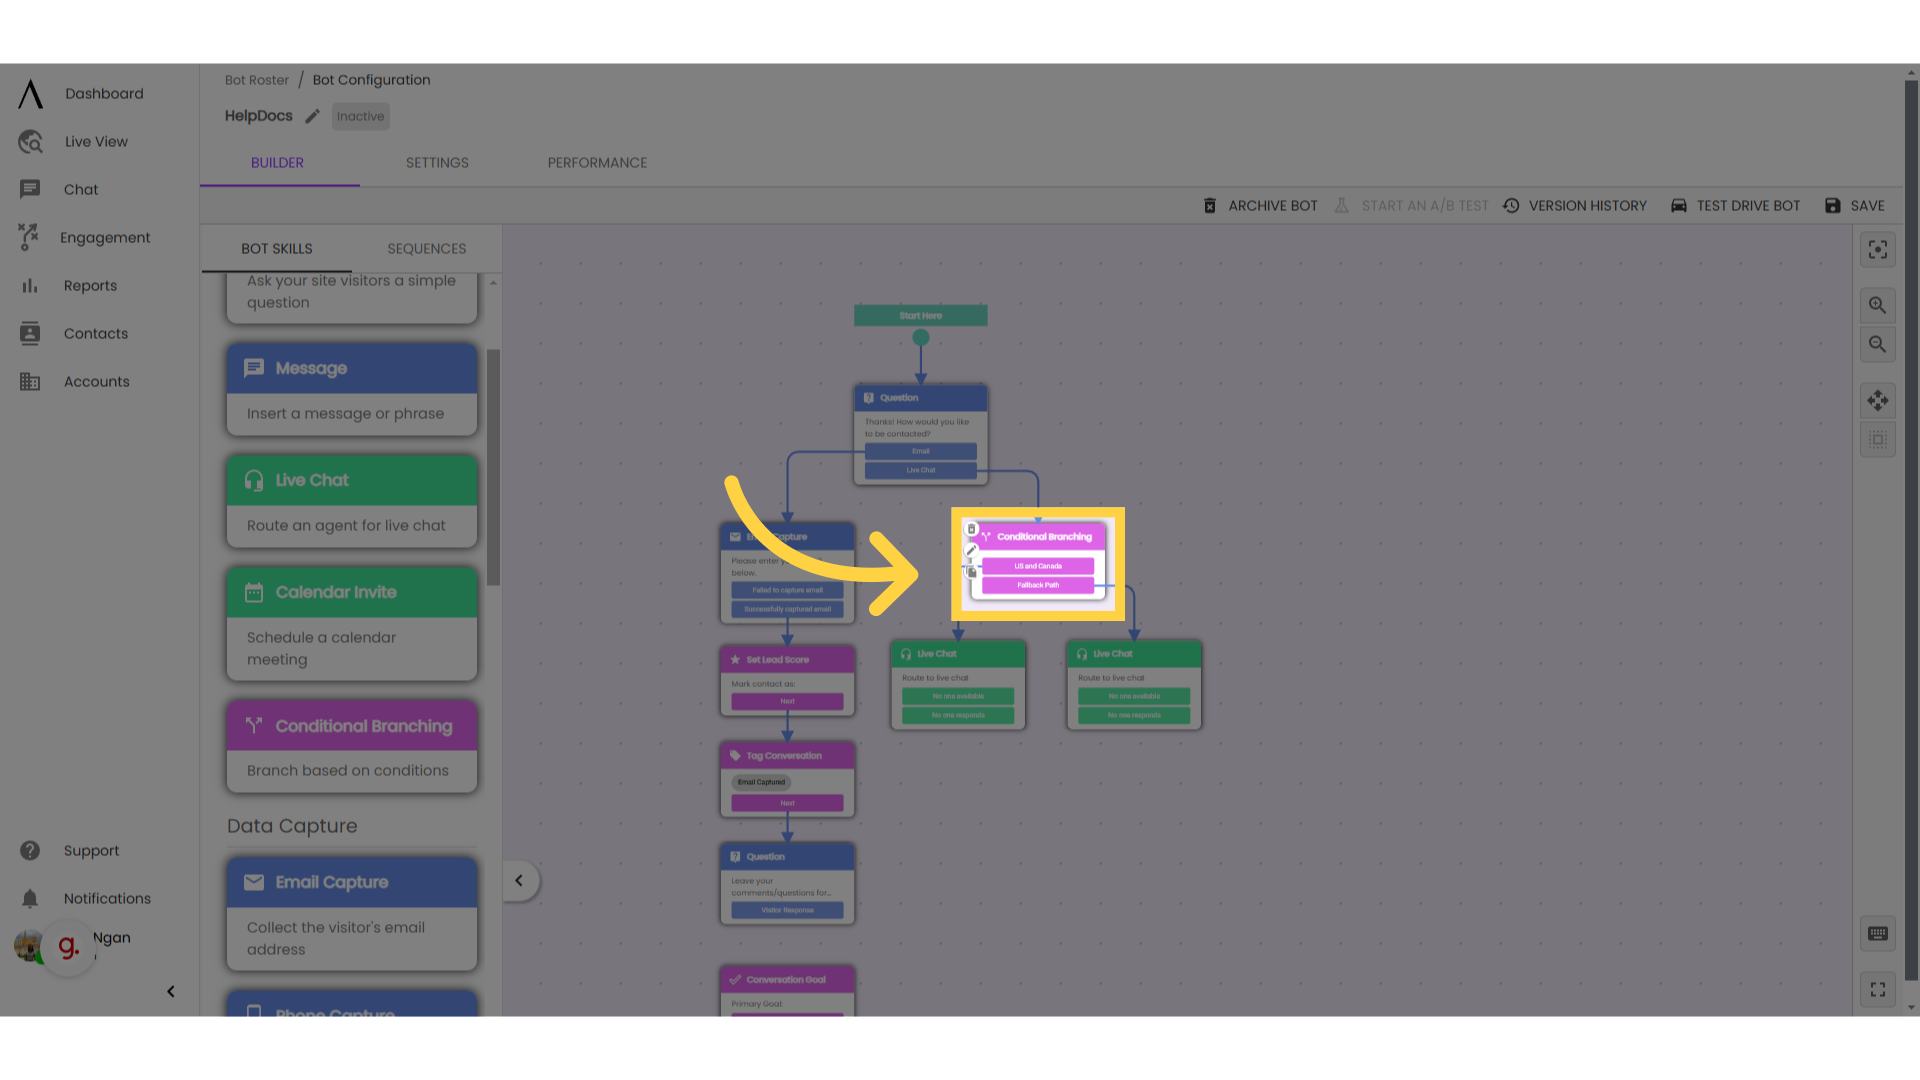
2. Drag and drop "Conditional Branching" into the flow
The Conditional Branching Skill allows you to create branches to reflect each agent's routing rule.
For example, if you have an agent named Kevin whose regional territory the United States and Canada, you might start by adding a Conditional Branching skill to your bot builder by dragging it out from the bot skills menu. Double-click on the skill to edit.
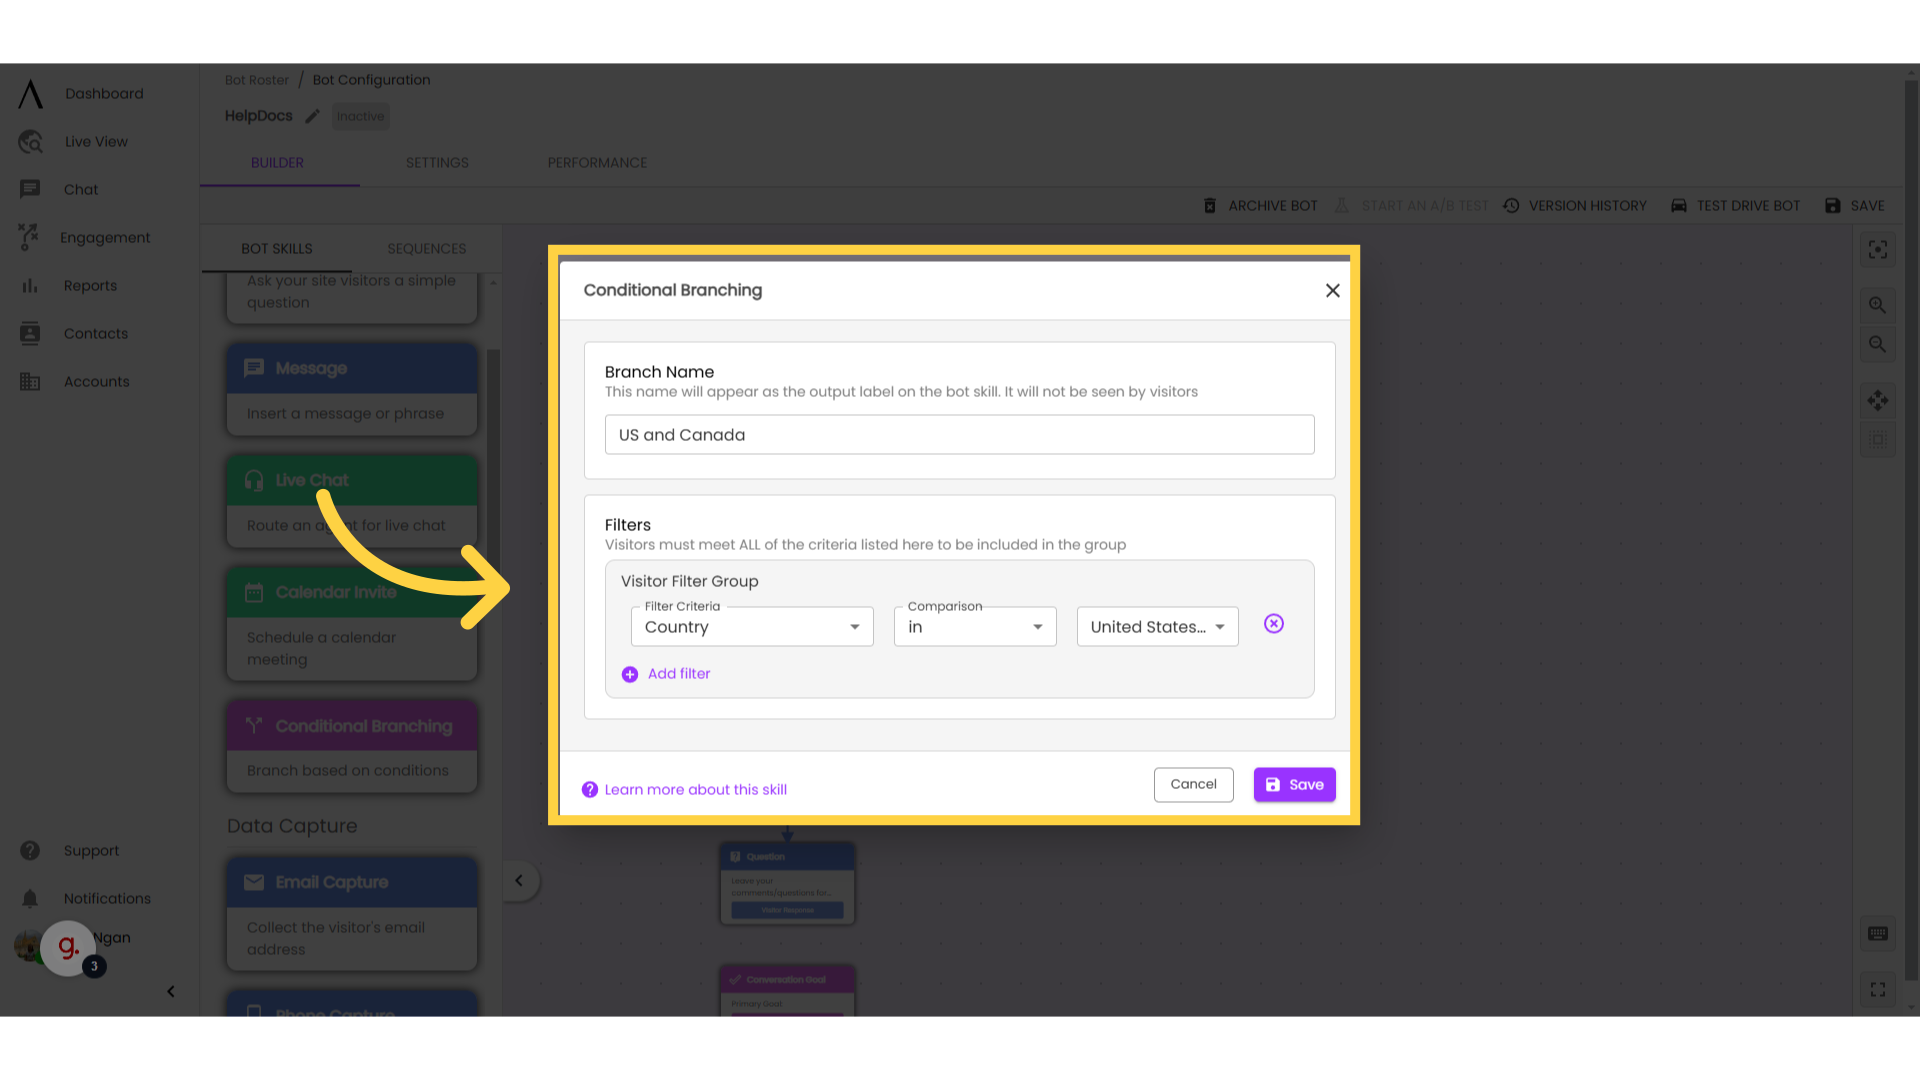
3. Click "Add New Branch"
Click "Add New Branch."
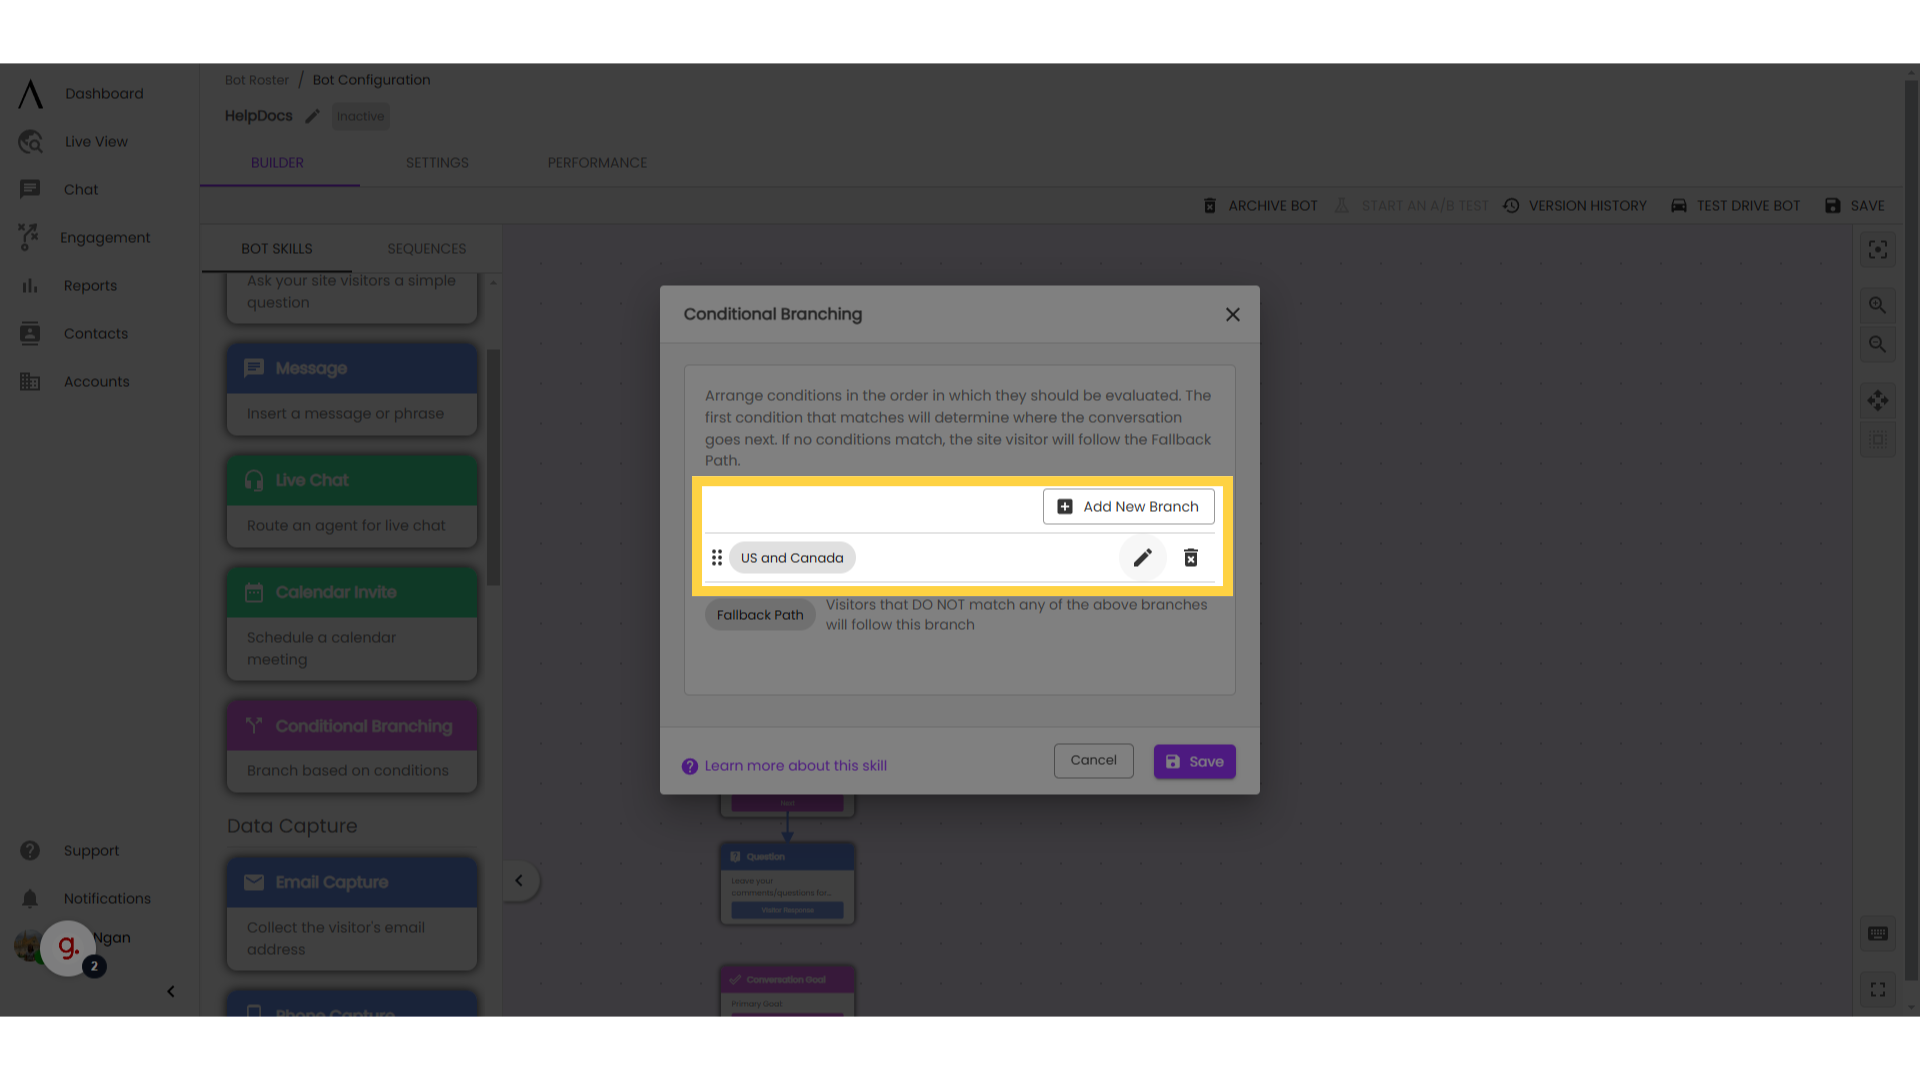
4. Configure branch settings
Give your branch a name: for this example, two good options would be "Kevin's Rule" or "US and Canada." As you set this up, keep in mind that you might one day need to update this rule if Kevin gets promoted or if territories change. Naming these branches will make your life easier down the road.
In the drop-down for Filter Criteria, select "Country" use the comparison "in", then selected the US and Canada in the list of available countries. Save your branch and repeat for each of your agents' territories.
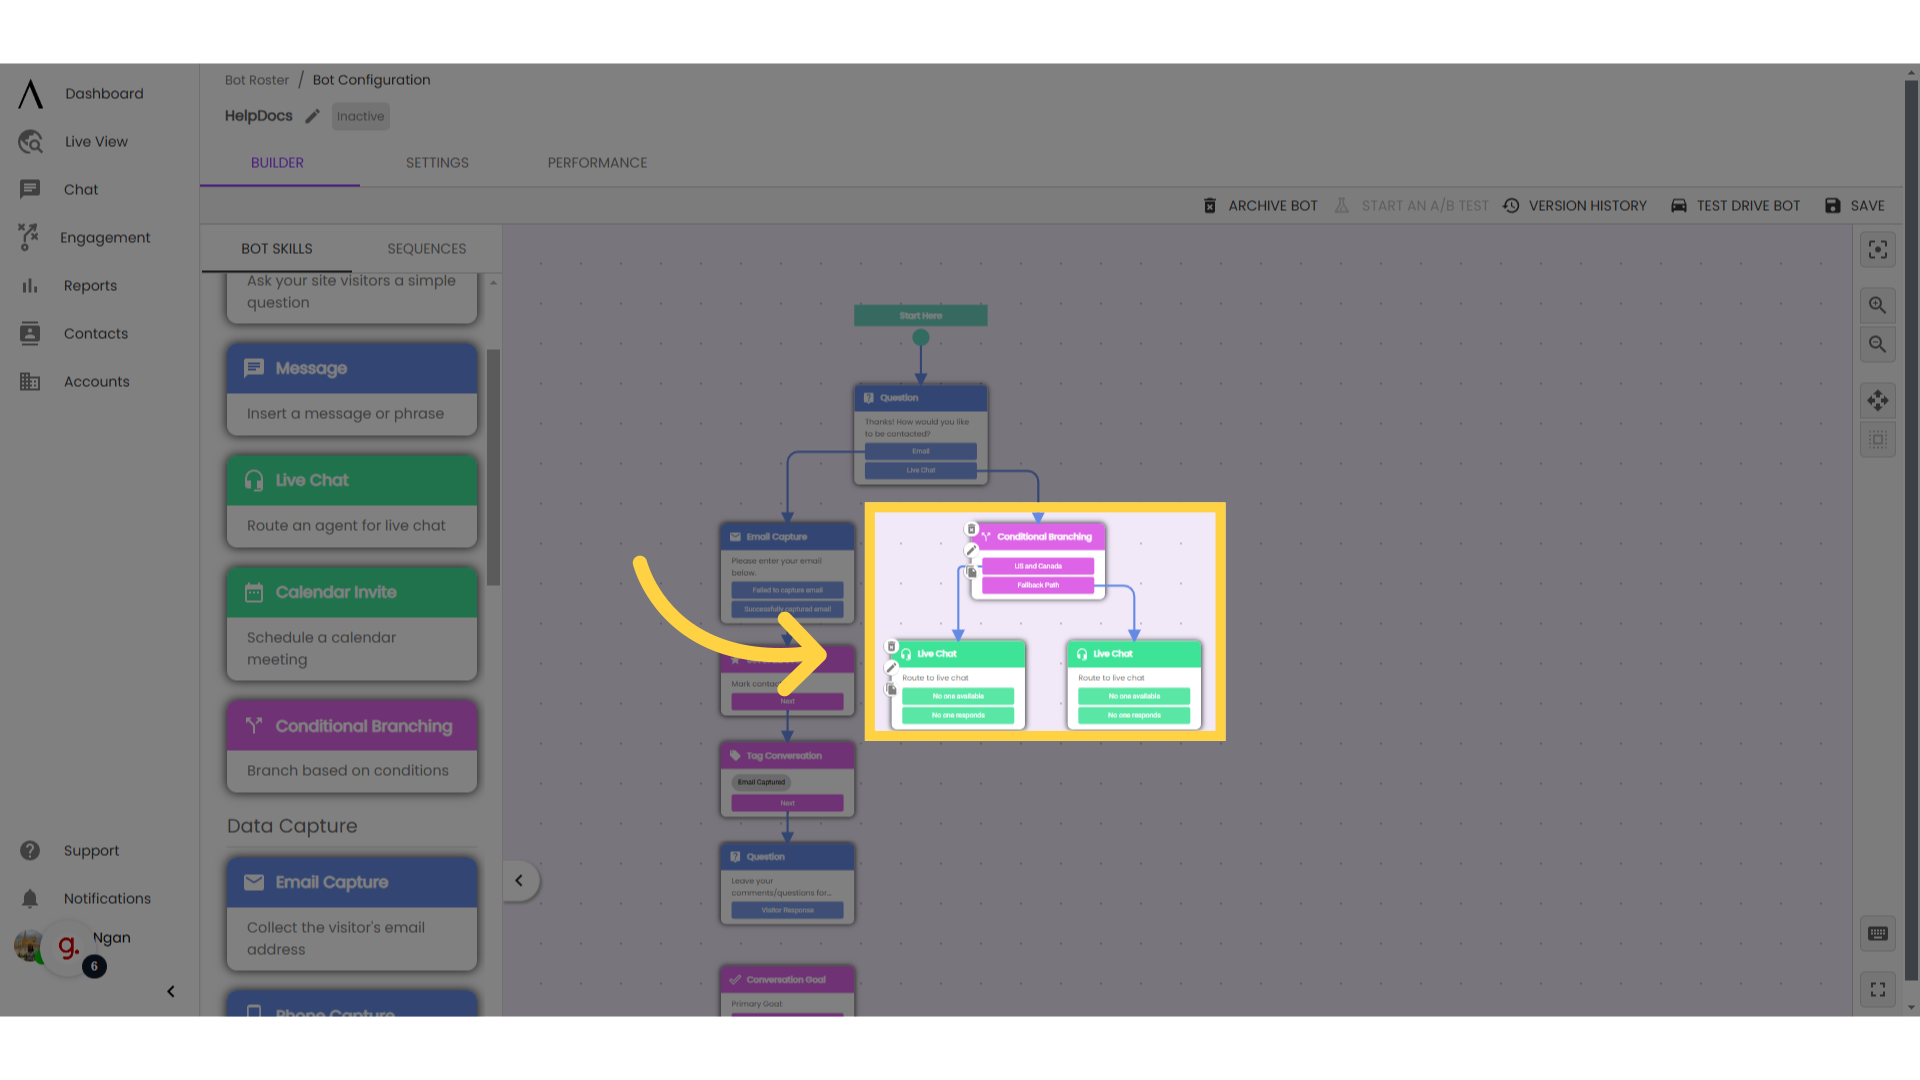
5. Drag and drop "Live Chat" into the bot flow
You should see exits from the bot skill for each of your regions, plus a "fallback path". This will be the exit for any site visitor whose location doesn't match any of the branches you've already defined.
To assign reps to these regions, drag a Live Chat or Calendar Invite skill out from the Bot Skill Menu and drop it into the bot builder. Double-click to edit.
6. Configure live chat settings
Type the message to be sent while your rep is coming into the chat, or when the calendar is dropped. Select "Route to a single agent", then select the agent who owns the first territory on your Conditional Branching skill.
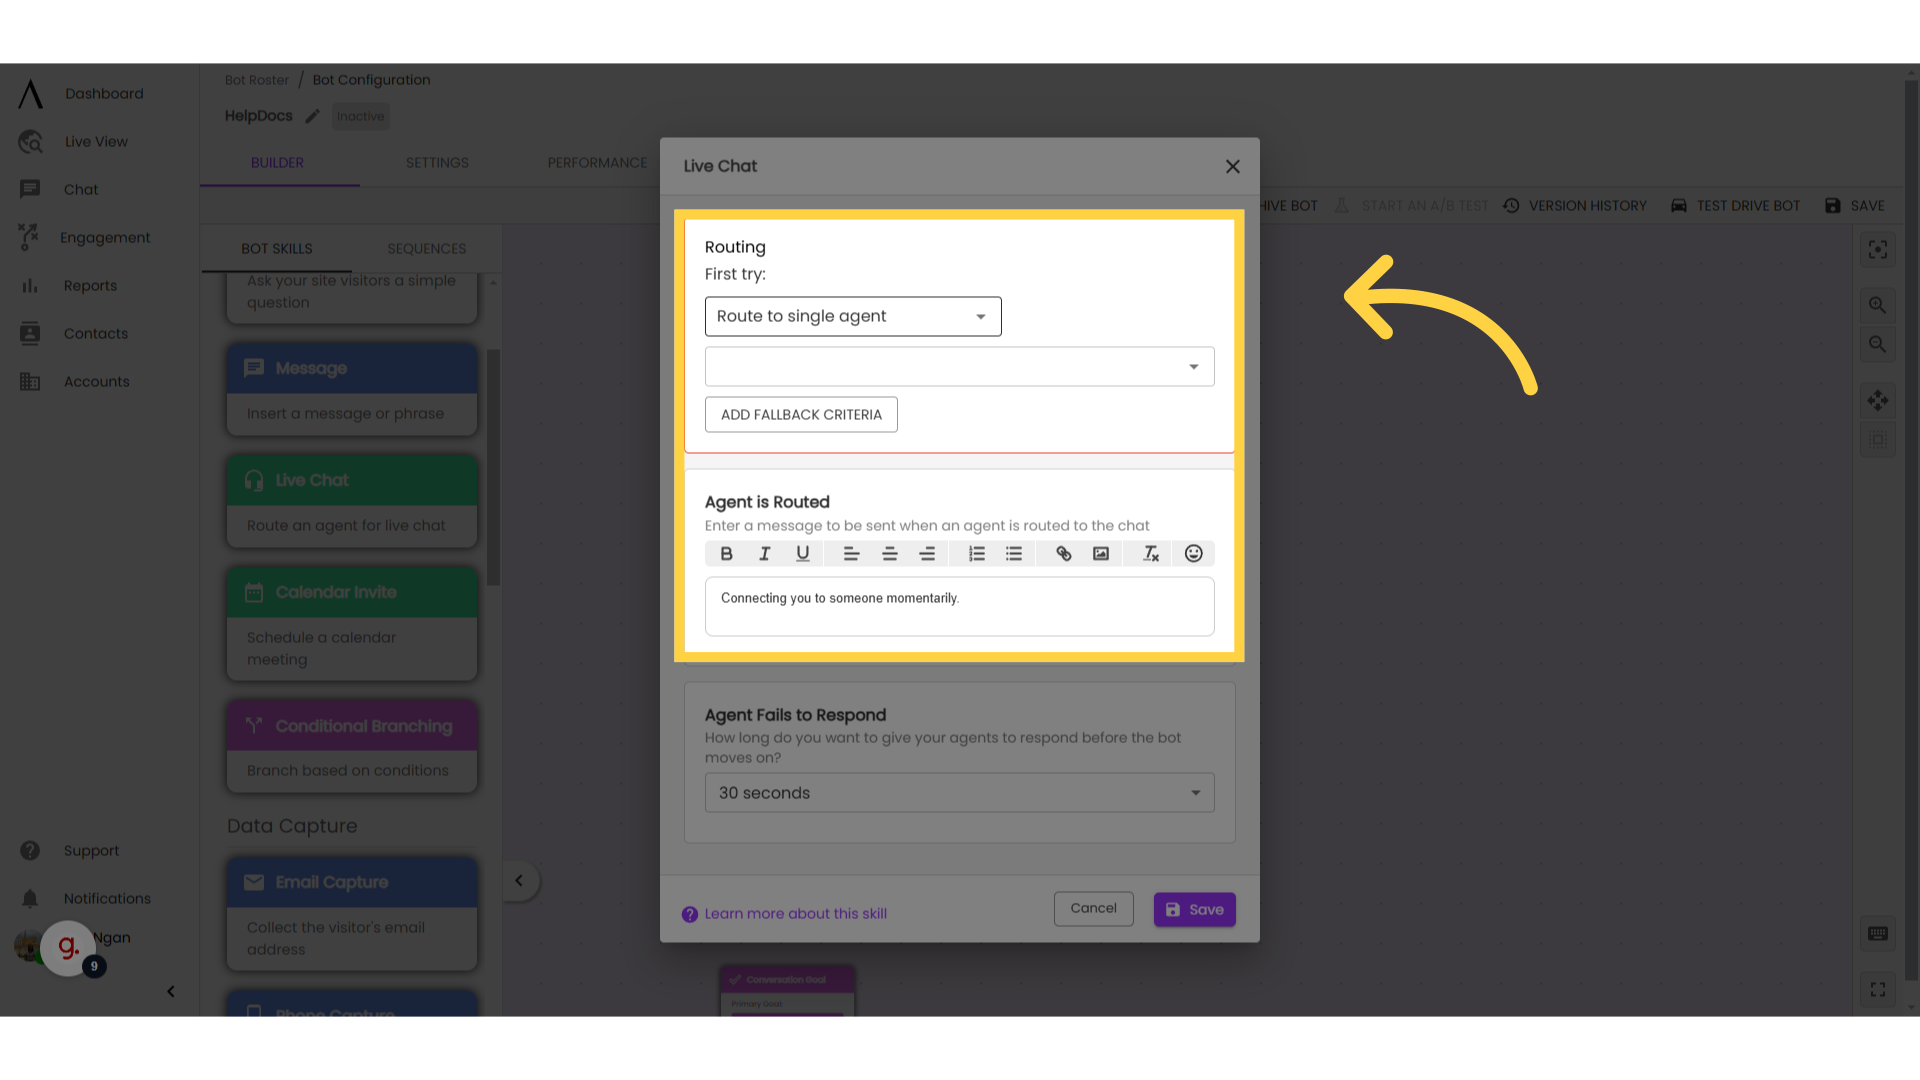
7. Configure live chat settings
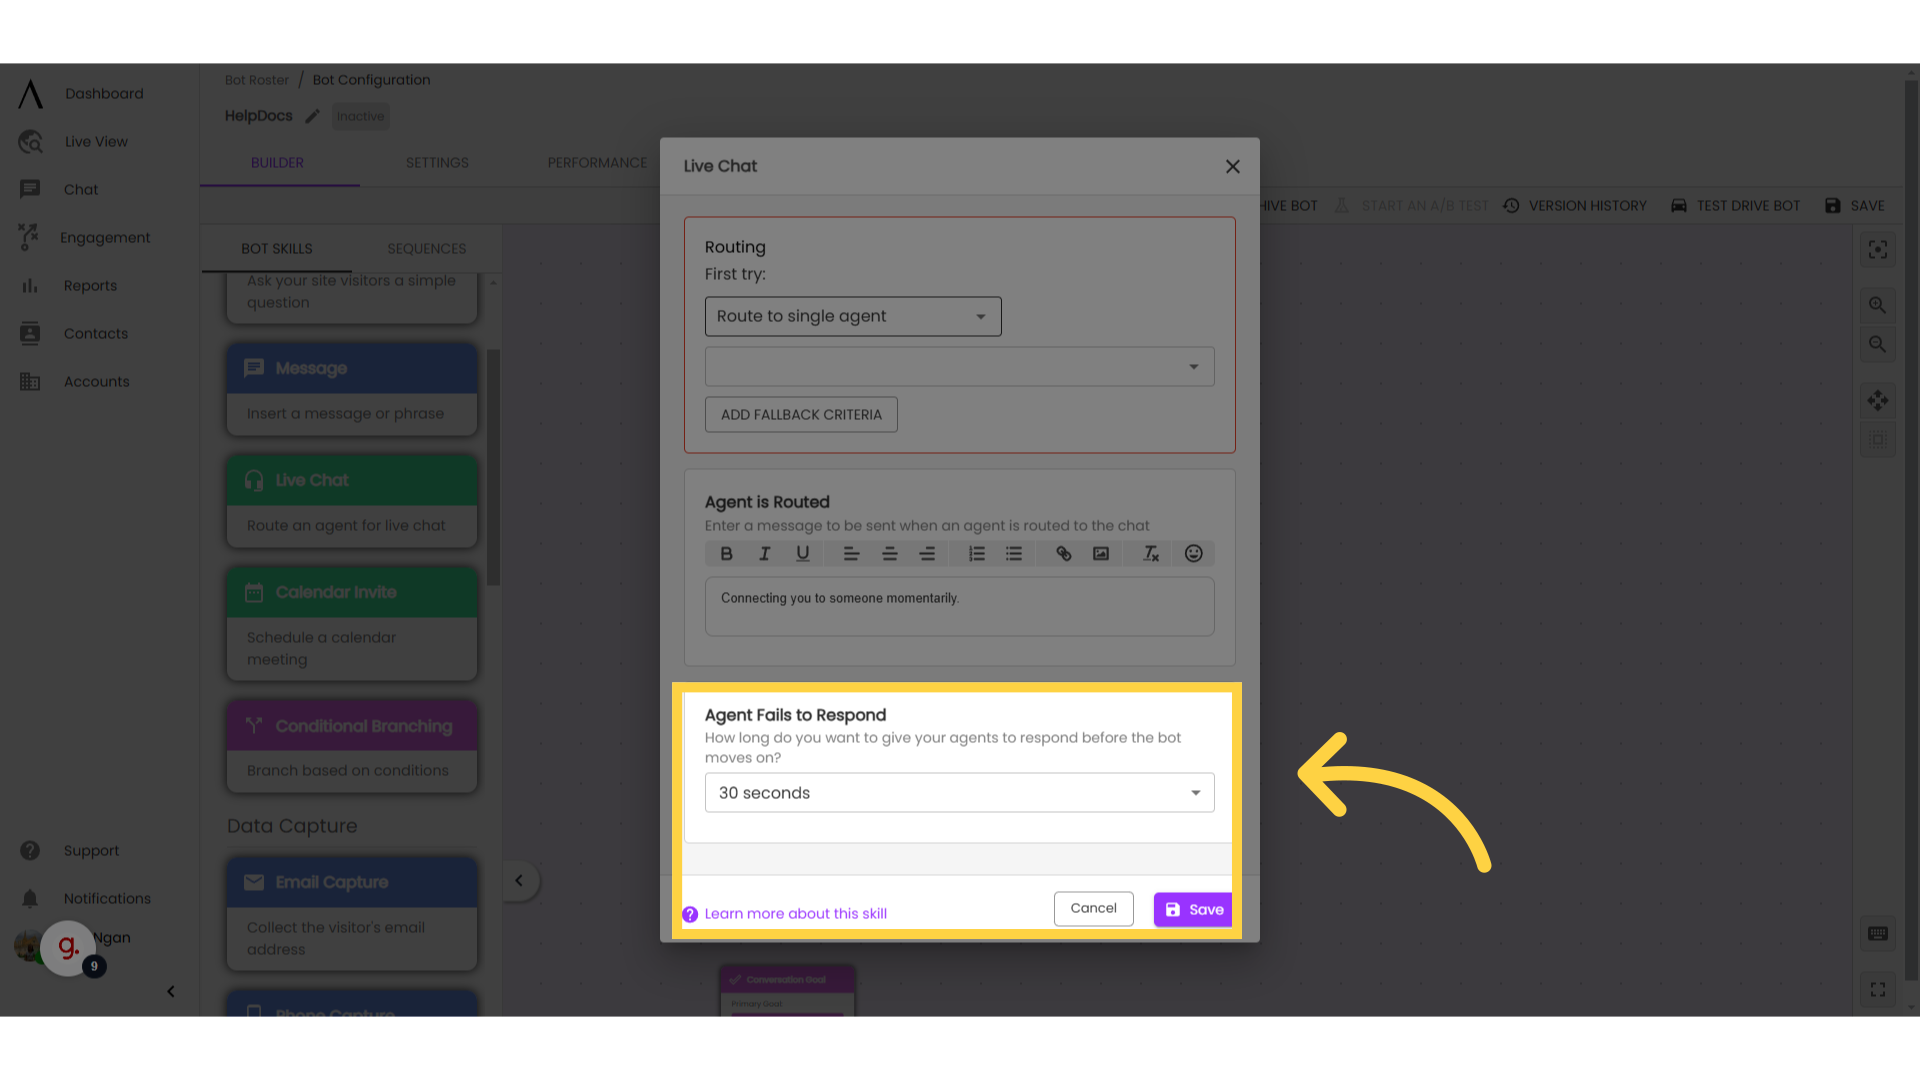
For Live Chat: Select the amount of time you want the bot to wait before moving on without the rep (default is 30 seconds).
For Calendar Invite: Select the meeting type that you want visitors to be able to book through chat. Save and close, then connect the appropriate branch to this skill.
Repeat for each of your reps' territories.
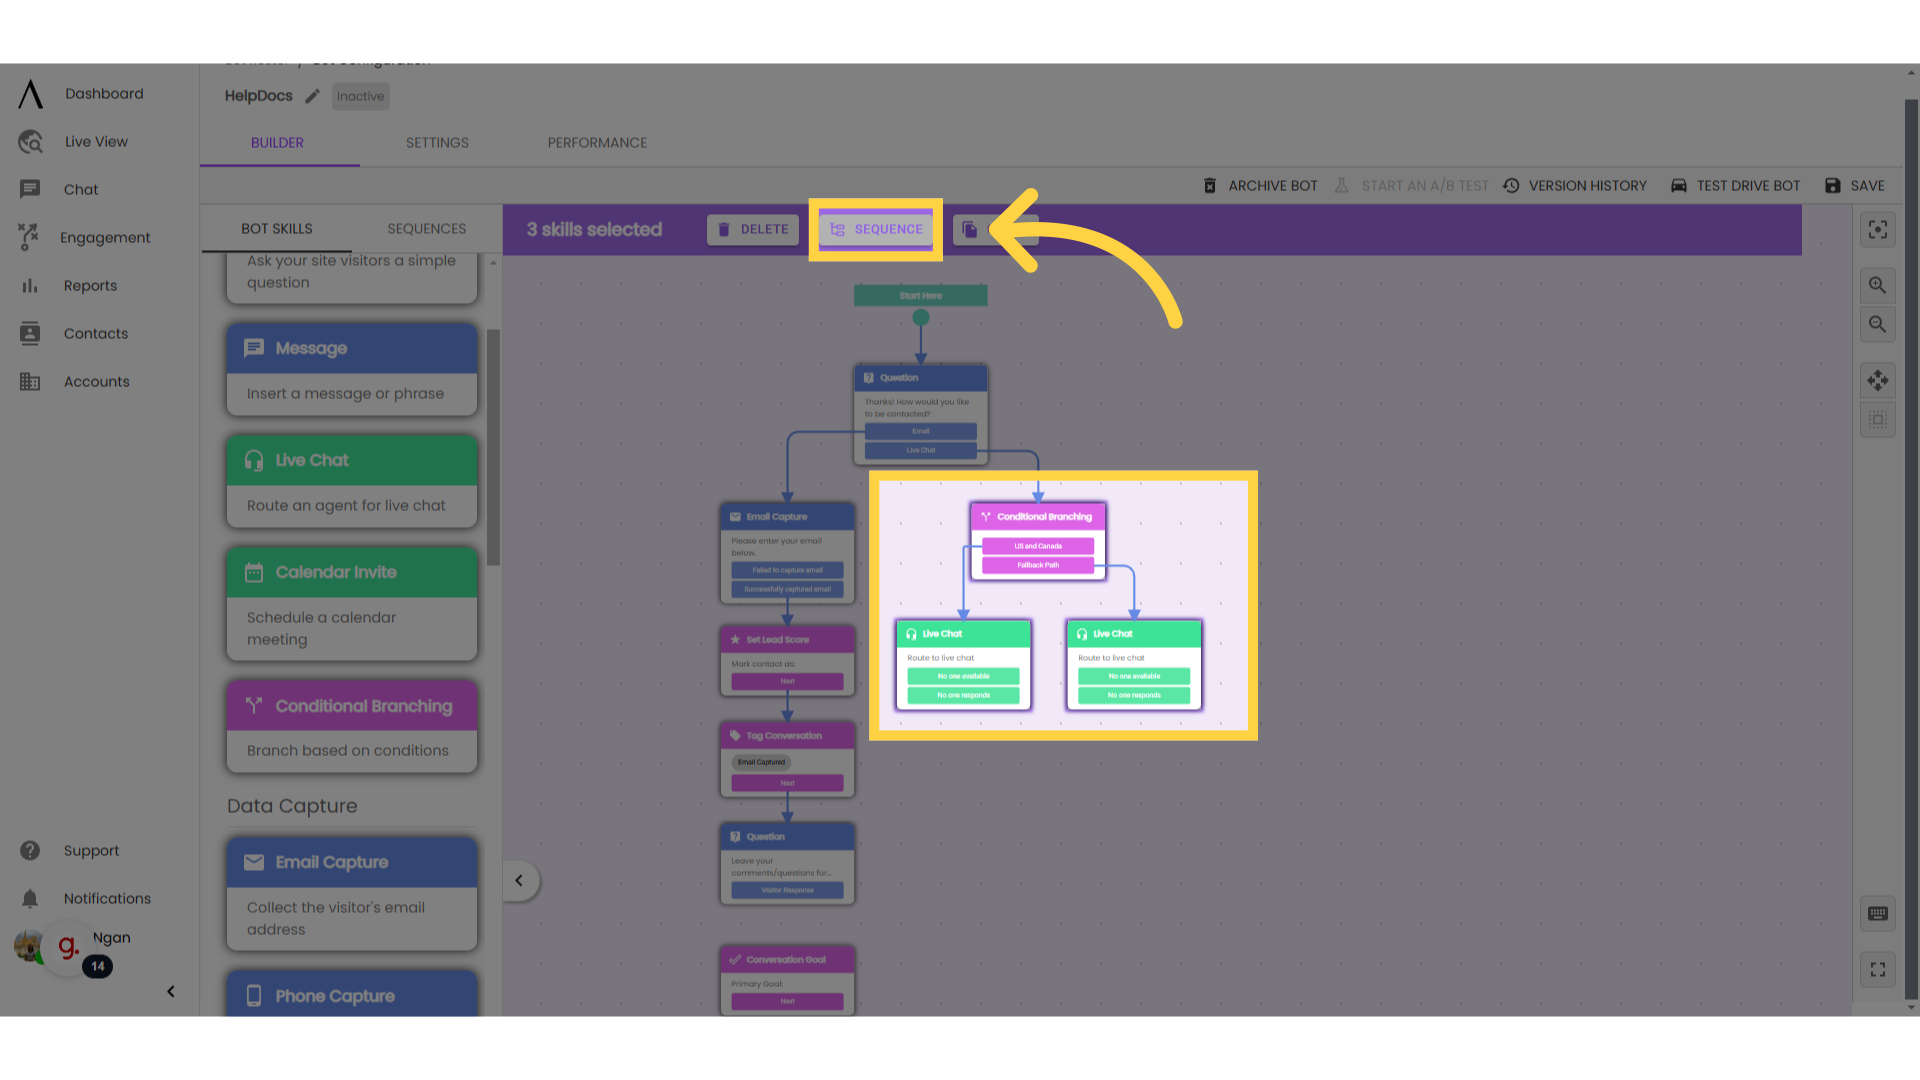
8. Create a sequence
The best way to manage this system across multiple chatbots is to create a global sequence that contains your conditional branching and live chat skills. This will allow you to reuse this same routing sequence without having to recreate the conditional branching skill each time.
Select the conditional branching and live chat skills that you want to sequence. This can be done either by hitting the space bar and dragging to select or by switching from "Pan Mode" to "Select Mode" in the right side toolbar. In the purple menu that pops up at the top of the bot builder, click "Sequence".
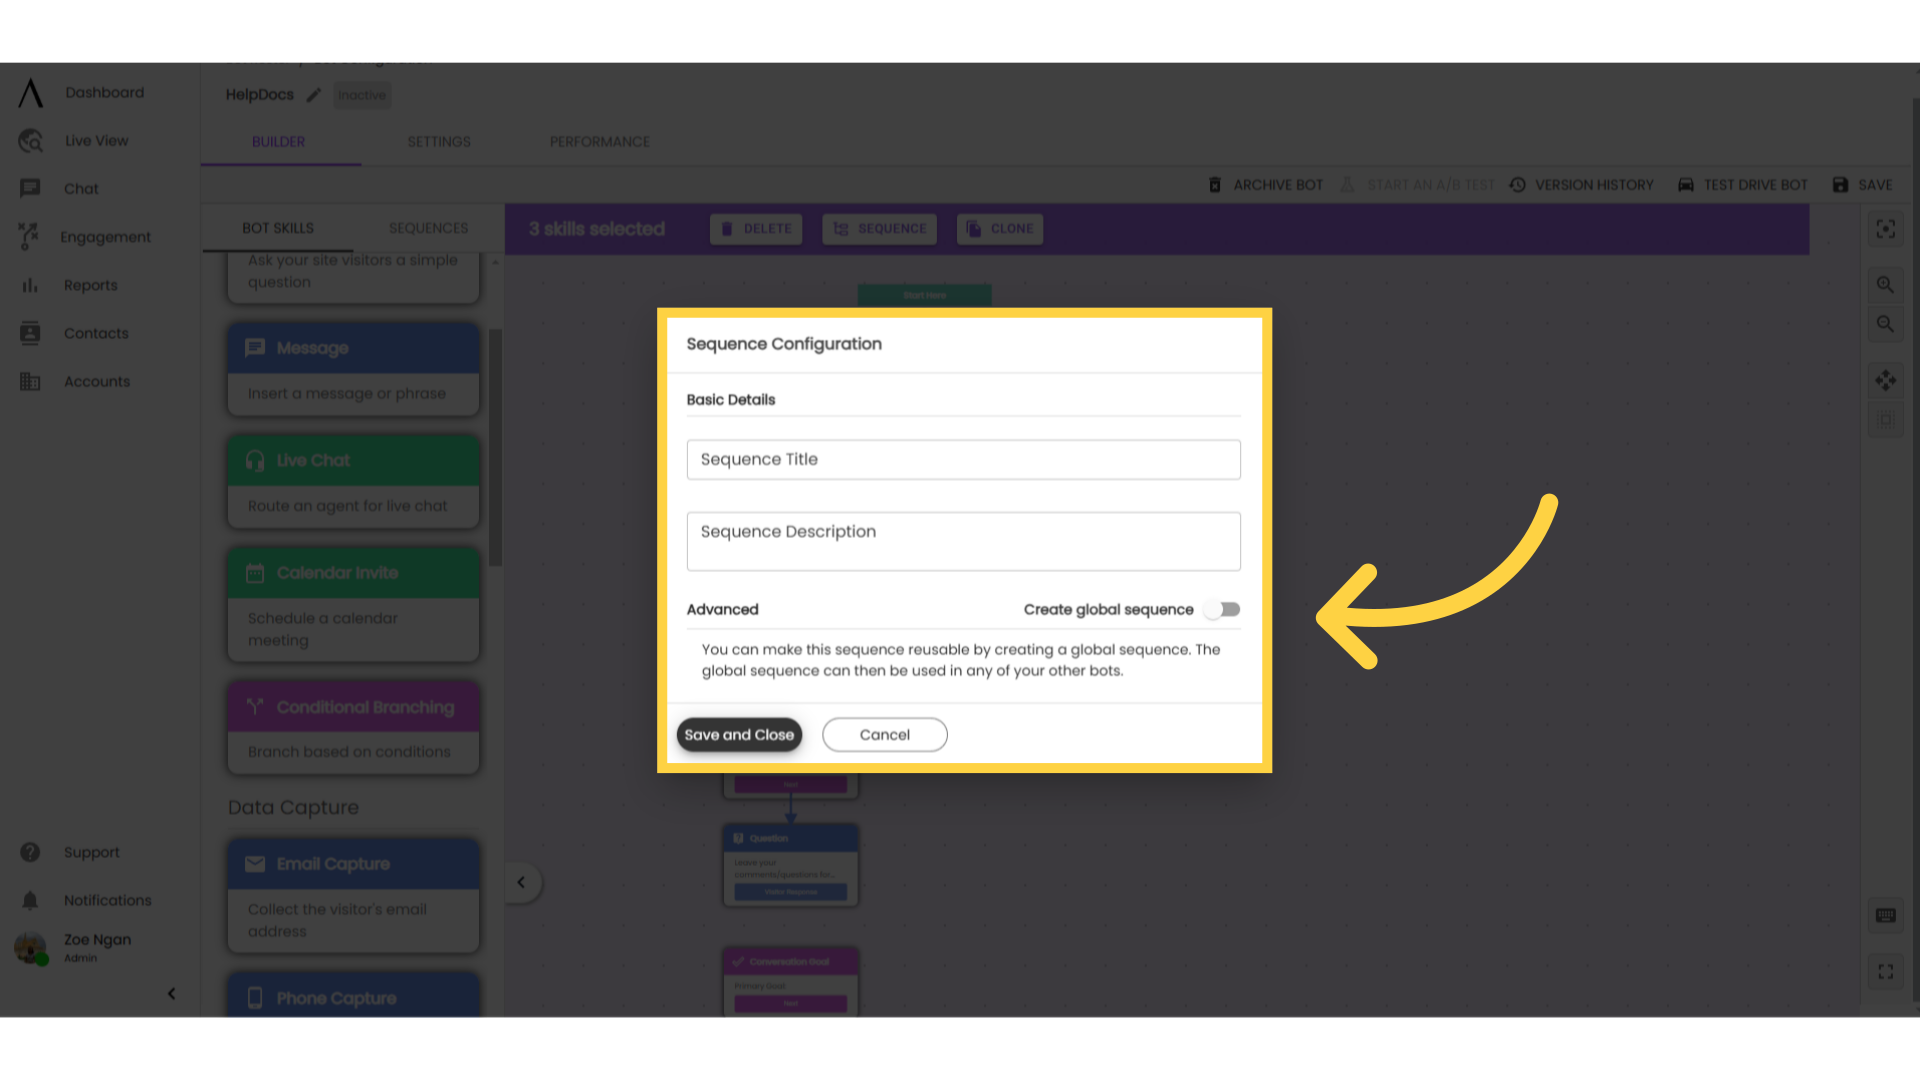
9. Configure sequence details
In the popup modal, give your sequence a name and a description, these will only be visible on the back end for organizational purposes. Make sure to toggle the switch to create a Global Sequence, then click "Save and Close."
Pro Tip: create one sequence for live chat and another for calendar, and name them accordingly.
10. Sequence
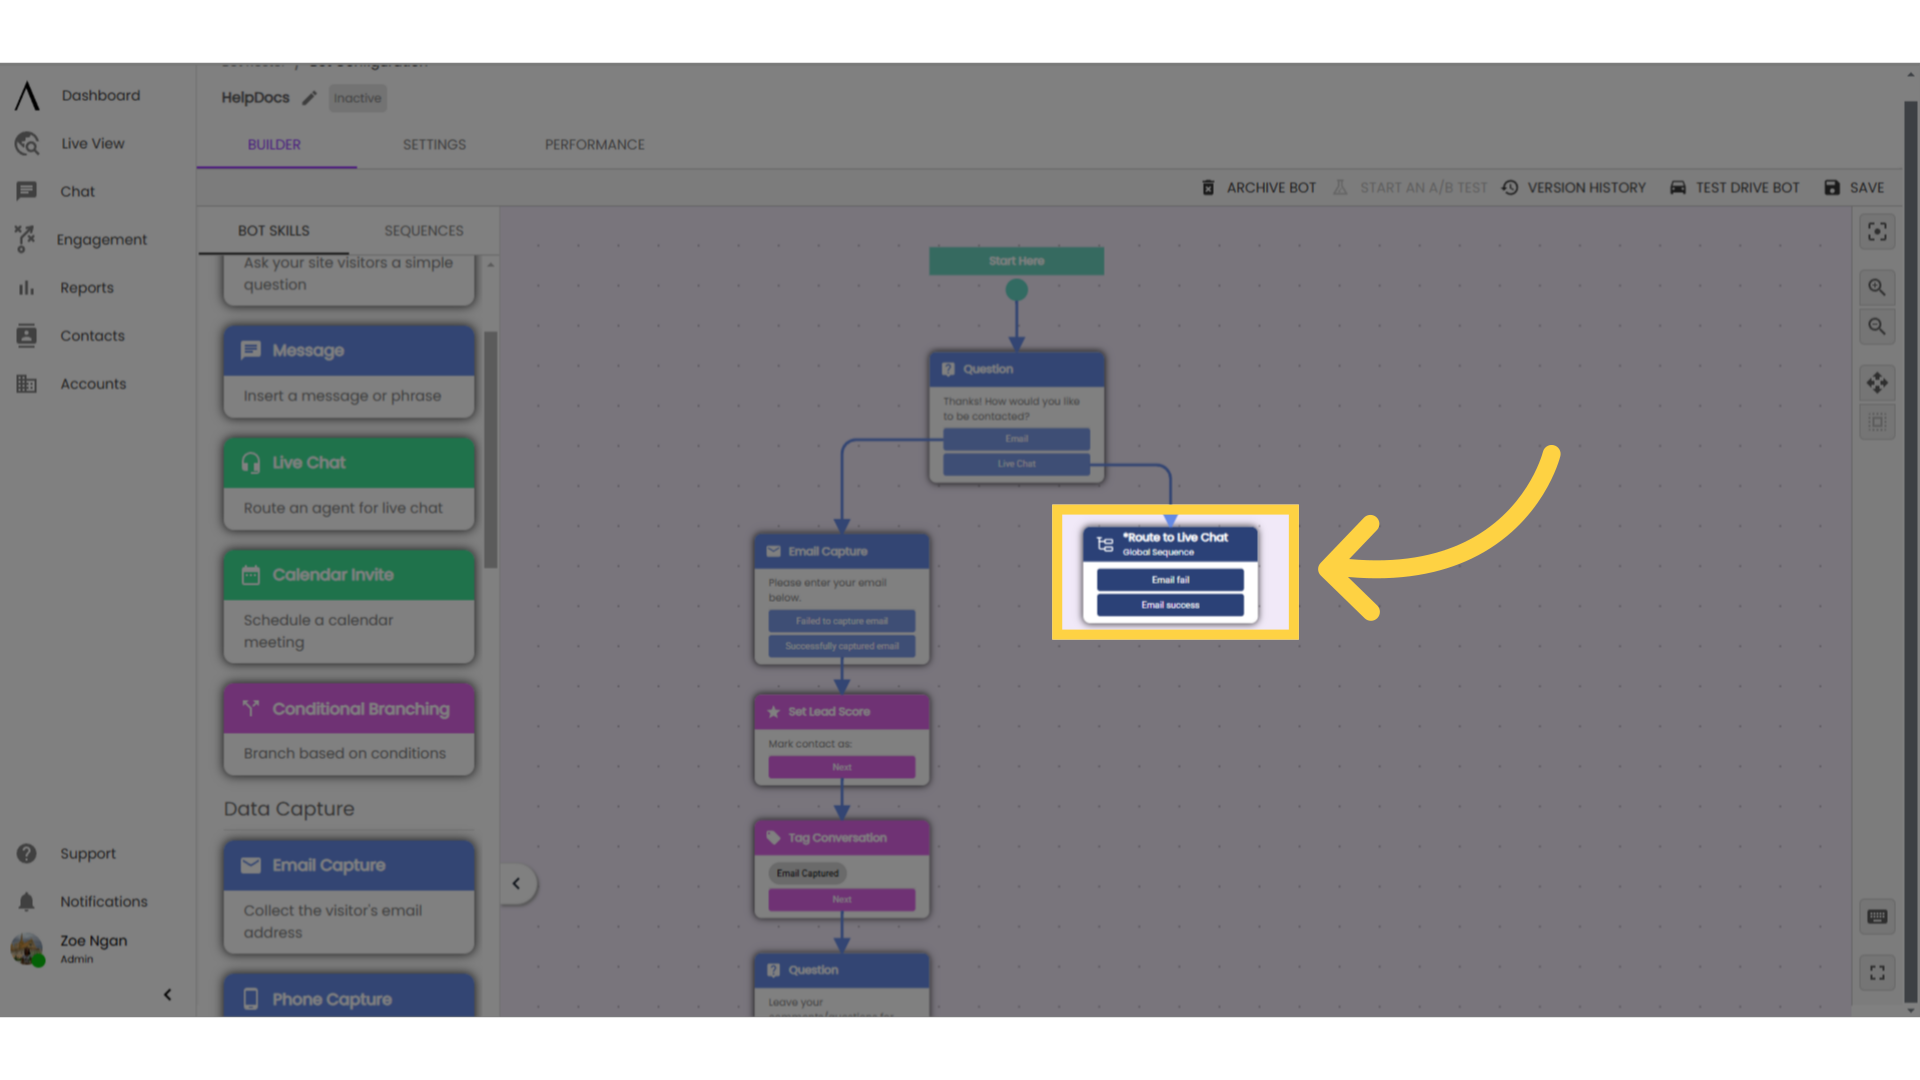
11. Recommendations
A recommendation for live chat is to add 2 sequence exits to your sequence, one labelled "no one available" and the other labelled "no one responds."
Once you connect your Live Chat exits to these sequence exits, you can use your sequence just like a normal live chat skill in other chatbots!

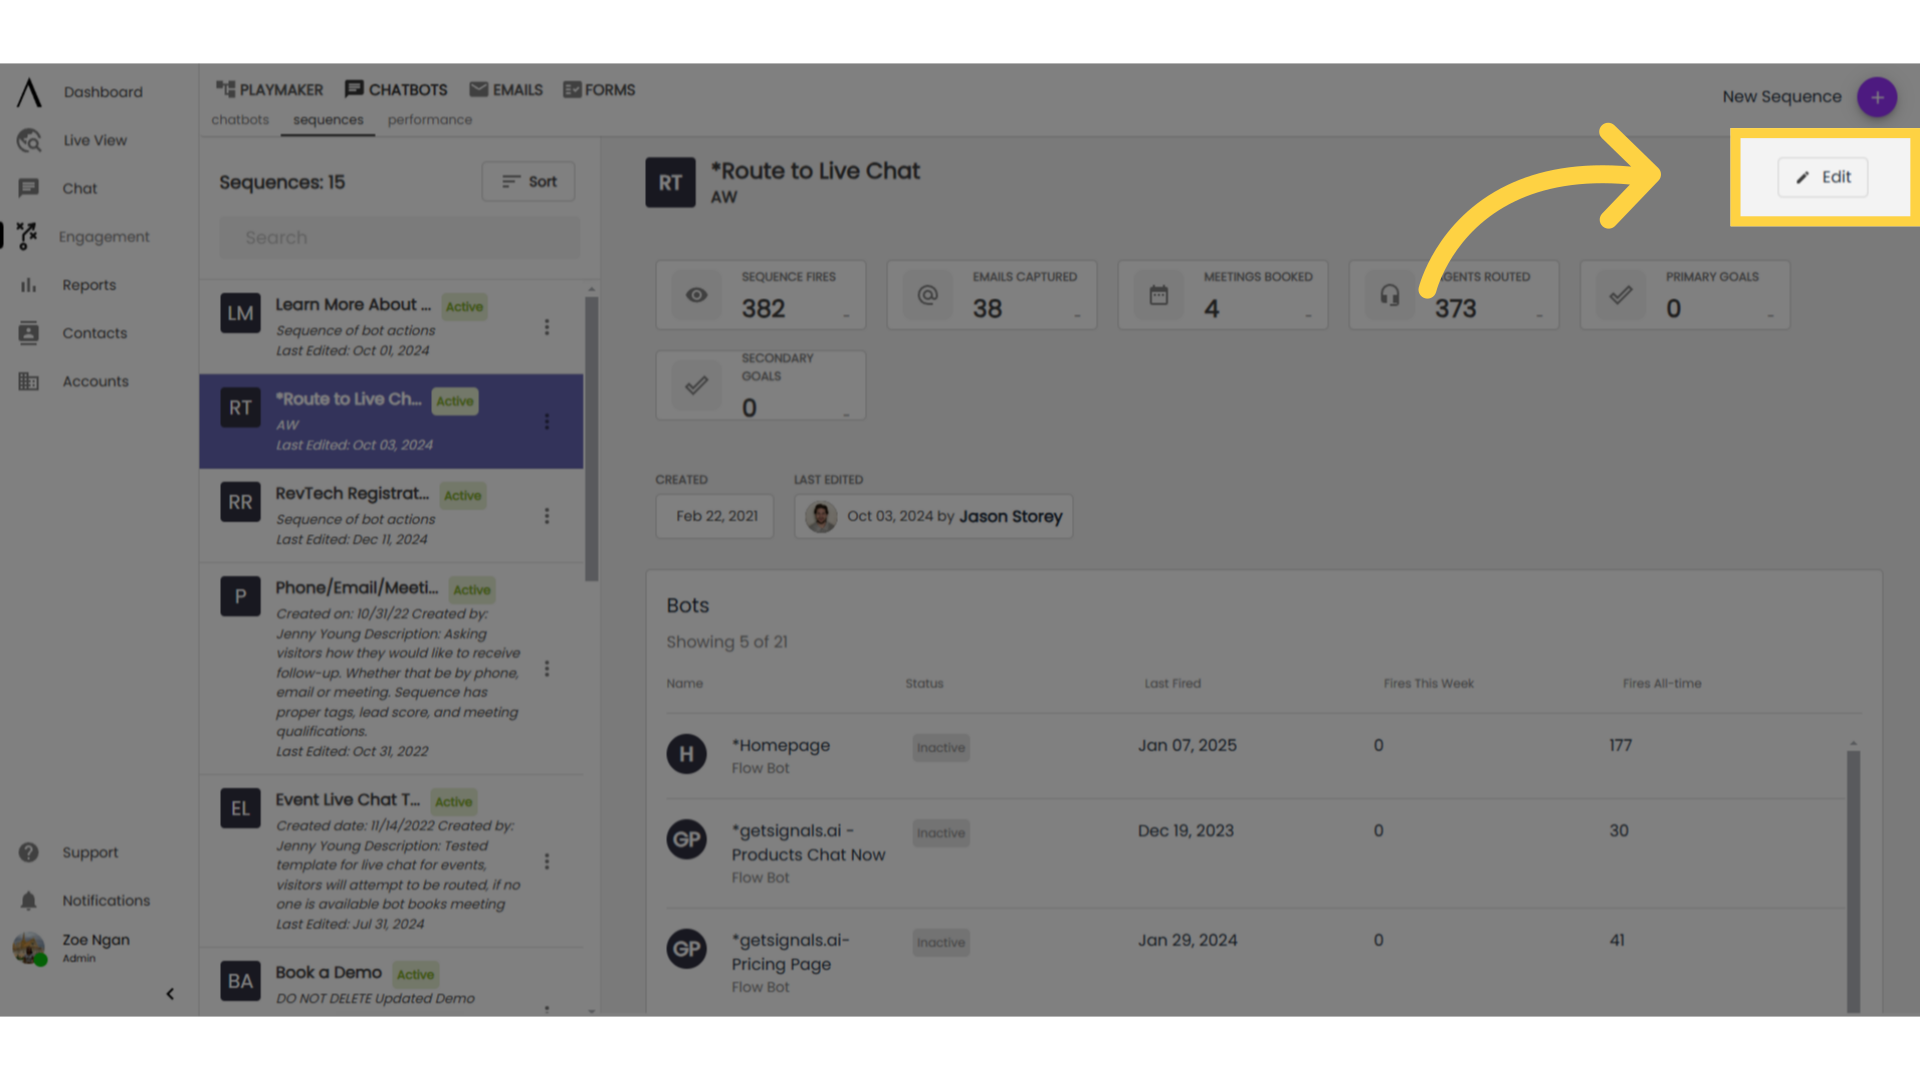
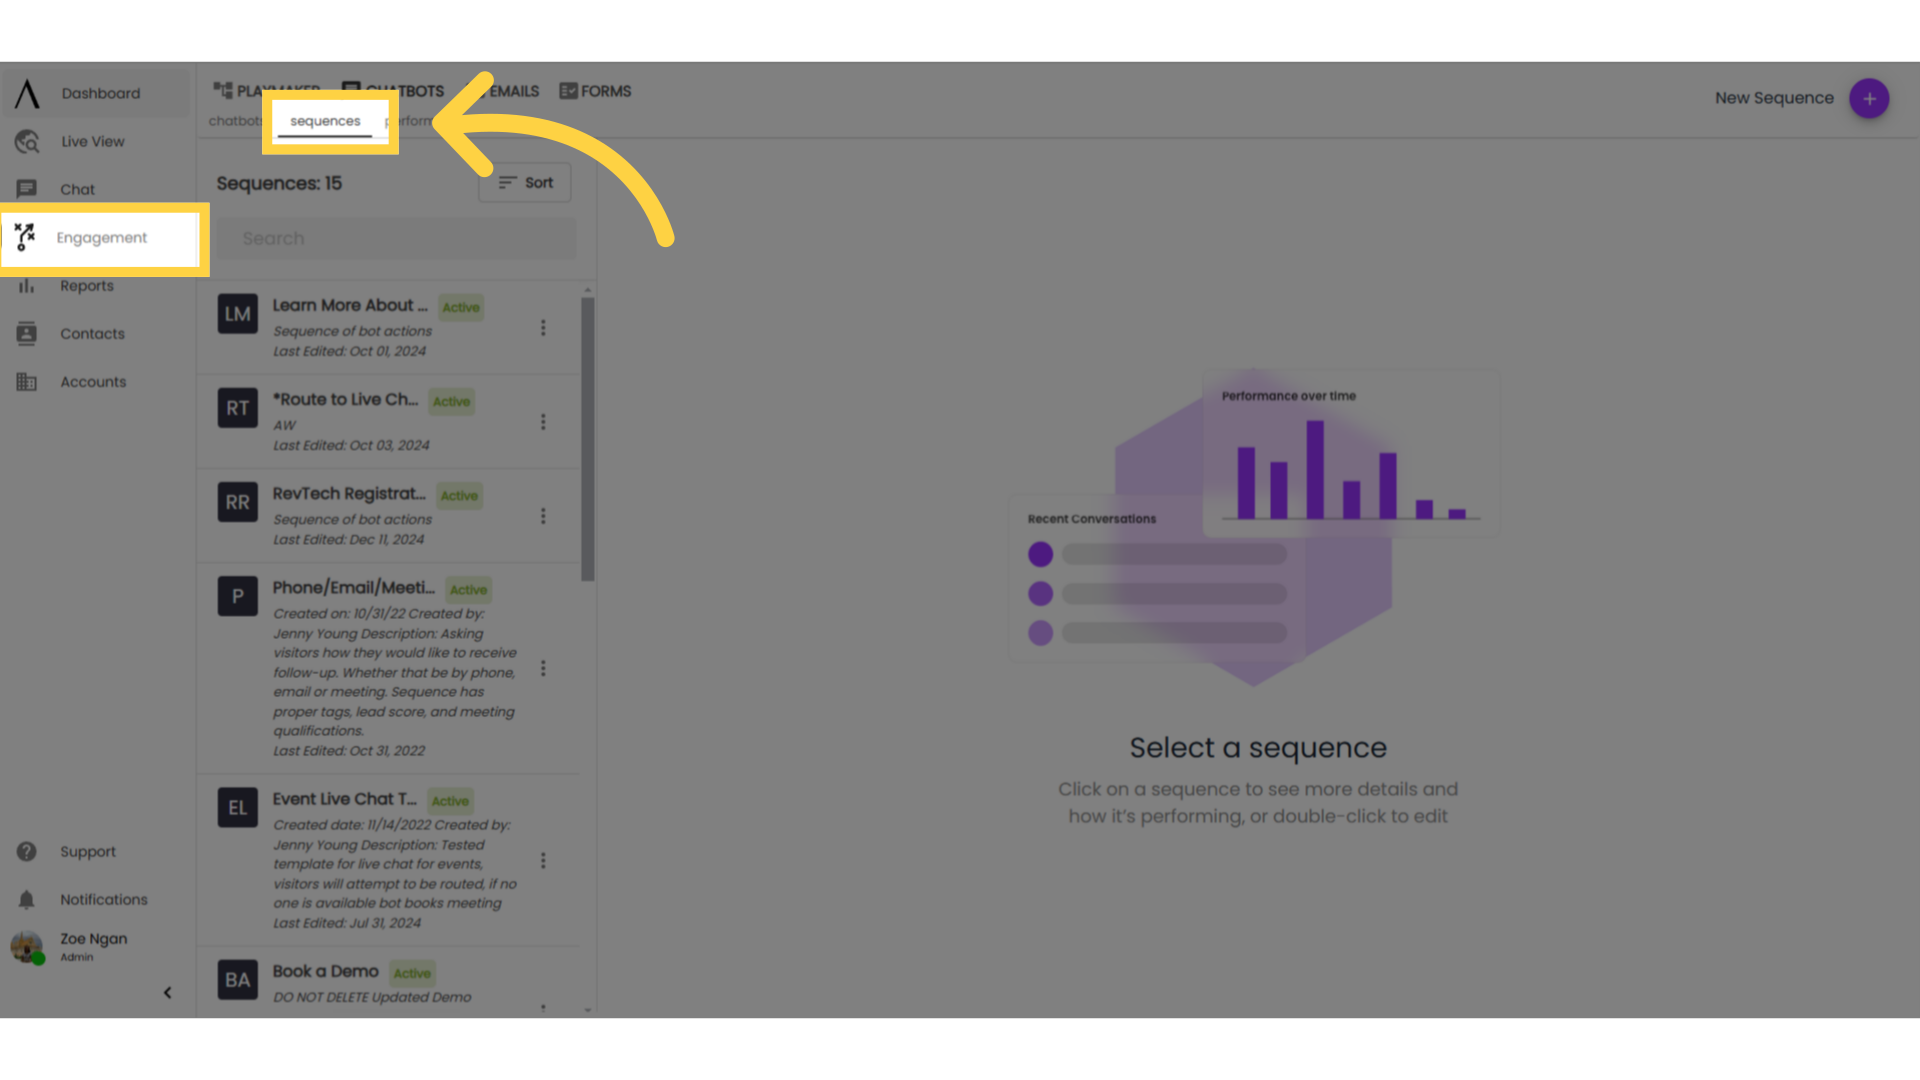
12. Go to "Sequences"
Once you have created regional routing global sequences for Live Chat and Calendar Invites, you can effectively edit all chatbots from one place.
To update global sequences, navigate to "Engagement" in the left sidebar, then go to the "Sequences" tab. Select the Sequence you wish to edit.
13. Edit your sequence
Make whatever changes you need to. Clearly labelled conditional branches will help here - if you need to remove or replace a rep, simply update the settings of the Live Chat or Calendar Invite skill assigned to them.
If you need to update regional borders, simply update the branches of your Conditional Branching skill. Be sure to click "Save."