Bot Emails
- Bot Emails
- Go to app.getsignals.ai
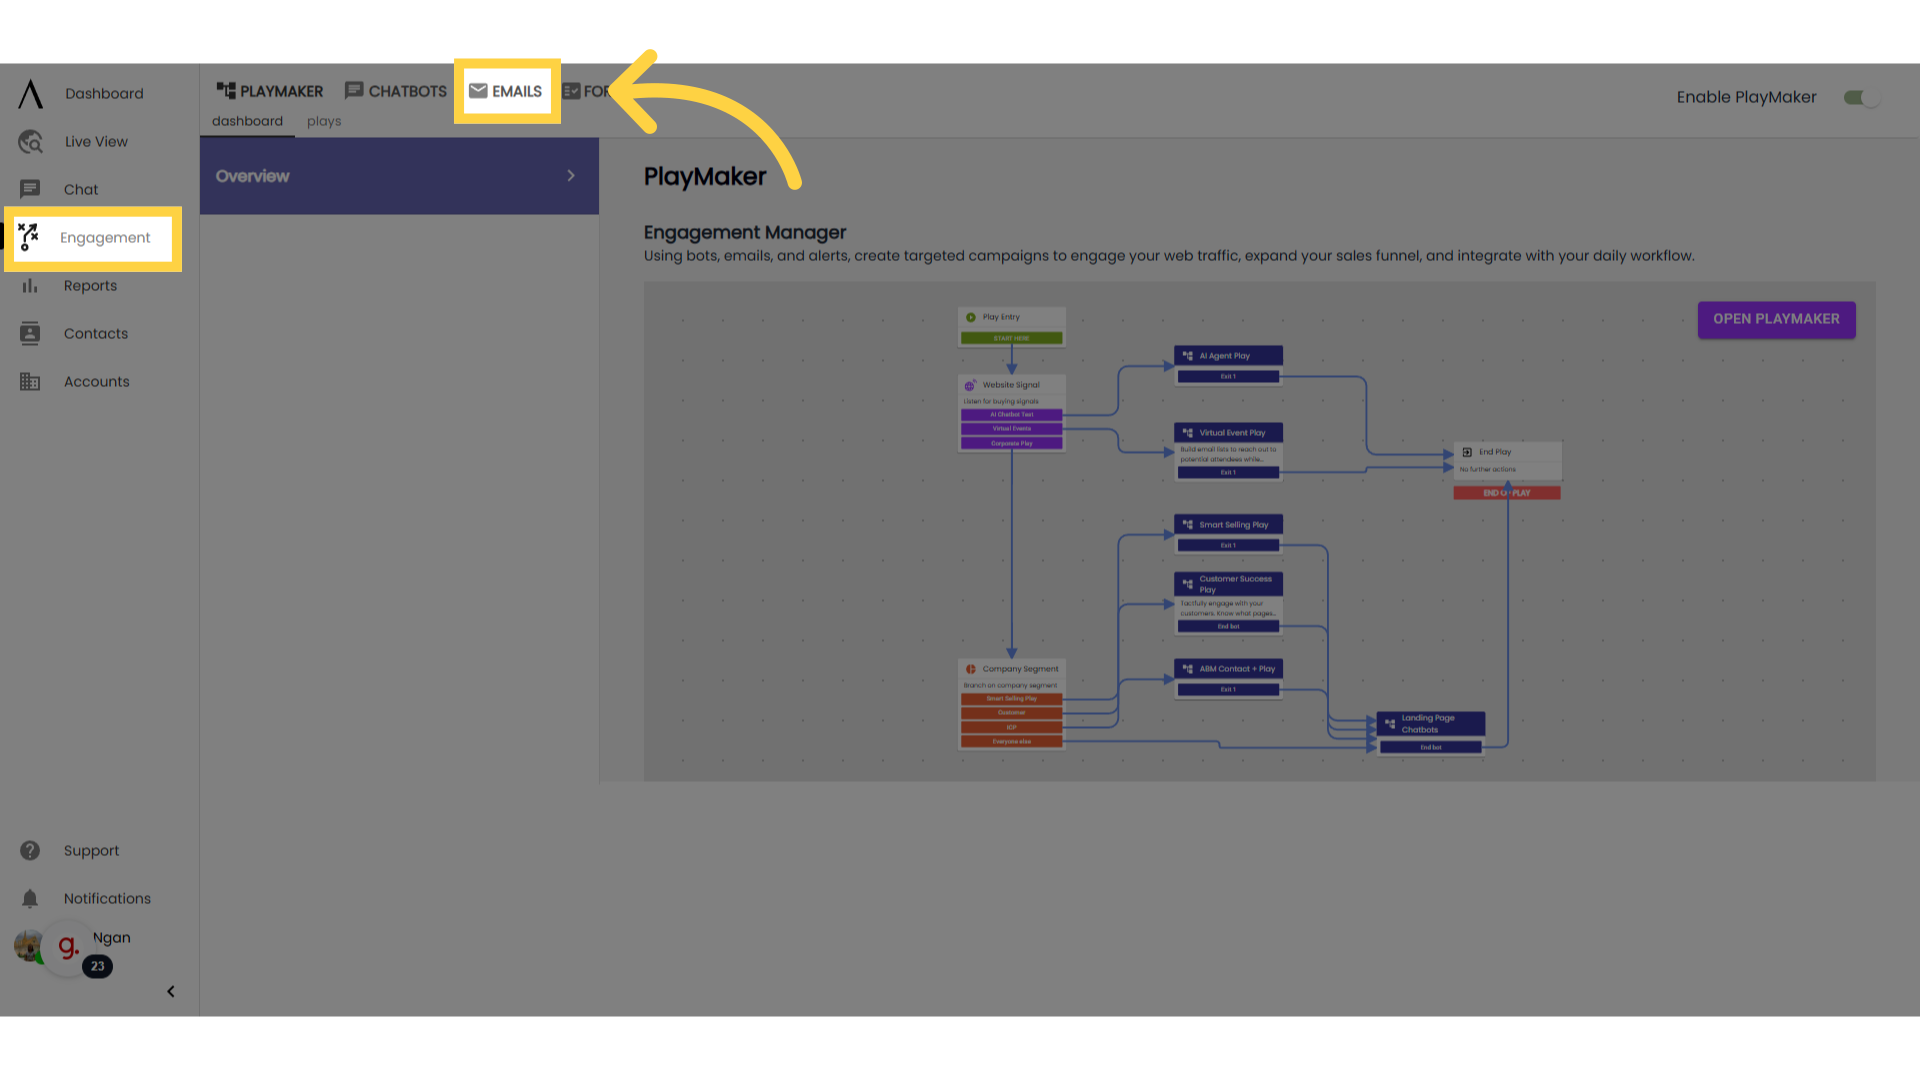
- 1. Click "Engagement"
- 2. Navigate to "Emails"
- 3. Go to "Add New Email"
- 4. Use a template, or build from scratch
- 5. Enter name and description
- 6. Choose a sender
- 7. Pick a layout and paste your message
- 8. Add attachments
- 9. Preview your email
- 10. Click "Engagement," then "Emails"
- 11. Click to view metrics
- 12. Using emails in bots and plays
- 13. Configure email settings
Bot Emails
You can configure your bot to send an email to your web visitor when they reach a certain point in your bot flow.
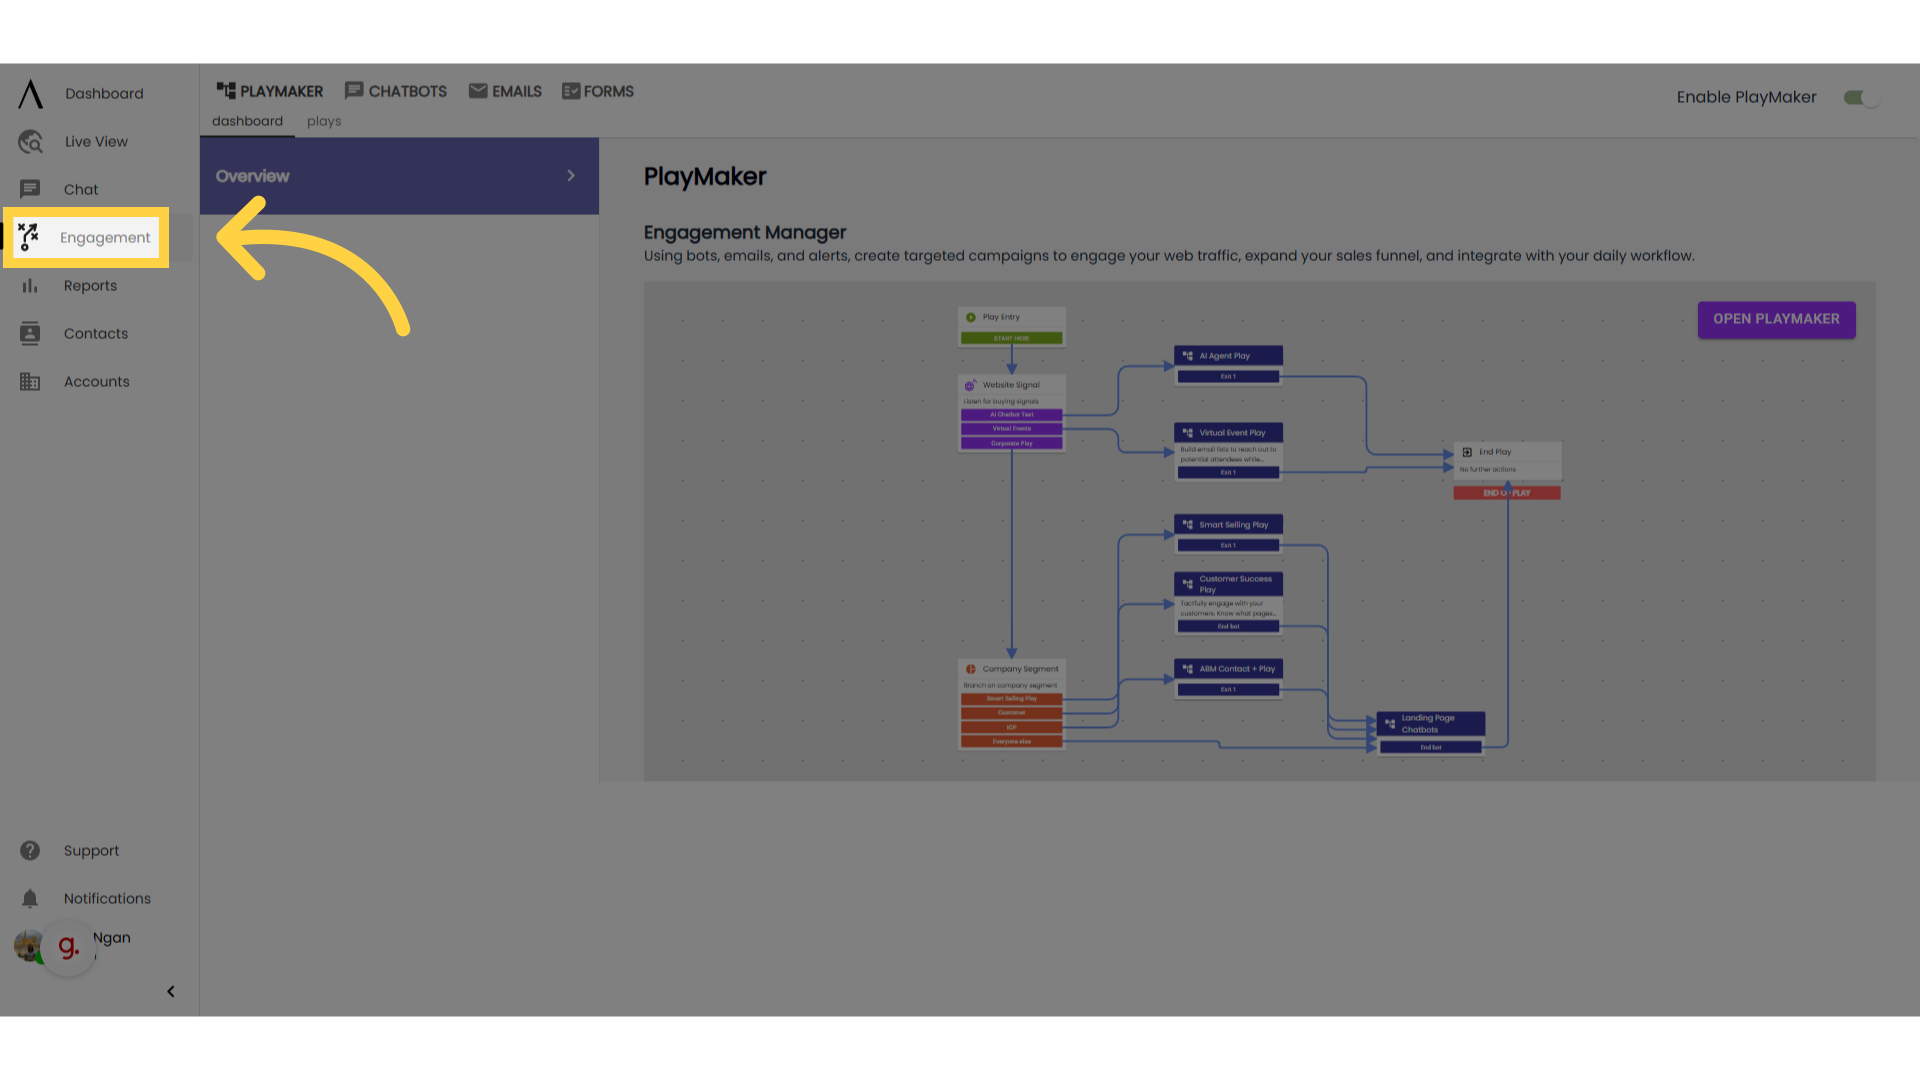
Go to app.getsignals.ai
1. Click "Engagement"
For example, if a visitor selects a bot button requesting information or a document, you could send an email with that information. If the visitor uses the bot to sign up for an event, you could use the bot to send a confirmation email.
In order to send emails through the chatbot, the DNS settings must be configured. Our HelpDocs on Email Settings can help walk you through this. Click on "Engagement" in the left sidebar to get started.
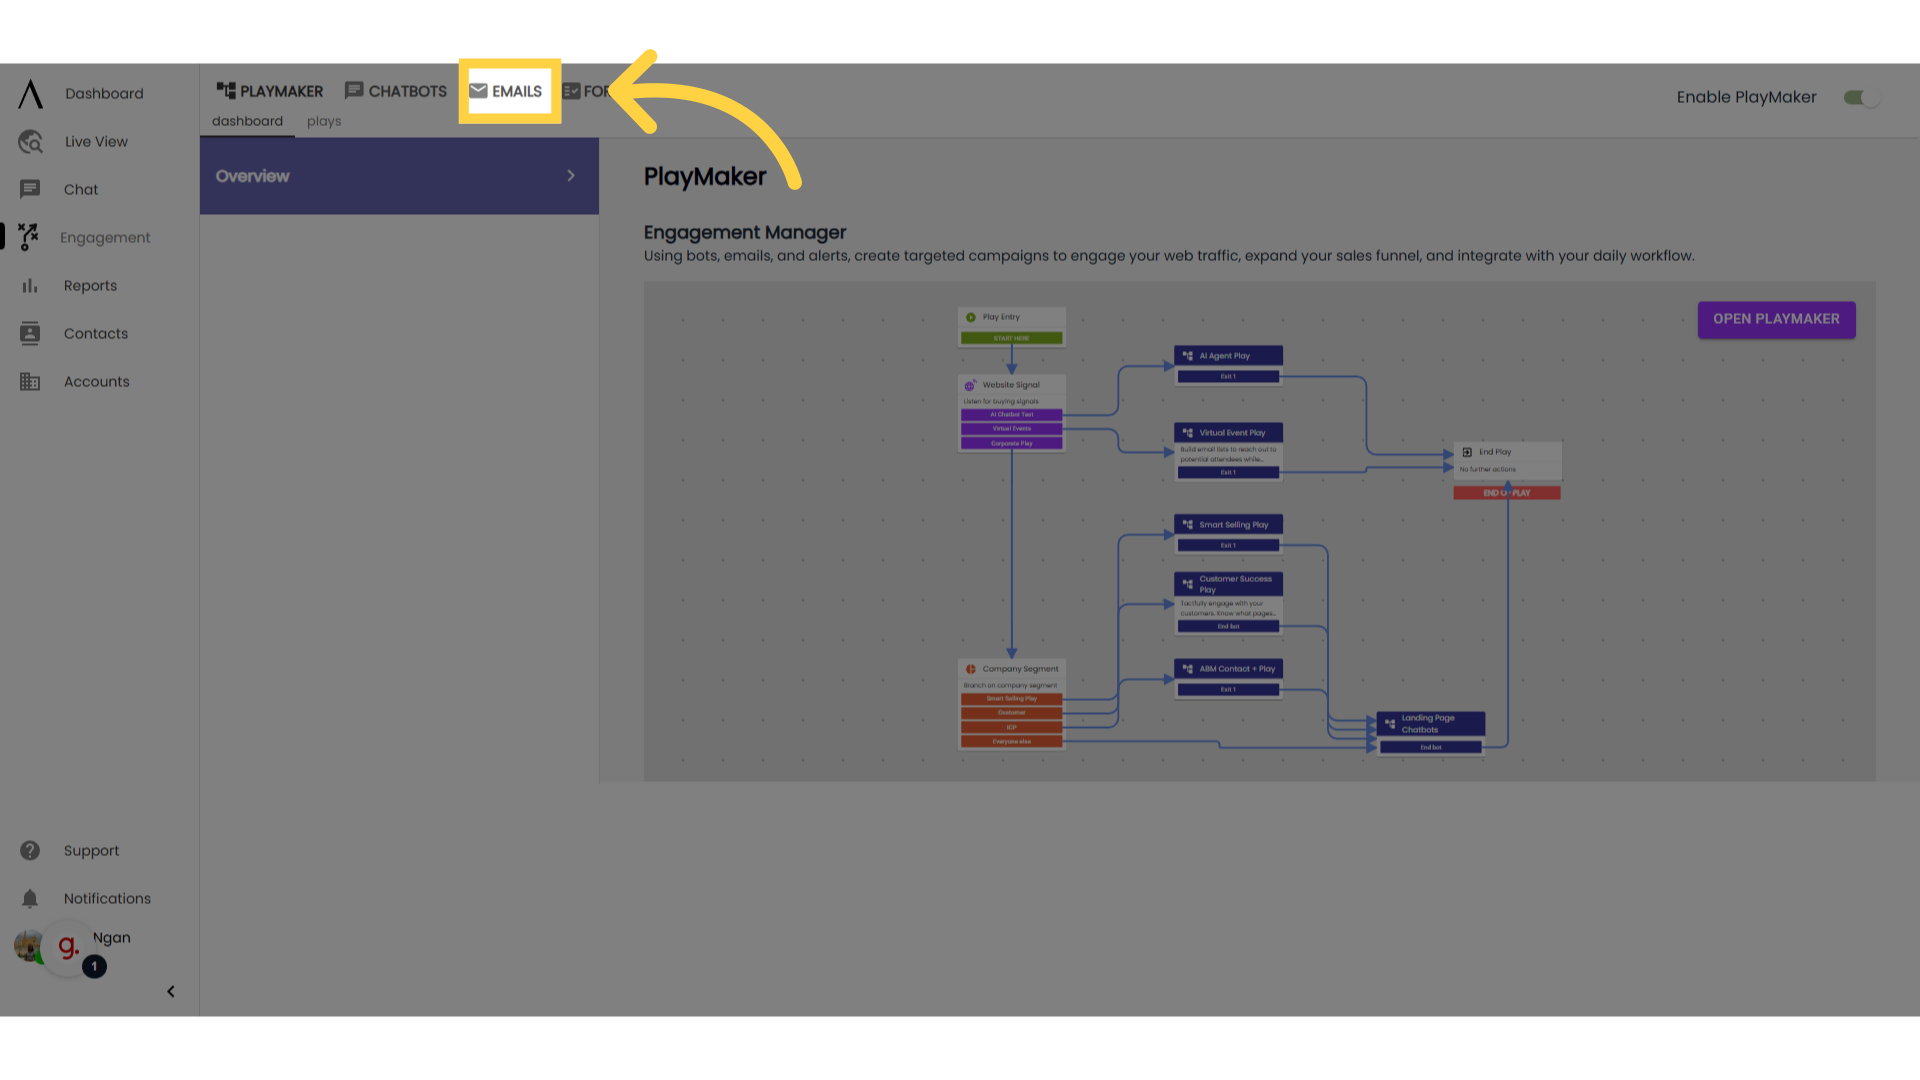
2. Navigate to "Emails"
Navigate to the "Emails" tab.
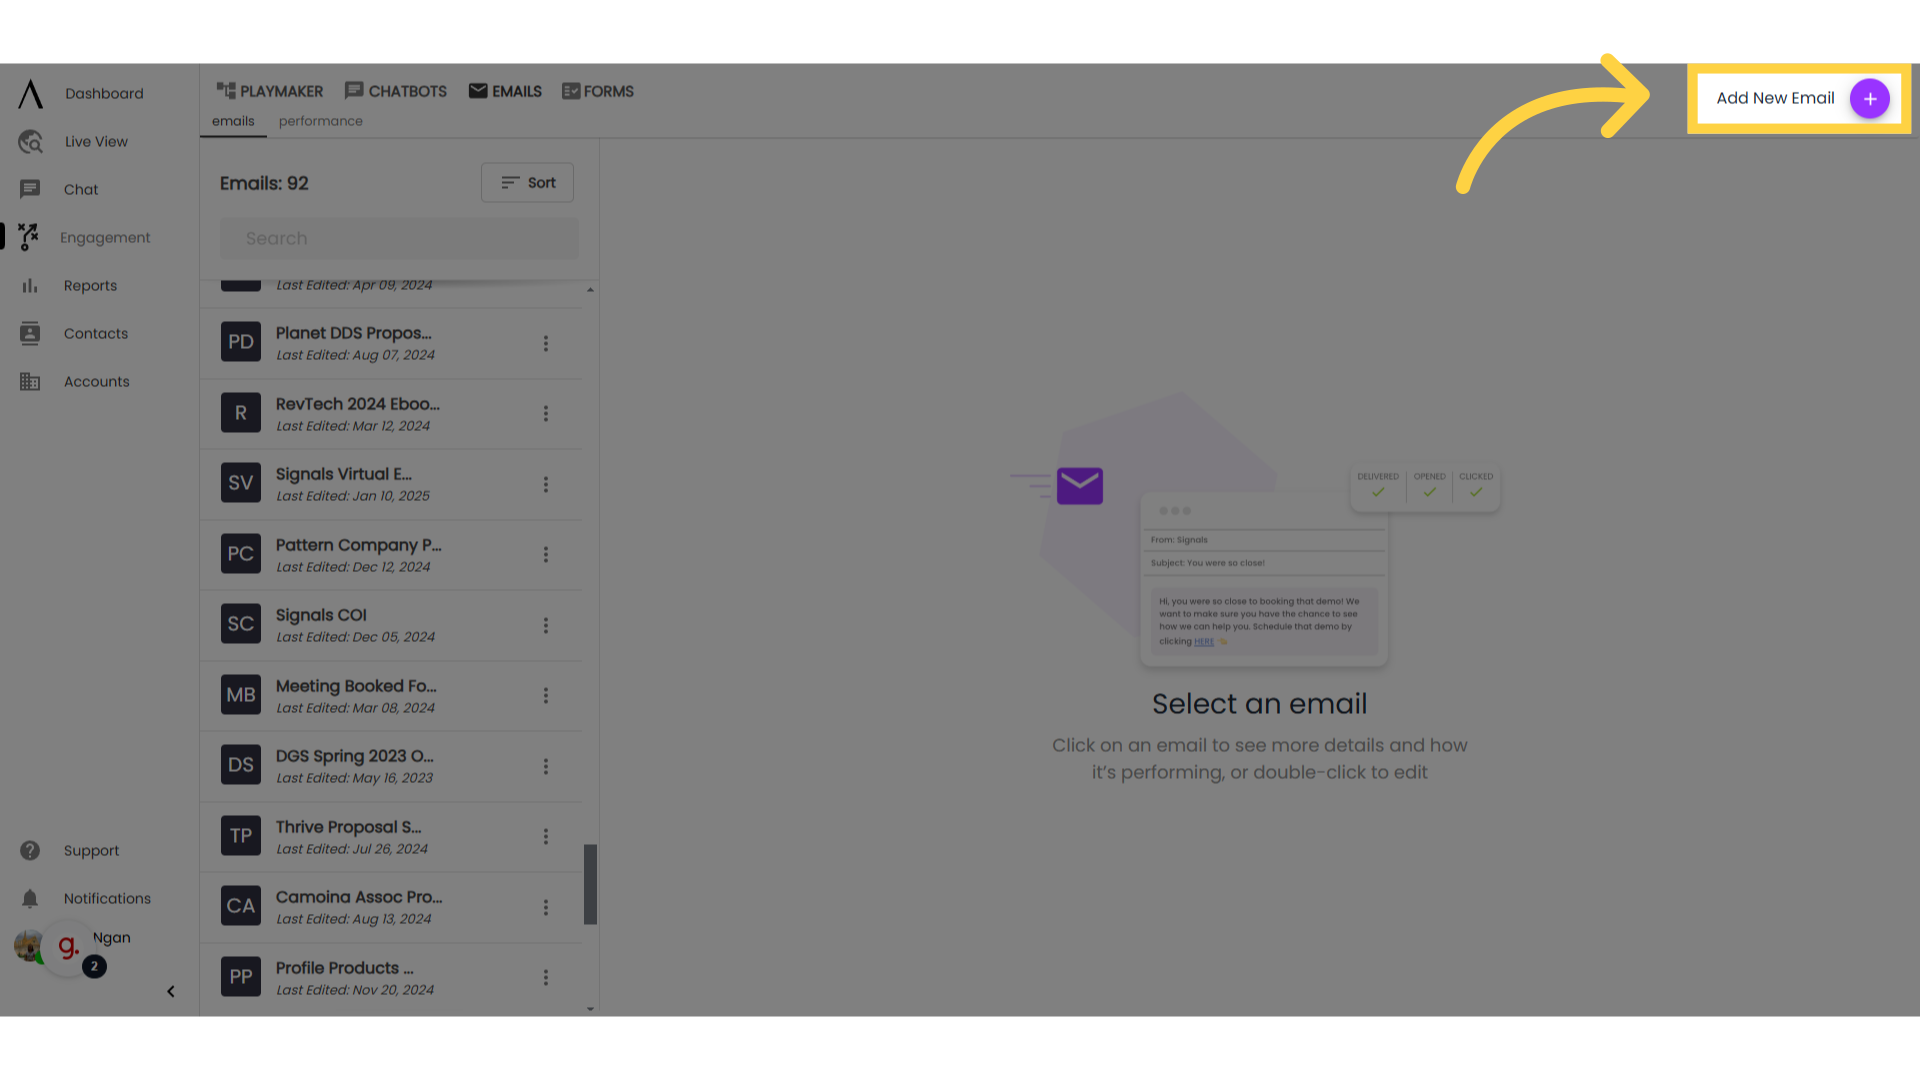
3. Go to "Add New Email"
Go to "Add New Email" in the upper right corner.
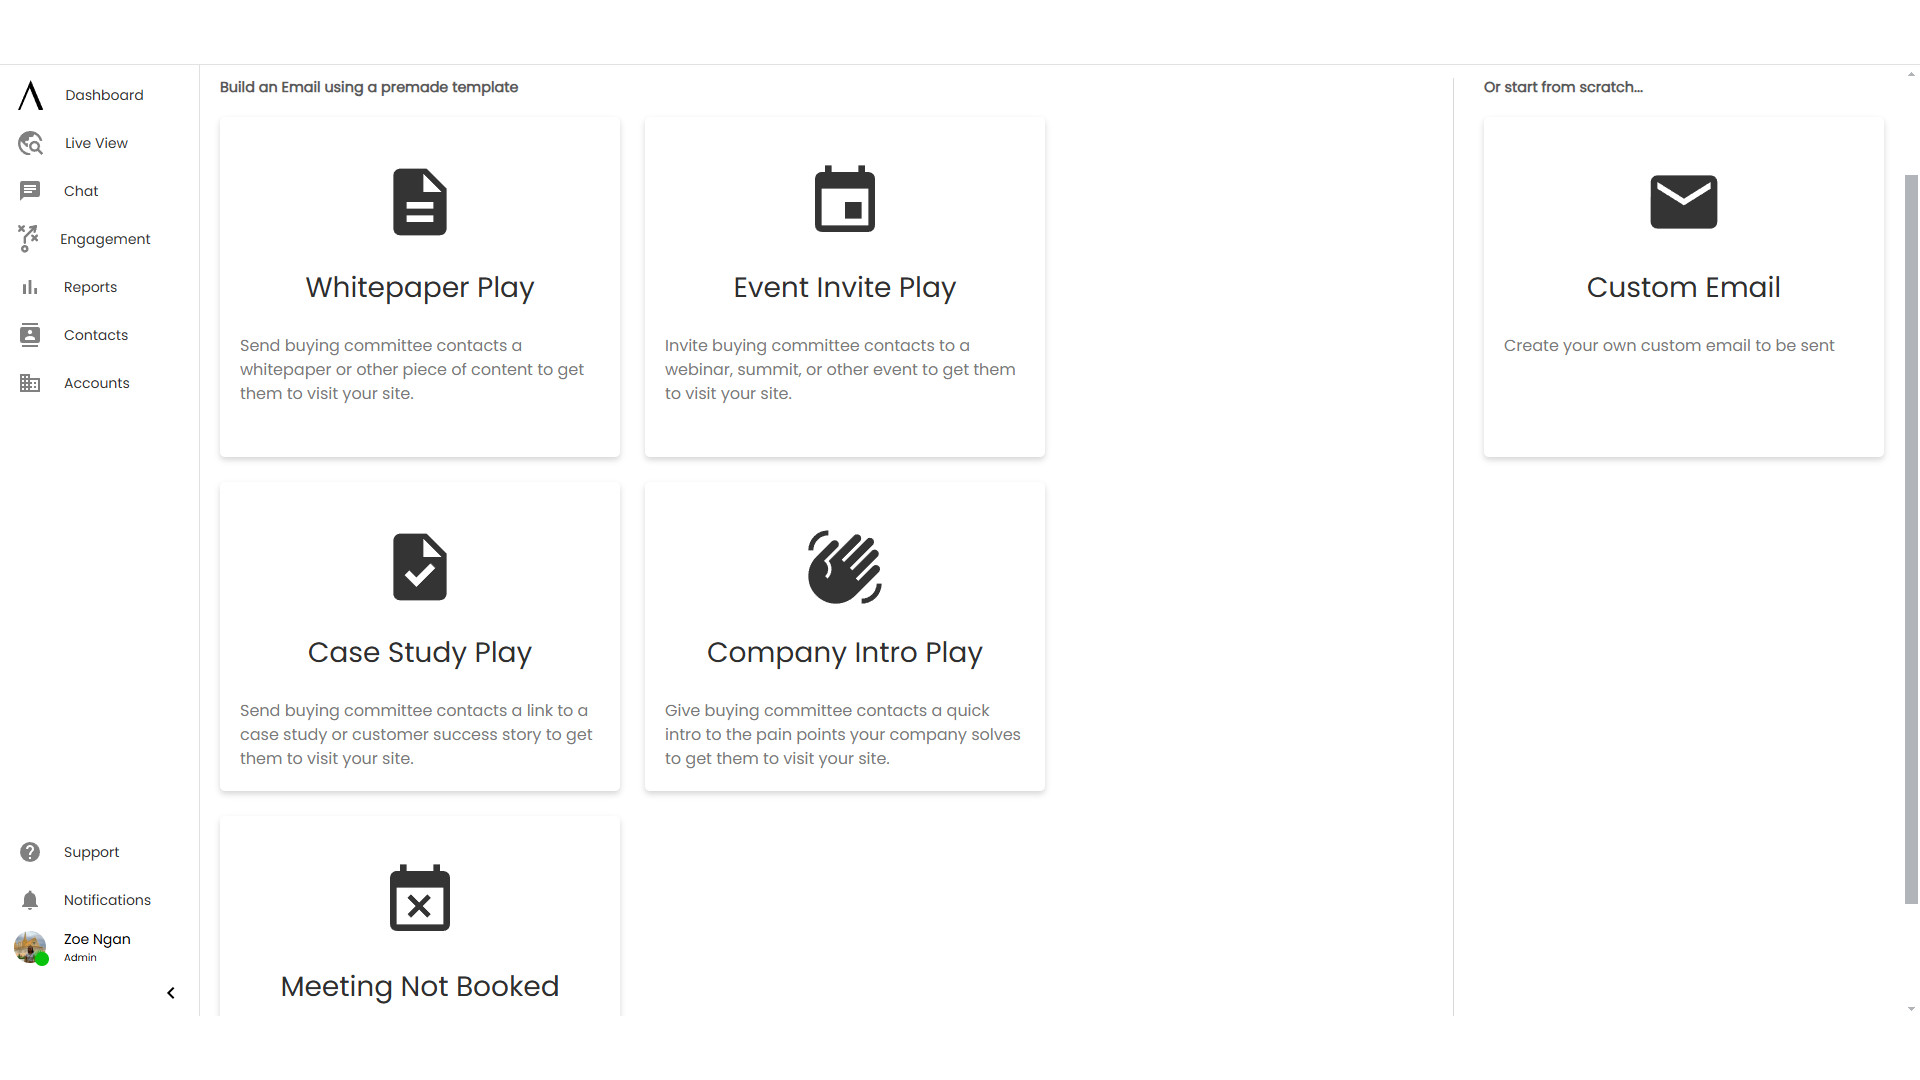
4. Use a template, or build from scratch
You can build an email using a pre-made template (tweak as needed), or start from scratch.
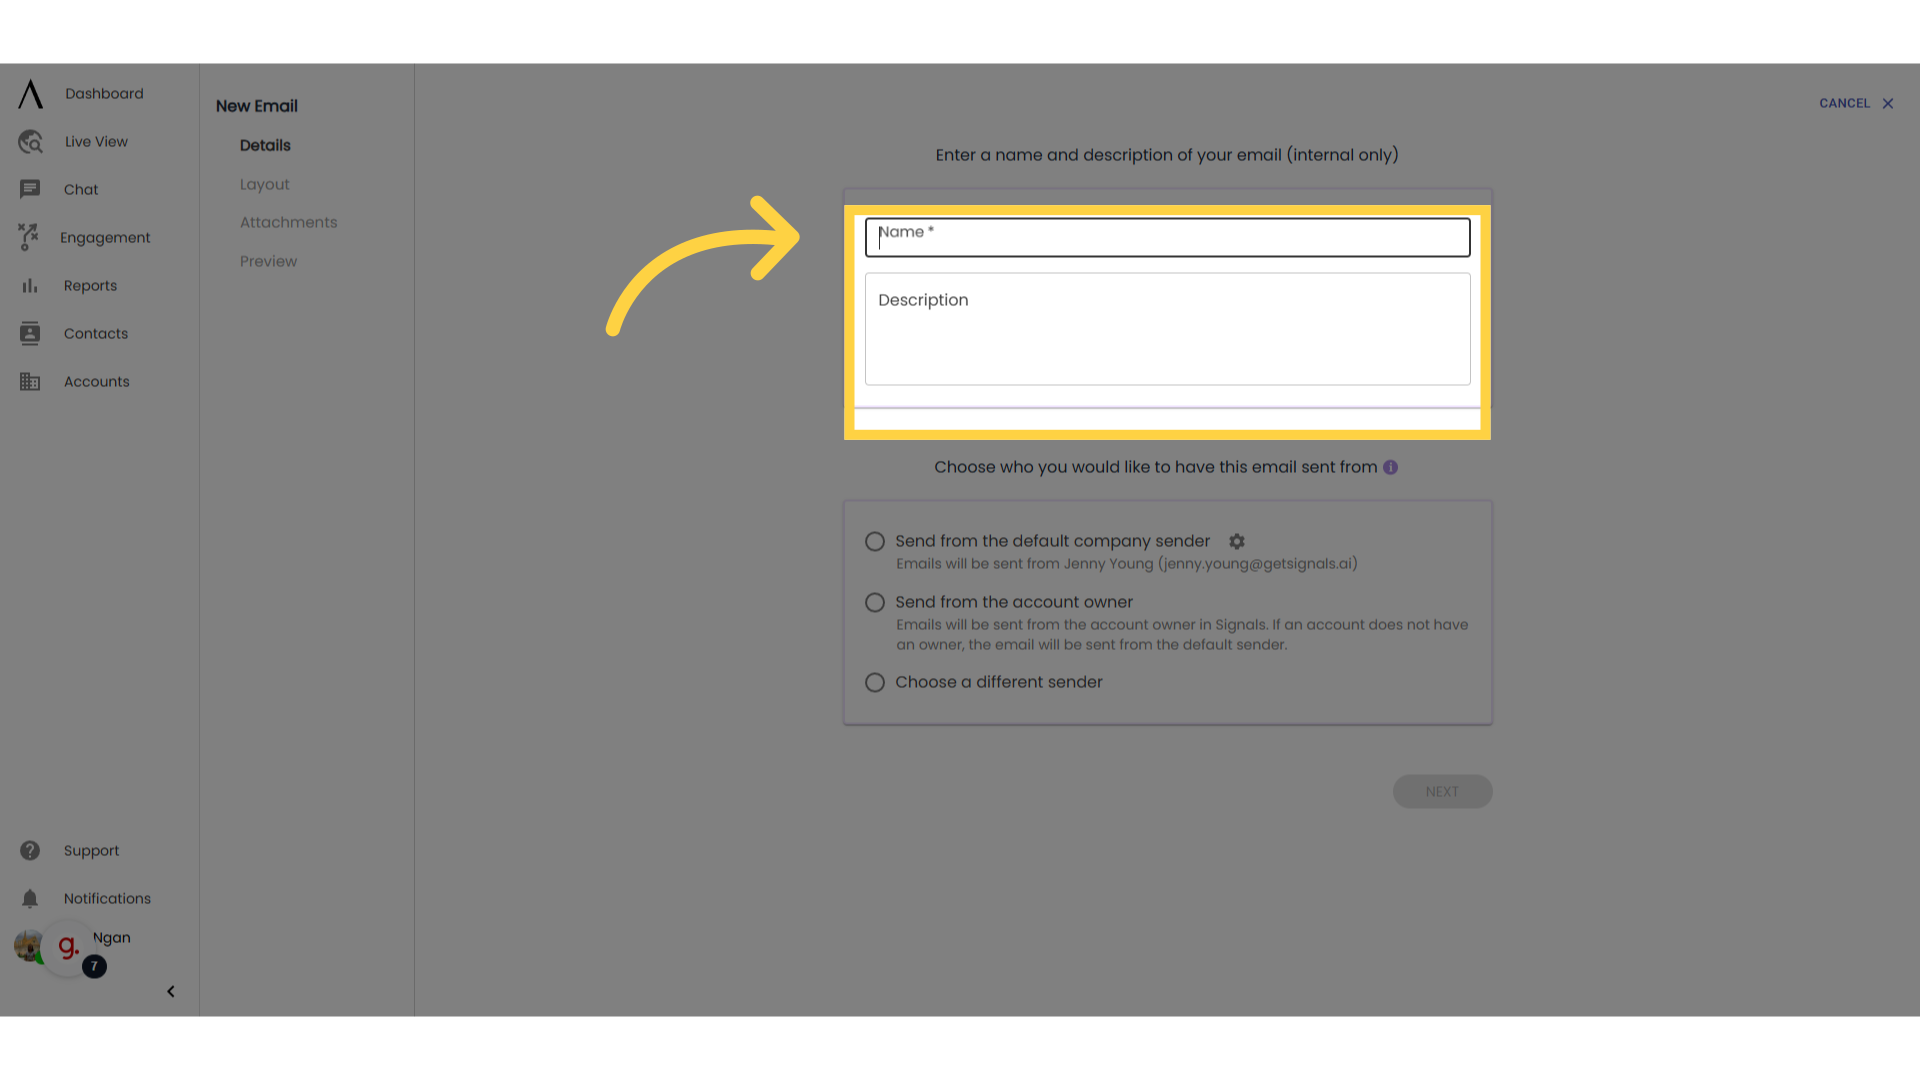
5. Enter name and description
Enter a name and description for your email. This will only be used so you and your organization can identify the email; the recipient of the email will not see this.
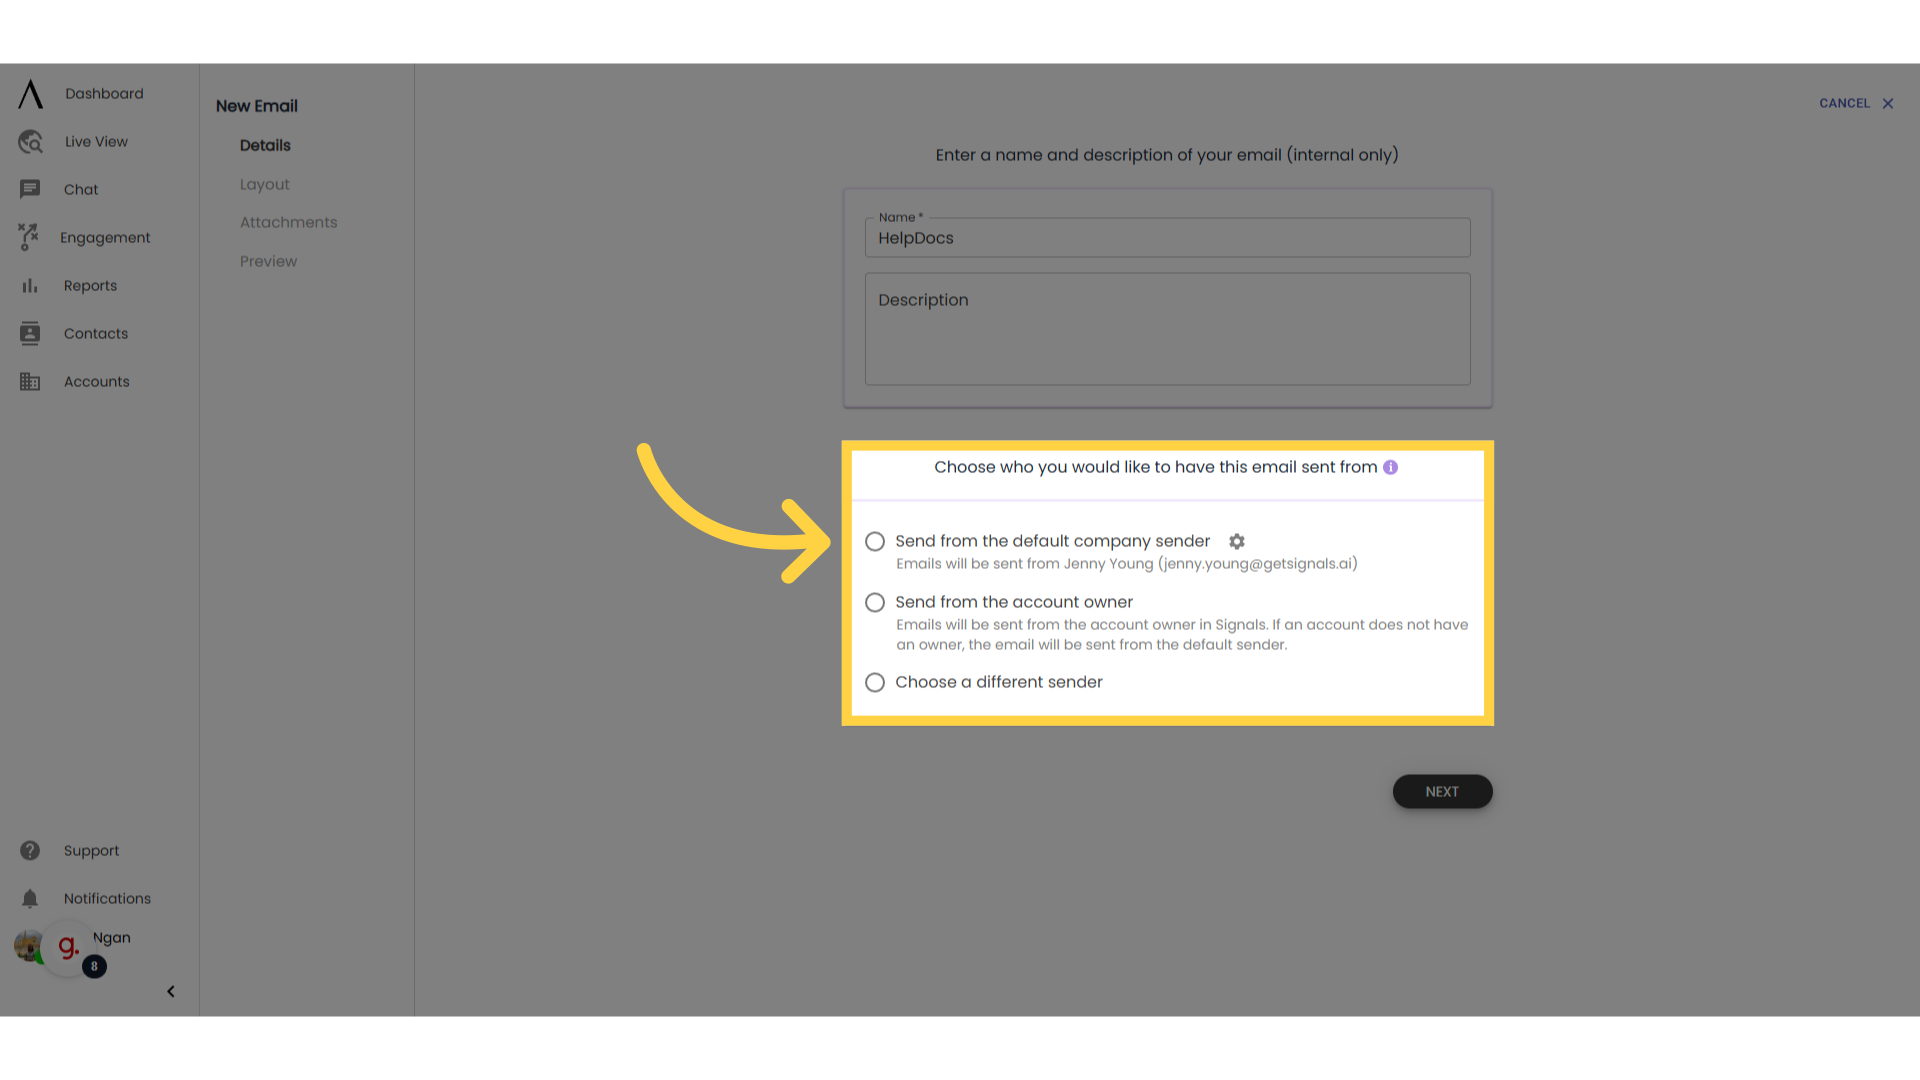
6. Choose a sender
Next, determine who you would like to have the emails sent from. You can send from the default company sender (i.e. the specific name and email address chosen to send emails from). This is configured in your organisation's email settings. You can also send from whoever the account owner is of the given web visitor's company.
Lastly, you can also choose a different name and email address you'd like to send each of these emails from. The email address must end with your organization's domain.
For example, if your domain was companydomain.com, you could have the emails send from jane.doe@companydomain.com, but you wouldn't be able to have them send from jane.doe@gmail.com.
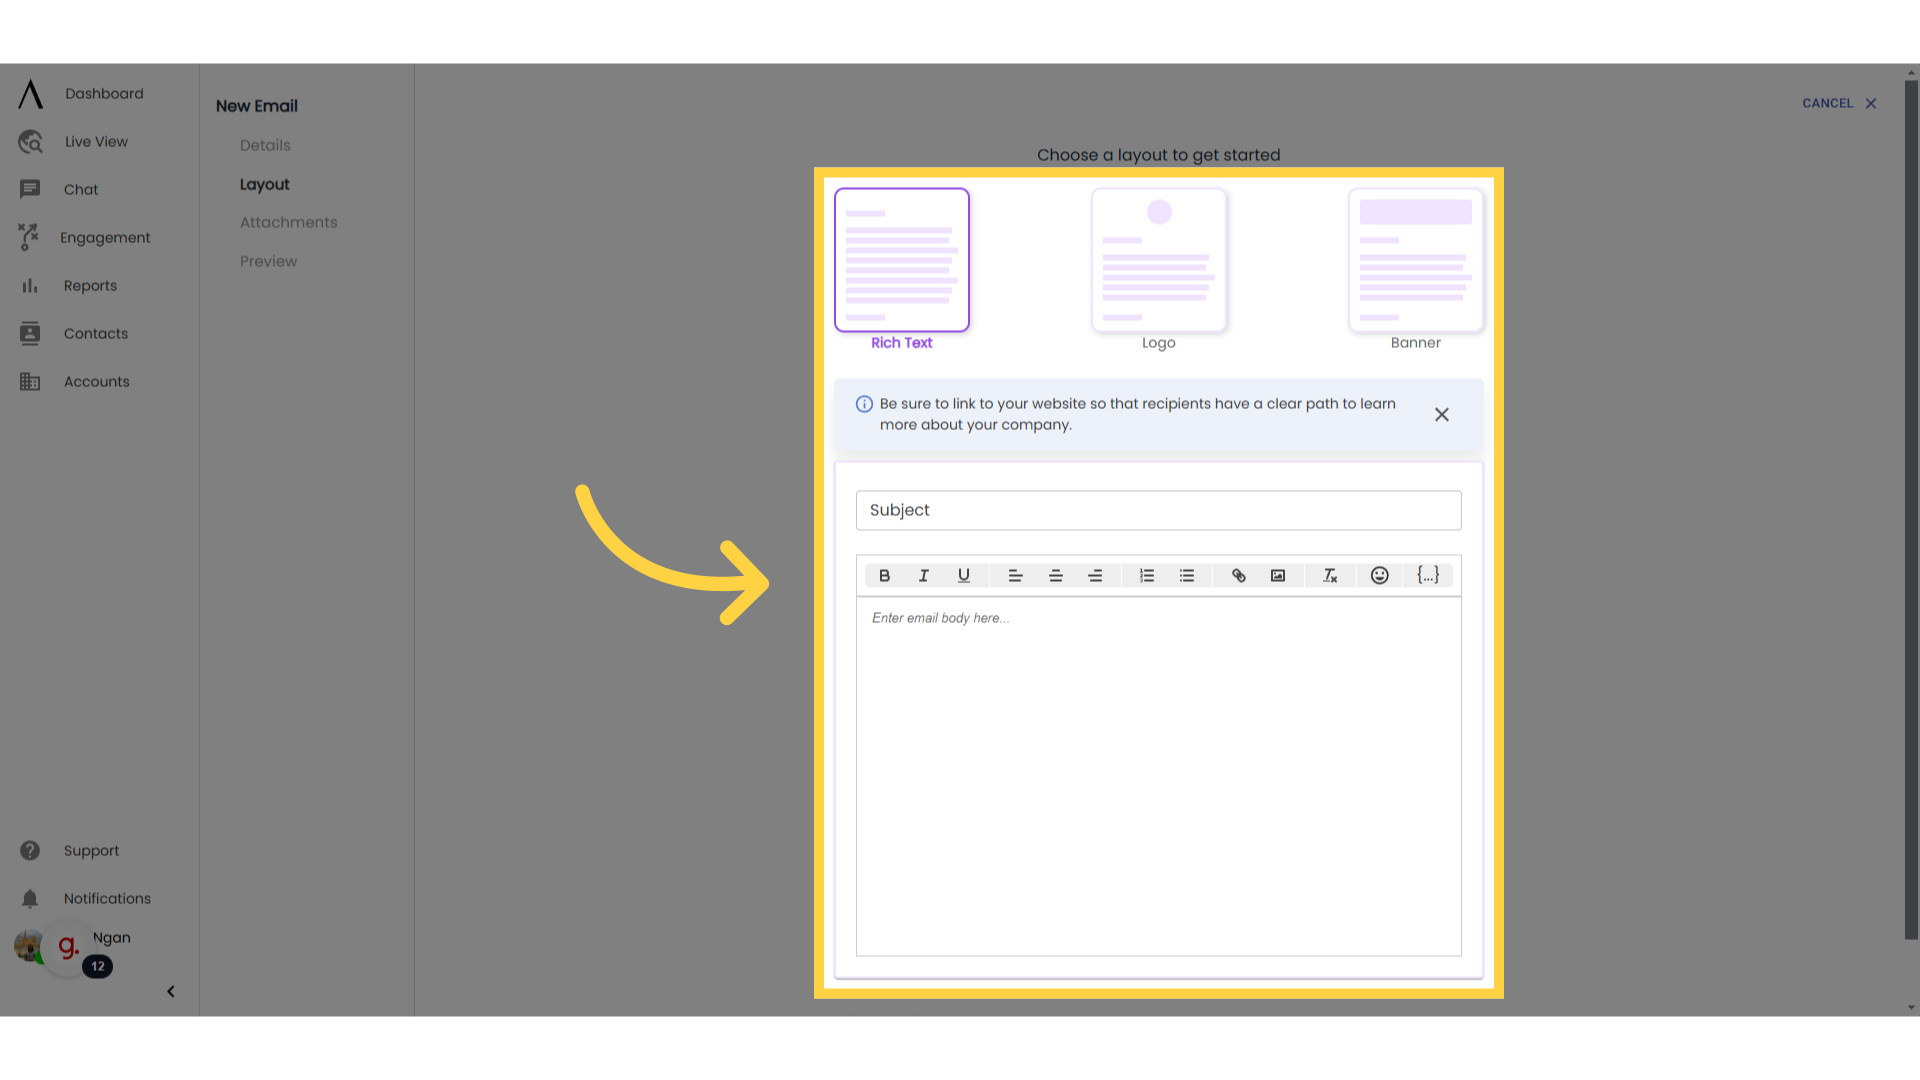
7. Pick a layout and paste your message
Next, choose a general layout and type or copy and paste your message.
You have three options:
Rich text (i.e. text styled with our text editor)
Logo (which allows you to upload a logo to your email)
Banner (upload a banner image).
Draft or paste your email below.
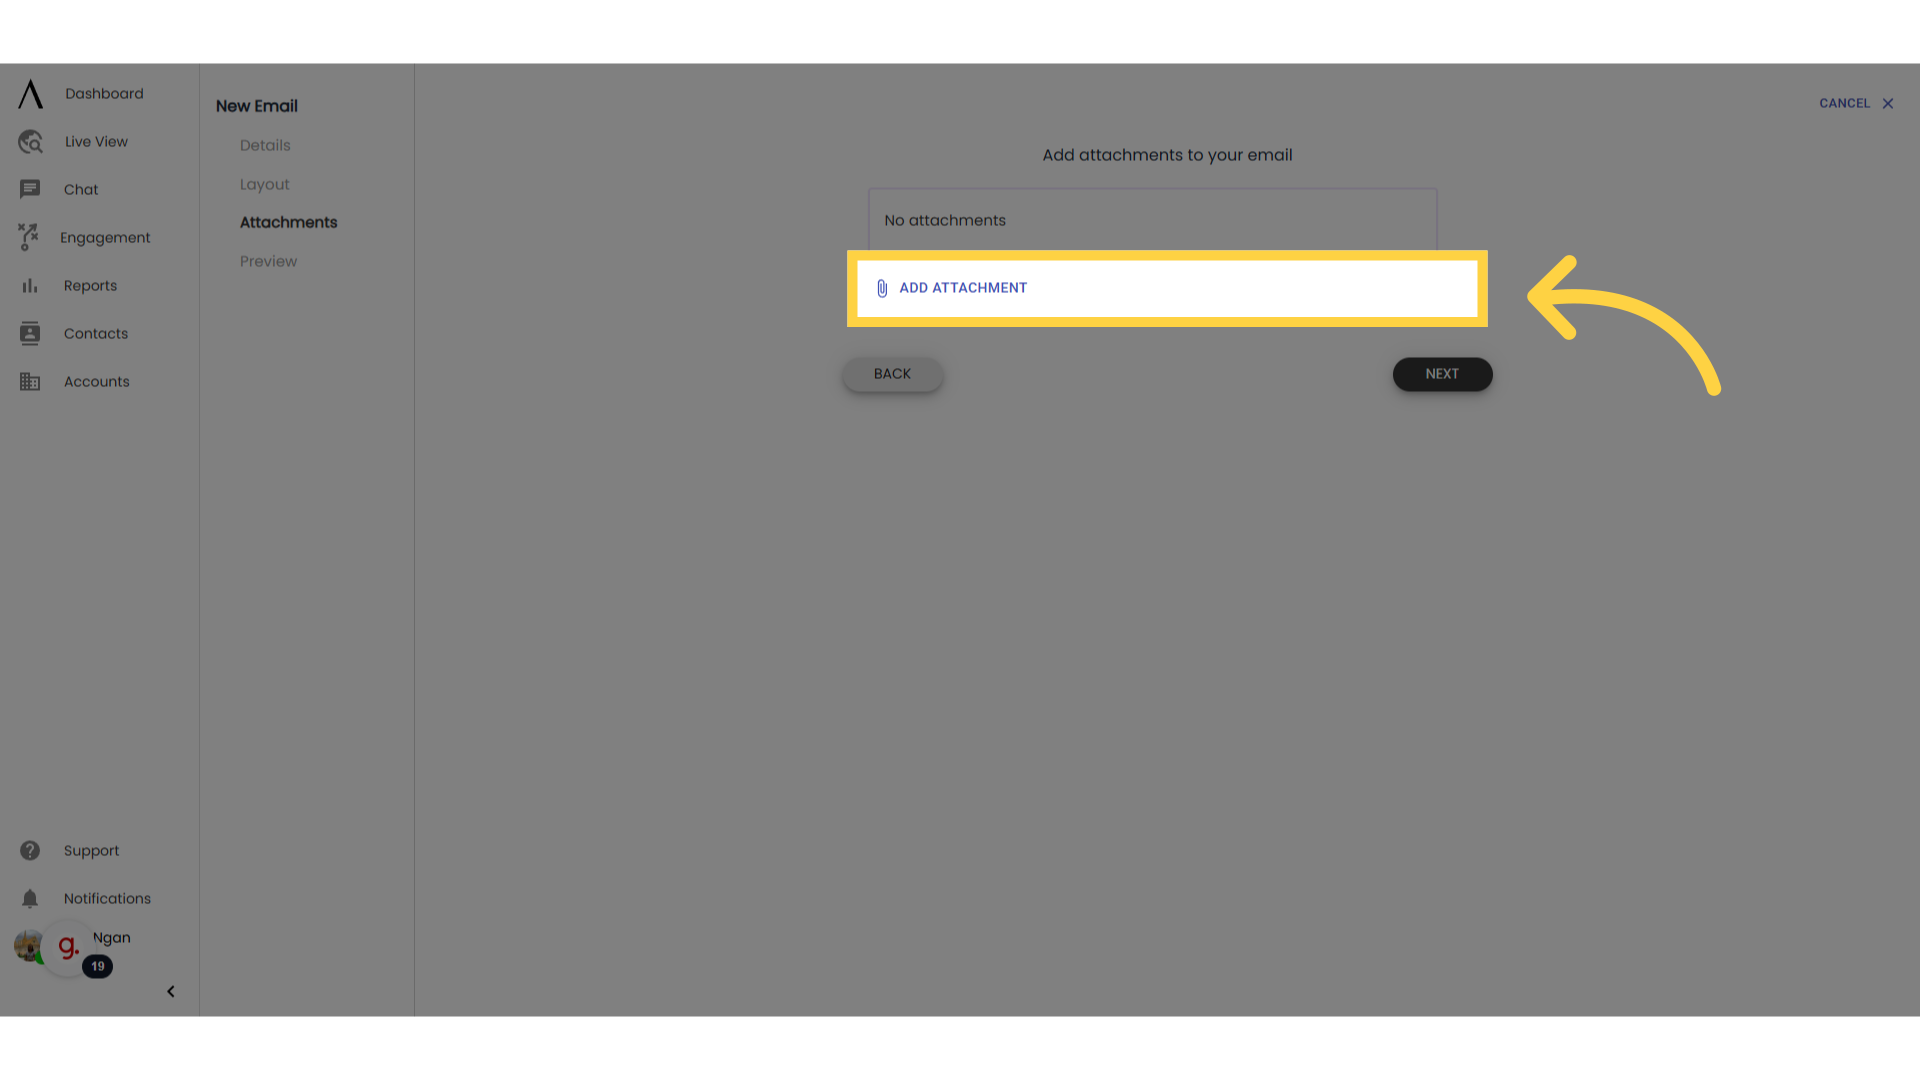
8. Add attachments
Attach relevant files if you'd like.
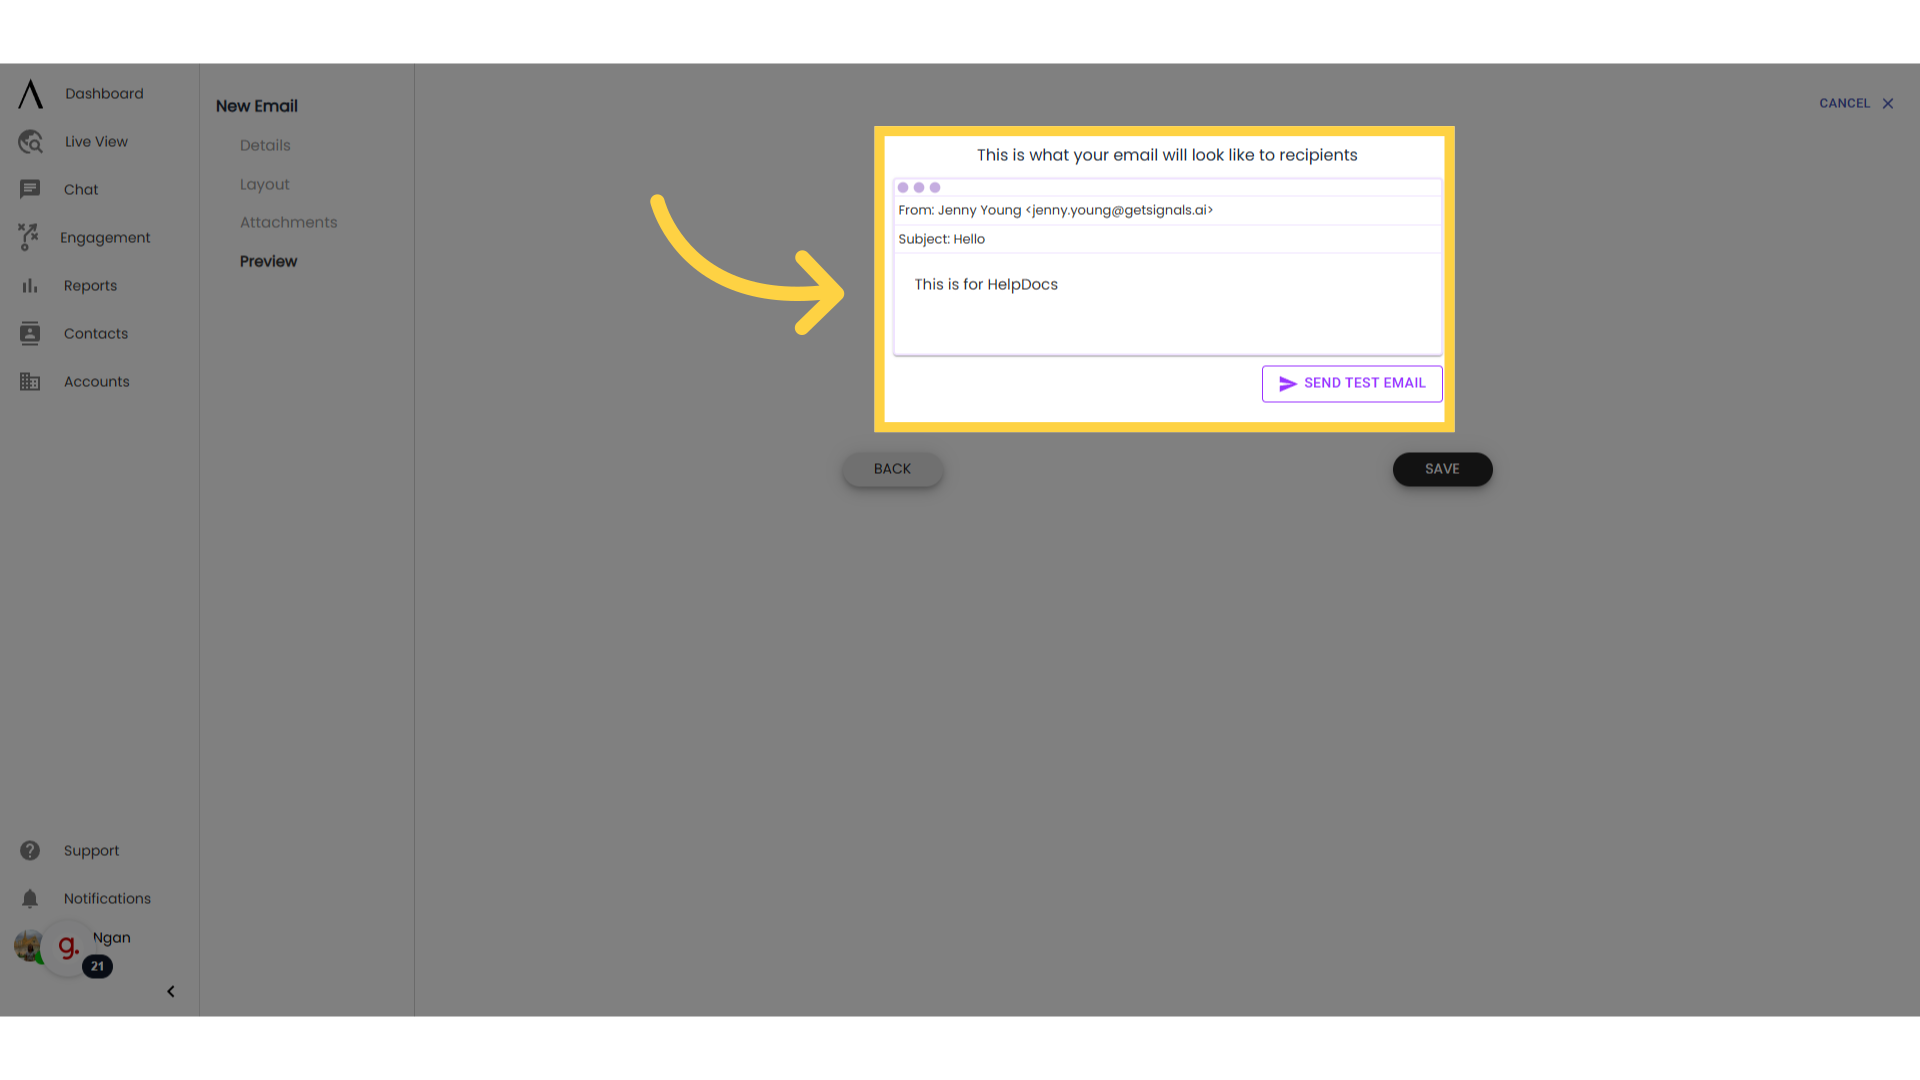
9. Preview your email
Preview your email and make any necessary adjustments. Click "Save."
10. Click "Engagement," then "Emails"
To view metrics, click on "Engagment" in the left sidebar, then "Emails."
11. Click to view metrics
Click on your email to view how many times the email has been sent, delivered, opened, and clicked.

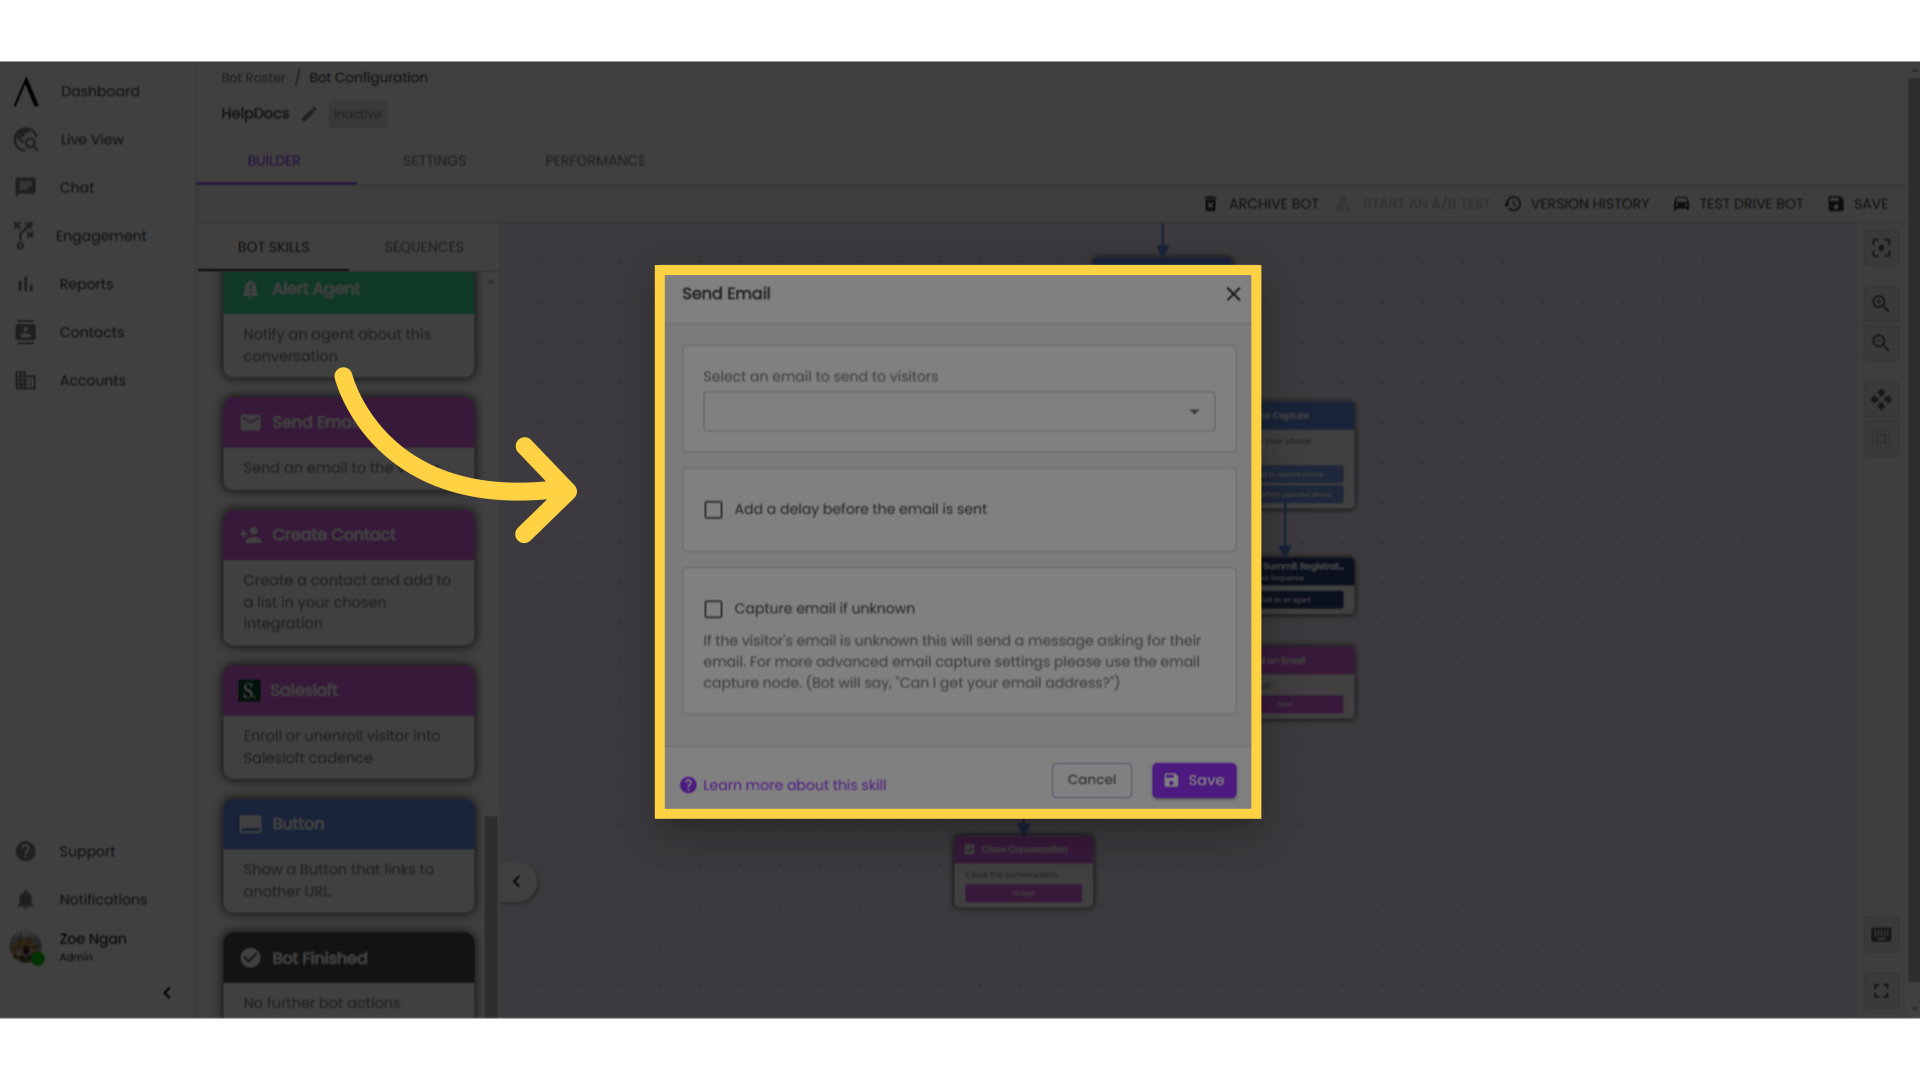
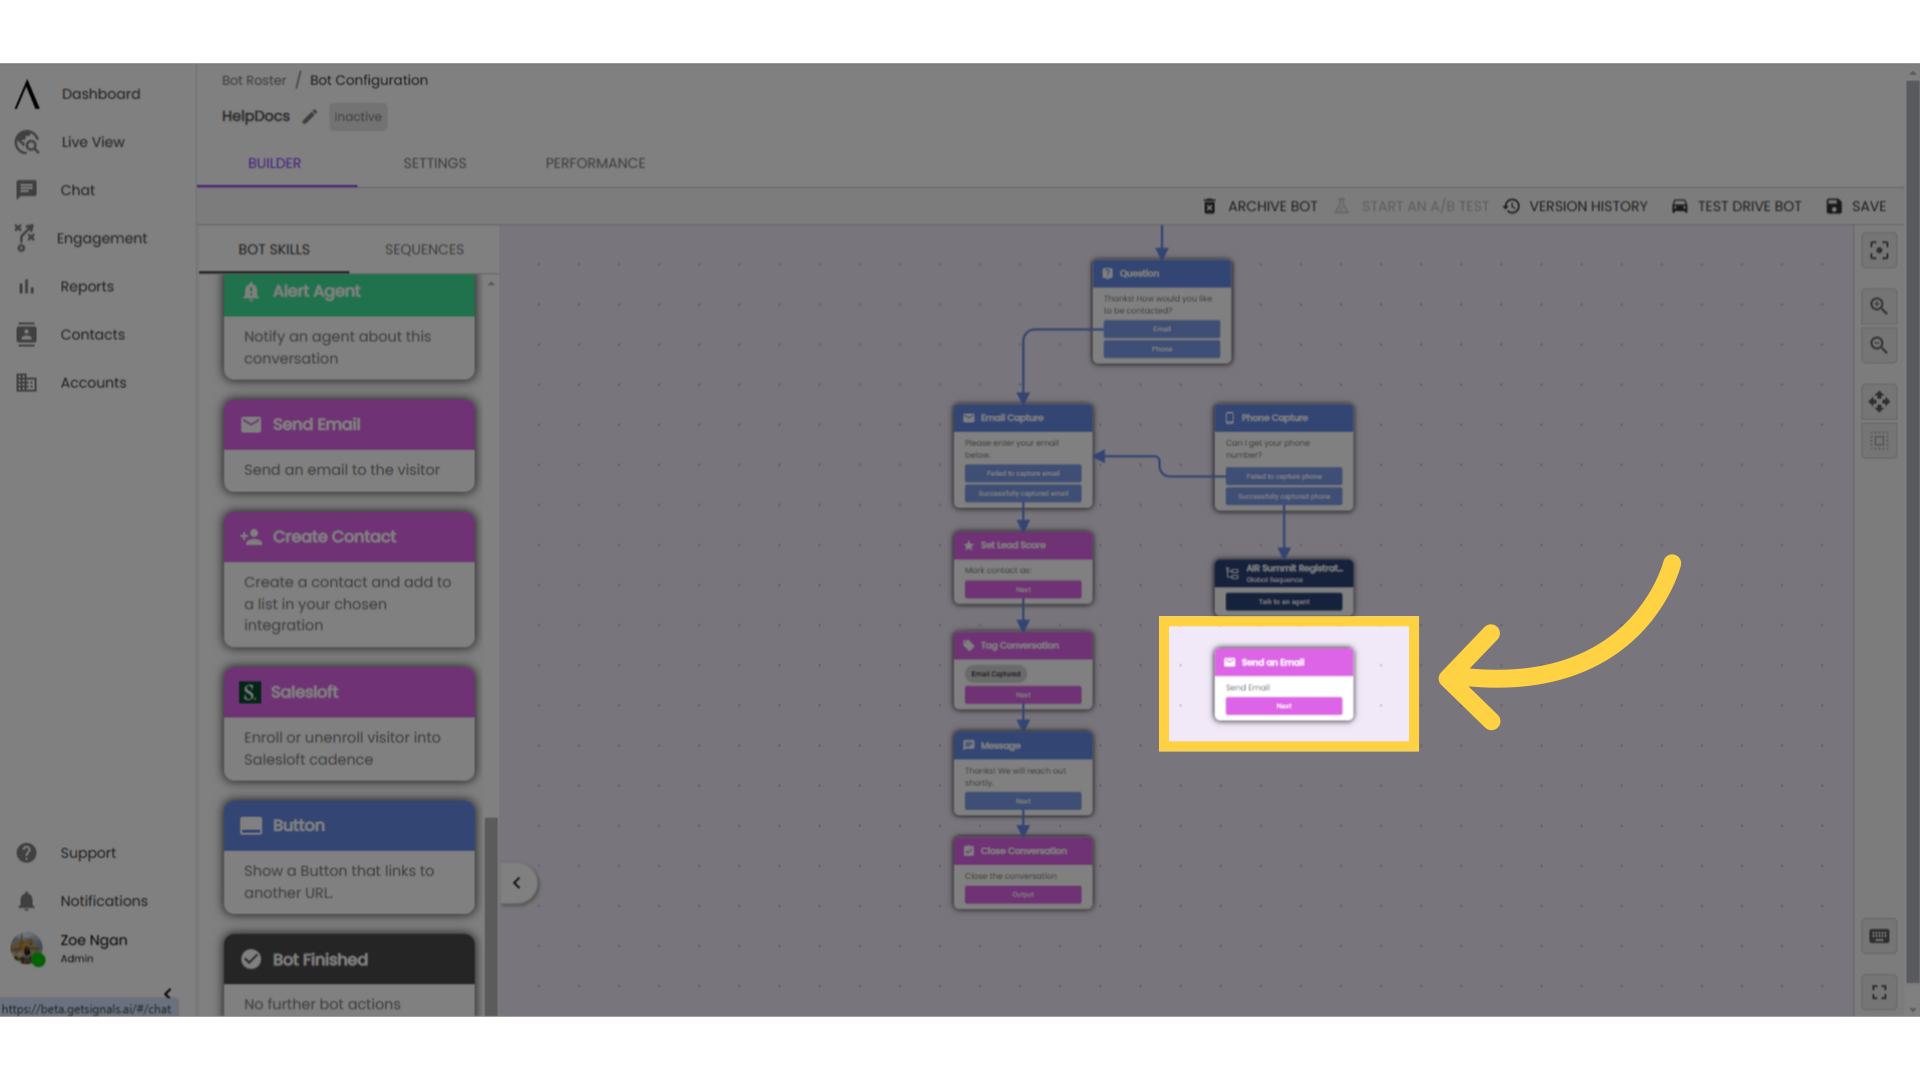
12. Using emails in bots and plays
Now, to implement this email into a bot so it can be sent to your web visitors, open the bot or play you'd like to have this email sent from, or create a new bot. Add a Send Email skill to the appropriate place in your bot or play.
Keep in mind that your web visitor will need to reach this point in the bot flow in order for the email send to be triggered. For plays, the visitor's email must be known when they first visit the website in order for the email to send.
13. Configure email settings
Open the settings of your Send Email skill and select the name of the email template you created. You can choose to add a delay to the send of your email.