PlayMaker Overview and Builder
- PlayMaker Overview and Builder
- Go to app.getsignals.ai
- 1. Introduction
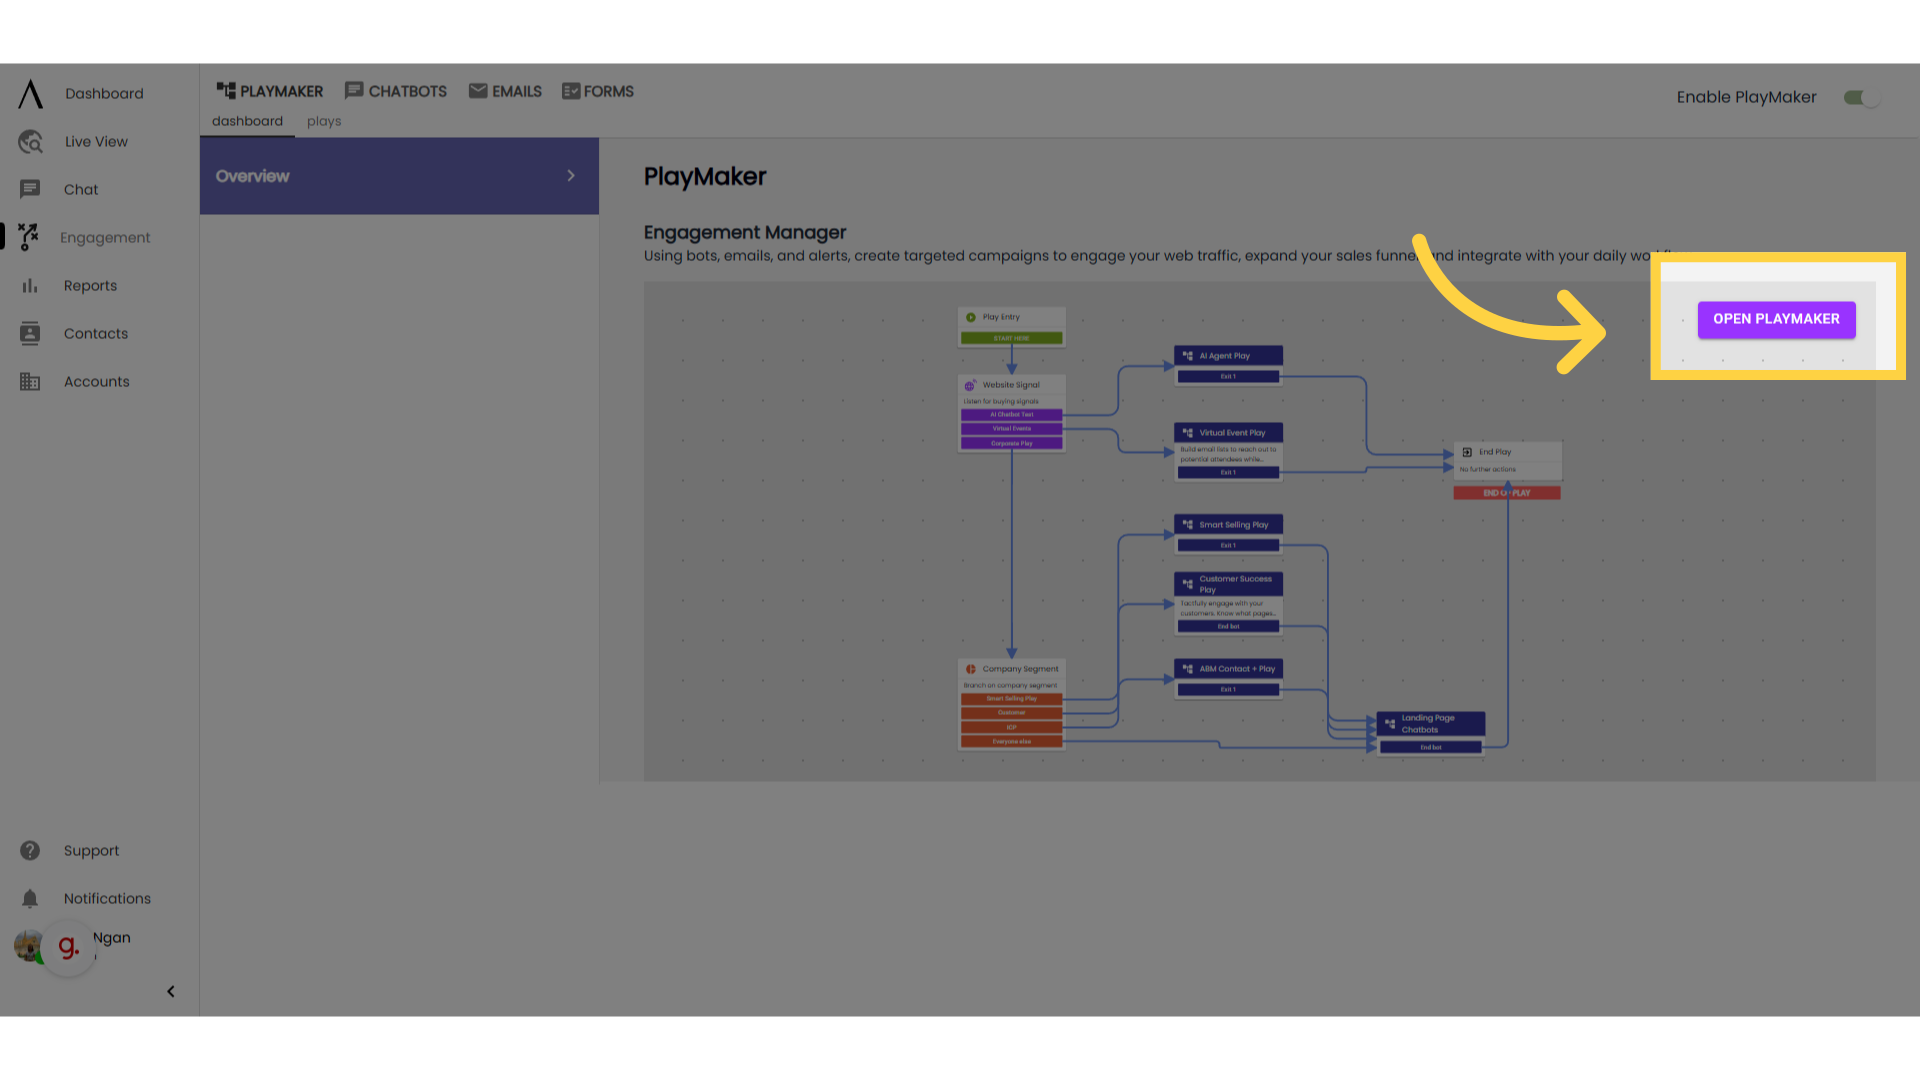
- 2. Click "Open Playmaker"
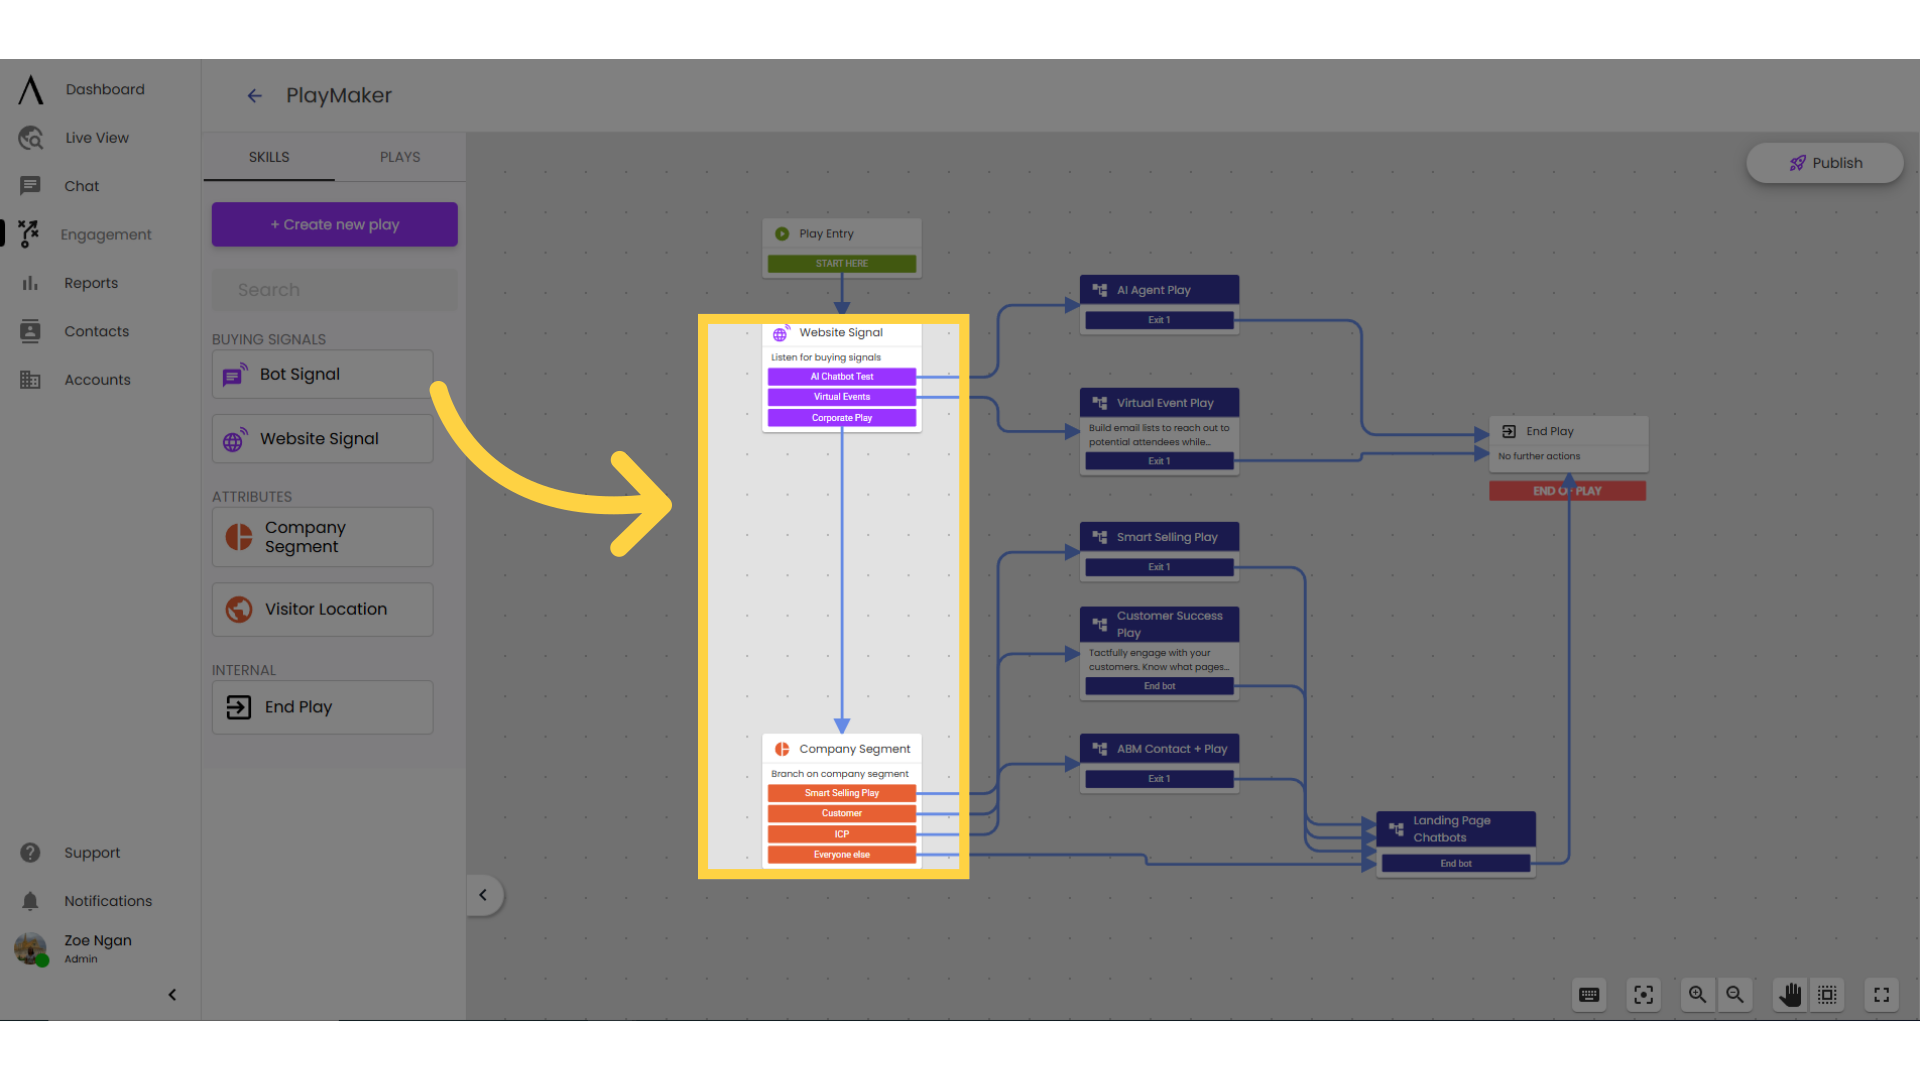
- 3. Determine Priority
- 4. Launching a Bot
- 5. Drag and drop "Fire Bot" into the flow
- 6. Removing a bot from a specific page
- 7. Configure Website Signal
- 8. Excluding specific audiences
- 9. Multiple Plays
- 10. Connect your plays
- 11. Hit "Publish"
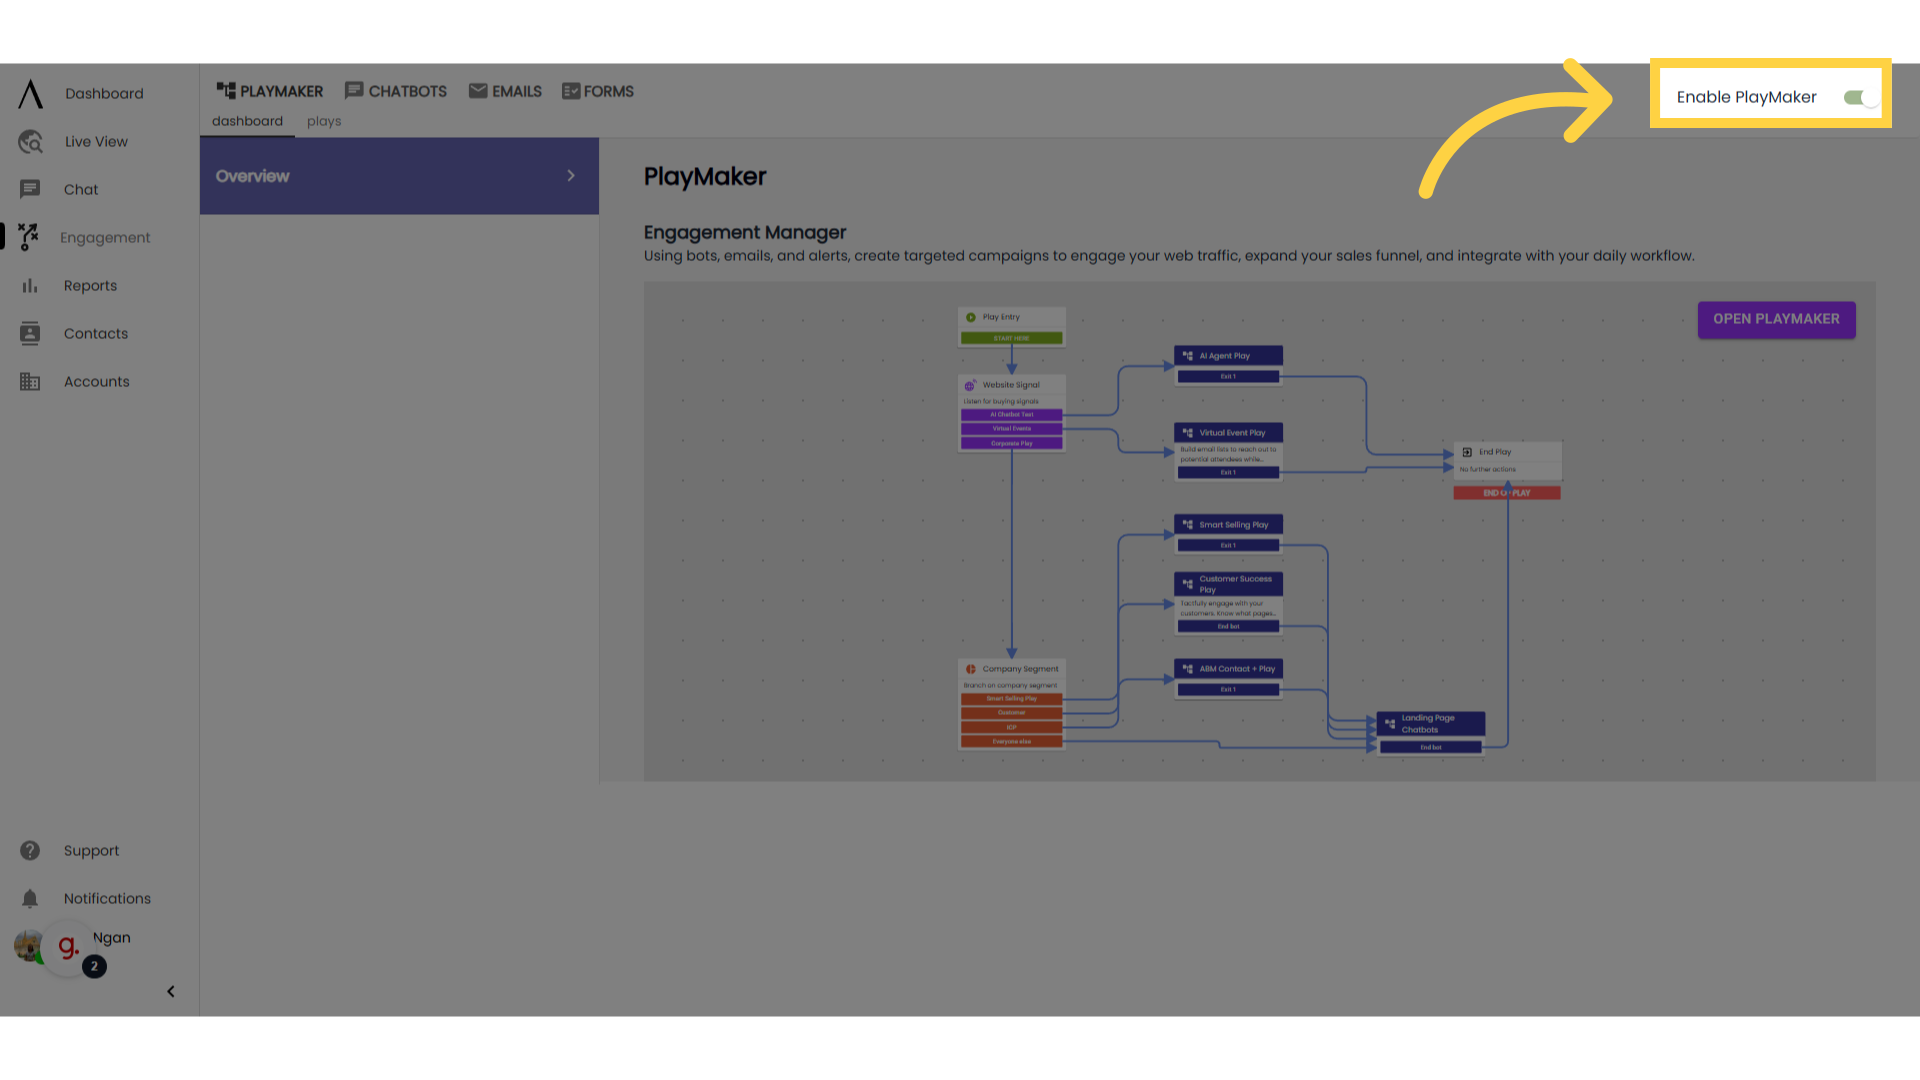
- 12. Enable PlayMaker
PlayMaker Overview and Builder
Use PlayMaker to automate portions of your marketing and sales processes. Some of the customization options available include firing specific bots or searching for contacts at the visitor's company.
Go to app.getsignals.ai
1. Introduction
Before you get started, ask yourself: What audience am I interested in engaging? This includes where, when, and who you want to engage with.
For best results, focus your efforts on high-intent pages and segments. If planning to use a chatbot, what goals do I want that chatbot to accomplish? Automated chatbots are great at qualifying leads, capturing contact information, and booking future meetings. Live chat agents tend to be more effective at answering questions and booking meetings quickly.
2. Click "Open Playmaker"
Now that you are ready to start automating and engaging with your visitors open PlayMaker by clicking "Open PlayMaker" or by clicking anywhere on PlayMaker preview.
3. Determine Priority
Priority exists. Your first branching skill and their branches have higher priority over your second branching skill and their branches. For example, in this screenshot, the AI chatbot test has the highest priority, then virtual events, descending in order until "everyone else" in company segment.
The more specific the audience criteria the higher in priority they need to be. For example, if you have a customized play for Target Account, start with company segments to ensure any visitor who matches your Target Accounts gets that designated Play. Utilize the different skills to help define your audience and the experience visitors will have when they come to your site.
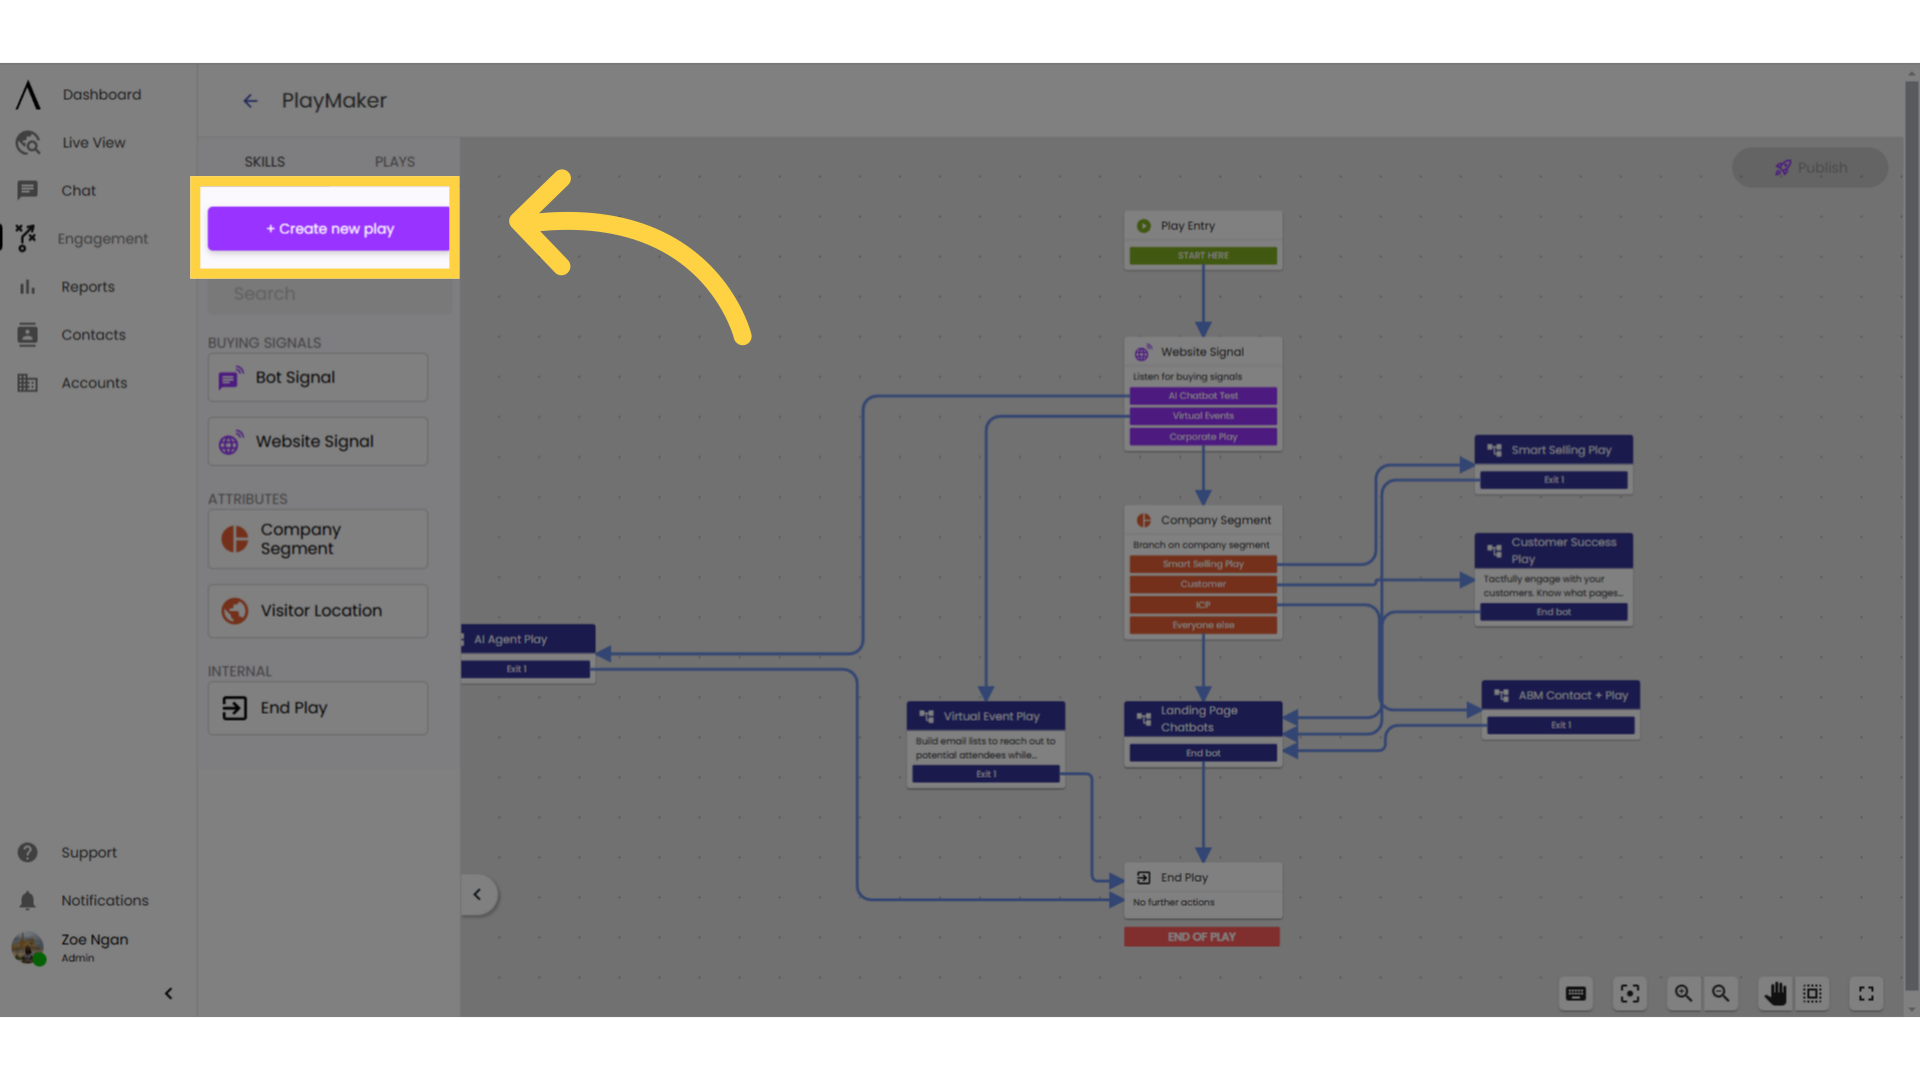
4. Launching a Bot
To launch a bot in PlayMaker, you must build a play for your bot. Click on "Create New Play" towards the left of the screen.
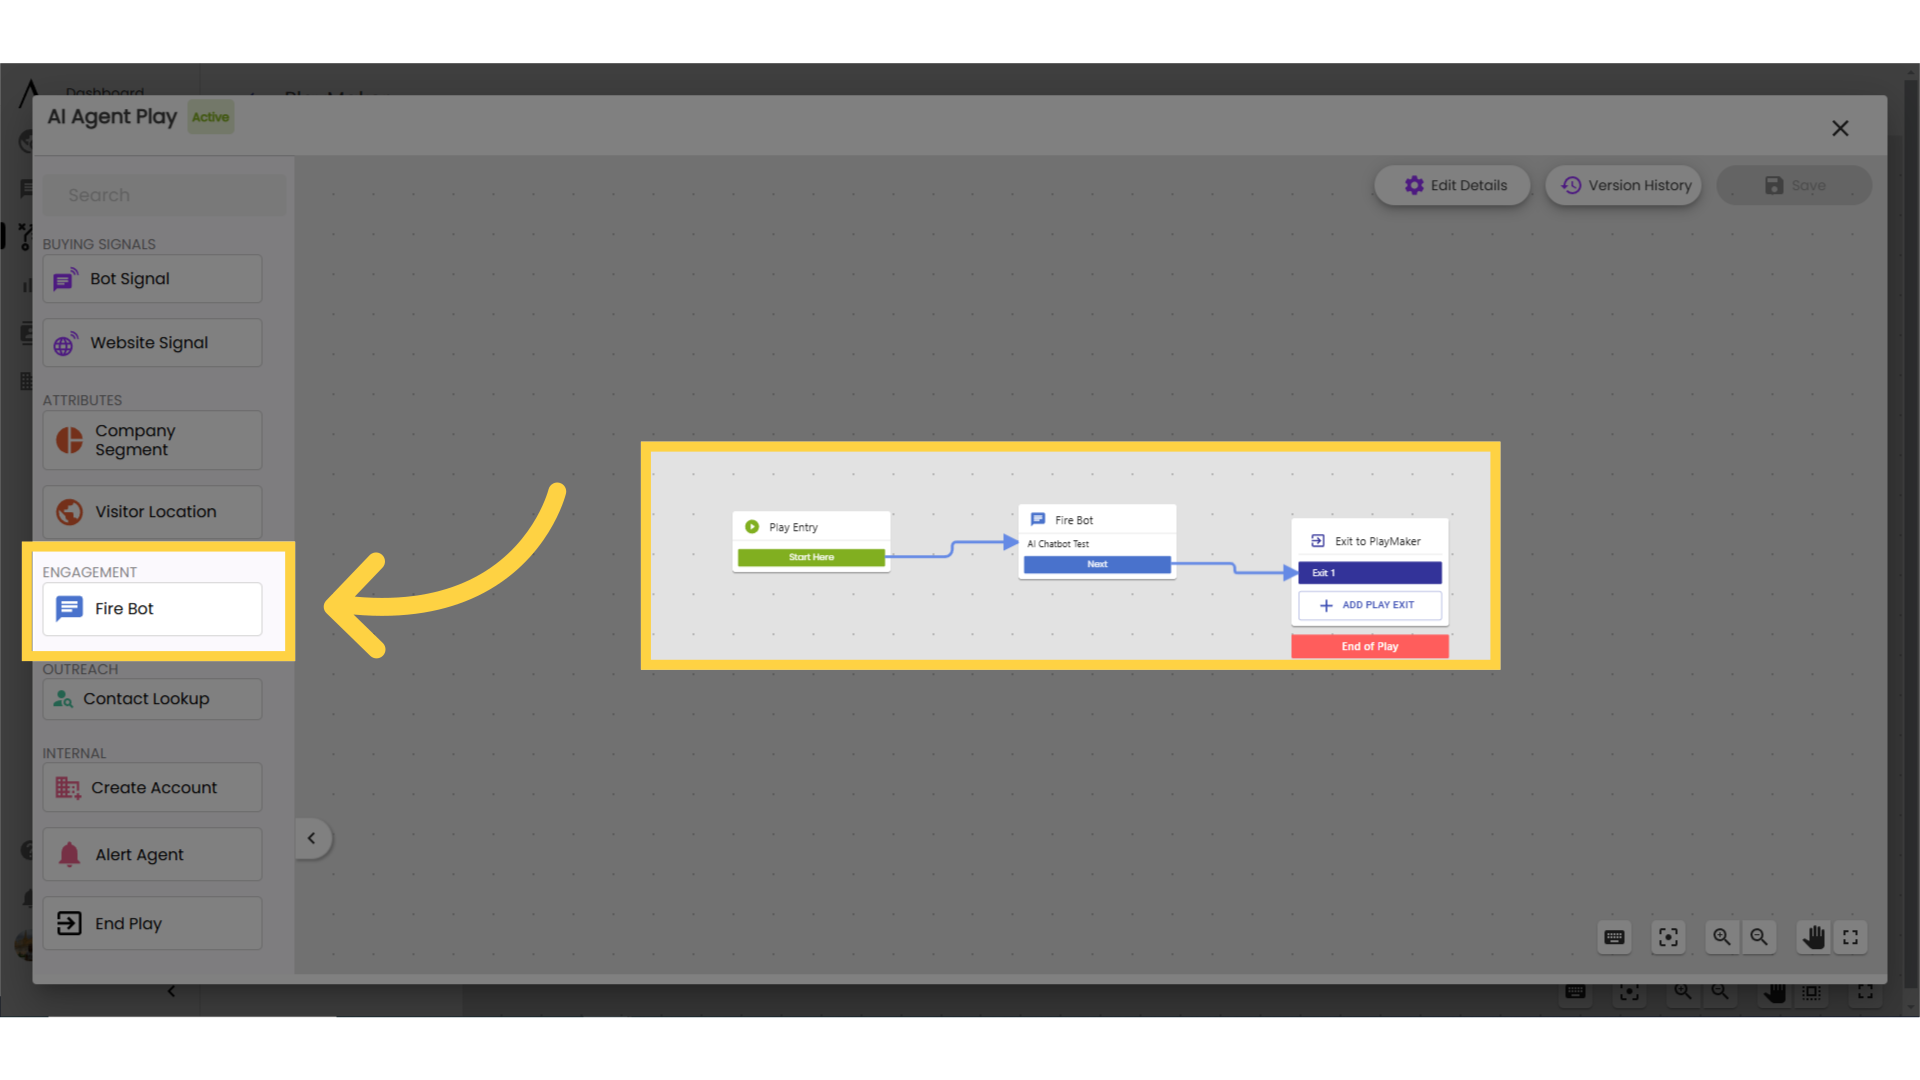
5. Drag and drop "Fire Bot" into the flow
Drag and drop the "Fire Bot" skill into the flow, then connect the skills accordingly.
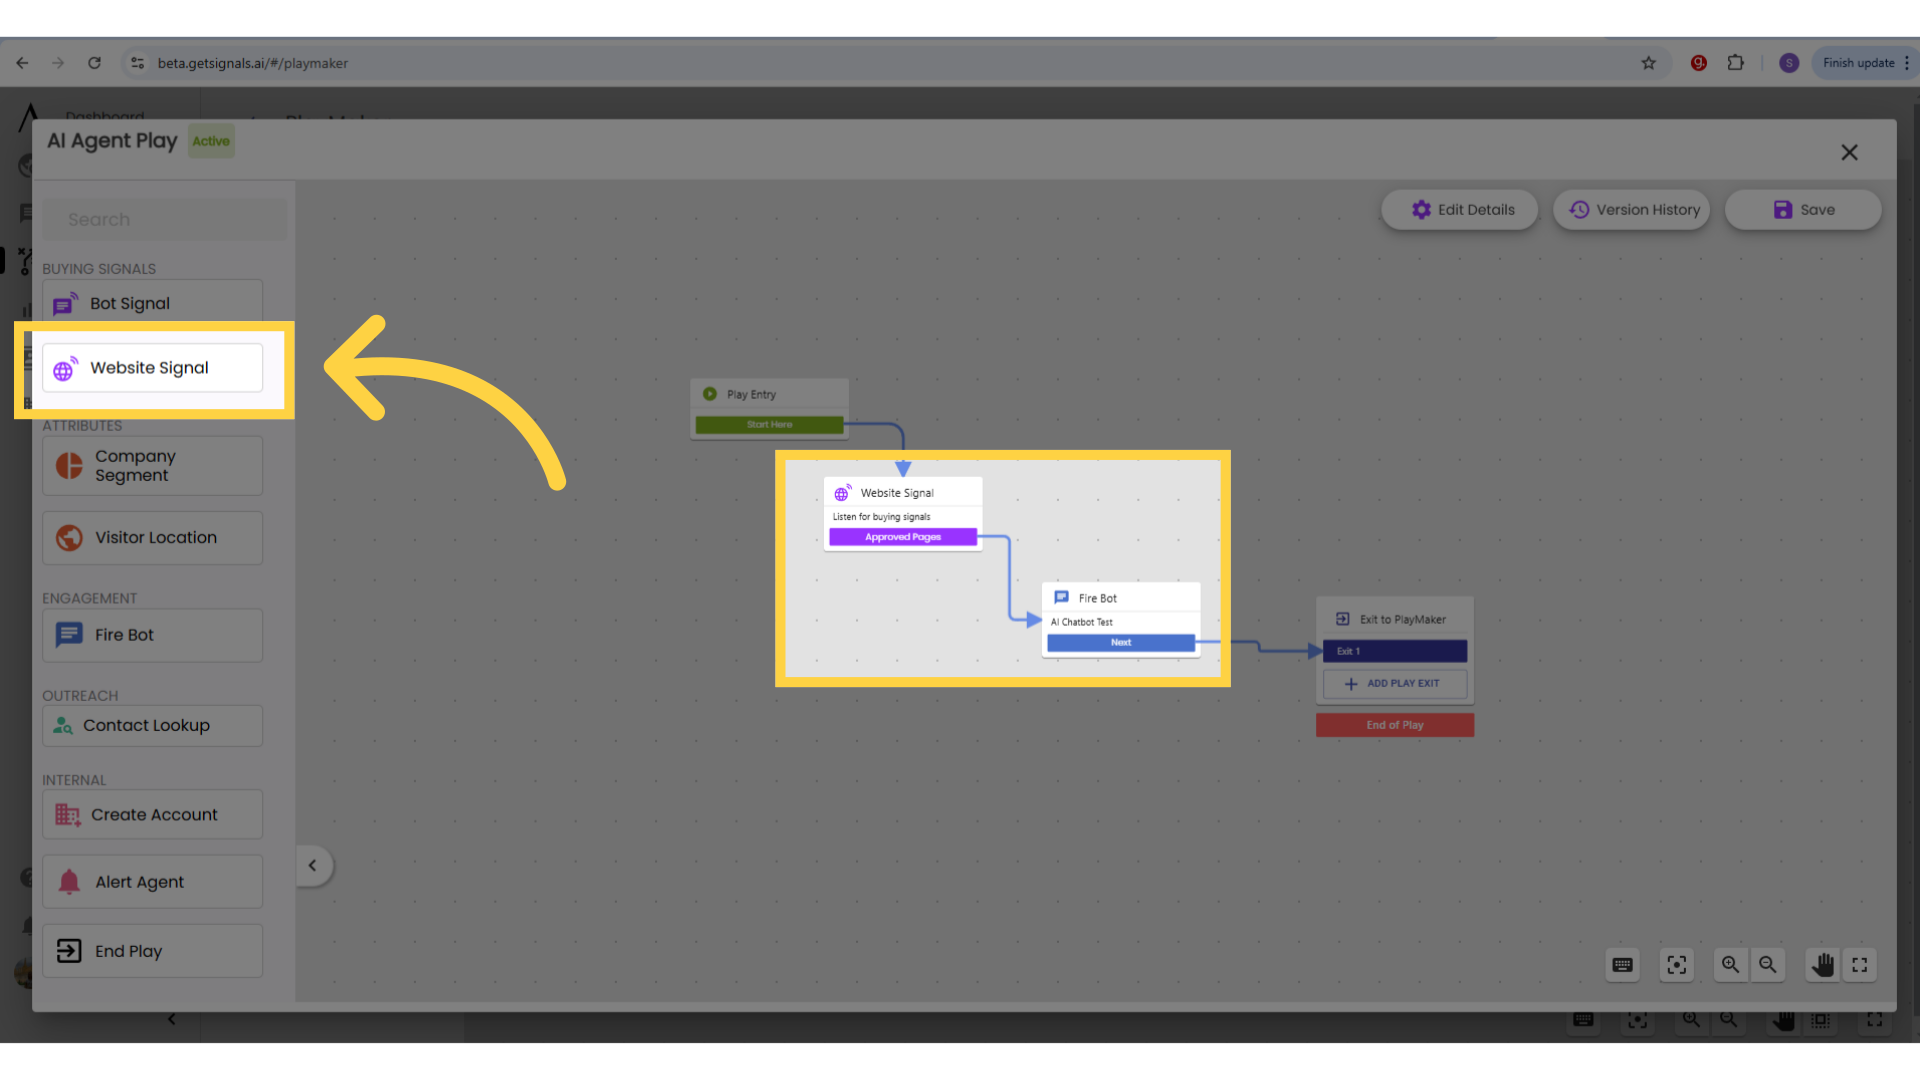
6. Removing a bot from a specific page
If you have a chatbot live on your site and want to exclude it from a specific page (or pages), you can insert a Website Signal skill before your Fire Bot skill.
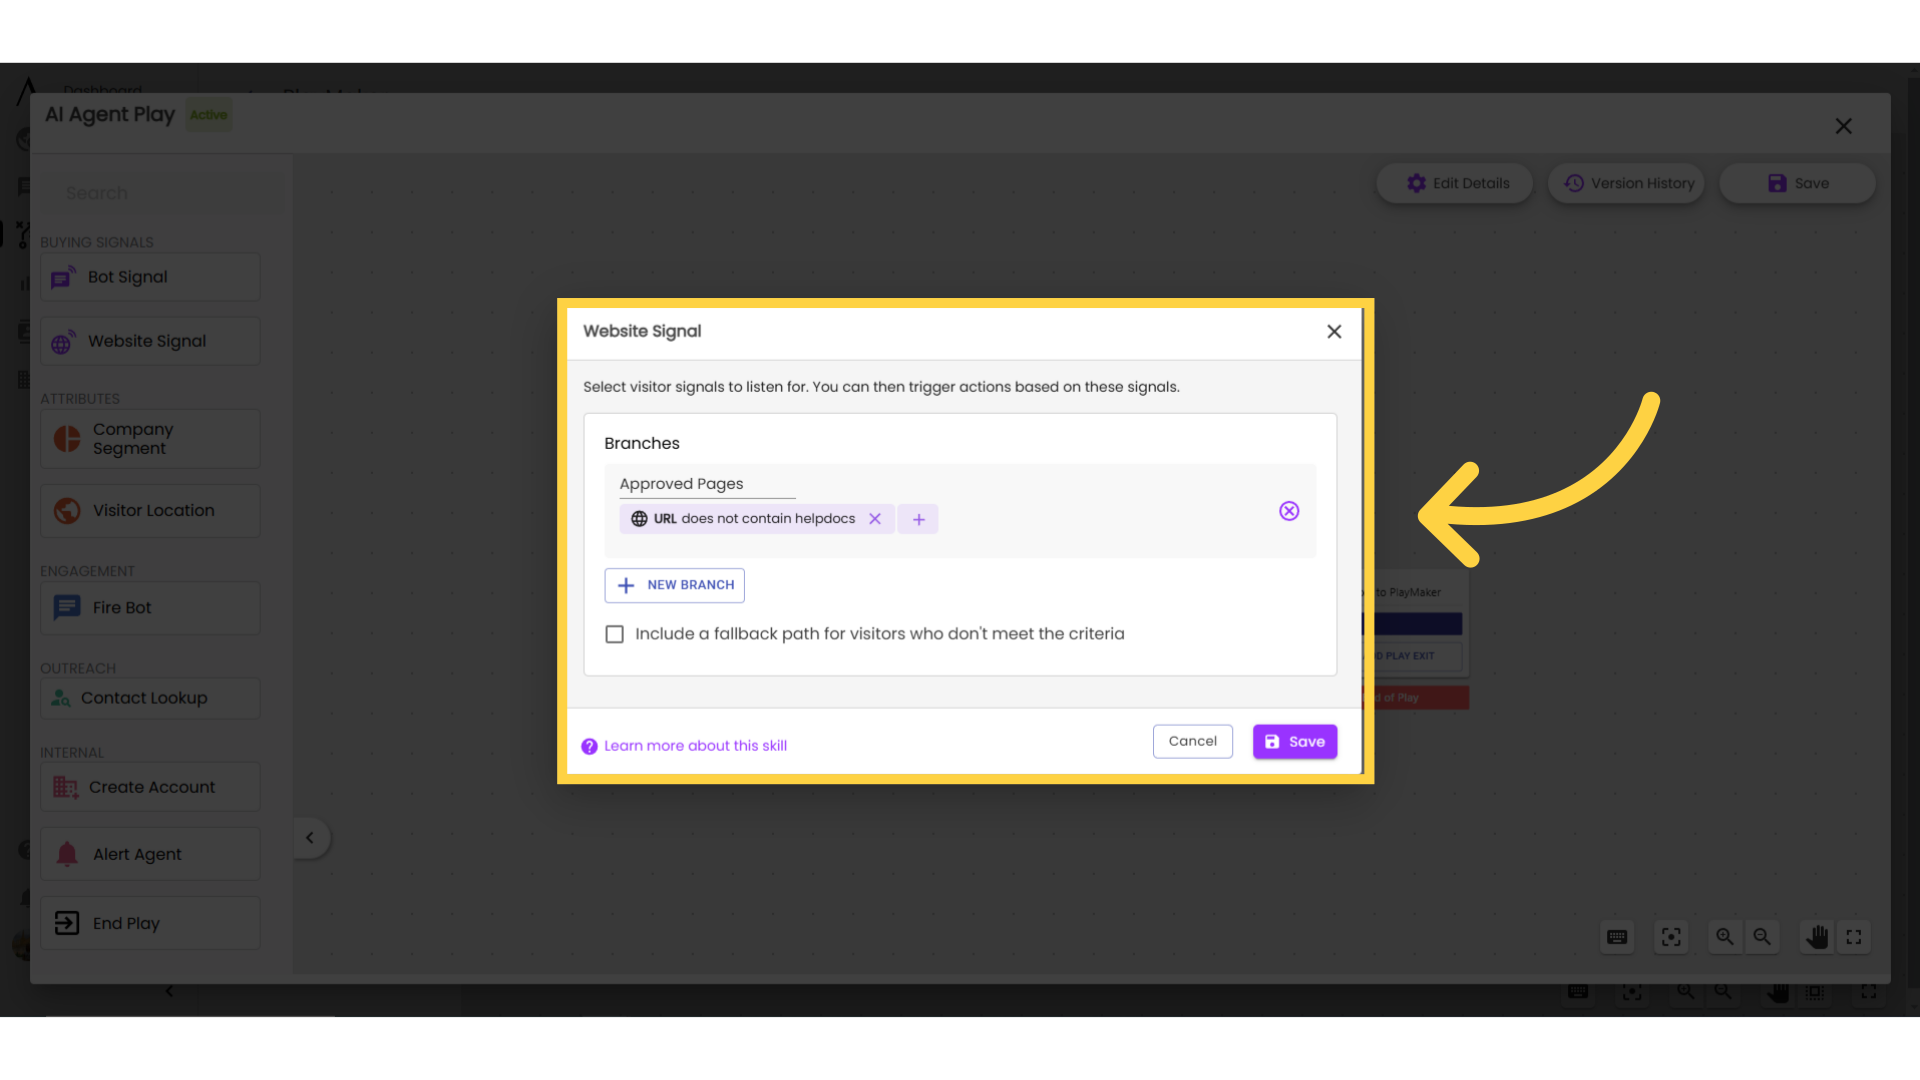
7. Configure Website Signal
Inside the Website Signal branching skill, create a Branch called Approved Pages. Click "Select Filter" underneath your branch, click "URL," then "does not contain," and finally enter the URLof the page (pages) that you don't want the chatbot to fire on.
You can also check the box to "Include a fallback path for visitors who don't meet these criteria," which will allow you to still use other engagement tools for visitors who enter this play but aren't on approved pages. Click "Save" and connect the skills. To turn off a bot globally, you can just delete the fire bot skill altogether.
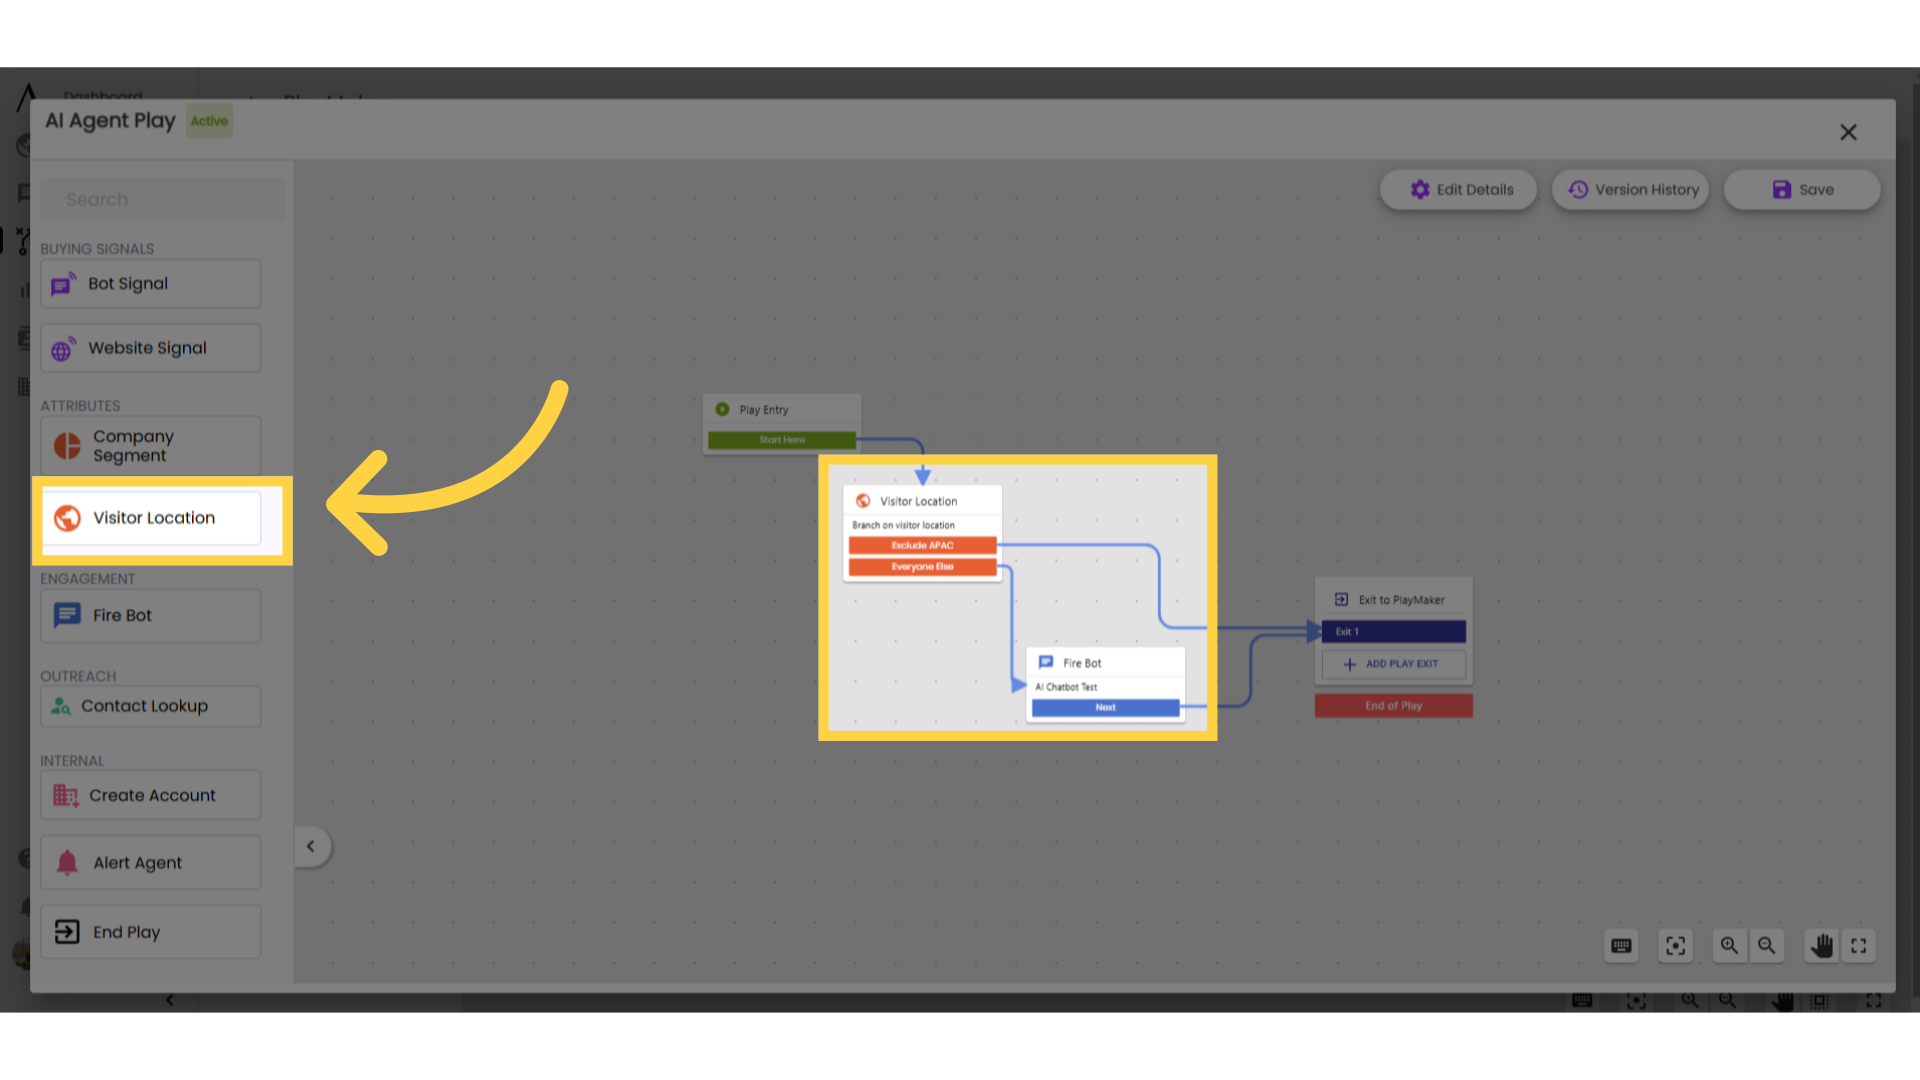
8. Excluding specific audiences
You can also exclude visitors located in certain countries from seeing the chatbot. To do this, insert a Visitor Location skill immediately before the Fire Bot skill. You can further specify your branching by stacking branching skills (for example, layer geography, company segment, and number of total site visits to create a very specific audience parameter). Name your branch Excluded Countries, then select which countries you want to exclude.
Be sure to check the box to "Include a fallback path for visitors who don't meet these criteria." Connect the "Everyone else" exit to your Fire Bot Skill, and your Excluded Countries branch to an End of Play Skill. If you want visitors from those excluded countries to still trigger other engagement tools after the bot, you can connect that branch back into the play after the Fire Bot Skill.
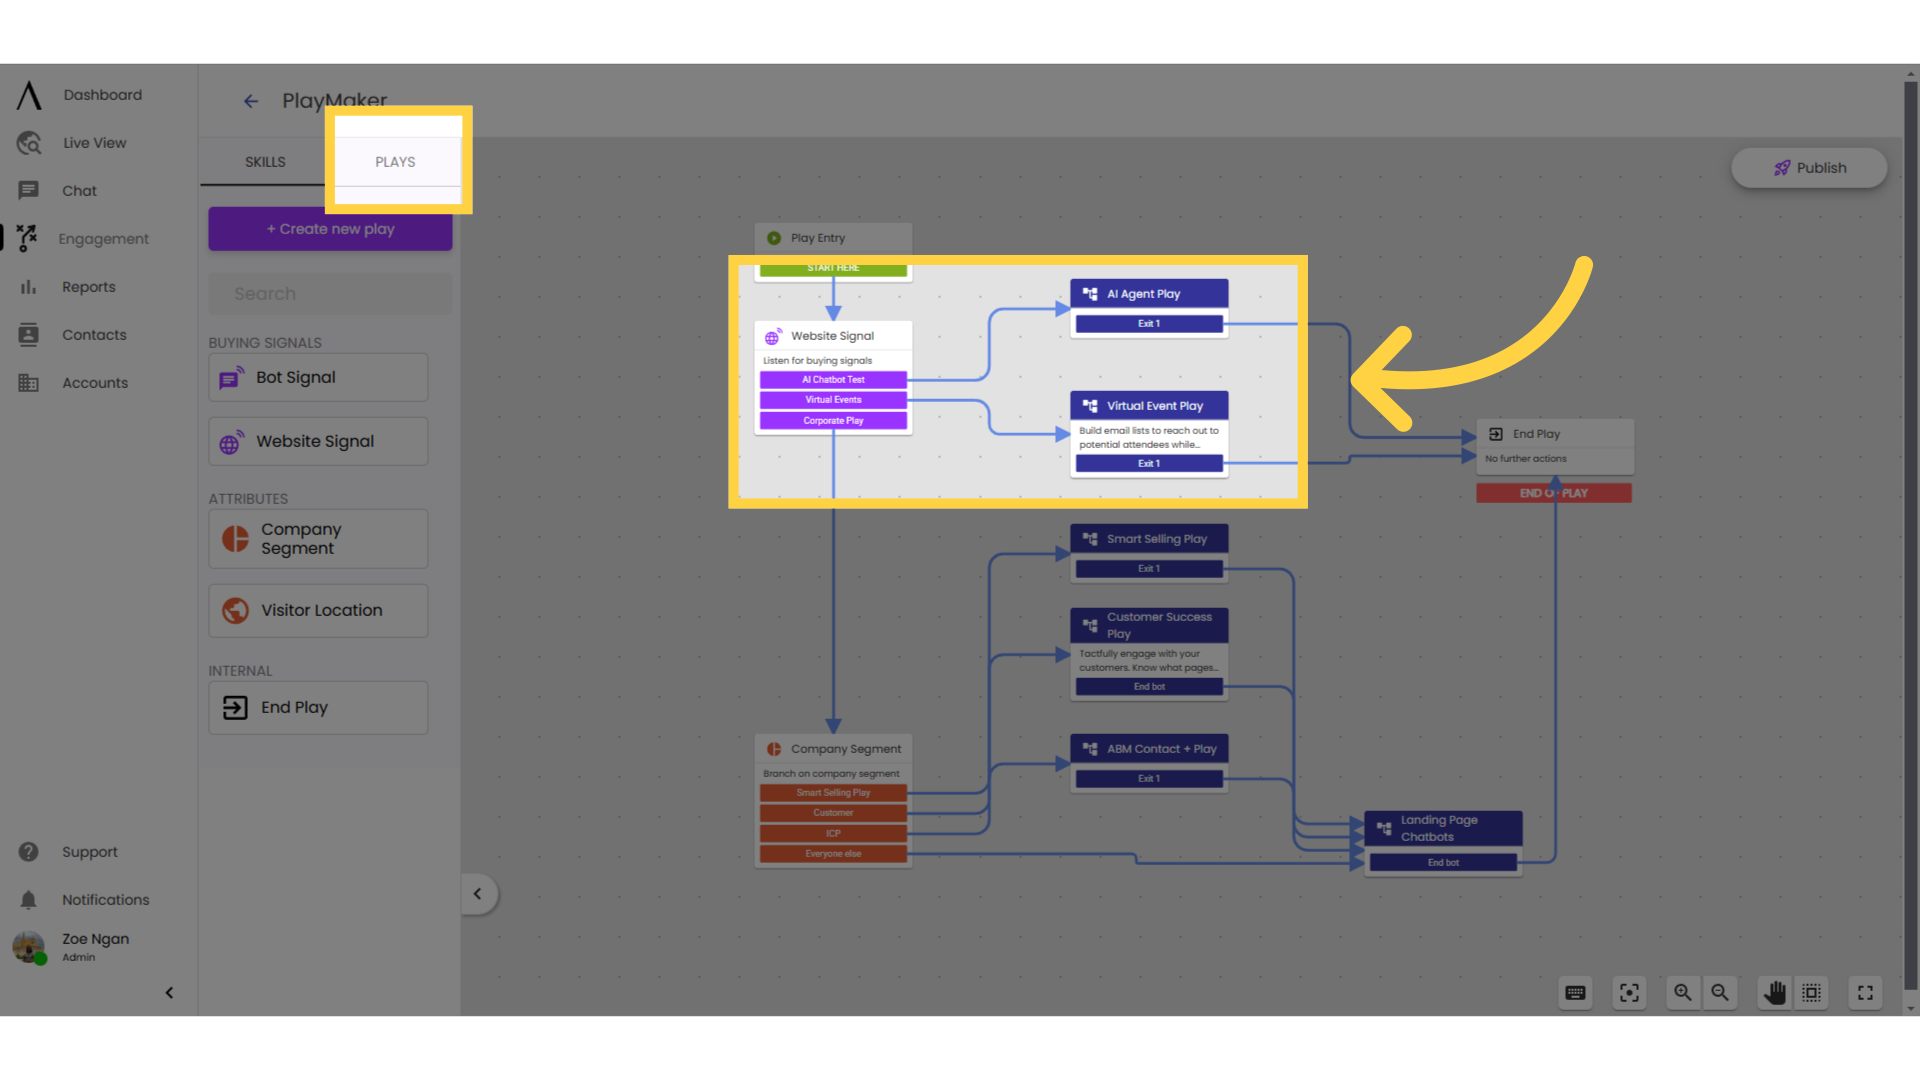
9. Multiple Plays
To connect multiple plays it is helpful to consider the audience to set up conditional branching. For example, for website signal, pen the branching skill and customise audience criteria for each branch.
Then, open the play tab and drag and drop your desired plays to the builder. Connect the output branches to your plays.
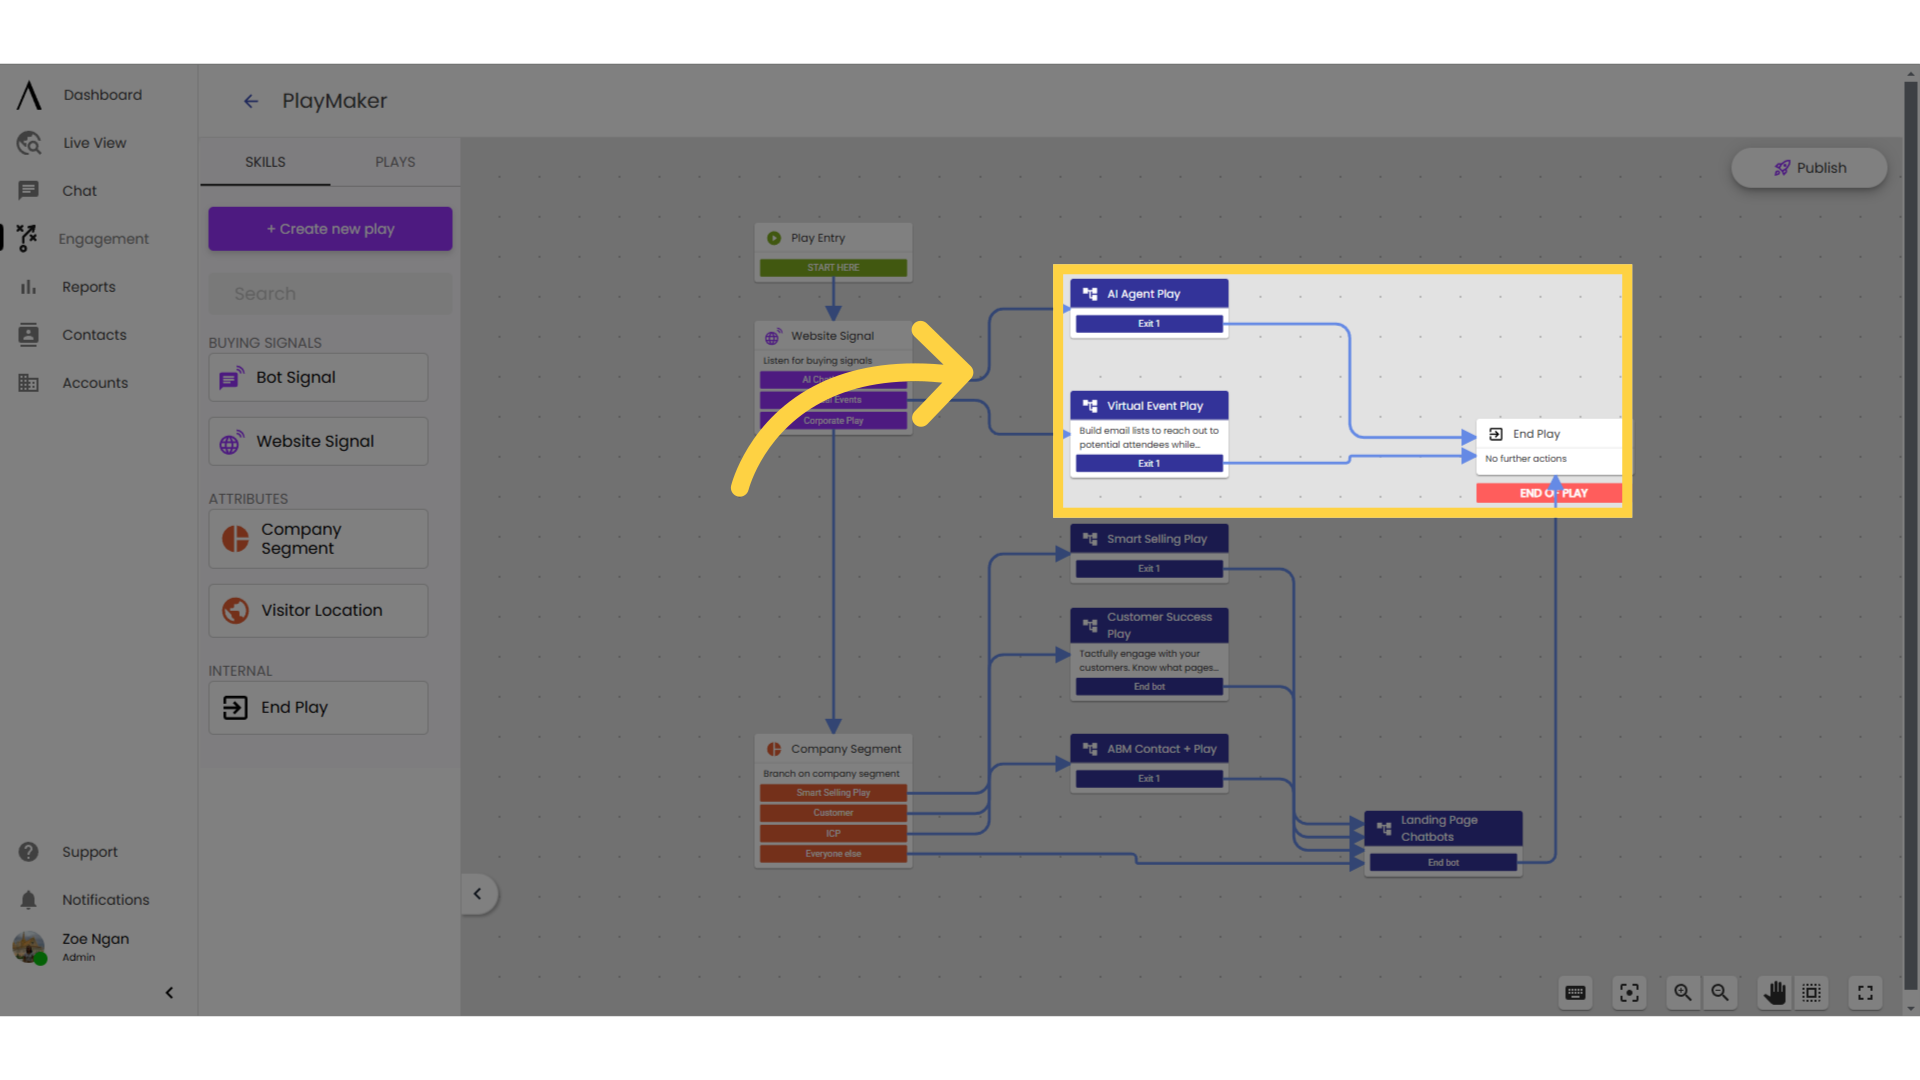
10. Connect your plays
If your plays have exits, make sure to connect to "End of Play" or PlayMaker will not allow you to save and publish your work.
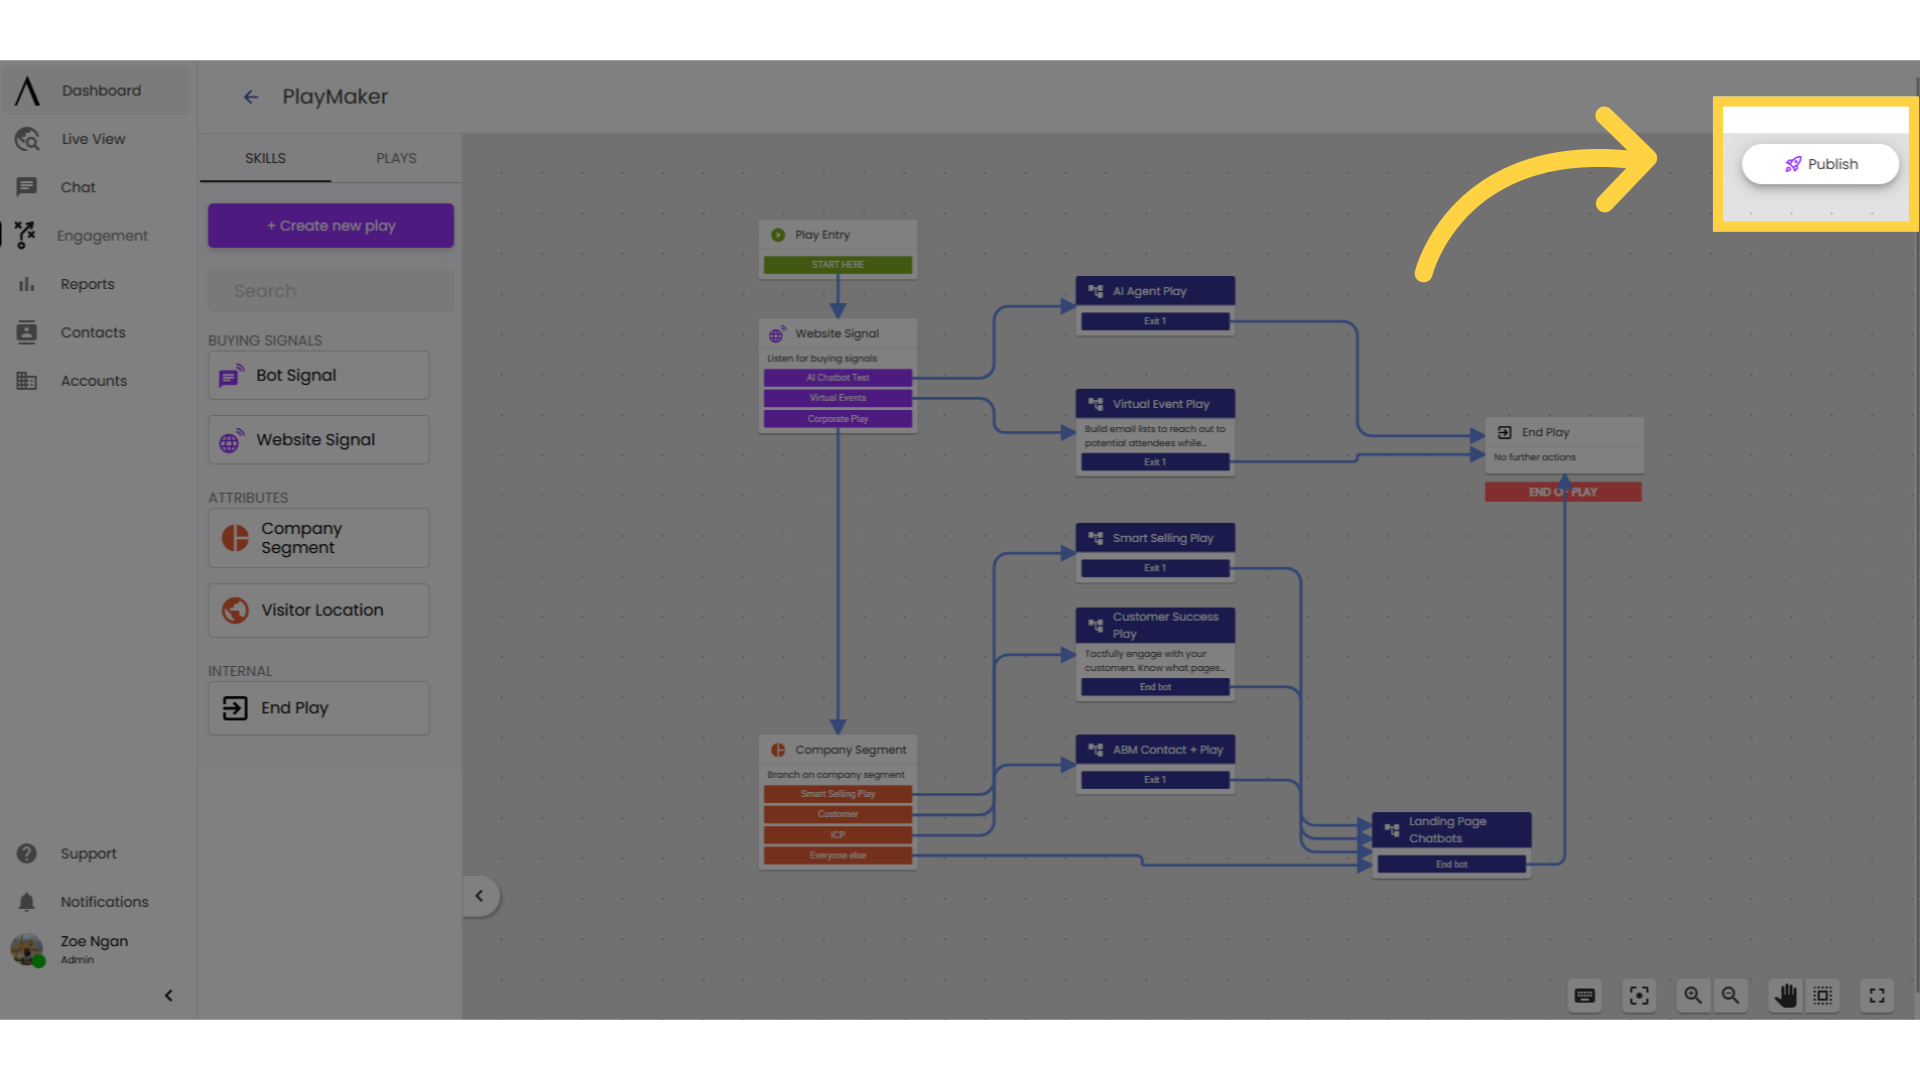
11. Hit "Publish"
To save and publish your play, click "Publish" in the upper-right corner.
12. Enable PlayMaker
Turn on PlayMaker by toggling on "Enable PlayMaker."